Bascule. You’ve likely heard the term when riders are discussing a horse’s jump. But what does it mean?
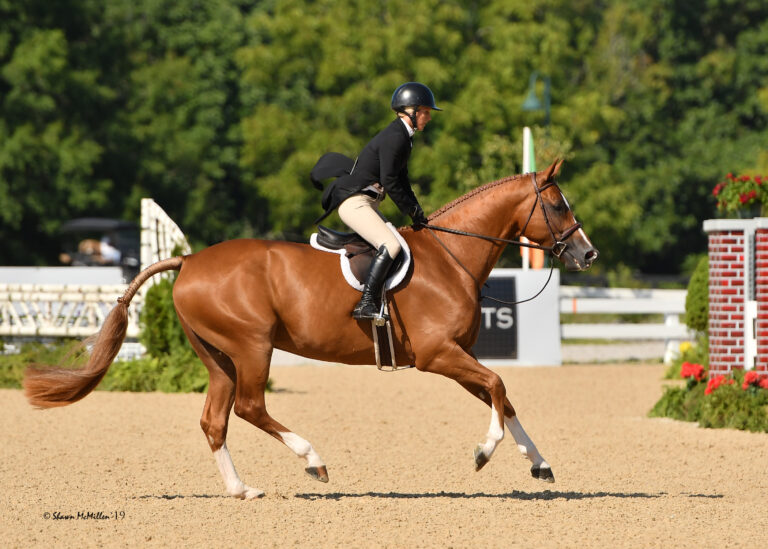
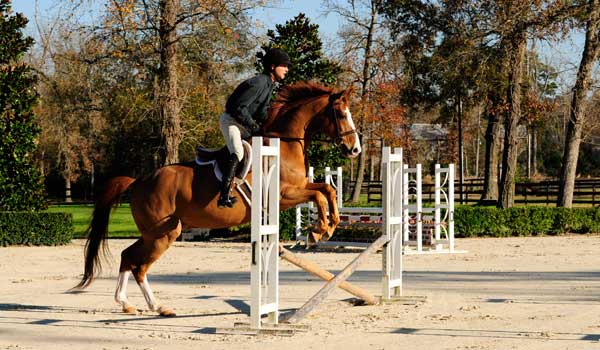
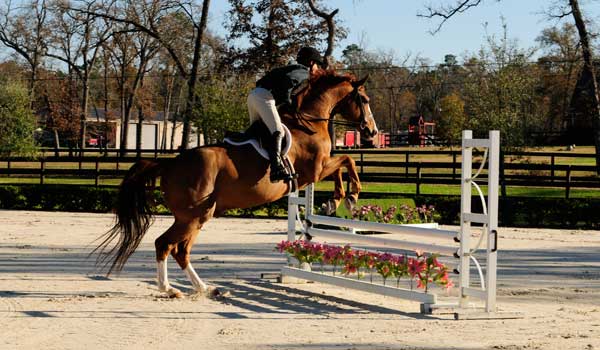
Picture a dolphin jumping a wave: The bascule is the round arc its body makes as it reaches the apex of its jump. Now picture a top hunter curling over a fence, his back rounded upward as he stretches his neck forward and down (much like the dolphin) with his knees jerked high.
That arc, or bascule, is rewarded by judges in the hunter ring. That’s because it not only is beautiful to look at, but it is also the safest, most efficient way to jump an obstacle. When your horse’s back, withers and shoulders are up, he’s free to bring up his knees for maximum clearance.
To achieve that bascule, your horse must reach his hind legs deep beneath his body as he thrusts off the ground, then he must round his neck and back as he arcs over the jump.
For some horses, a good bascule comes naturally. For others, it can be hard because it takes strength and flexibility. It can be easier for a horse to jump with his back flat and often with his neck and head up rather than down. He may still be able to lift his front legs out of the way, but his topline will look stiff, even inverted.
As you’ll see when we start the jumping exercises, this can result from your horse pushing off the ground with his hind legs lagging behind his body, rather than reaching deep beneath it. Doing so weakens his thrust off the ground and puts his trajectory forward (hence the flatness) rather than upward so he can arc over the jump.
The good news is that you can improve any horse’s bascule. In this article, I’m going to give you a progression of three over-fences exercises (plus some flatwork) that will help you do just that. Practice them consistently, and you’ll see a marked improvement in your horse’s jumping form.
Note: Due to space limitations, for the purposes of this article I will assume that you are reasonably proficient at finding a distance to a jump, can count strides down a line and understand basic collection on the flat. Ready? Let’s ride!
First, the Flatwork
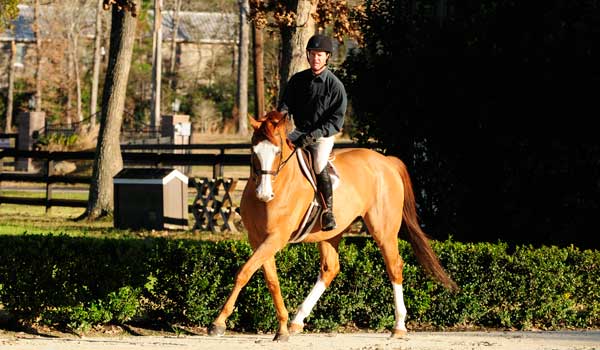
Before we start jumping, you’ll introduce the roundness required for a good bascule on the flat. Why? A good bascule actually starts there.
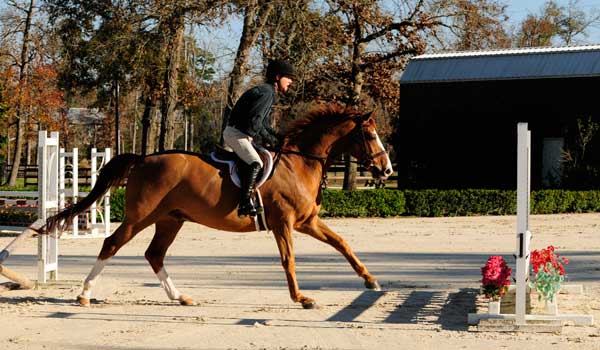
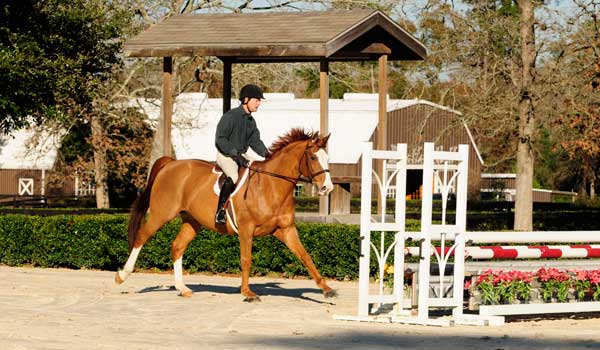
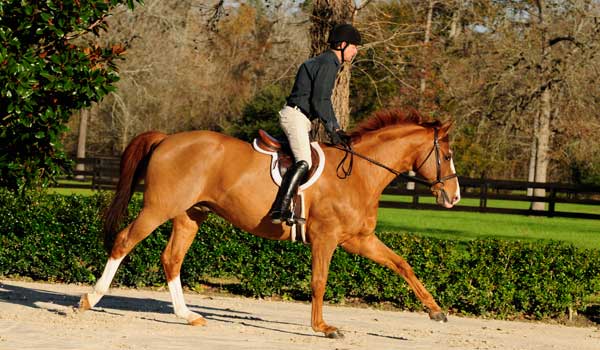
For your horse to reach deep beneath his body with his hind legs in front of a jump, he needs to be cantering in a round, balanced frame as he approaches it with his back, withers and poll elevated and his weight rocked rearward over his hindquarters. His hindquarters are his engine: If he’s dragging himself along on his front end, he loses power in his hind end.
I’m not talking about dressage-like collection in the hunter ring. But as you can see in the photo above, you will be doing an exaggerated degree of collection at home on the flat before we tackle the over-fences exercises so your horse learns to round his topline and elevate his withers as he shifts his weight rearward, and gains the elasticity and strength to do so.
Outfit him in his normal tack, using protective leg gear if that’s your norm. I like to use a snaffle whenever possible to keep my horses soft, confident and relaxed, but you can use your usual bit. (I will caution, however, that when it comes to bitting, less is best; “more” can often cause more problems.)
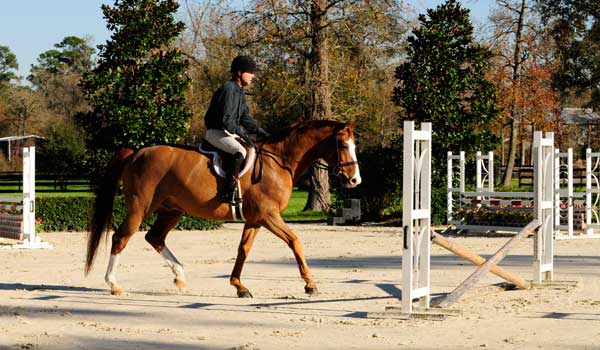
Warm up your horse. Once he’s relaxed and responsive, introduce the basics of collection by asking him to compress his body as he flexes his head and neck from side to side. Not only is it easier for him to yield to the bit laterally than it is in a straight line, but doing so also helps supple and strengthen his back.
At an active posting trot, establish light contact on both reins as you track left on a 60-foot circle. Softly take back with your left hand and move your right hand slightly forward until you can see your horse’s left eye. Use outside leg pressure as needed to keep his hips from swinging outward and to maintain impulsion as he compresses his body into your light bit barrier. (With repetition, you’ll actually feel his back rise into your seat as he compresses, raising his poll, withers and back as he rocks his weight rearward.)
Hold the contact until he gives—you’ll feel less pressure in your left hand. As soon as he does, immediately reward him by releasing your yielding aids.
Allow him to trot normally for several strides and repeat. Reverse these aids to counter-bend him to the right. Tip: Your horse will naturally be stiffer in one direction than the other. Spend more time on his stiff side than on his softer side to help even him out.
Repeat at the trot until your horse is readily bending and counter-bending to your aids in both directions. (This could take a day, or days or longer, depending on his degree of education and suppleness.) Then graduate to the canter and repeat the exercises.
When he’s consistently bending and counter-bending at the canter, you can graduate to the jumping exercises.
Exercise 1: Three-Jump Gymnastic
I love gymnastics, which involve setting multiple jumps in a row, much like cavalletti over fences. This one will encourage the basics of a bascule as it teaches your horse to use his body effectively and to think for himself. It also will help build strength, balance and confidence.
Your job? To keep your horse straight and forward but to otherwise stay out of his way. That’s the bonus—he does all the work and you get to focus on yourself.
In this gymnastic, you’ll set three small jumps. Their height need not be more than 2 or 3 feet (you can adjust the height based on your horse’s and your comfort levels). It’s the distance between the jumps that’s key: A tighter-than-normal distance will encourage him to compress his body, rock his weight back and get his hind legs under him so he jumps upward and can build on his bascule, rather than merely hurtle himself forward and jump flat.
Make the first jump a crossrail—you’ll trot in to keep your horse quiet and relaxed. Set the second jump as a low vertical, slightly higher than the crossrail, about 18 feet away, which is one stride when you trot in. Follow it with a slightly higher vertical about 21 feet away—a tight one stride at the canter. Note: If your horse has an unusually long stride, you may need a bit more distance between jumps two and three. However, don’t make it too long—you want him to compress his body, not get strung out and reach.
Warm up using the bending and counter-bending flatwork discussed above. When your horse is relaxed and responsive, establish a rhythmic posting trot with light contact. Guide him on a straight line to the center of the crossrail. Keep your eyes up and on the next jump as you keep your horse centered and balanced between your reins and legs. If you were to look down, you’d inadvertently tip your upper body forward, which would cause your horse to shift his weight forward in an effort to balance beneath you, defeating the purpose of the exercise.
Post to maintain your rhythm (counting “one, two, one, two” if you need, to help maintain it) until he leaves the ground. Follow his motion with your reins and upper body, maintaining light contact with his mouth so you can keep him balanced through the exercise. Avoid hurling your body forward, which would force his weight forward, which is counter to our goal. Also avoid falling behind his motion such that you’re pulling him off balance with your reins and body. Grab mane if you must to stay with his motion and avoid snatching him in the mouth.
As he lands, bring your shoulders back and stay centered above him. Keep him straight to the center of the second jump, but avoid helping him otherwise—let him figure out the exercise. Follow his motion over it, and repeat over the third fence.
Repeat the gymnastic several times and assess. If your horse is anxious, slow your trot to the crossrail. If he’s lazy, establish a more energetic trot to it. If his pace is working, ask yourself, “Is he starting to back himself off the third jump, now that he’s familiar with the tighter distance?” If the answer is yes, quit for the day. If not, find a good spot to quit. Incorporate the gymnastic two or three times a week into your schooling sessions, until your horse is relaxed and confident throughout. This could take one day or a week or more. Only then is he ready for Exercise 2.
Exercise 2: Oxer-to-Oxer Combo
In this exercise, you’ll set two square oxers two tight strides apart. This is a natural progression from Exercise 1: There, you let the tight distances rock your horse’s weight back as he jumped low verticals. Here, the tight distance not only will build on that “rock-back” message, but the oxers’ width will encourage your horse to arc his body over each jump. As with Exercise 1, your job is to get your horse to the jumps straight and balanced but otherwise to leave him alone to figure out what he needs to do.
Set your oxers 33 feet apart, with each about 18 to 24 inches wide. If your horse has an extra-long stride, you may need to add about a foot. I usually set the height at 3 feet or 3-feet-3. Set yours at a height that’s comfortable for you and your horse; it’s the width and tight distance that do the work here.
Warm up using the flexion flatwork, followed by Exercise 1. When your horse is relaxed and responsive, establish a balanced, active canter with light contact. By active, I don’t mean fast. I mean that you have his weight rocked back so you can feel him pushing off from his hind legs. He’ll need that energy to build on his bascule and to get through the combination. If you were to let him fade before the first jump, you’d make getting to the second jump hard for him.
Guide your horse straight to the oxer, maintaining his rhythm by counting “one, two, one, two.” The canter is a three-beat gait, but I have students use a one–two count to maintain a steady rhythm.
Ask your horse to wait for a slightly deeper-than-normal distance—so he has to rock back as he leaves the ground—by sitting up with your shoulders slightly ahead of your hips and keeping your eyes up and looking ahead to the second oxer.
Follow his motion in the air with your hands and body, remaining balanced and centered above him as he lands. Sit up and keep your shoulders slightly ahead of your hips as you keep him straight between your reins and legs. Otherwise, leave him alone as he negotiates the tight two-strides, then rocks back to jump up and over the second oxer.
Thanks to the tight distance, once your horse understands the exercise (it’ll take a time or two or more) you should feel him compress his body before the second jump then rock back and spring off the ground up and over it. His improved jump will have more thrust and energy than a flat-backed jump will. If he still feels strung out, he may have a short stride and need a tighter distance between the two oxers. Or he may lack the energy he needs coming into the first jump. Try increasing his canter stride (not speed), and do the combo again. If that doesn’t work, shorten the distance by a foot or so and try again. If he’s getting to the second oxer too quickly, slow your approach to the combo.
Note: It is key that you allow your horse the freedom in his neck and head to use his body in a true bascule. If you were to get left behind his motion and snatch him in the mouth, you’d be inadvertently punishing him for it. If that should happen, grab mane to be sure to stay off of his mouth over each oxer.
Repeat several times, until your horse is relaxed and comfortable, and is rocking himself back before the second oxer. If he is anxious, go back to Exercise 1, then try again. Be patient: It may take more than one session for him to understand the combo. Then move on to Exercise 3.
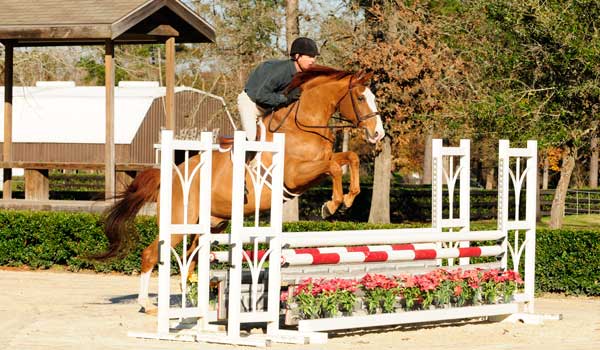
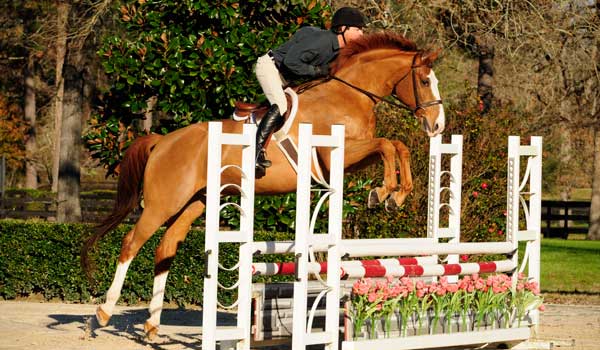
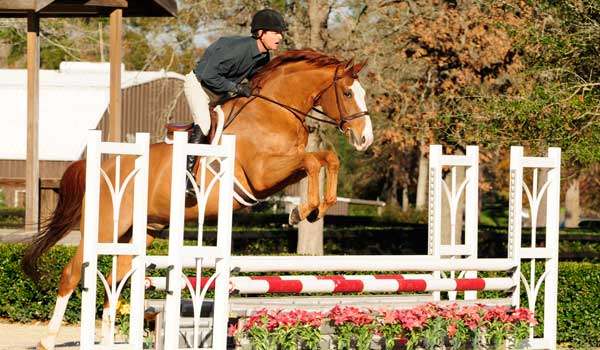
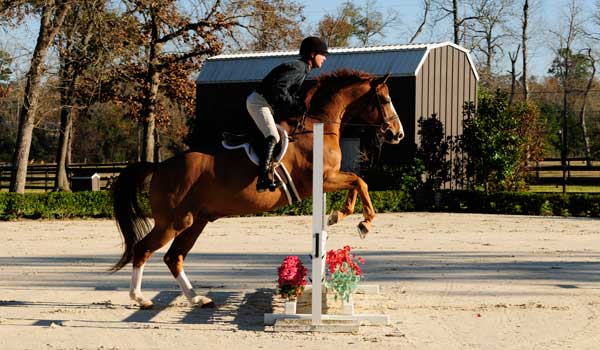
Exercise 3: Single Ramped Oxer
Our final exercise is a single oxer—but not just any oxer. The key is to “ramp” it, meaning the front rail is lower than the back one. The ramped shape will help refine the shape of your horse’s improving bascule because the oxer’s width and higher back rail will encourage him to pull up his back and knees as he reaches forward and down with his head and neck. And, thanks to the previous two exercises (and flatwork), he’s gaining the knowledge, strength and flexibility to do so.
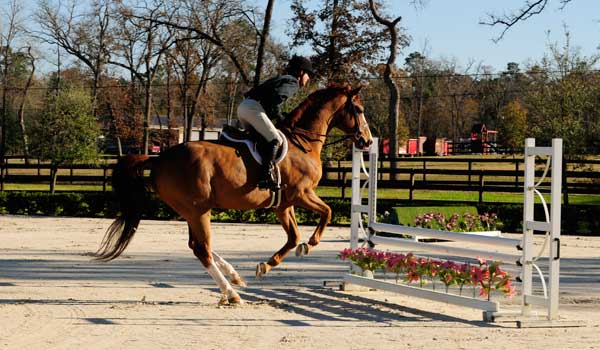
Set the single oxer so you can canter the combo in Exercise 2, then loop around for an easy approach. Aim for a height that is comfortable for you and your horse. Set the back rail at that height, then set the front rail at least 3 inches lower. You can always raise both rails as you and your horse get more comfortable. Place the standards about 2 feet apart.
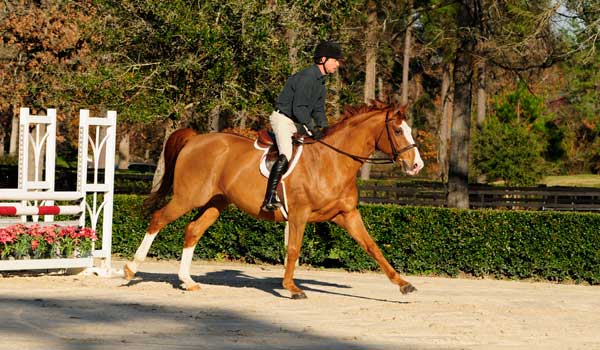
Canter through the Exercise 2 combo, then sit up and steady your horse as you balance through the turn to the single oxer. Since it is a single fence, you’ll need slightly less energy than you did to the combo. Maintain a soft, balanced canter on the approach, using the one–two count if needed to maintain the rhythm. Keep light contact with your horse’s mouth and keep your shoulders upright and just in front of your hips to encourage him to keep his weight rocked back. Avoid getting ahead of or behind his motion, which would alter his balance and rhythm and your ability to see a distance.
Allow the distance to happen out of this rhythmic stride by maintaining your light rein contact until your horse leaves the ground. Follow his motion over the oxer, then steady and balance him when he lands. If he jumped it well, give him a pat and quit for the day. If you missed the distance, assess and adjust. (Got there too fast? Slow down. Not enough horse? Add energy to his canter.)
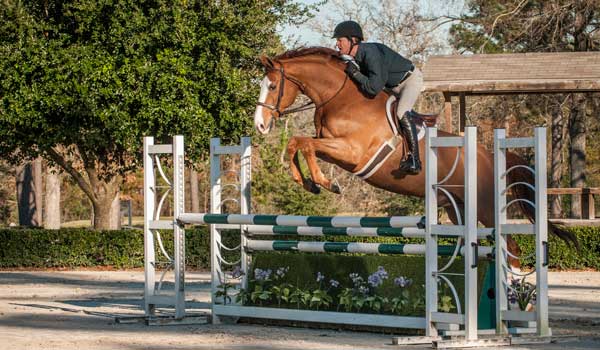
As you can see in the photos, the progressive nature of these exercises really pays off: Your horse will take what he learned from the previous exercises and put it to use at this oxer. You’ll feel him power off the ground as he raises his back and lowers his head and neck. With time and repetition, you’ll build his best possible bascule.
Peter Pletcher has been training hunters and jumpers for more than 30 years. He’s ridden to numerous national titles and won championships at all the major Indoor shows as well as the Devon Horse Show. In 1991, Peter piloted Uncle Sam to win the President’s Cup at the Washington International Horse Show and has represented the U.S. in numerous international World Cup competitions. In 2002, 2004 and 2007, Peter won the coveted World Champion Hunter Rider title at the Capital Challenge Horse Show. He was selected in both 2005 and 2007 to represent the United States when the World Champion Hunter Rider Team Challenge pitted four U.S. hunter riders against an international team of world-class jumper riders at the World Cup in Las Vegas, Nevada. In 2010, he was selected to participate in a demonstration of Hunter Derby Classics at the World Equestrian Games in Lexington, Kentucky. In addition to his own success, Peter has coached his clients and their horses to numerous national titles and honors.Peter trains out of his PJP Farm in Magnolia, Texas, with the help of his assistants Danny Arendt and Diane “Bean” Douglas.
This article originally appeared in the June 2014 issue of Practical Horseman.