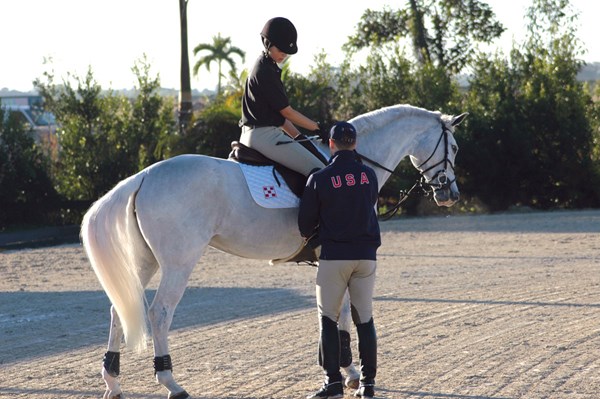
 Credit: © Sandra Oliynyk Ask your trainer or an experienced horse-person to check your position from behind and from the side. Your toe should be in line with your knee.
Q: I have a problem keeping my left heel down and I tend to curl my ankle. Sometimes I feel pain in my knee and hip when riding. This only happens with my left leg; my right leg is perfect, as if it belongs to a different person. How can I strengthen my leg, keep my heel down and stop the ankle curl?
TINA DAVEY
A: This type of rider imbalance is very common. Just like horses, we all have a strong side and a weak side, which can lead to weight-distribution and balance problems. In addition to curling your left ankle, you may also be leaning to the right. Your right leg feels perfect because you’re putting more weight on it, which means it has to work harder—and has thus become stronger—and your right heel is dropping into a more secure position. You may also be compensating for your weak left leg by gripping with your right leg, staying on your horse with sheer strength rather than proper balance.
To shift weight back into your left heel and straighten your ankle, you’ll need to evaluate your entire position. I’ll explain how to below. First, ask yourself:
-Do you have any physical conditions, such as an old injury, in any part of your left leg (knee, ankle, hip, etc.)? If so, you may benefit from balance and strength exercises off the horse, such as yoga.
-Does your horse fit you well? If you are tall and riding a narrow or small horse, your leg might hang so low on his side that you curl your ankle unconsciously in an attempt to get your heel where it feels like it needs to be to apply a leg aid. Although you can’t do anything about a body mismatch, understanding its existence may alleviate your frustration as you try to correct the problem.
– Is your equipment solid? You need sturdy boots that don’t bend or curl around the stirrup. I always recommend plain fillis stirrup irons, not jointed or lightweight. If your feet hurt, you might want to invest in a good shoe insert to support your foot. Also consider wearing an ankle brace, especially if you have suffered from a sprained or broken ankle in the past. This will help to stabilize and straighten your ankle while you develop its ability to support you properly.
-Are you keeping in mind that your ankles, knees and hips are joints, not muscles? They’re great for absorbing shock and creating the angles necessary to balance you properly in the saddle, but they’re built to flex only in certain directions. If you try to bend them in unnatural directions (for example, twisting your knee sideways), you create strain on your joints and tendons. Riding in the correct position may sometimes result in sore muscles, but it should never produce painful joints. If you continue to feel pain in your joints as you follow my recommendations below, consult a medical professional.
Evaluate and align your position.
At the beginning of each ride, follow these steps to be sure your weight is evenly distributed across both sides of your body and down into both heels:
1. At the halt, take both feet out of your stirrups and sit squarely in the saddle with equal weight on both seat bones and a little more weight on your crotch than your tailbone. Let your legs hang down so that the inner parts of your thighs, knees and calves lie against your horse’s sides. Then ask your trainer or an experienced horse-person to check your position from behind and from the side, making sure that your shoulders and hips look even and your upper body isn’t collapsing at your core or leaning to one side.
2. Next, check the length of both stirrups at the same time (so you don’t accidentally lean sideways). With both feet out of the stirrups and your legs relaxed, the base of the irons should hit at about the level of your anklebones. Don’t worry if your right and left stirrups need to be slightly different lengths to fit your legs. This isn’t uncommon and is only a problem if they are jarringly different.
3. Now twist the front branch of each stirrup to the outside, turning the irons perpendicular to the girth. Place the stirrups directly under the balls of your feet, which are the widest part of your feet and thus provide the most balance. Check that your little toe is next to the outside branch of the iron and your foot points slightly away from your horse’s side, at about a 10- to 15-degree angle across the stirrup.
4. Push both heels down and slightly in toward your horse, putting a little more weight onto your big toes than onto your pinky toes. This will help to keep your ankle from curling. (If your knees come off the saddle, you’re turning your heels too far inward.)
5. Check that your contact with your horse’s side is evenly distributed between your inner calf, inner knee and inner thigh. If it’s not—for example, if the back of your calf is touching him instead of your inner calf—check your foot position again. If you’re pinching with one knee, it may be compensating for a weakness in the opposite leg, so check the position of both legs. Also ask your ground person to confirm that your toe is vertically in line with your knee, when viewed from the side.
Once you’ve established this position, your next challenge is to maintain it throughout every ride, especially whenever you give a leg aid. Concentrate on squeezing your leg while keeping it in place, rather than kicking with your heel. If your horse is lazy, add a voice aid (“walk,” “trot,” “canter”) and consider carrying a dressage whip in your left hand until you can ask for transitions and bending without leaning or curling your ankle. Looking where you’re going and stretching your body up through the turns will also help to prevent leaning.
Strengthen your legs.
With your body correctly positioned and balanced, you can begin strengthening both legs properly. Work on two-point position, first at the walk. As you lift your seat out of the saddle, drop equal weight into both heels and squeeze your legs against your horse’s sides, applying even pressure from your knees to your heels. Keep your hands off your horse’s neck so that you balance only with your legs.
As this gets easier, practice halting and then walking off without sitting in the saddle or putting your hands on the neck. If your upper body tips forward, backward or sideways, go back through the steps of checking your seat, heels and legs.
Gradually progress to the trot and canter, doing plenty of transitions and turns in two-point position to test your balance and leg stability. Eventually, your legs will stay in position without you having to think about it.
Many riders develop bad habits without even realizing it, so your recognition of this problem is a great start. Once you’ve ruled out medical causes, it will just be a matter of replacing the bad habit with good habits. This will take time, and the correct position may feel strange at first—even for your horse—but you’ll be glad you stuck to it!
Mississippi College Equestrian Program Director Tina Davey was the captain of her college equestrian team at the University of California, Santa Cruz. In 2007 she started working at Jim Hagman’s Elvenstar Orange County facility in California. In 2012, she relocated to Providence Hill Farm, in Jackson, Mississippi, to coach the Mississippi College team.
This article originally appeared in the December 2013 issue of Practical Horseman.