Regardless of the preferred riding discipline, level of expertise, training philosophy or personal body shape, all riders do better when they take care of their bodies by doing activities outside of riding. While riding is a great way to maintain an active lifestyle, riding on its own is not enough.
The Fit to Ride program, an intensive corrective and body reconditioning program, is structured to be performed for nine weeks, three times weekly, for approximately 30 minutes duration for each workout. Its main goals are to build the rider a straighter and suppler frame, while improving cross-body coordination and awareness, endurance, ability to transfer core strength to movement requirements in the saddle and creating the simple habit of fitting your exercise into your life. Within each week’s three-day program, Day One of the new routine is about learning the new exercises for that week. On Day Two you perfect your technique. On Day Three, you can add repetitions or change weight loads. Each daily workout is organized into several parts: Warm-Up, Core Training Exercises, Strength and Muscle Memory Exercises, Deep Stretching and Stamina and Cardiovascular Training or Movement.
In this adaption from the book, you will learn the standard warm-up stretches (Chapter 6) and the week one training program (Chapter 7).
Standard Warm-Up Stretches
This warm-up routine should be completed before each workout (and also before riding). As you get familiar with these exercises, you will find this routine goes very quickly. I recommend you repeat each exercise three to six times, depending on how stiff you are feeling that day.
Most exercises start with you in a spine-neutral rider position (legs apart, knees bent, spine and pelvis straight, core engaged), unless otherwise indicated. None are done with the knees locked because a straight, locked leg tilts the pelvis forward, breaks spine neutrality and disengages important posture-supporting core muscles.
Shoulder Rotations
Purpose: To loosen the shoulders and chest area
Shoulder rotations come in many forms. Rolling shoulders back and swinging an arm or both arms around in full backward circles are two of them. This particular version is designed to help stretch the minor pectorals and the shoulder rotator cuff muscles, which commonly cause a rider’s chest to collapse.
If your shoulders are very tight, you may not be able to complete the motion fully. In this case, you may need to have a very wide grip, or adjust your position to bring the lead or whip overhead and behind you, one arm at a time. Maintain a two-handed grip, even if you need to wiggle, bend your elbow or otherwise maneuver.
Side Bends
Purpose: To stretch the obliques and latissimus dorsi.
Side Bends release your obliques, latissimus dorsi and intercostal (between the ribs, under the obliques) muscles to allow freedom of movement in your shoulders and hips.
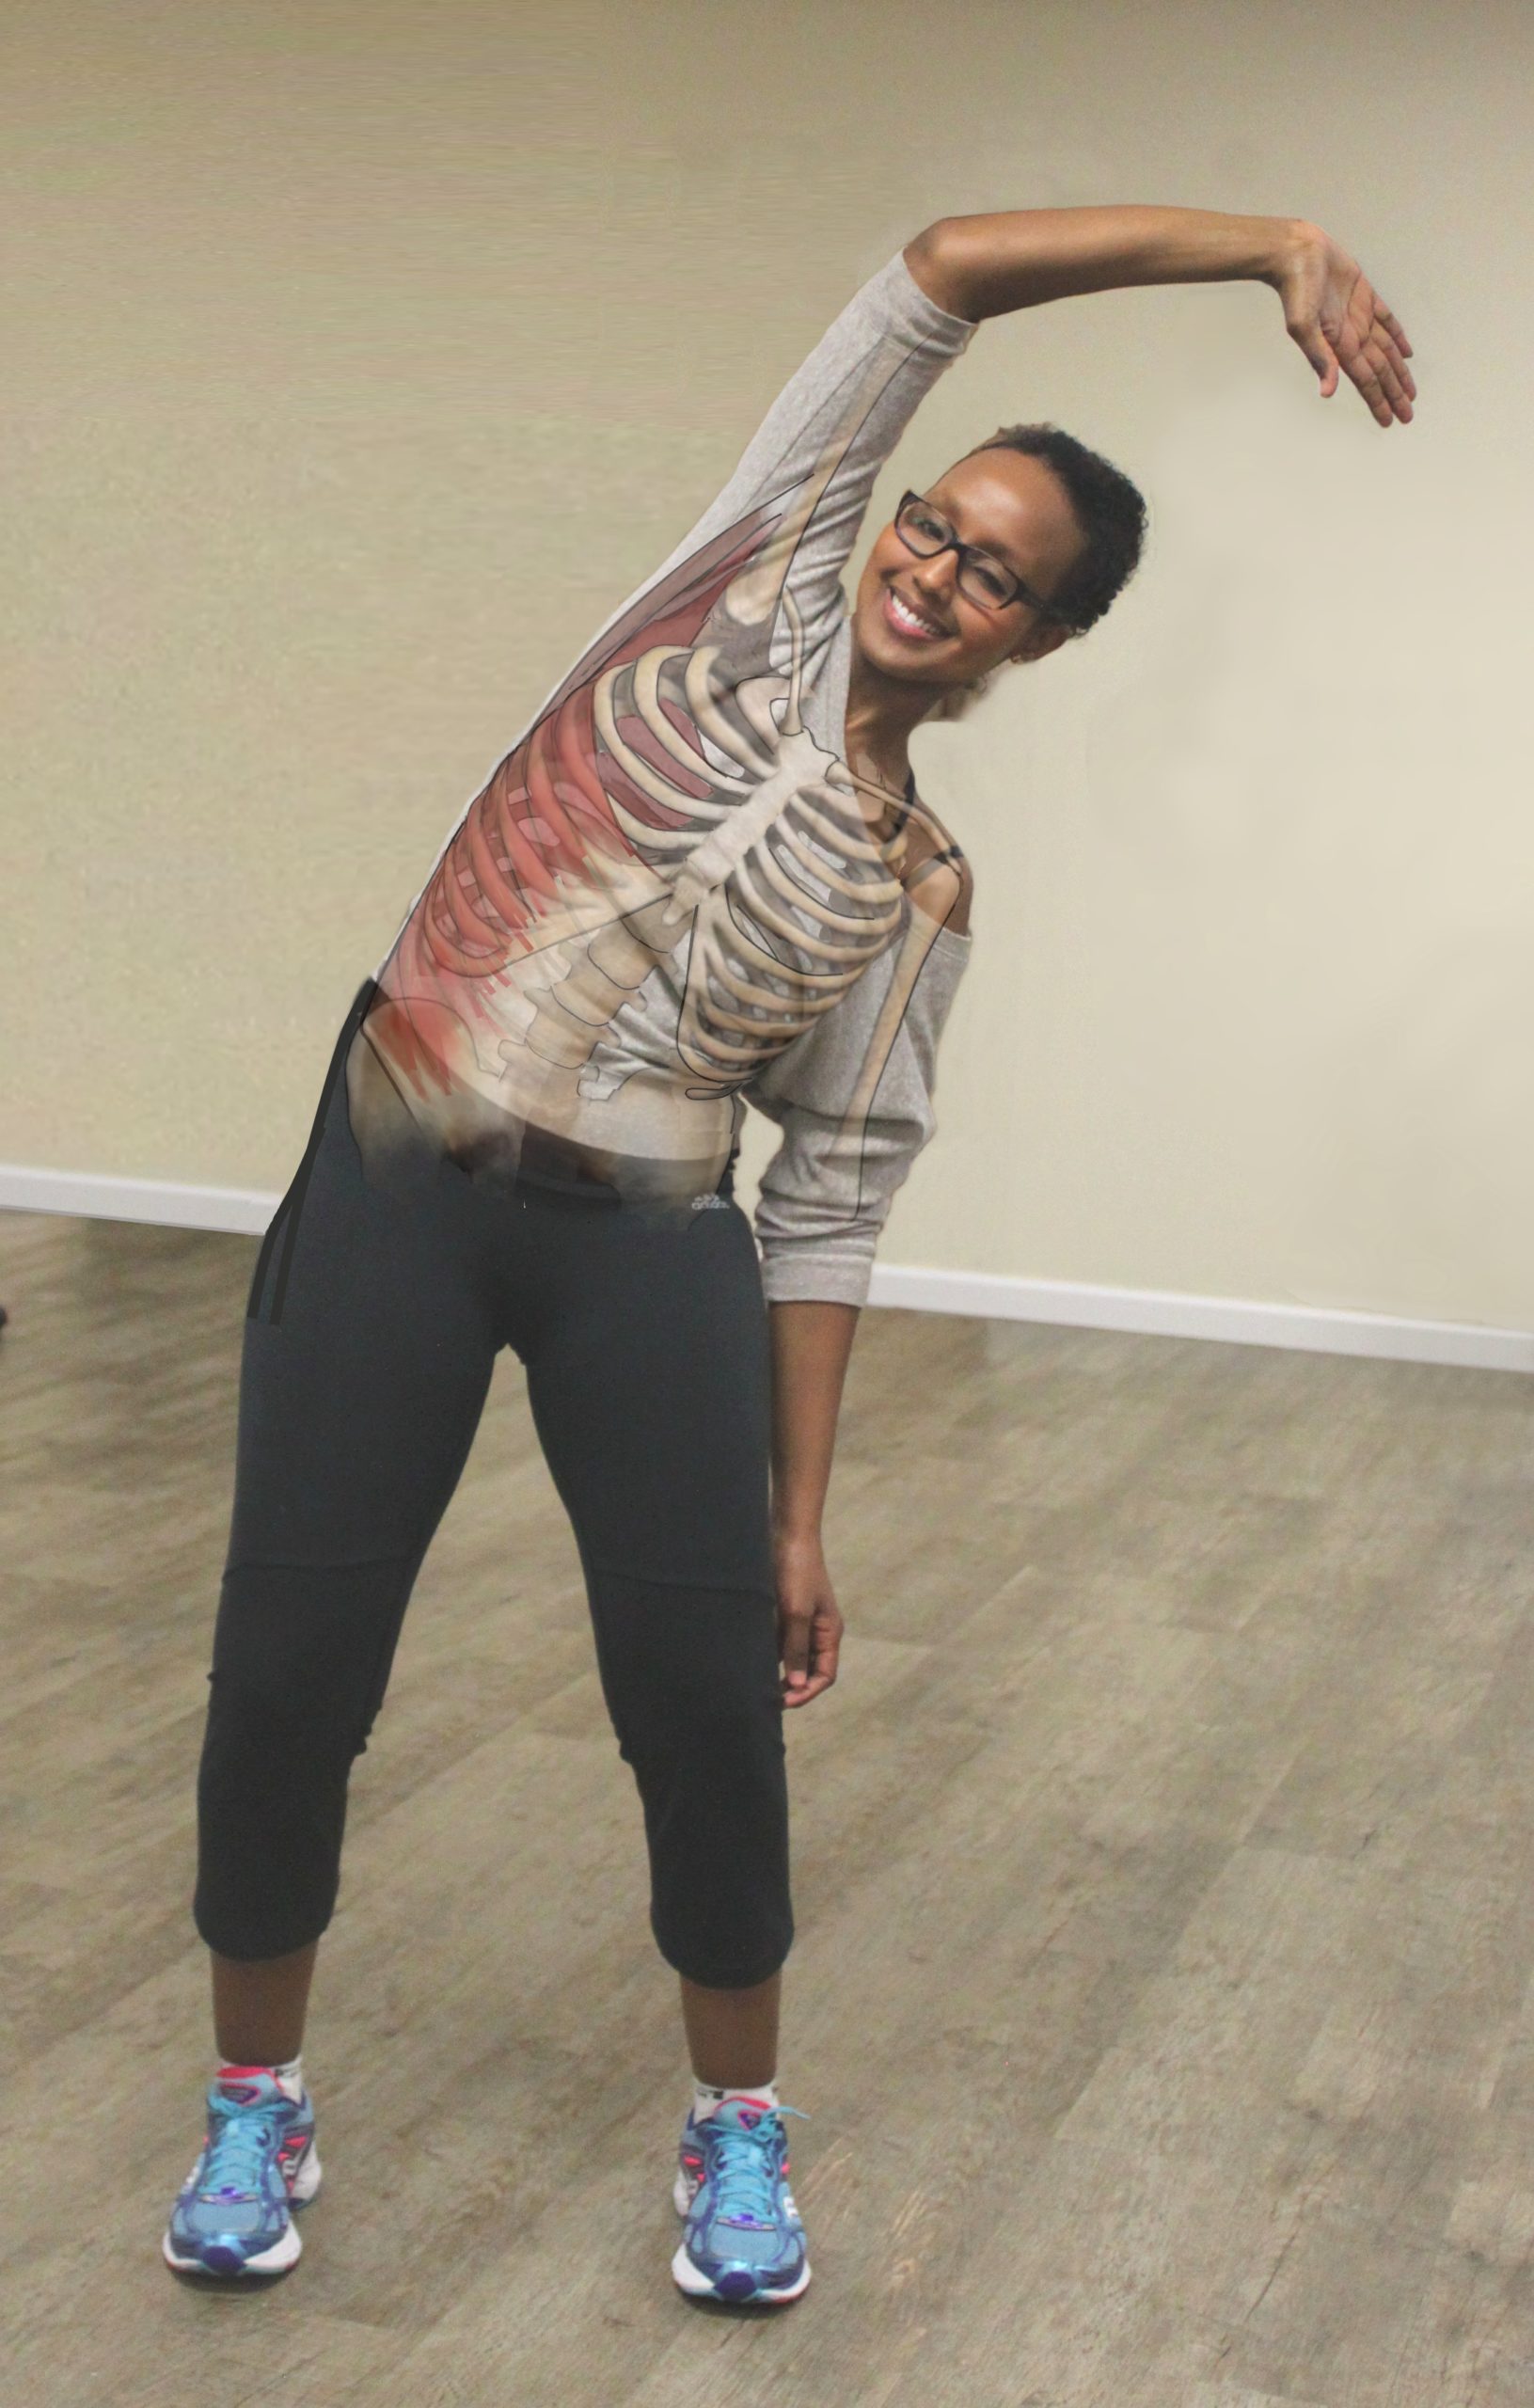
Imagine you are curving around a ball to keep aligned and stretch through your ribs. Reach into the stretch while almost pushing your ribs in the opposite direction until you feel the stretch along your ribs, as well.
Neck Stretch
Purpose: To stretch neck muscles, including the trapezius.
Believe it or not, stretching your neck muscles makes a difference, even though we do not see riders craning their necks very often. Stretching your neck actually stretches the levator scapula as well as the trapezius muscles, in addition to neck muscles. If you carry tension in your shoulders and neck, this exercise is especially important, but if you are relaxed and supple, doing quick neck stretches will just be part of healthy spine maintenance.
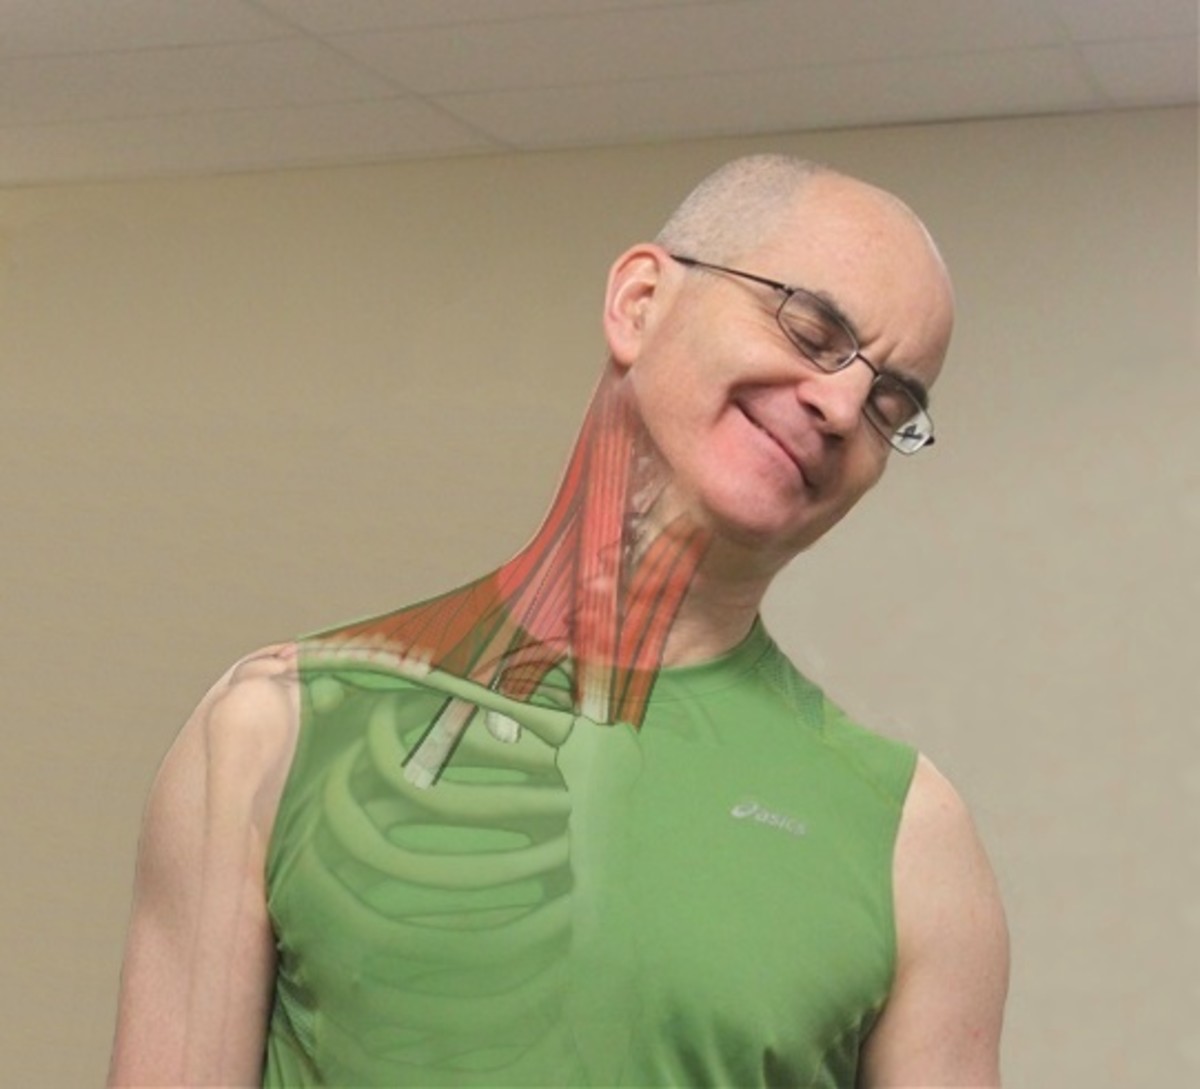
Do not roll your head back because this compresses your neck vertebrae. If you have a lot of tension in your neck and shoulders, you can help release it by taking a free hand and squeezing your trapezius muscle or pushing down on it gently as you lean into the stretch. Do not hold the stretch very long before switching to the other side. These stretches should be done fairly slowly and rhythmically.
A rider with shoulder tension can do this stretch, holding it longer, at the end of the day. When doing a deep neck stretch (any stretch can be turned into a “deep” one by holding it longer), it is important to use your hand to help raise your head afterward, since a deep stretch in the neck muscles will stretch the fibers and you can strain something by trying to lift the weight of your head using the same muscles that you just elongated.
Fold and Roll
Purpose: To stretch the lower back area and hamstrings while mobilizing the spine.
This stretch sequence combines a hamstring stretch with a spine flexion to mobilize it. It could also be called Toe Touch with Roll Up.
Hip Flexor to Ankle Stretch (Lunge and Press)
Purpose: To stretch psoas, quadriceps, calf muscles and Achilles tendon (see photos at left under “Hip Flexor to Ankle”).
Those who need this stretch combination the most find that they cannot go very deeply into it. Do not compromise your lower back. Do not overdo the lunge phase of the stretch, and do not worry if you cannot touch your heel to the ground in the press-back phase (Photo 2 in gallery above).
Side-to-Side Lunge
Purpose: To stretch the adductors
This stretch is particularly helpful for riders with chair-seat tendencies, as well as those who have difficulty sitting more deeply in the saddle. However, all riders can benefit. Loosening the inner-thigh area helps release the hips to follow the horse’s motion, as well as permit a more neutral leg position.

Editor’s note: Two warm-up exercises (Round and Hollow and Ankle Circles) were omitted from this excerpt because of space considerations.
Week One
Theme: Establishing a stretch routine and incorporating core training.
Equipment Needed: Exercise tubing or lead rope, mat.
Introduction: This week, your Standard Warm-Up Stretches should have become familiar and you can now use them to prepare your body to do core training, which, this week, focuses on foundational postures and movement, as well as getting in the habit of a regular workout. As a bonus, you also start to tackle deeper stretches for areas that are commonly tight for riders.
Notes: Establish standard stretch routine, then do lying hamstring stretch. Day 1: Stretch and walk for 10 minutes. Day 2 stretches will go faster and you can add the core training exercises.
WARM-UP: Perform the standard warm-up stretches.
STAMINA & COORDINATION: 10 minutes walking, three times per week.
CORE TRAINING
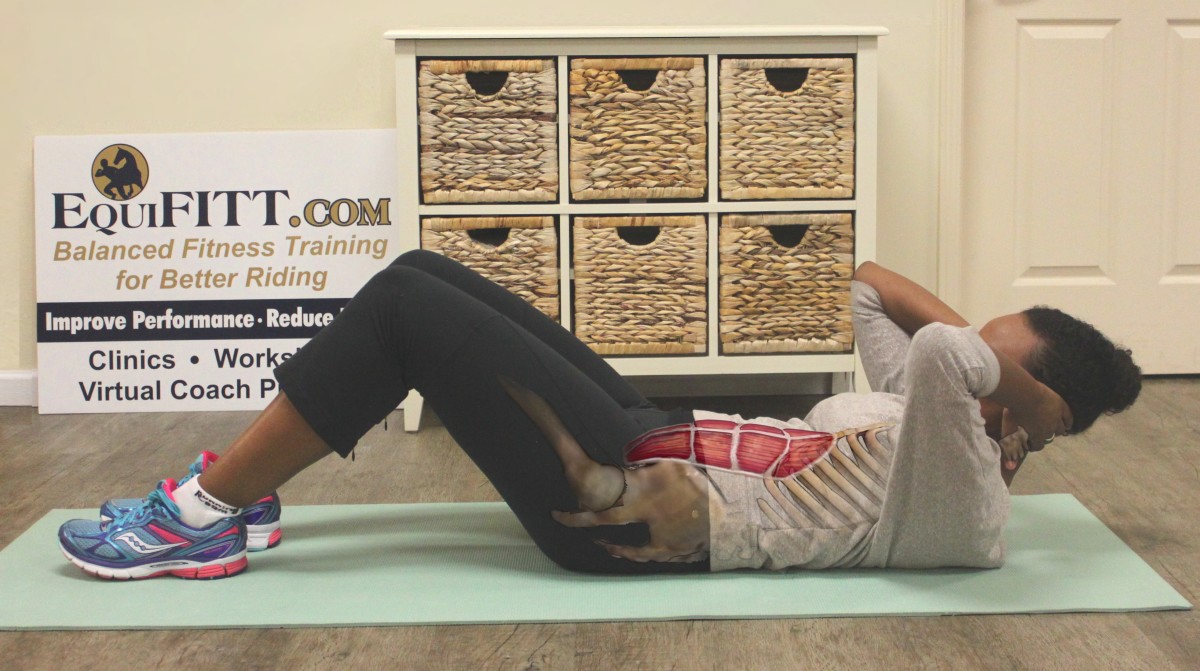
Floor Crunches
Goal: 20–30 reps or one set of as many as you can to fatigue.
Muscles Worked: Rectus abdominis.
This basic crunch exercise is the foundation of other core-training exercises. Learning to position your spine and engage your core so that your spine and pelvis are neutral creates muscle memory and an engagement pattern that you can transfer to all other floor and standing core exercises, as well as movement with integrated core engagement (see sidebar below).
Crossover Crunches
Goal: 20 reps (left and right equals one rep).
Muscles Worked: Rectus abdominis and obliques.
Once you have mastered the basic position, this exercise adds an element of asymmetrical loading and cross-body movement.
Make sure that you feel a squeeze in your obliques (near the ribs on one side) and that you otherwise maintain symmetry and alignment. Crossing your body with a good effort is more important than actually reaching your knees. Again, compromising alignment with speed will reduce the effectiveness of the exercise. You should not be wiggling, and your hips and legs should not be moving.
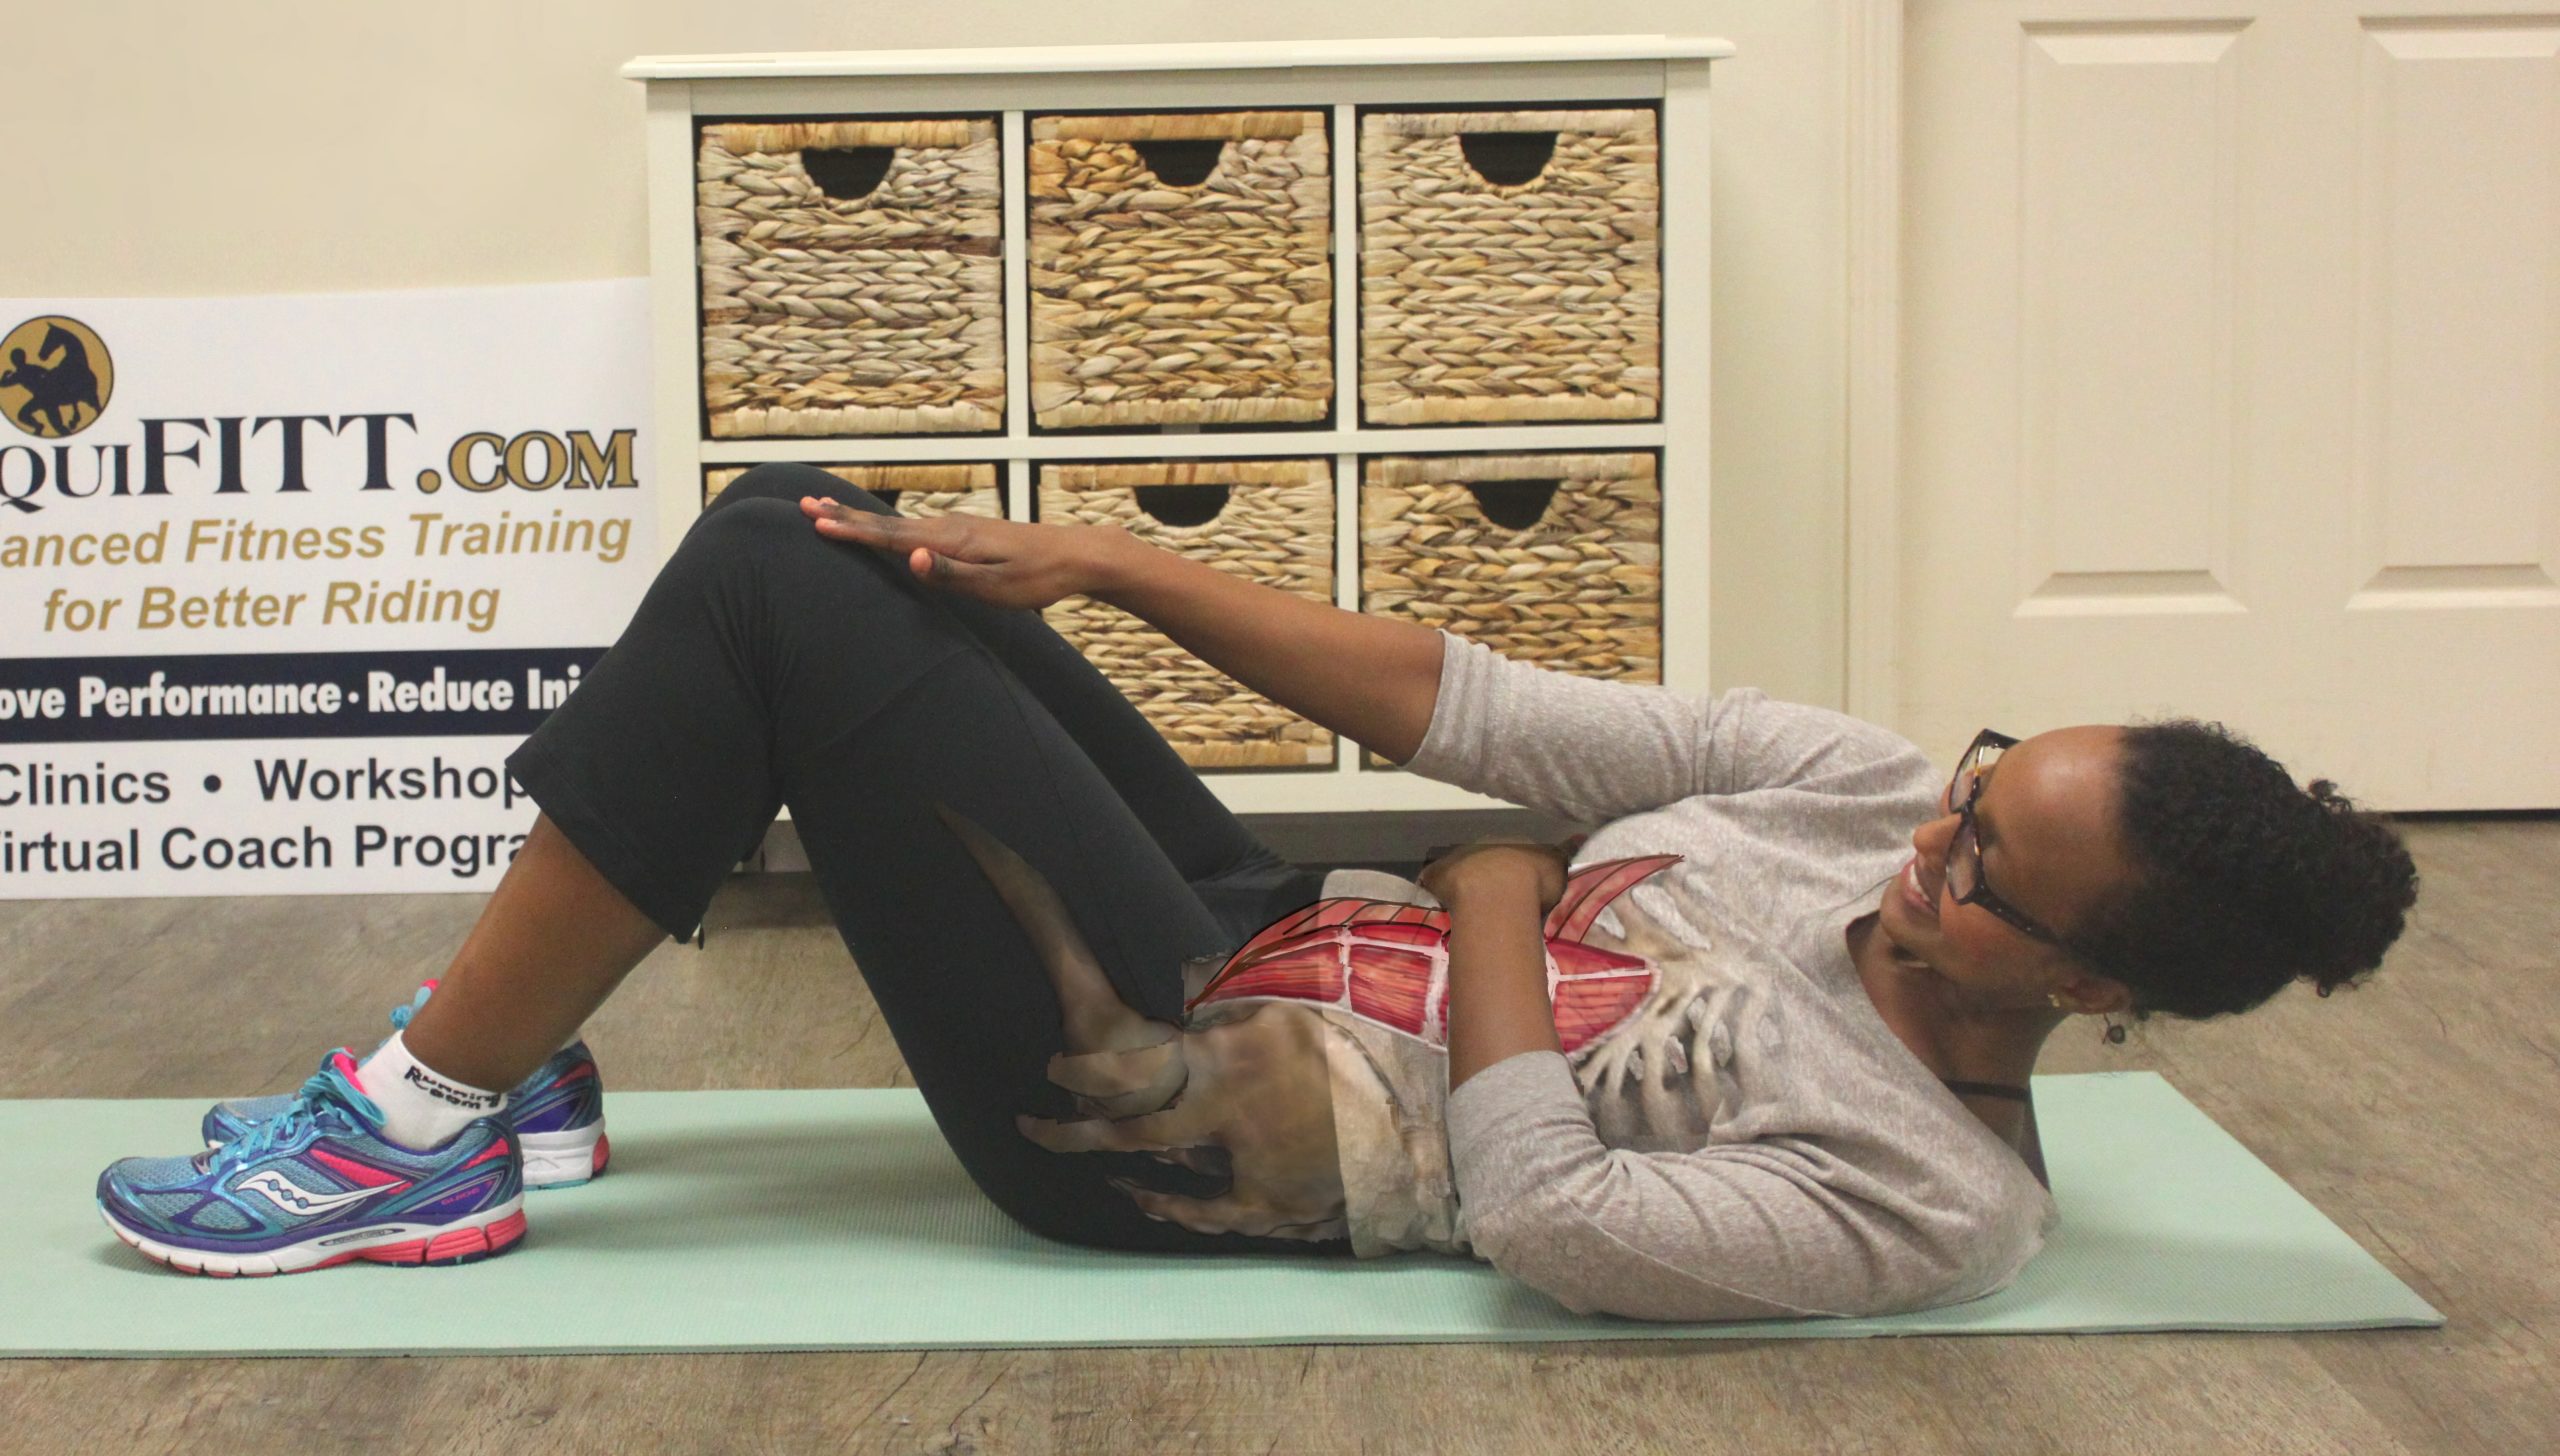
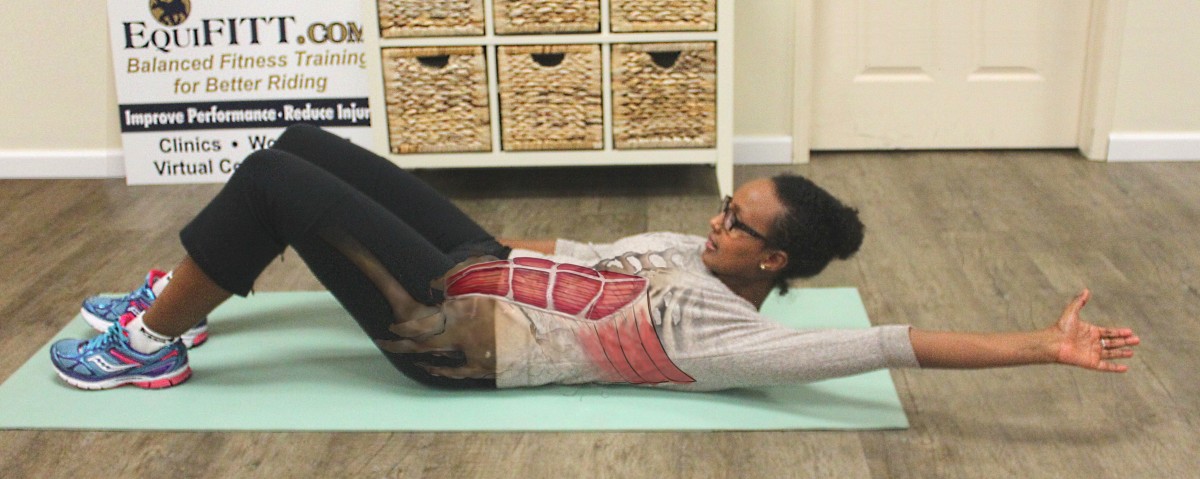
Isometric Crunch with Alternate Arm Shift-Backs
Goal: 10–15 reps (left and right equals one rep)
Muscles Worked: Transverse abdominis, lower back muscles, latissimus dorsi.
This exercise finishes off working your abdominals by adding extra endurance and asymmetrical loading when they have already been fatigued from the previous exercises.
Sidebar: Engage the Abdominals
You can engage your abdominals by imagining that you are pulling your belly button up slightly. You can check to see if your abdominals are engaged by placing your hands on your waist. Your waist should feel like it presses out at you slightly. It is incorrect to try and engage abdominal muscles by sucking in your belly.
Speed is not your goal. Performing the exercise slowly will cause your abdominals to be under load for a prolonged period, building endurance.
DEEP STRETCHES
Lying Hamstring Stretch
Purpose: Stretches the hamstrings, calf and Achilles tendon and even the lower-back area.
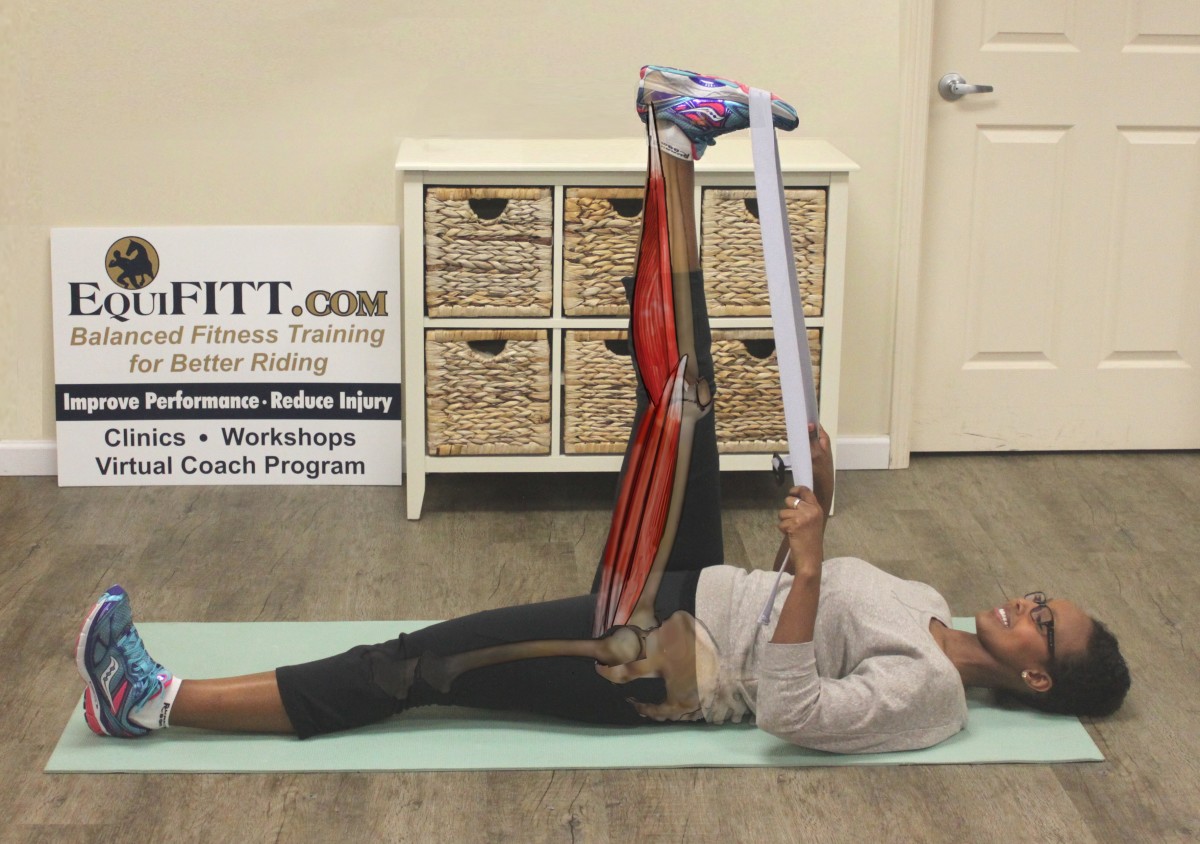
Your knee can be straight or slightly bent, whichever is more comfortable. If you are particularly tight in the hamstrings, you will need to stay in this exercise for two to five minutes to get the full benefit. Go slowly, increasing the stretch by small increments. Aggressively pulling your leg up until you feel pain will not help your muscles and ligaments get more supple. It will tear them. Aggressive or too-quick stretching also triggers contraction in the muscle you are trying to stretch.
This was adapted from Fit to Ride in 9 Weeks! by Heather Sansom with permission of Trafalgar Square Books. Softcover, 199 pages, $27.95.
This article originally appeared in the August 2016 issue.