The main purpose of braiding is to enhance the horse’s appearance. A good braid job—neat, tidy and uniform—shows the judge that you are a winner. A bad one—loose, messy and unkempt—is distracting and gives the impression that you don’t care about your presentation. Braiding is all about the economy of motion and getting into a rhythm. To do a good braid job takes practice, but it doesn’t have to take so long that you’re tired and frustrated by the end of it. Instead, it’s about having a sensible and effective system that doesn’t wear you out. Eventually, your muscle memory will take over and braiding will become instinctual. In this article, I’ll explain not only how to make beautiful mane and forelock braids for the hunter ring but how to do so methodically and efficiently.
What You Need
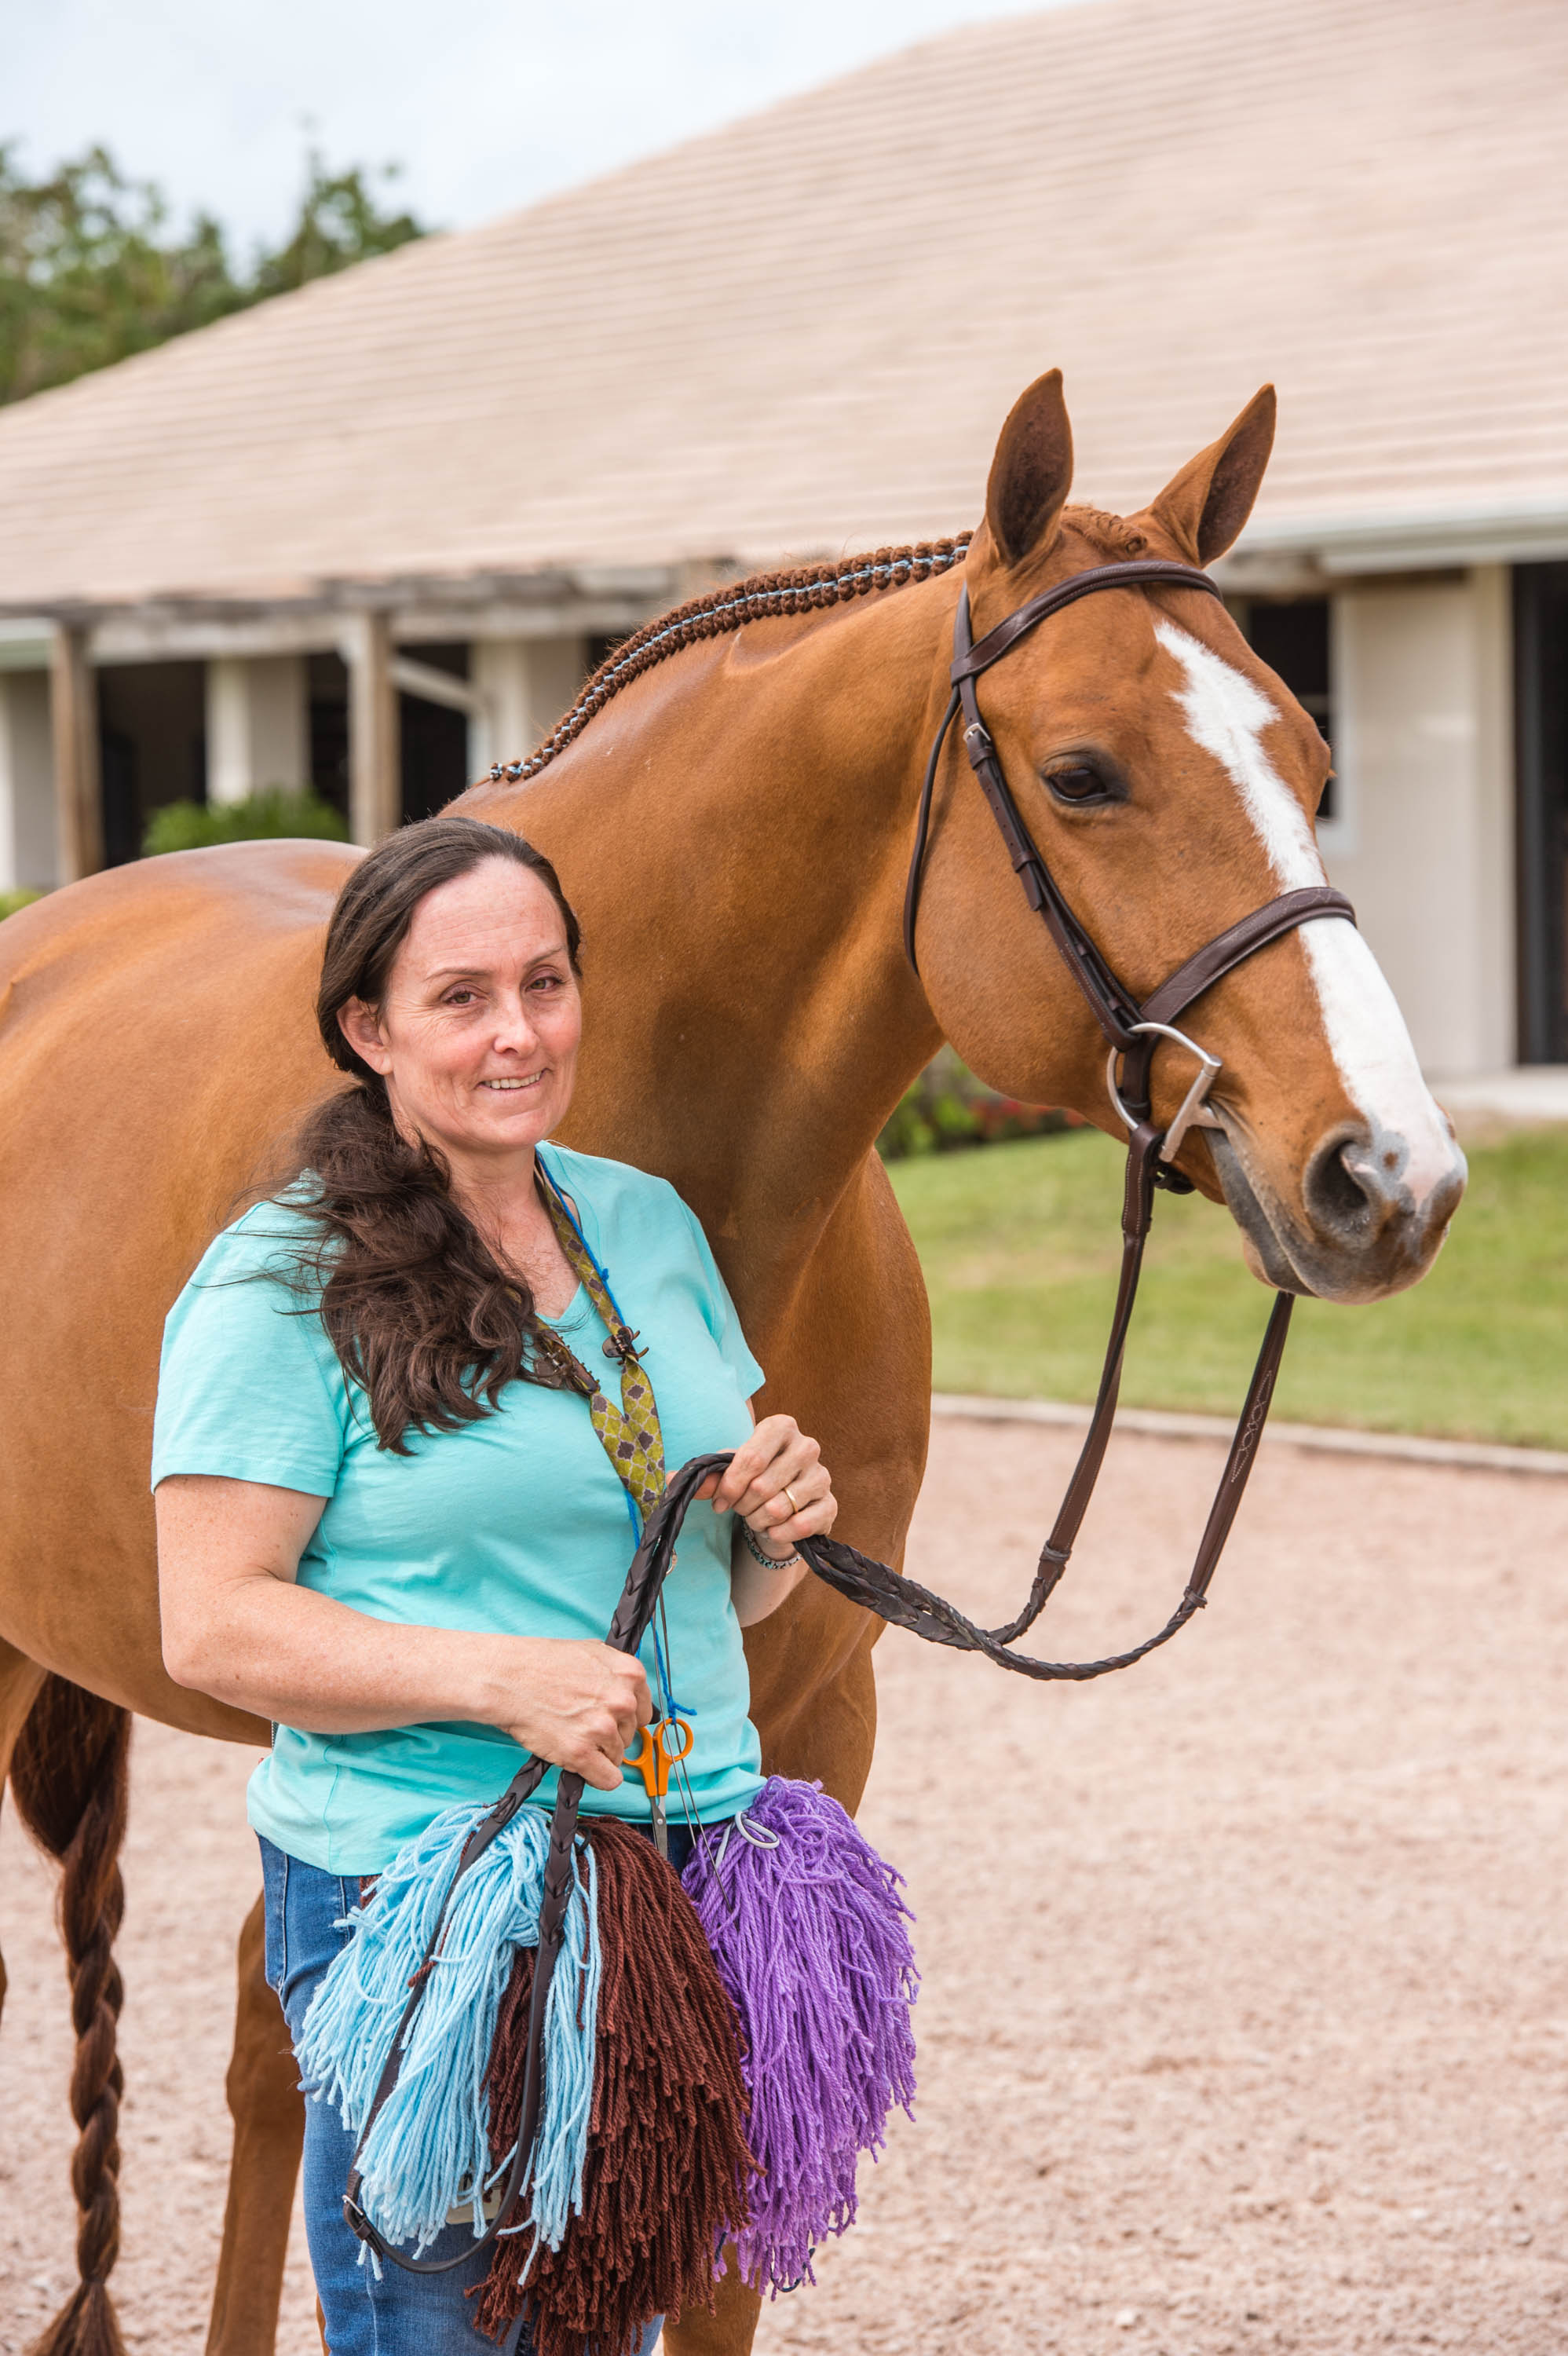
• Yarn: It’s important to use 100 percent acrylic yarn because it won’t snap. Thicker natural fibers like wool will separate and break more easily, so stay away from those. I typically use Trait Tex acrylic yarn. I get it from former braider Kelly Ward of All Dressed Up. You can email her at alldressedupstyle@gmail.com. Don’t be afraid to use color, but keep in mind using color draws attention to the mane and can highlight mistakes. If you aren’t confident about your braid job just yet, use a color that closely matches the color of your horse’s mane.
• Comb: You don’t need anything fancy. A 7-inch plastic comb for $2 to $3 that does not have sharp teeth works well. I like getting my combs from Sally’s Beauty Supply because they tend not to break easily. It’s best to get one with a colorful handle so you can see it if you drop it in a stall.
• Clipper blade: A large old-fashioned clipper blade is helpful for evening out or shortening a mane without thinning it.
• Scissors: Scissors with a sharp blade are a necessity to cut the yarn with precision. I attach them to a long string of yarn or horse show number string and put it around my neck.
• Shoestring: I tie a shoestring around the center of my cut yarn and tie the shoestring to my belt or belt loop so I can easily grab yarn as I need it while I’m braiding.
• Step ladder: You can find affordable, portable step ladders at stores like Home Depot. I like using a ladder with different level steps so I can keep a consistent eye line as I’m braiding. I don’t want to be stooped over the neck. I want to be able to look up at the braids a bit.
• Sponge and/or spray bottle: Some people prefer one over the other to wet the mane. Use what works for you and your horse. If your horse is afraid of the noise that spray bottles make, obviously a sponge is the way to go.
• Quic Braid™: Quic Braid helps to grip the hair. You can use it in a spray bottle or with a sponge.
• Latch hook: Available at tack or craft stores, this tool pulls the bottom of the braid up through the top of the braid (see photo 11, page 78). It’s always good to have a backup, as they are easy to lose and break fairly often. I also suggest putting brightly colored duct tape on the handle so it is easier to find if you drop it.
• Braiding needle: This tool is handy for pulling up thick forelocks, but a latch hook may also work if the forelock is very thin and small. You can order the braiding needles and latch hooks I use from Kelly Ward. I put them on a lanyard around my neck.
• Seam ripper: Used for taking braids out, the seam ripper cuts through the yarn without cutting the hair.
• Thumb protectors: I buy 6 millimeter rubber mechanic gloves and cut off the fingers. Discarding the palm part of the gloves, I use those fingers to cover my thumbs to protect myself from abscesses under my fingernails. They also protect you if you get a cut or have a broken nail and will stay on better than a Band-Aid.
• Headlamp: Helpful even during the daylight, a headlamp makes a huge difference in seeing what you’re doing. Just make sure that if you are braiding your horse, you don’t startle him by suddenly turning it on while standing over his neck braiding.
• Radio: I listen to music while I braid because it’s relaxing, and I believe it helps with patience and the whole braiding process. I also make playlists as a gentle way to time myself without any pressure of a timer or alarm.
• Jammies hood (stretchy hood used for protecting/covering the neck and braids): When you finish your braids, you will want to protect them by covering them. I use Jammies brand only, but they tend to be too long and get close to the horse’s nostrils. I roll it up one or two times so it sits just below the horse’s cheekbone (see the last photo in the “Braiding the Forelock” photo gallery below).
Preparing to Braid
Before you braid, measure and cut your yarn. Roughly, the yarn should be 18–22 inches in length. The number of pieces of yarn you will need will depend on the thickness of your horse’s mane. The thicker it is, the more pieces of yarn you will need. I usually cut a skein of yarn all at once, storing any pieces I don’t use for another time. Whether you decide to cut all your yarn at once or not, you need to cut at least 50 pieces so you won’t need to stop in the middle of your braid job to cut more. I have found that an 8-by-6-inch notepad works well as a measurement guideline. A three-ring binder or planner works, too. I wrap the yarn around the notepad or binder several times, then pull it off so it’s one big loop of several strands of yarn. Then, I grasp one end so my hand is holding the multiple strands of yarn and I cut the strands at the other end of the loop so I have several long pieces of yarn. I then tie a shoestring around the center of my cut yarn and tie the shoestring to my belt or belt loop.
I gather all my tools—clipper blade, comb, sponge or spray bottle, latch hook, braiding needle, scissors, yarn, stool and radio—before starting.
Make sure the horse is standing on flat ground and keep his head up high by putting him on cross-ties or tying him. If you let him stretch his neck forward and downward, the scalp stretches and when he brings his neck back up, the braids will squish together. If you tie him, first put two to three pieces of yarn on the ring of his halter and clip his lead rope to the yarn so that he will be released if he pulls back hard.
If you’re braiding a difficult horse, ask a friend to hold him for you or try braiding him in a space where you know he is comfortable. For example, a horse who always stands with his head in the back corner of his stall may be more comfortable being braided there. It’s also OK to not finish your braiding job all at once. If you’re working with a restless horse, take a break and then come back later to finish.
Before starting, make sure your horse’s mane is clean. Use any regular shampoo but avoid conditioners or shampoos with essential oils or the mane may be too slippery to braid. Then check to be sure the horse’s mane is even in thickness by running your hands through it. A thinner mane should be shorter than a thicker mane. A thin mane gets too spindly if you let the mane get long. With a thick mane, you have to remember that sometimes the scalp is 3 to 4 inches wide, so the scalp itself takes up some of the length.
Braiding the Mane
The number of braids in the mane depends on the individual horse. A daintier horse with a thin scalp—where the hair meets the skin—and fine hair should have smaller braids to match his neck and stature, and vice versa—a big thick mane needs bigger braids. You wouldn’t want to put tiny braids on a big horse with a thick mane—they would look like raisins! If a horse has coarse mane, each hair diameter is thicker and wider, so the braids need to be bigger. Using wider sections of hair will make the braid thicker. You want to try to make all the braids the same thickness by making the sections of the braids a consistent size. I braid everything I can. I don’t believe in having a bridle path because it ends up getting longer and longer every time the horse is trimmed and then the first braid starts too far back. I braid close to the withers, too.
It’s also important to stay right in front of what you’re doing. As you braid, be careful you aren’t leaning to the side because unconsciously, you will make the braid crooked. Horses are always moving. It’s important that you move with them by moving your step ladder, not only to keep your braids straight but also so you aren’t putting unneeded strain on your own body, especially your back. Remember, braiding is all about practice. It might take many repetitions to get the feel for it.
Braiding Should Be Fun
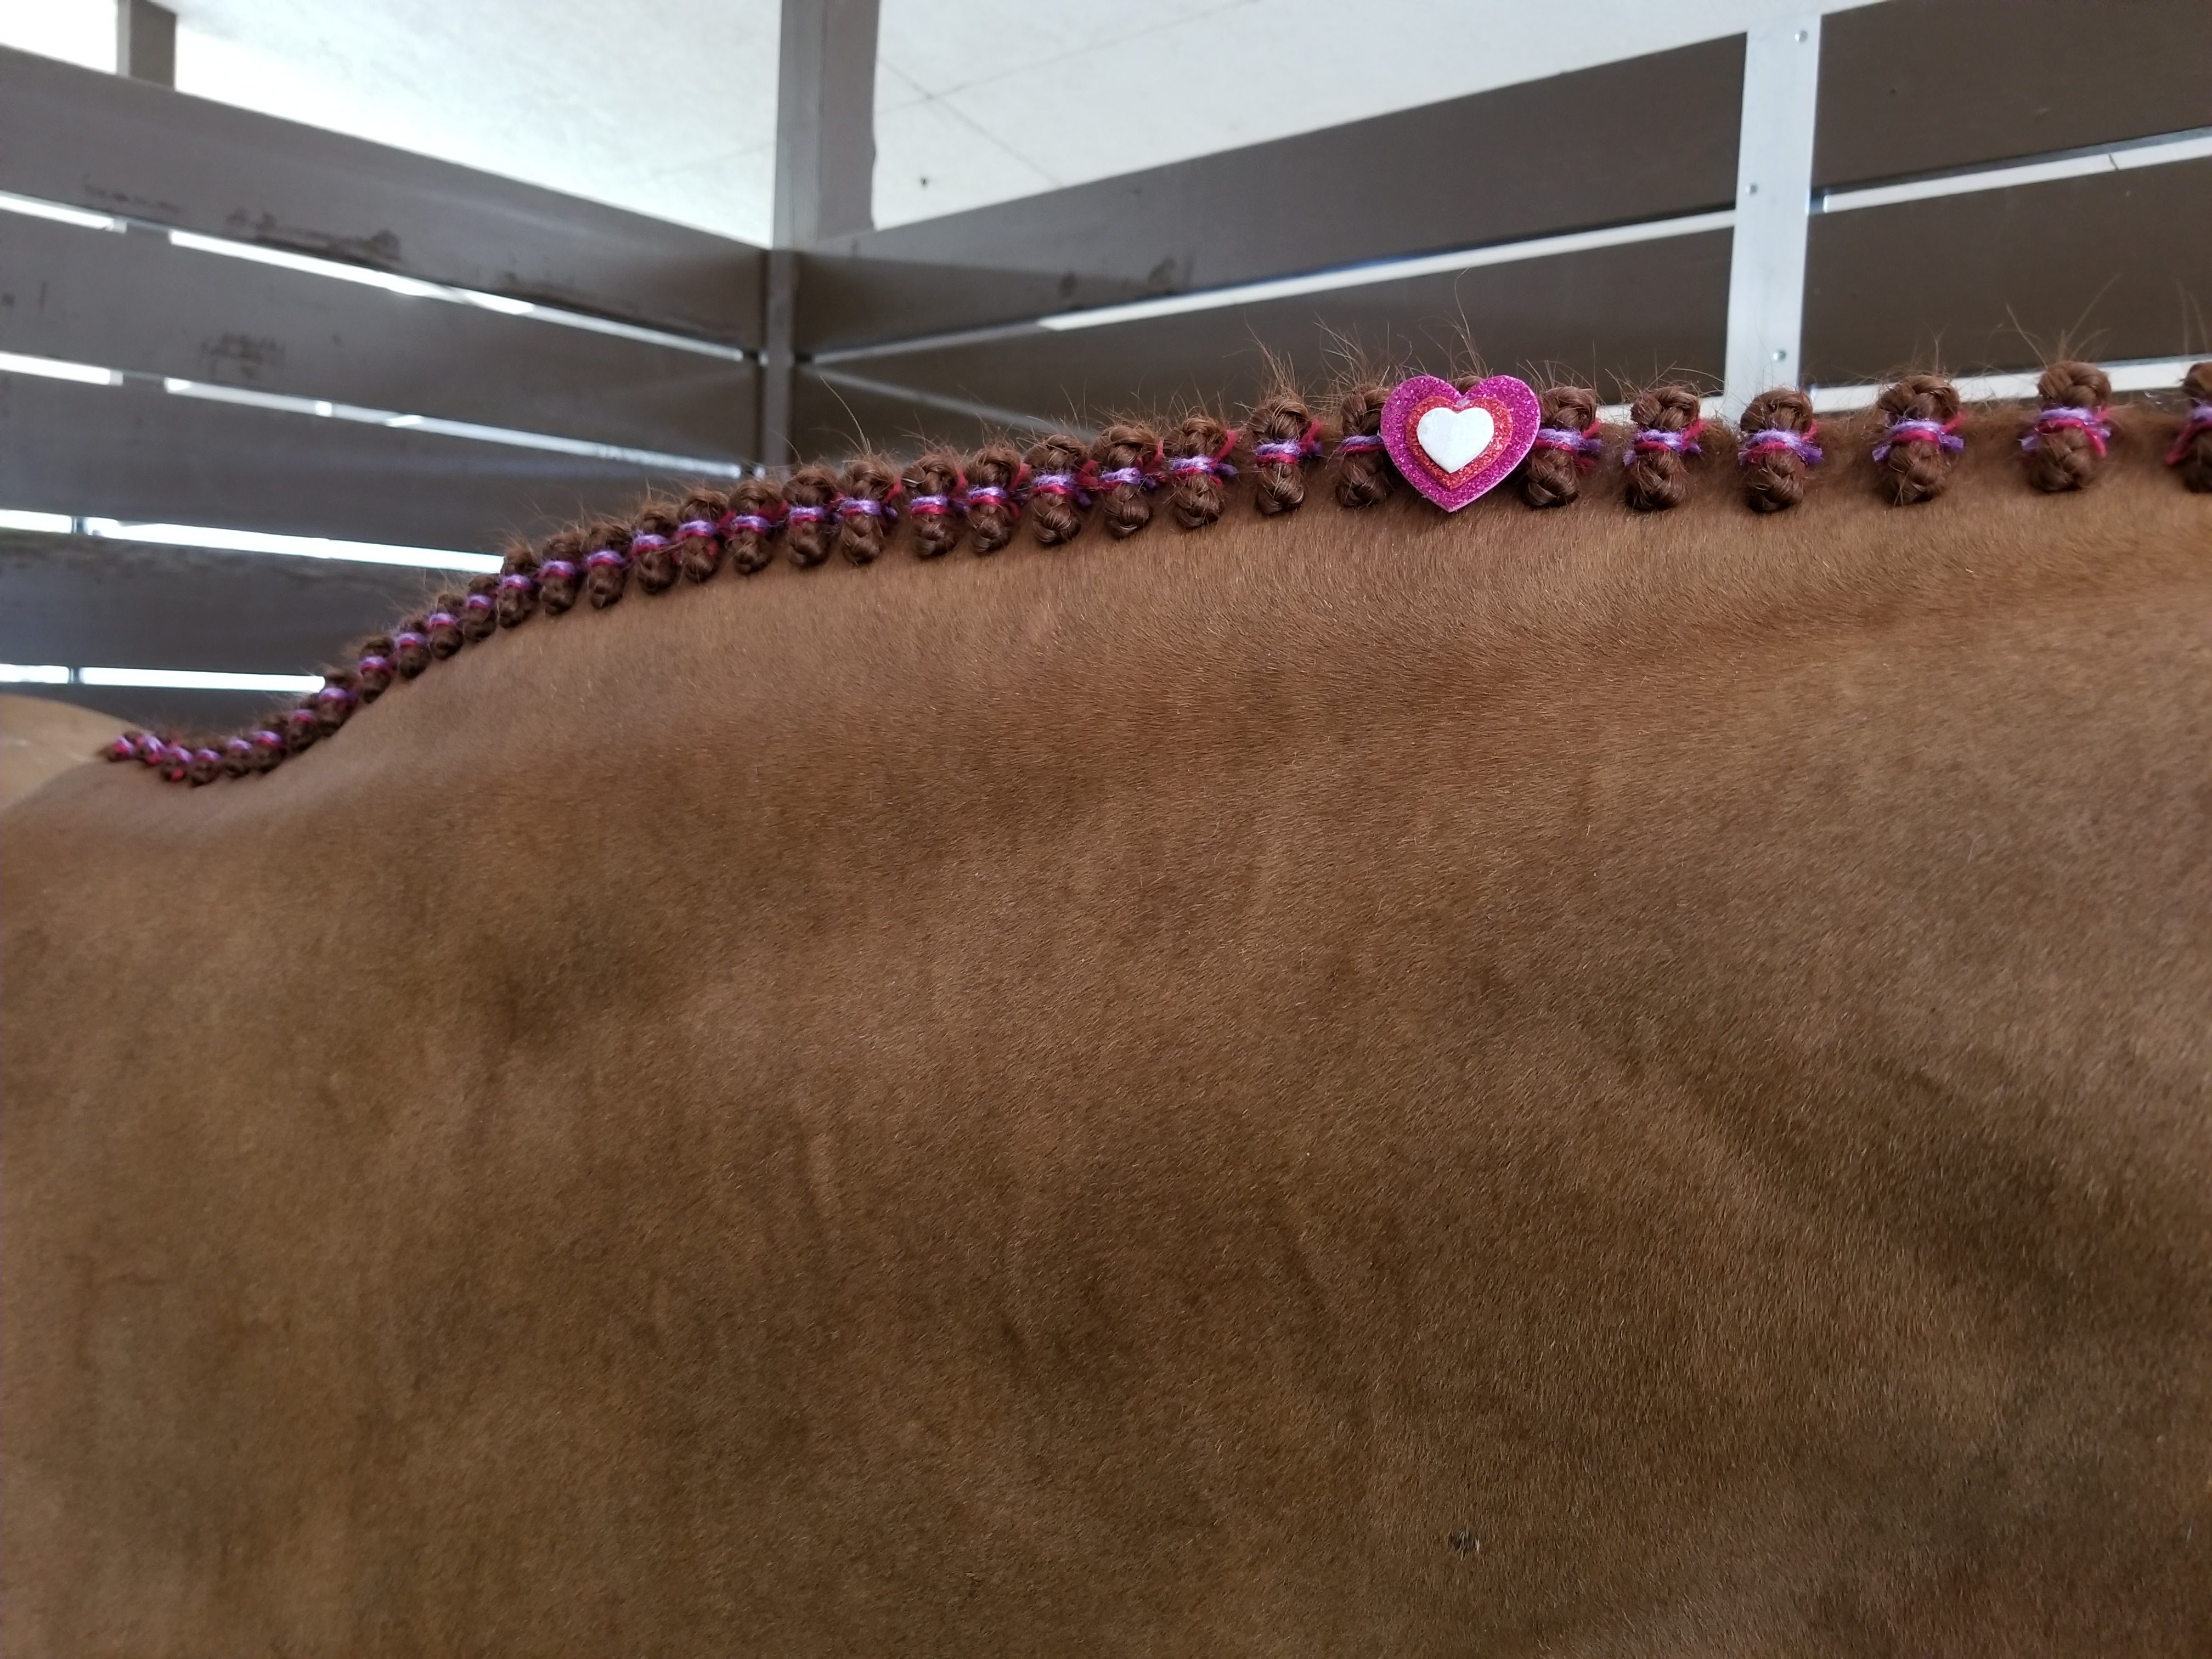
I’m a firm believer that people should try to have fun with braiding and do what they like. Don’t be afraid to use color! But keep in mind using color is a bit more advanced because it draws a lot of attention to the mane and can highlight mistakes. Navy blue yarn is a staple in my arsenal, even for conservative classes, as is slate blue yarn, which is a must-have for white manes. I like to help my clients stand out by braiding with brightly colored yarn for themes or holidays, and I even add glittery ribbon or buttons to add a tasteful sparkle when appropriate. I usually like putting these embellishments in the top third of the mane.
About Jennie Vigliano
Jennie Vigliano has been a professional braider on the A-circuit for over 25 years. She braids for top trainers including Scott Stewart, Jennifer Bauersachs, Anne Kursinski and Ralph Caristo, among others. Vigliano has won the Braider’s Award at the Alltech National Horse Show in Kentucky three times and at the Brandywine Horse Show in Pennsylvania twice.
This article originally appeared in the Fall 2019 issue of Practical Horseman.