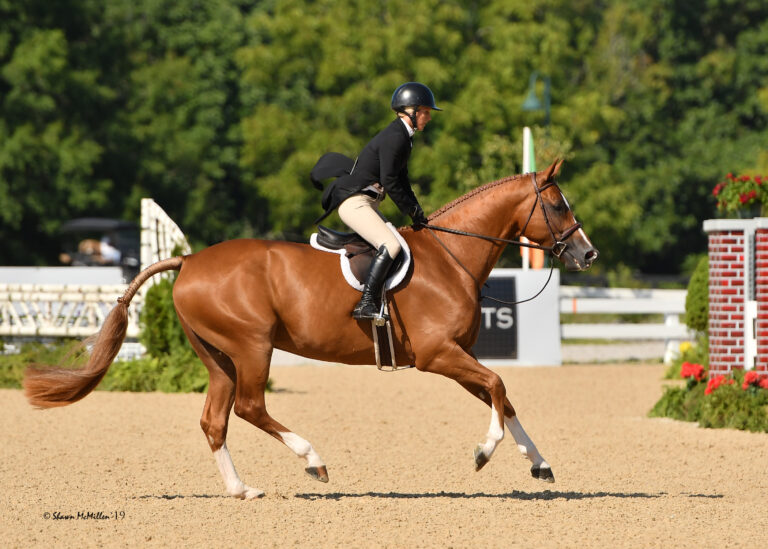
Trotting over small jumps is an excellent exercise for you and your horse. Here Emma Schauder and Lord Corda G are straight, calm, regular and attentive as they approach the vertical. Remember to maintain your posting motion as you get close. If you change your posting rhythm, your horse will lose the rhythm of the trot, which will make even a small vertical feel awkward. Emma’s eyes are focused correctly. The top of the fence will have just gone out of sight between her horse’s ears, but it is not quite time for Lord Corda to leave the ground. He needs to take one or two more steps at the trot to arrive at the right takeoff point, theoretically, the height of the obstacle in front of the obstacle. To help you trot small fences well, count the remaining steps your horse takes after the top rail goes out of sight and concentrate on keeping the rhythm. | © Amy K. Dragoo
Your first lessons on horseback are typically difficult, but after you get a few hours in the saddle, they are usually fun. There are few greater pleasures than applying a new skill or technique to a riding situation and getting the desired response from your horse. However, there are certain learning speed bumps in all three classic disciplines that you are likely to hit as you develop your skills. Let’s talk about these speed bumps, how to get over them and how to speed up your learning curve again.
You Can Sit the Trot!
As always, let’s talk about dressage first because dressage is your ability to speak to and listen to your horse. Whether you are interested in pure dressage, show jumping or eventing, dressage always comes first. By now, you know that your dressage position is important, but you may be starting to get frustrated because no matter how hard you work, your dressage is not getting any better. “How can this be?” you think. “I am straight in the saddle, I have a straight line from my elbow to my horse’s mouth, I am using simple lateral work to supple my horse, I practice dressage three or four days a week, but I am getting nowhere. What’s up with that?”
Relax. We have all been there, and there is a way forward. Here it is: You have overlooked the essential part of your position—your connection to your horse’s back. Use your position to attach yourself to your horse, not just to mechanically run through the movements of your dressage test. Before your next ride, take a mechanics lesson from your best professor—your horse.
Turn him out in a small paddock or put him on a longe line if you do not have a small turnout facility. Let him stretch his legs while you watch him move. Give him time to settle down, then use your voice to encourage him to show you all three of his paces. Because you will sit on his back while you are riding him, study the action of his back. At each pace, watch his hips first, then his shoulders. When he walks, what do his hips do? How are the four beats of the walk formed? What would his body feel like underneath you if his hip moves a certain way while his opposite shoulder is reaching forward? Visualize these moments, remembering what he does with his body at all three paces, and then we will be able to “reverse engineer” your position.
For example, you may still have trouble sitting the trot. When watching your horse earlier, you noticed that when he trots, the hind foot that has just swung back dropped the hip on that side while at the same time the hind foot coming forward under the other side of his body lifts the hip on that side. Now watch his shoulders at the trot. The shoulders swing but do not oscillate up and down as his hips do. By now, you should be having an “aha!” moment: When you were bouncing at the trot, you were actually sitting on something that was twisting under your seat bones, not bouncing straight up and down. Now your challenge is to figure out what your lower back and your seat bones need to do to remain connected to your horse’s back during the two beats of the trot.
I don’t expect you to feel your horse’s back that sensitively—yet—so let me give you a hint: If his hips are moving a certain way, his shoulders are moving a certain way at the same time. If his left hip is up, his right shoulder will have reached forward, which should draw your right seat bone down. In other words, don’t try to lift your left seat bone; instead, press your right seat bone forward and down as his right front foot hits the ground. The answer is that you need to allow your horse to push your seat bone up when his hip comes up, but it is easier for you to relax if you have a purposeful movement to make in the saddle.
This is just one example. There are a series of movements you will need to make at each of your horse’s three paces to remain connected to his back at all times. I want you to develop your understanding by observation and feel. I have written books on the subject, and if you continue to struggle, they will offer some possible solutions. But I would much rather have you take a lesson from your horse first—he is a far better professor than I will ever be.
 Bonnie Mosser and Ike show you what an excellent lower-level galloping position looks like. Obviously, as the speed increases above 500 meters per minute (mpm), Bonnie will shorten her stirrups. However, for Novice and Training levels, I want your stirrups adjusted the same for cross country as for show jumping. Take your feet out of the stirrups, let your leg hang straight and adjust the leathers so that the tread of the stirrup touches you at, or just above, your ankle bone. You need to practice maintaining the correct pace by using what I call speed traps. Measure a distance, say 350 meters, put markers at the start and finish of the measured distance, then practice cantering the distance in one minute, which will produce a speed of 350 mpm. This will develop your feel for that pace. Once you can do this accurately, measure 400 meters, 450 meters and so on. After some practice, you will be able to go through the various speed traps at the required pace by feel, rather than by watching your stopwatch. | © Amy K. Dragoo
Why Trotting a Fence Is Harder
Another speed bump you may encounter is that when practicing show jumping, you may find it easier to canter 3-foot fences than to trot 2-foot fences. First of all, why trot fences? Aren’t you going to compete at the canter? While it is true that you will be competing at the canter over fences, there are good reasons for training your horse to trot over fences as well. First, by approaching a small (about 2 feet high) fence at the trot instead of the canter, you have lowered your speed. The lower speed increases the emphasis on technique rather than momentum, which teaches your horse to jump with a more efficient style. Finally, because the jumps are lower, you reduce the impact of landing, which helps preserve your horse’s soundness. “OK,” you say, “I get all that, but when I try trotting small fences I always wind up either jumping up my horse’s neck or getting left behind. What’s up with that?” My answer is that when riders trot fences they invariably lose the rhythm of the trot in the final few steps. About the only guarantee I can ever make about horses is that if you lose your rhythm, bad things will happen.
Here is the fix I give my students: First, remember that I always want you to look at your fences through your horse’s ears until the fence goes out of sight. Normally, when the jump goes out of sight, it is time for you to follow his jumping motion. But in this case, the fence is so small that it will go out of sight well before you arrive at the correct takeoff point. When this happens, start counting the steps your horse takes until he jumps. Be careful to maintain the regularity of your posting motion as you count. There is no correct number of steps; the number will be affected by how tall you are, whether your horse carries his neck high or low and the size of the jump. The number is not important, but the rhythm is extremely important.
This time of the year is perfect for working on your basics over small fences, and this technique will be an important addition to your skill set.
That Clock in Your Head
Yet another speed bump that riders run into is, literally, cross-country speed. You want to move up to the next level and have tried several times, but you always get in trouble on cross country. Twice you were the slowest rider in the event, and then last time you got a “talk” from the technical delegate about riding too fast. What’s up with that?
What has happened is that you got to the next level without developing your feel for that level’s required cross-country speed. In order to speed up, you have to slow down. Let me explain: Find a field where you can canter and gallop on good footing, one with a straightaway at least a quarter mile long. In a perfect world, the field will be a large oval or rectangle. Put a marker down at one corner of the field, then take the meter wheel that you borrowed from your local TD or course designer and measure, let’s say, 350 meters. Put another marker down at that point. You now have a speed trap where you can learn what 350 meters per minute (mpm) feels like when you are in the saddle. At some other point in the field, put a 400-mpm speed trap down, and then somewhere else, put down markers for 450, 500 and 520 mpm.
By now you can see where I am going with this. We will start with a speed you are very comfortable with, 350 mpm, which you will achieve by riding that speed trap in one minute, using your stopwatch. Horses rarely go exactly a certain speed, and you have to find out what your horse feels like at each level of speed. On days when you are conditioning your horse, practice through these various distances until you can set your horse’s speed at, for example, 400 mpm, and then go through the 400-mpm speed trap in exactly one minute.
Don’t do too much work through the 500 and 520 mpm traps when you first start this process because your horse’s conditioning has to improve a bit for him to tolerate the increased workload of the higher speeds. Eventually he should be able to go back and forth through the various speed traps happily. At some future point, you should no longer need to look at your stopwatch to know you are traveling at a certain speed. One training tip: While warming up, you can work your way up from the slowest speed trap. Later in his training, however, your horse should be happy to go from 350 mpm to 520 mpm and then back to 350 mpm. This exercise simulates the requirements of modern cross-country courses where you will need to repeatedly go forward and come back while on course.
OK so far? Hopefully, you now have “a clock in your head.” (That’s a racetrack expression, describing a jockey who can go at the correct speed per quarter mile without looking at a watch.) But now what about doing this with jumps in the way? That’s what got you in trouble in the first place, remember? So let’s repeat the process, but this time with a jump involved. Put a vertical in the middle of each speed trap with a ground line on either side so you can jump it in both directions. Build the jumps to match the requirements of each level—Novice, Training and Preliminary. Warm up over the lowest jump, and then move to the next. Before you jump any of the obstacles, make sure you have engaged the clock in your head and that you are going the correct cross-country speed for the level. Concentrate on keeping a consistent speed as you approach, jump and depart each obstacle. I want to emphasize this: Regardless of the size of the jump in the speed trap, approach, jump, land and depart all at the same speed. My reasoning is that the only way you can do that is if your horse stays in balance, and when your horse is in balance, you will find your speed bumps disappear.
Learning to ride well does not involve a smooth upward learning curve. You have to expect that you will struggle from time to time, but if you stick with it and study your particular problem, you can break through to the next level. The feeling of satisfaction you will get makes all the trouble you went through meaningful and worthwhile, and your horse will show you that he appreciates your efforts by going better than ever.
This article originally appeared in the January 2016 issue of Practical Horseman.