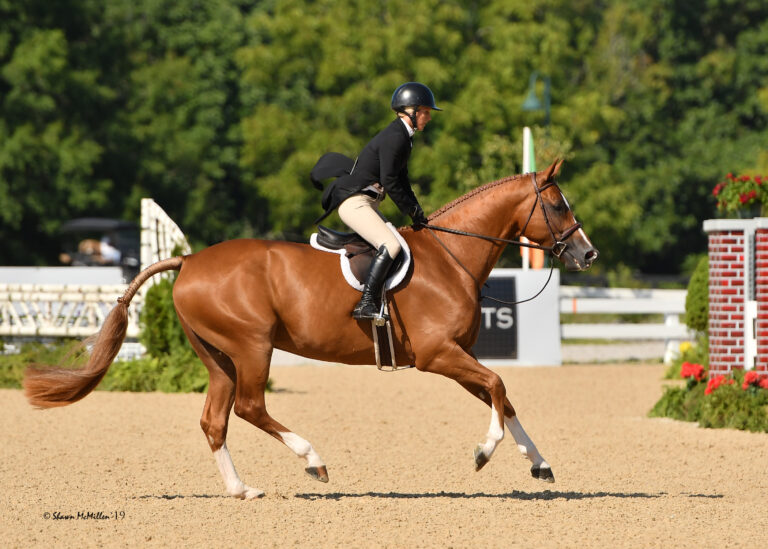
For me, the warm-up is first and foremost the building block toward what we want to achieve with the rest of our ride. For this reason, I prefer a very structured, systematic approach to my riding that begins with the warm-up. Whether I’m riding green or Grand Prix horses, the warm-up is about knowing I can do three things:
1. Check and train my horse’s reactions to my seat, leg and rein
2. Check and test my ability to regulate the length of my horse’s stride
3. Check and test my ability to control his overall shape
Every moment I am sitting on my horse’s back, I am teaching him something, and the warm-up is no different. The work has to be directly relatable to his training. I want to have a set of rules that apply to where I want the rest of my ride to go. These three variables may be the whole focus when working a green horse. Here is how I ride a warm-up with the purpose of checking and training my horse’s reaction time, stride length and overall shape.
For more from David Marcus, read his feature article on how your weight aids can improve your horse’s training at every level.
Reaction Time
Once I have walked on a long rein for 20 minutes, I start in working trot. Studies have shown that walking for 20 minutes reduces the chance of tendon and ligament injury. For this reason, I make this an important part of my warm-up. I then start in a relaxed working trot rising. I ride long and low in both directions, making sure my horse is flexible and reaching forward toward the bit.
I start to work my horse with transitions within the trot on 20-meter circles and long, straight lines. The goal at this point is to find the most rhythmic, harmonious version of my horse.
The first step of the Training Scale is rhythm. However, we cannot control the rhythm until we can control our horse’s reactions. Here is an exercise that I do with any level horse to make certain he is moving forward on his own with an immediate answer to the tiniest of aids.
By riding alternating half-circles of working trot and lengthened trot, I check my horse’s reaction time to the transition aids.
At this point, the goal of the exercise is not to ride the most textbook-perfect lengthening. The goal is to further educate and refine my horse’s reaction to my aids by utilizing the transitions between working and lengthened trot.
How to ride the exercise:
1. Ride the first half of the 20-meter circle from A to the centerline in a working trot.
2. Make a transition to lengthened trot the second half of the circle from the centerline to A.
My focus is on the immediacy of my horse’s reaction to my aids—both “go” and “whoa”—at A and the centerline. At A my expectation is to get a reaction equal to my aid. A general rule I have is that if I can see the rider’s aid I want to see the horse react forward. Ideally, I do not want to see an aid to see a reaction. If I feel this has happened, I immediately reward his response with either a soft pat with my inside hand or a gentle “good” with my voice.
Once I approach the centerline, I ask my horse to return to a normal working trot by closing my outside rein, squeezing softly with my knees and relaxing in my body. I maintain the working trot for another half of the circle until I approach A again.
If my horse did not immediately react to the smallest of aids the first time we were at A, I repeat the exercise. This time when I get to A, I ask for a quicker reaction by increasing the volume of my leg aids. After I’ve done this, I always repeat the transition the next time around with the smallest of aids to check his response as a result of the training from this increased aid.
I repeat this exercise until I have created a horse who is reacting immediately to my aids. Then I can change direction and repeat the circle exercise on the other rein.
Tips for the exercise: I pay attention to my geometry so I am aware of where my horse’s body is under me and how he is reacting to my aids. When I am committed to a certain circle and my horse is suddenly off that line, it heightens my awareness of where he is (or is not) under my body.
I also pay attention to maintaining the honesty of how in front of the leg my horse is throughout. Meaning, my horse has the same desire to go forward on his own in the working-trot portion of the exercise as he does in the lengthened-trot section.
Remember to reward your horse with your voice or pat every time he makes an effort that is better than the time before.
This exercise can be done in both trot and canter. My expectations will remain the same in both gaits; however the use of my leg will be different. I use my lower leg to go forward, specifically my inside leg in trot and my outside leg in canter. I use both my upper legs together equally to slow my horse in trot and canter.
Stride Length
Now that my horse is reacting immediately to the smallest of aids, I can move on to the next exercise that will help me manage the length of his stride.
The focus of this exercise is on the quality of the gait. The goal is to maintain balance and rhythm as I transition from a working trot to a lengthened trot to create adjustability in my horse’s stride length.
I begin on a 20-meter half-circle in working trot but this time I utilize the long side to open up the figure to an oval to develop scope and quality in lengthened or medium trot. Then I return to working trot on the next 20-meter half-circle. By opening up the circle to an oval, I allow my horse to successfully achieve correct rhythm and balance. I may go straight for half the long side or my horse may require use of the full arena. For instance:
1. Begin in rising trot, on the left rein.
2. Ride a 20-meter half-circle from R to S in working trot.
3. Ride from S to V in lengthened trot.
4. Repeat the working trot on a 20-meter half-circle from V to P.
5. Ride from P to R in lengthened trot.
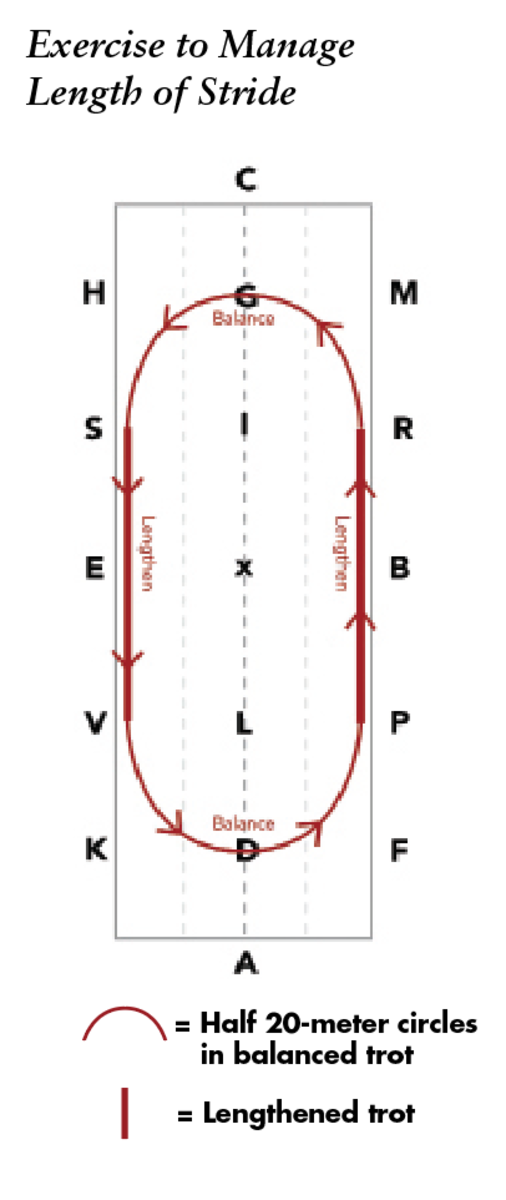
With time, I will be able to take a horse who can stay balanced on the larger ovals back onto the 20-meter circle and ride the same transitions without losing quality. Only then is the 20-meter circle appropriate for the exercise.
Once I take a walk break, I may repeat the exercise in canter. In canter I find counting strides on each half of the circle helps me know that I am making the strides longer—not faster—in the lengthening portion of the circle. Thus, my lengthened canter half should have fewer strides in it than its counterpart in working canter.
Body Shape
At this point, I allow myself to be mindful of my horse’s body shape and the way he is carrying his neck and topline. Through quickening his reaction time and adjusting his stride length, I can now become more aware of how his frame can be affected.
Oftentimes, we fear the discussion of controlling the neck because it is such a taboo topic. However, I need to be able to control my horse’s outline and neck shape. I need to be able to adjust the height of his neck from where I want the frame in the show ring to where I want it in the stretching trot.
What is important to remember is that correct neck control is not about pulling a horse’s head up or down into a frame. Instead, the ability to correctly control the height of the neck is directly related to the horse’s correct response to the aids, impulsion and adjustability of the stride.
No single exercise fits every horse to develop adjustability in neck height. Every horse’s conformation is different and this plays such a big part in my ability to give concrete guidelines. For this reason, the focus must be different depending on the horse, so instead of one clear exercise, I focus on these five tips:
1. The horse should always be reaching to the bridle from active hind legs over a supple back, no matter his neck height.
2. After your warm-up, try to spend some part of your ride each day in a show frame appropriate for your horse’s current level. Make sure the suppleness of the back and the softness of the underneck is still there. If this is not possible, the neck may be too high and hollow.
3. The poll can go as low as you’d like as long as your horse continues to reach forward toward the bit and it is not maintained for long periods of time.
4. The ability to control the neck is a direct reflection of how a horse is using his hind legs and back. If you do not have the ability to raise or lower his neck, first check that he is active enough behind—the slow hind leg can create a hollow back and, thus, no ability to control the neck.
5. In general, if a horse wants to maintain a very high head and neck carriage, work to lower the neck, and if a horse wants to maintain a very low head and neck carriage, work to raise the neck.
After riding through these exercises and focusing on these variables, I should have a horse who is truly reactive to my aids and in front of my leg, giving me the ability to harmoniously control the length of his stride and the shape of his neck. Only now am I ready to start the training portion of my ride. Sometimes I spend the whole ride or lesson on something considered a warm-up variable, but the goal should and must always be to get the quality first.
About David Marcus

David Marcus is among North America’s top dressage competitors. He and Chrevi’s Capital represented Canada at the 2012 Olympic Games and the 2014 Alltech FEI World Equestrian Games. A dual citizen of the U.S. and Canada, Marcus is a well-respected trainer who has helped students of all levels meet their goals. He and his husband, Nicholas Fyffe, own and operate Marcus Fyffe Dressage, a year-round training, competition and sales operation at the heart of the equestrian scene in Wellington, Florida.
Find More on DT OnDemand
Want more from David Marcus? In his five-part video series “Structure Your Warm-Up,” this Canadian Olympian discusses why he prefers a structured, systematic approach to his riding that begins with the warm-up. Enjoy a sneak peek at this series or watch all the training videos, plus more than 3,000 others, by taking advantage of a free trial membership with Dressage Today OnDemand at ondemand.dressagetoday.com.
This article originally appeared in the Summer 2020 issue of Practical Horseman.