Getting the correct distance between two fences depends on two skills:
1). Your ability to recognize what type of jump you have going into a line—either a long takeoff where the horse jumps the fence from far away or a short/deep distance where the horse’s front feet are very close to the jump before he takes off—and
2). Your ability to control the length of the horse’s stride.
The kind of jump you have over the first fence and into the line determines how the distance between the two obstacles rides. If you jump into the line with a good jump on the correct stride length, whatever the distance is, it will ride easily. For example, if you’re riding a line where the distance between the two obstacles is long, you want to approach the line with a longer stride. If you get to the first jump off a longer stride and have a good jump in, then the long distance will ride easily. The same is true for the opposite. If you’re approaching a line that measures short, you want to shorten your horse’s stride. If you have a decent jump in off a short stride, you’ll be able to fit in the short distance easily. Understanding this basic concept might take some trial and error, but if you learn from your mistakes, finding the right distance will soon become routine.
In this article, I’ll share my step-by-step process for getting the correct distances between obstacles by determining the type of jump you have going into the line and learning how to adjust your horse’s stride on the flat, over poles, small jumps and down the lines.
Exercise 1: Lengthen and Shorten in the Warm Up
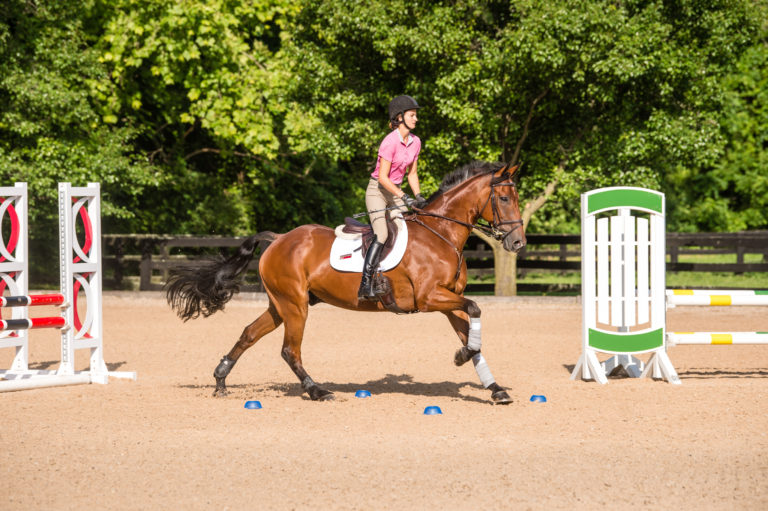
First, practice lengthening and shortening your horse’s stride on the flat. This is a good way to warm him up and ensure you can get him moving forward and back before trying it with obstacles.
Start at the posting trot. Lengthen your horse’s stride on the long sides of the arena and collect on the short ends. These transitions don’t have to happen in two steps—you can ride them in 10 to 12 steps. To lengthen, close your legs and ask him to move forward. Keep an even tempo and encourage your horse to stay steady in the bridle by keeping your hands and arms very still with an elastic feel that follows the motion of the horse—this doesn’t mean stiff, rigid or robotic.
To collect, shorten his step. The tempo should stay even and not get slower. This is why, when asking most horses to collect, you need leg to keep his tempo from getting slow and lethargic. Again, keep your hands and arms still with an elastic feel. You can exaggerate the collection, keeping the stride slow and short, yet active. It should feel like your horse is sitting behind with his withers higher than his hind end. I like to tell my students to try to get their horses to trot in place. This helps the rider realize that the more they ask the horse to collect, the more leg it takes.
Once you feel like you can easily adjust your horse’s stride in trot, move up to canter while keeping the same idea in mind. Remember that at every gait, having a feeling of the tempo is important. Lengthen the stride to a hand gallop by pushing with your seat and squeezing your legs to ask your horse to go forward. Once your horse is galloping, get into your two-point. Next, start to collect by gradually sinking into the saddle, bringing your shoulders up and back and taking more feel of your horse’s mouth. As he starts to come back from hand gallop to canter, move from a sinking position to sitting a bit heavier. Really try to feel the length of the stride shortening. It’s normal for a horse to want to break to trot when you are asking him to collect, so you need to be ready to support with your legs. The shorter you go, the more leg you need.
If you are finding that one stride length is more challenging than the other for your horse, this is an indication that he needs to practice it more. For most horses, the gallop—which comes naturally to the horse—is easier and collection is more difficult.
Exercise 2: Lengthen and Shorten Over Ground Poles
When you can easily lengthen and shorten your horse’s stride on the flat, add ground poles. You will work on the same idea—lengthening and shortening the canter. This exercise is the beginning of recognizing what kind of “jump” you have going into the line and controlling the stride appropriately.
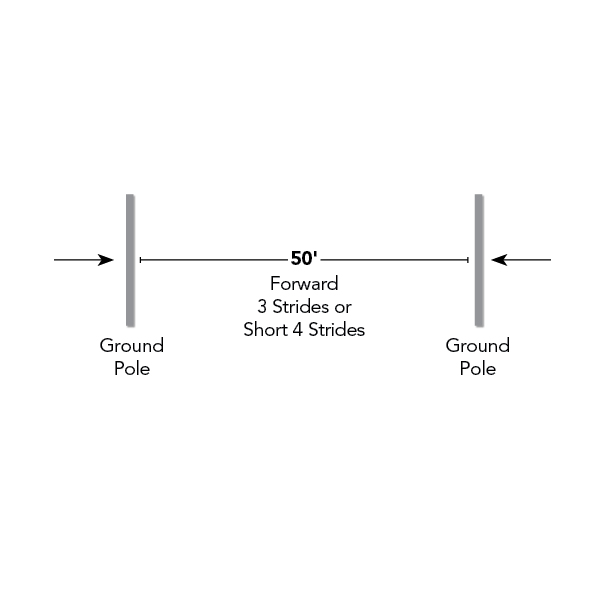
Set two ground poles 50 feet apart. This measures as a forward three-stride or a short four. First, you’ll gallop the two poles in three strides and then as you go around the outside of the ring, you’ll gradually collect your horse and see if you can put in four strides without breaking stride.
When approaching the forward three-stride line, think about using the same aids you used to lengthen the canter as you did on the flat. Use your legs to send your horse forward and then lighten your seat. If you approach the forward three and don’t have a forward, or long enough stride, your horse will do three strides and a chip. If you approach it with a long enough stride and maintain that canter down the line, he’ll do the three easily.
Similarly, you’ll use the same aids for collecting on the flat to get to the short four-stride. Remember, putting more pressure on the horse’s mouth will sometimes encourage him to break stride. You need to coordinate that pressure with closing your leg so that he shortens but remains cantering. Be sure to keep the collected canter every stride. Often, the horse will step over the first pole and then break to a trot as you’re trying to shorten him.
Think about how you are “jumping” into the line. Try to feel whether your horse leaps or just steps over the first pole. Are you coming in on a short stride or on a big, open stride? What happens when you come in to the short four-stride on a big canter? If you keep going forward, you’ll either get to the second pole by leaving out the fourth stride or end up on a half stride so your horse has to take a small fourth step right before the second pole. The mistakes will teach you to feel how you are you jumping into a line and how to react accordingly. You have to do this exercise enough on your horse to see where the problems occur. It’s a lot of trial and error, and it’s not the same for every horse. You have to figure out what length of stride your horse has. Are you on a huge-moving horse, a medium-strided horse, or does your horse have a short stride? Is it hard for him to fit in the distance or it easy for him to leave it out?
Exercise 3: Lengthen and Shorten Over Two Small Fences
Set two small jumps or raised poles, no bigger than 1-foot high, 24 feet apart on the short end of the arena.
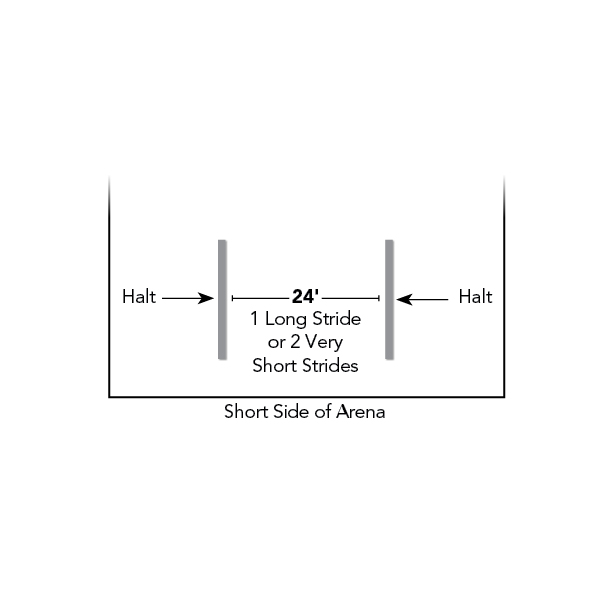
Ride this small gymnastic with the same idea of lengthening and shortening and alternate between riding it in one long stride and then in two very short strides. This exercise will continue to help you learn how to create the right canter for the jump. It is more challenging than the ground pole exercise because now you’re jumping small fences. To get the one-stride, you’ll have to gallop a little—although 24-feet is a normal one-stride distance, it will actually ride long because the jumps are so small. To get the two-stride, you’ll have shorten the canter.
I like putting this exercise on the short end of the ring and have the rider stop on a straight line after the jump because as soon as the horse sees the turn coming, he’ll want to rush and cut the turn. Stopping on a line teaches him to wait and listen to the rider.
First, ride the one-stride. You know the one-stride distance will ride long at this height so you need to create a stride that will make the long distance easy for your horse by lengthening his canter. Just like during the warm-up and pole exercise, relax the pressure on your horse’s mouth, lighten your seat, and allow him to gallop and lengthen his stride about three-quarters of the way around the ring. By the time you get to your approach, you want to have created the stride you need. After riding the long one-stride, halt right after the second obstacle on the same line.
Once you can do the exercise in one stride and halt successfully after, ride it in two strides, again by creating the correct stride. So this time ask for a shorter, more collected stride. Sink in the tack, using your seat and leg to collect. Your hand also tells the horse to come back. If he gets rigid or resistant, that’s when you add more leg. When shortening at any jump, stay back with your shoulders to help balance your horse. Just like with the one-stride, halt on the line.
If you don’t like what you see distance-wise, keep going. You have to work it out and learn from your mistakes. If the distance comes up a little too long or a little too short, make sure you still support your horse with what you feel he needs. The more you practice this, the more you’ll realize how controlling your horse’s stride makes it easier to see the distance, not only in the line, but coming to the line.
Exercise 4: Ride Short and Long Two-Stride Lines
More advanced riders can try this final exercise. Set two oxers at 3-foot on both sides of the ring—one with a long two-stride distance (37’) and one with a short two-stride distance (33’).
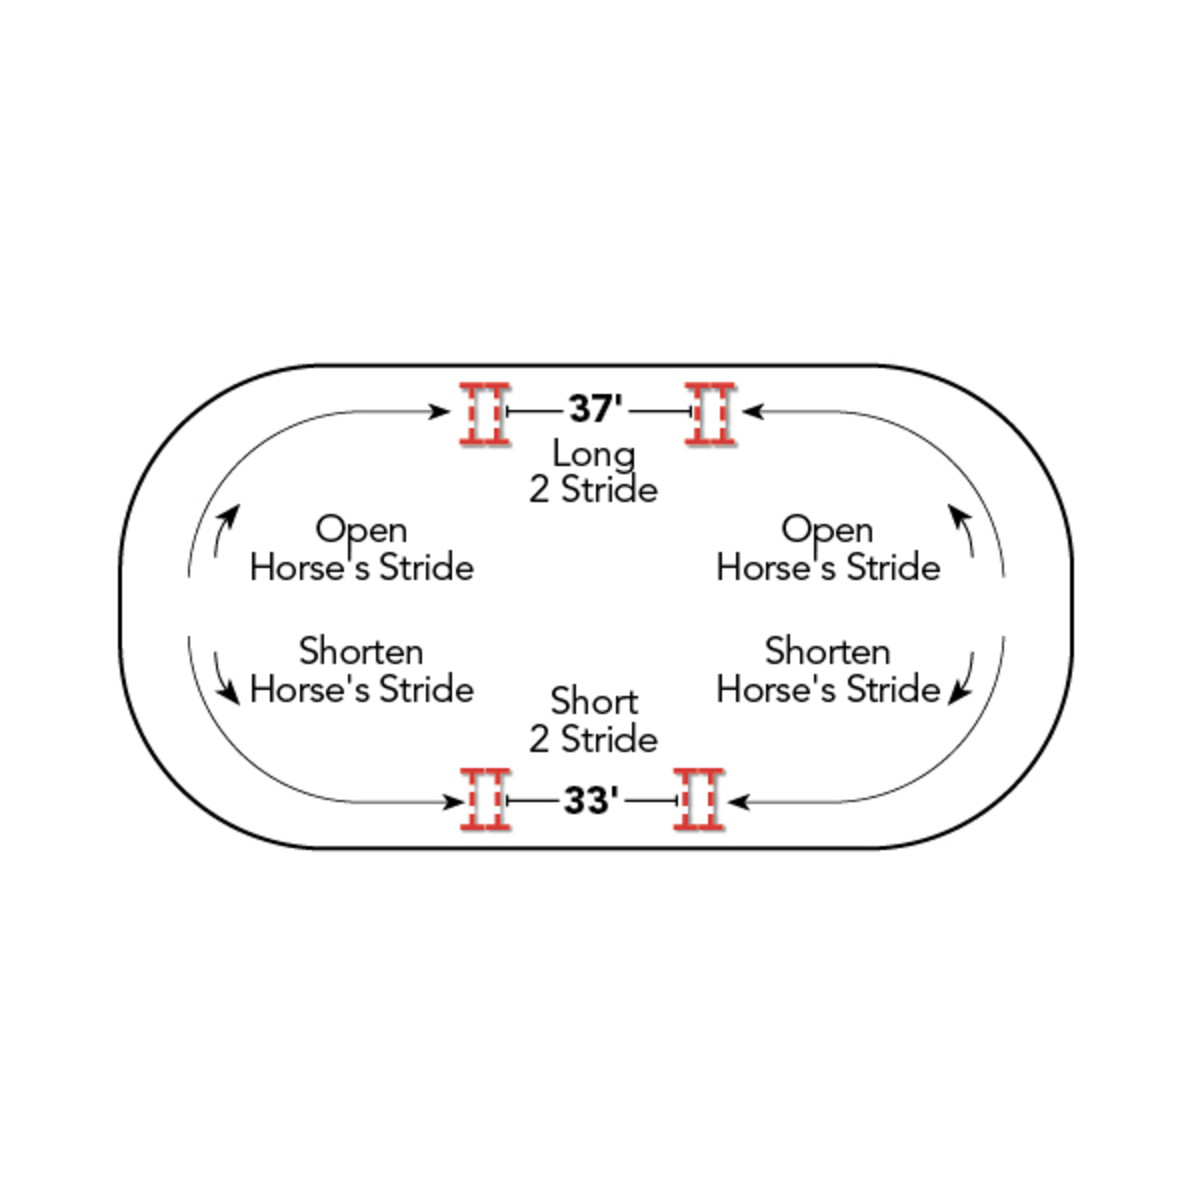
The striding between two oxers, even when they’re set at a normal distance, usually requires you to support with your leg because the horse has to stretch over them. Setting two double oxers, one long and one short, allows you to think and feel the stride on the approach and how the distance rides in between the fences. It also helps you work on finessing the hand and leg aids because if you don’t love the jump in, then you have to take action in between the oxers to control the stride and help your horse. If the long distance comes up short, then you have to help your horse by closing your leg and giving with your hands. If you come in too long on the short two-stride, then you have to help your horse by closing your hands and bringing your shoulders back.
You’ll ride this exercise just like you did on the flat, over the poles and over the small gymnastic. You’ll use your knowledge of lengthening and shortening that you learned earlier and feel whether you have to press your horse to move up with your leg or close your fingers and ask your horse to come back.
I love to give the basics to riders and then let them find their way of making horses with every type of disposition and jumping style into the best they can be. I take great joy in seeing that horse and rider develop and become better. It’s fun. I love this sport from the lowest to the highest level. First you have to love horses. And to be really good, you have to love horses and love the journey.

Feel Your Horse
There are some horses who have natural impulsion and as you collect, they never try to break—they can almost canter in place. With this type of horse you don’t need leg to ask him to collect. You have to feel what kind of horse you have in the moment. Horses are living, breathing, feeling animals, so there’s never one explanation for any aid you give at any time—hands, legs, seat, back—you always have to feel and understand what kind of your horse you’re riding.
Improve Your Eye
For students who don’t have a good eye or struggle to see a distance, I like them to try this simple exercise of jumping on foot like they’re a horse, which gives them a feeling and understanding of pace. “Canter” on foot over a pole on the ground. Then, make a mark on the ground 3 feet in front of the pole. Again, “canter” on foot to the pole but now “take off” by the marker and make sure your foot doesn’t go beyond that mark. So, let’s say that the 3-foot mark makes it a wide jump, you’ll find you can’t make it over unless you “canter” to it with a faster pace. Another way to visualize this is to imagine you are standing by a stream that’s 4-feet wide. You won’t be able to jump over it from a walk; you’ll need to run to clear it.
As you practice, your ability to see your distance will improve, and you will realize how to adjust your own stride on foot. Soon it will become clear that it’s the same theory when you’re on your horse’s back. You have to see the distance and regulate the length of your horse’s stride to get to the jump correctly.
Challenge Yourself
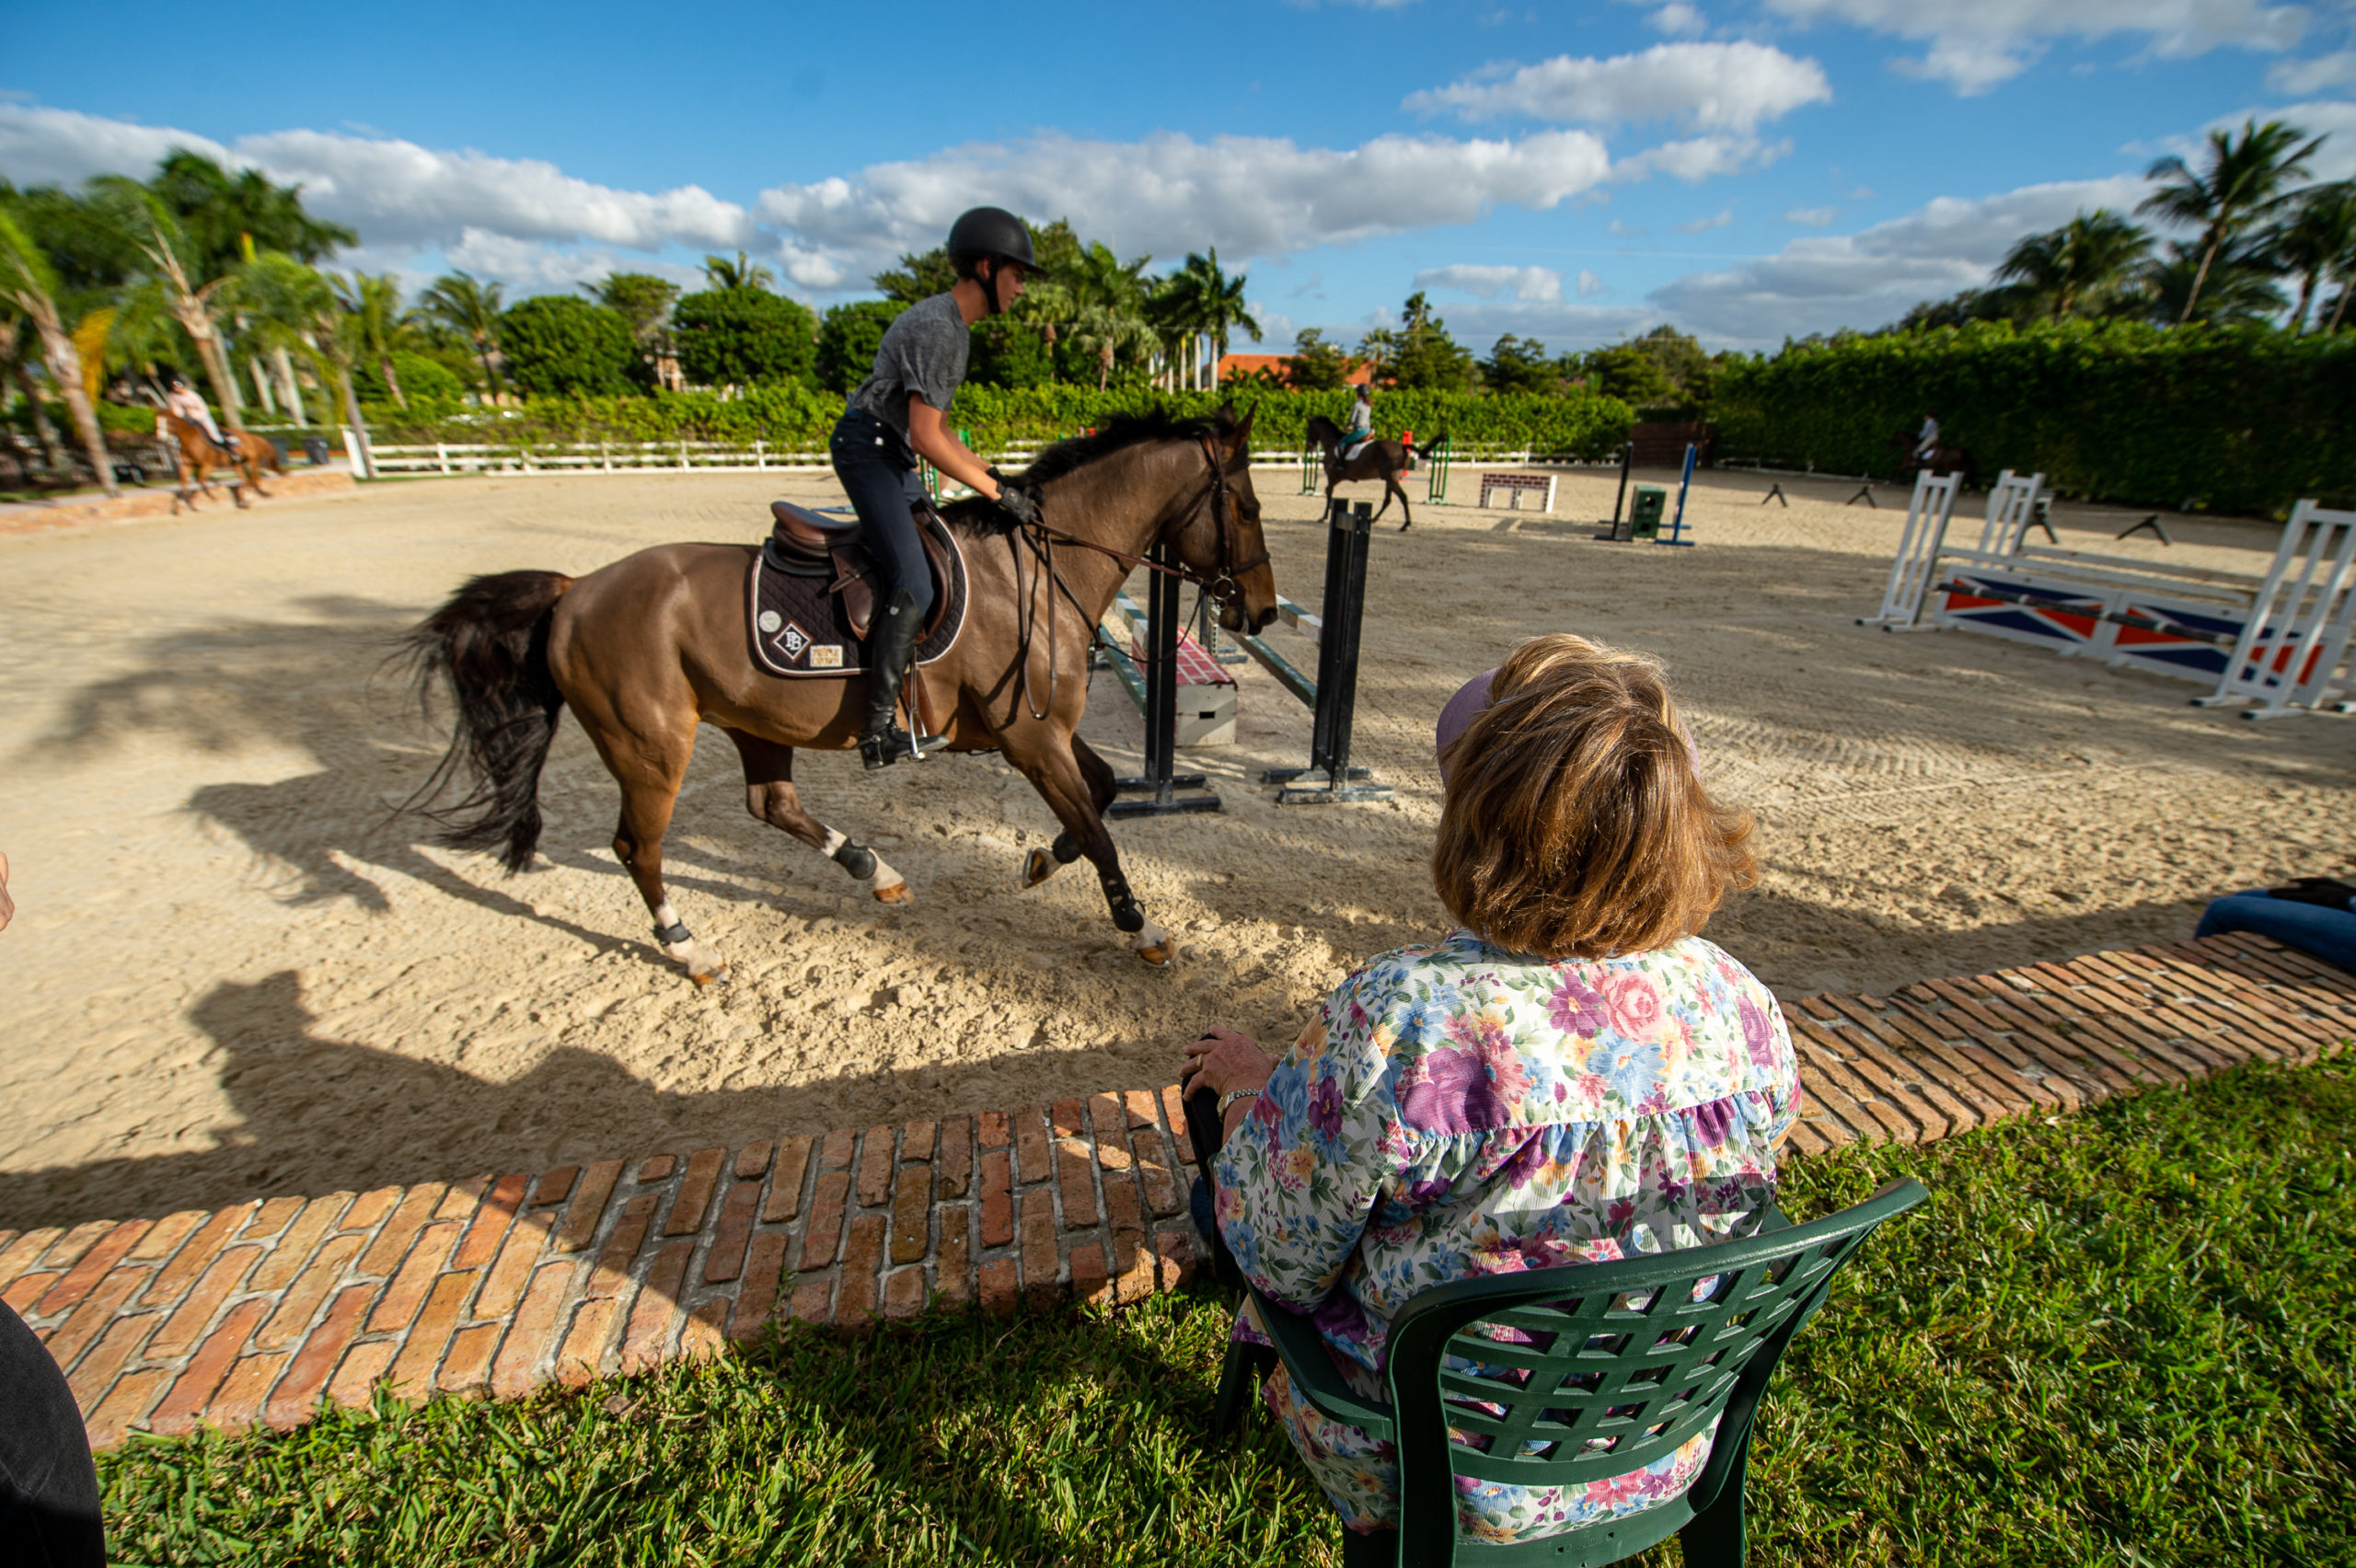
It’s good to put students on both lazy and hot horses. By doing so they learn how to use their leg, how to be light with their seat and how to be quiet with their hands. I love putting all of my riders on horses who are sometimes difficult because they learn to fix problems by riding these horses, and it teaches them when to be strong and when to be soft.
Today, a lot of professionals mount the kids beautifully and that’s great for the competition, but in the downtime kids need to ride green, spooky or difficult horses. That’s how students learn to ride those problems. I tell my students who have dreams of riding at the higher levels that it doesn’t matter how great the horse is you’re riding. When you get to the upper levels, you really need to anticipate what help the horse needs to jump the big fences. It isn’t as easy as it is over 3-foot fences with a made horse.
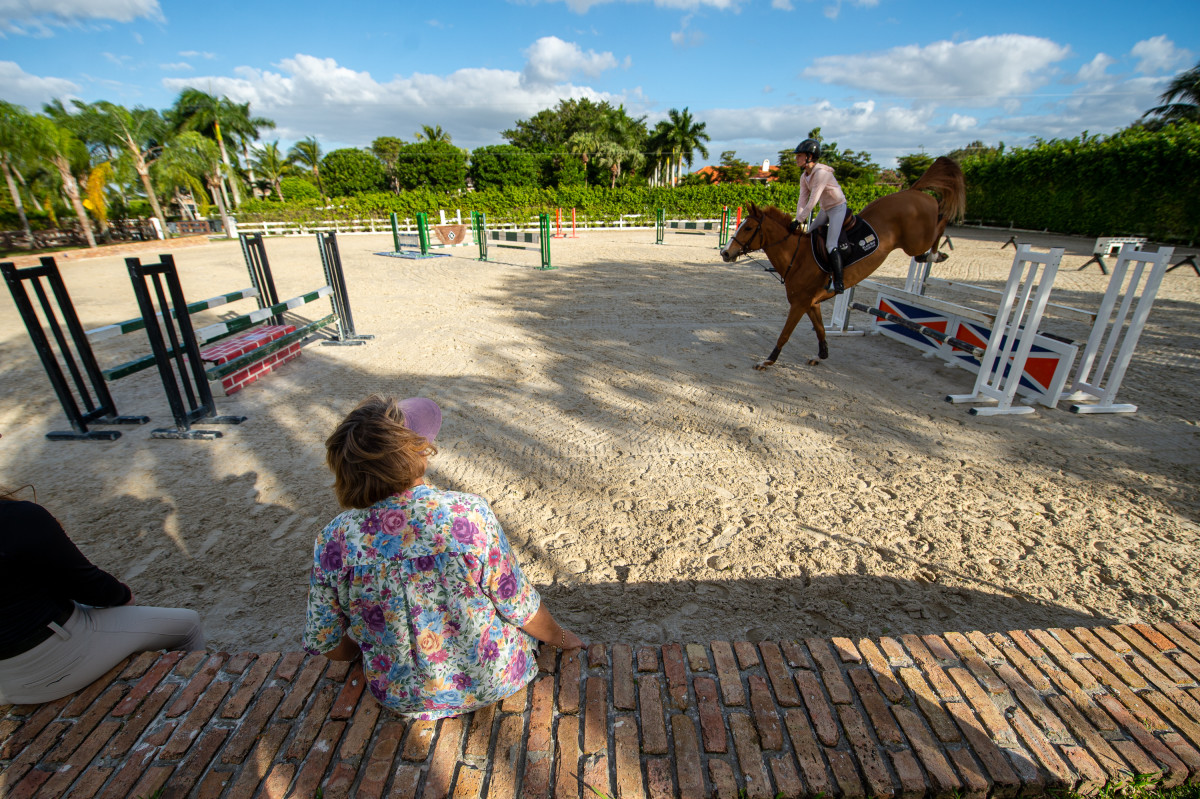
About Katie Monahan Prudent
Katie Monahan Prudent’s stellar career in the hunter/jumper world began as a Junior with wins in both the AHSA [now USEF] National Hunter Seat Medal Final and the ASPCA Maclay National Championship followed by multiple championships in the hunter ring before she emerged as an international jumper star. A member of the 1986 gold-medal World Championship show-jumping team, she has won almost every major grand prix in the United States and was named American Grand Prix Association Rider of the Year three times. In 2000, she was named Coach of the Year for developing riders by the U.S. Olympic Committee. She currently runs an international training program with her husband, French equestrian Henri Prudent. They divide their time between Wellington, Middleburg, and Rosires aux Salines, France.
This article originally appeared in the Spring 2021 issue of Practical Horseman.