Whether riding in hunters, jumpers or equitation, we all want the perfect round—one that’s smooth and seamless and looks effortless. If you watch professional riders, that’s often what you see. How do they get such rounds time after time? They allow their horses to jump.
As a trainer, I find this is one of the most difficult concepts for less-experienced riders to learn—and more importantly—to feel. Instead, they think they must always do something to make their horses jump. This usually leads to using too much leg, too much hand or both on the approach to the fence.
The reality is, your horse doesn’t jump because you make him. He jumps because there’s a stationary object in front of him. If he is concentrating on jumping and not what you are telling him to do when he is preparing for his takeoff, he’ll jump much better. So remember that you are just a passenger, and the less you interfere with his balance and rhythm, the better he can do his job, which is to jump.
Once you can separate out your role, the pressure of “seeing a distance” will diminish because your jumps will start to be smoother. In time, your confidence will increase and, with that, the subtleties of your riding can begin to evolve.
Being a passenger, however, is hard. It’s human nature for riders to want to do something to help their horses get to the jump. I can’t just say, “Don’t interfere,” or “Don’t pull on the way to the jump,” and expect my students to be successful.
Instead, I give them tools that allow them to focus on what they should be doing. I tell them, “It is easier to concentrate on what you WANT to do instead of what you DON’T want to do.” At a certain point in front of the jump, what I call “in the zone,” I have them get into their jumping positions and relax on the reins. That’s all. They just focus on those two things.
At this point, students usually ask two questions:
• What do you mean by “in the zone?”
“In the zone” is the point where you need to stop influencing your horse and just let him jump. For less-experienced riders, “in the zone” is typically three to five strides in front of the jump where they might start worrying about a distance and consequently interfering. For riders with more experience, “in the zone” might be just as their horses take off. The concept is the same, though: At some point, you have to allow your horse to jump.
• What if I don’t see a distance?
When you don’t see a distance to a fence, you, like so many riders, might want to make a drastic change to find one: kick your horse to move up for a long spot or pull to fit in a short one. To make matters worse, this kicking and pulling is often executed at the same time, resulting in a “clash of the aids.” This merely interrupts your horse’s concentration and rhythm and takes away from his balance. Good balance makes for a good jump, so you always want to be mindful of your horse’s balance. If you are able to leave your horse alone, he’ll most likely jump a nice jump for you.
Those drastic “chips” that come from forcing him off the ground or “long flyers” where you are feeling left behind will be replaced with jumps that can work. I try to have my riders concentrate on letting their horses “stretch” if the distance comes up long and to let them “wrap around the jump” if the distance comes up short. Later, as you gain experience, you can help your horse move up if the distance is a little long or shorten his stride if it’s a little short. This is where you can positively influence him and the subtle riding comes in—where you are working toward what I call “invisible riding.” Before you can do that, though, you need to learn how to not interfere—to actually let him jump on his own without “help” from you.
To help you learn this, I’ll share the progressive system I use with my students. First you’ll practice your “in-the-zone” position on the flat and then over a small pile of poles on the ground. I cannot emphasize enough how much your jumping can be improved by position work on the flat and over poles, so stick with these exercises until you feel confident you can maintain your jumping position no matter what. Next you’ll work on it over single fences, then in a line of two jumps and finally throughout a course.
I teach this approach to my students who are learning to see distances, but I also use it if I’m having trouble seeing distances myself—I focus on getting into my jumping position several strides in front of the fence and relaxing my hand forward, and the problem starts to sort itself out. I also use it to help green horses figure out their own balance and timing to fences instead of relying on me. This brings up an important point: I’m gearing this article toward training the rider, not the horse. Learning to master the skills in the following exercises is much easier on a quiet horse than one who makes a “bid” at the fences. If your horse rushes to the poles on the ground or to the fences, enlist the help of a trainer to work with him. You should practice these exercises on a steadier schoolmaster. By improving yourself, you’ll be better able to help your horse.
Jumping Position Defined
The jumping position is critical for success, so first I’ll describe where your position needs to be when you’re riding on the flat and then how it changes when you get to riding over jumps.
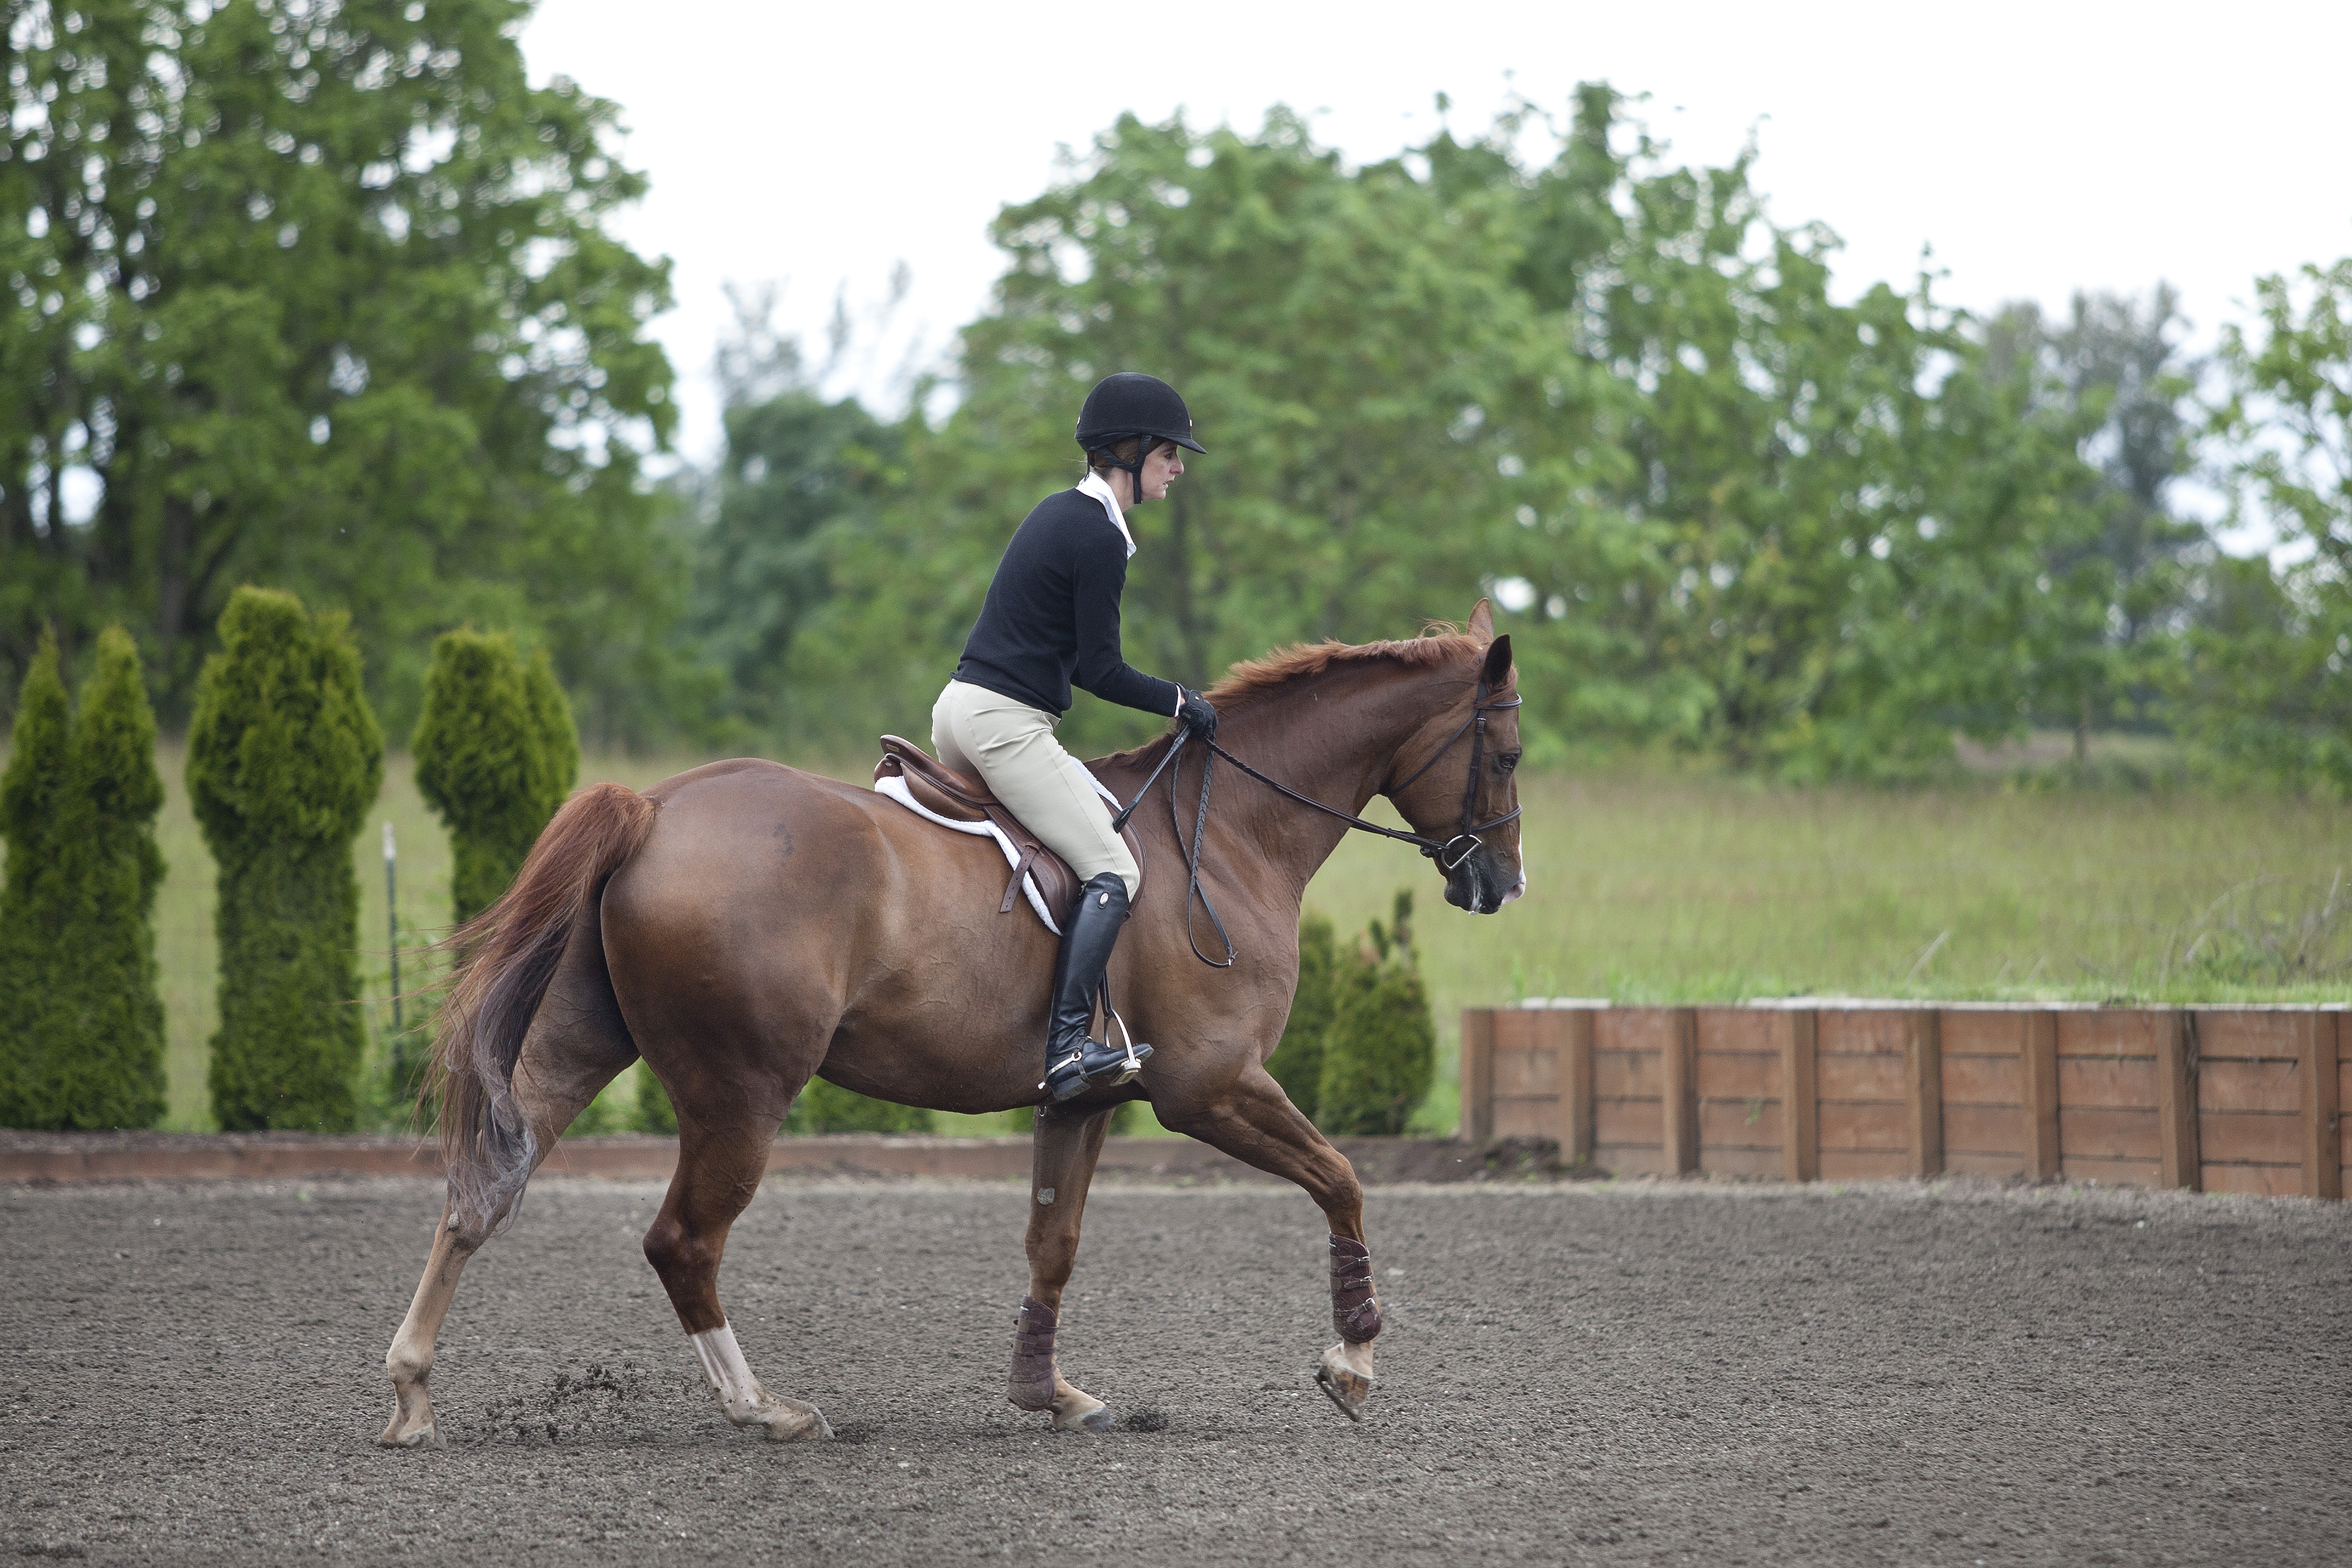
On the flat, your feet are placed on the stirrups, which are perpendicular to your horse’s girth. The weight is in your heel, your leg is underneath you at the girth and your heels and hips are in line with each other. The strength of your position comes from having your heels down and your feet correctly positioned on the stirrup. At the halt, walk, sitting trot or canter, your upper body is inclined forward of the vertical just a hair—a degree or two—so you won’t be stiff. At the posting trot or gallop, you close your hip angle to say, 30 degrees, so you can stay with your horse’s motion. Your hands are above and in front of his withers and there is a straight line from the bit to your hand to your elbow. Your eyes are up.
As you approach an obstacle and get “in the zone,” you want to get into your jumping position. This is known as the half-seat. For less-experienced riders, the two-point contact is used as an exercise to practice the position for the half-seat. In two-point, you raise your buttocks out of the saddle so only your two legs are touching the saddle and you close your hip angle the same amount you would for the “up” position of the posting trot—about 30 degrees. In the half-seat, also known as the jumping seat, the seat is a little lower, and provides freedom to your horse but still allows you to maintain security to be able to influence him if needed.
Now let’s talk about your hands. You need to make sure you have enough position control so you are independent of your hands. This means you can hold your jumping seat in balance without falling back in the saddle and without balancing on the reins. To help with this, when you get in the jumping position on the approach to the fence, move your hands ahead of the withers (2–3 inches ahead of the martingale strap if your horse is wearing one).
Developing independent hands can be tricky for green riders. Many slightly hit their horses in their mouths. However, with the split-second timing of the jumps, they are unable to feel this; thus, they are unaware they’re even doing it. To ensure they aren’t, I always recommend clutching a little piece of mane. I teach everyone how to hold the mane—no matter how good they are! I’ve had students say to me, “I’m really good on the flat, but I’m scared to jump.” Sometimes those same riders initially become a little less comfortable on the flat when I have them clutch the mane because they can’t rely on holding their horses’ mouths for balance. The issue has less to do with the jump and more to do with the security of holding the horse’s mouth all the time.
Now that you know what it is, you’ll practice the …
Jumping Position on the Flat
By practicing the jumping position combined with a slackening of the reins on the flat, you’ll feel how your horse uses what is known as the “oscillating gesture,” or “balancing gesture,” of his head and neck and learn to follow that movement at the walk and canter. When a camel walks, it is easy to see the motion of his neck going forward and back as he walks. This oscillating gesture is similar to the gesture a horse uses with his neck at the walk and canter, except that it is a little more exaggerated with the camel. Many riders are told to “sit still,” but you can’t sit still and be with your horse’s motion. Instead, you want to sit in a noninterfering way. If you try really hard to sit still, you often become stiff. When you’re stiff and you jump, you hit your horse in the mouth.
Practicing the jumping position and slackening the reins on the flat is also a good test to make sure you’re comfortable letting go of your horse’s mouth. If you’re not, then you’ll be uncomfortable jumping where you have to let go of his mouth at some point—and that will just take away from your confidence. So on the flat is the best place to really practice.
To start, warm up on the flat at the walk and trot. Then return to the walk and get up in the jumping position: Raise your buttocks out of the saddle, close your hip angle, move your hands a few inches ahead of the withers and collect a little piece of mane in your index finger. As you walk around the entire arena, concentrate on holding your position and feeling the oscillating gesture of your horse’s head and neck. Ride a few times around the arena or for as long as you can without losing your position, then return to your full seat. Change direction and repeat.
Next, ask your horse to pick up a forward trot, and get up into your jumping position. This time, feel how his head and neck DON’T have the oscillating gesture at the trot. Hold this position for as long as you can, take a break, then change direction and repeat the exercise.
Finally, repeat this exercise at the canter. As at the walk, you’ll feel the oscillating gesture of his head and neck. Maintaining a loose rein will be the most difficult at the canter if you are not confident and secure in your position.
As you become comfortable in your jumping position, incorporate small circles into your flat work. When you can do that on the flat, you’ll know that you are consistently with his motion. Depending on your strength and experience, it can take a few or several sessions, but be patient and stick with it. The more independent you are of your hands, the more confident you will be about jumping.

“In the Zone” Over Single Fences
As you work on maintaining your jumping position on the flat, you can begin to practice it over an obstacle. I like to start with three or four poles piled on top of each other on the ground—two or three poles on the ground with one on top of it. This gives you the feel of a jump but takes the difficulty out of the equation, so you can concentrate on yourself.
Set the pile of poles any place where you’ll have a fairly long approach of four or five strides. Pick up a posting trot. As you come around the corner and are about five strides in front of the fence, consider yourself to be “in the zone” and get into your jumping position: Raise your buttocks out of the saddle, close your hip angle, move your hands ahead of your horse’s withers a few inches, and collect a little piece of mane in your index finger. Focus on maintaining this position all the way to the poles and let your horse take care of himself. After he steps over the poles, go several steps and then ask him to stop on a straight line. Turn around and trot back the other way. Don’t worry if he takes an awkward step over the poles. If he trusts you to leave him alone, he’ll start to figure out his own balance and what he needs to do to get over the poles comfortably. Horses naturally don’t want to step on the poles.
Once you’re trotting over the poles consistently and feel that you’re maintaining your jumping position, pick up a slow canter. Make a circle to establish your pace. Four or five strides in front of the fence get into your jumping position. Again, do not worry about the poles or the distance—just focus on maintaining your position. After your horse canters the poles, ask him to stop in a straight line. Turn around, pick up the canter on the other lead and circle if needed. Get into your jumping position and head to the jump, focusing on yourself.
Starting out, your horse may do some awkward things—he may break to a trot over the poles, reach for the long distance or chip in. That’s OK—it’s why you’re practicing over such a small obstacle. Just let whatever happens happen.
If you can stick with it and not be tempted to interfere with your horse’s stride by trying to fix a distance, most horses will start to figure out how to adjust their own strides to meet the fences comfortably.
At this stage, I want this exercise to allow you to focus on yourself. If your horse drifts to one side or the other, use a few guide poles to create a chute leading up to the fence.
After you’re trotting and cantering over the poles comfortably and you can maintain your jumping position without interfering, build a little crossrail and repeat the exercise, first trotting over it. Try to carry the noninterfering feeling you had over the poles to the crossrail. Focus on maintaining your position and not pulling back on his mouth or adding leg to fix a distance. Let him figure it out. After he jumps over the fence, allow him to canter away, then stop him in a straight line.
Once your horse is comfortably trotting the fence and you’re focused on your position, pick up the canter and repeat the exercise. This gets harder because the desire to “see a distance” often increases at the canter. Try to resist it. If you think you’re going to arrive at a bad spot, just let it be and focus on yourself. Bad distances happen to everyone—even Olympic riders. How you react to them is what makes the difference in the type of jump you have.
After you’ve worked over the crossrail at the trot and canter and feel you can maintain your position no matter what happens, repeat the same exercise over a little vertical.
“In the Zone” Over a Line
Once you’re comfortable focusing on your position over single obstacles—which could take anywhere from a few sessions to several weeks depending on your experience level—set a simple line of two small crossrails or verticals (whichever you’re most comfortable jumping) set 72 feet apart. First you’ll trot into the line over the first jump and canter out over the second jump, then you’ll canter both.
For a horse with an average-length stride or a longish stride, the trot-in, canter-out line will be a nice six strides. When you move to the canter, it will be five strides. At this stage, though, the number of strides isn’t important. If you have a horse with a shorter stride and he’s more comfortable going down the line in seven strides (when trotting in) and six strides (when cantering both), that’s OK. Focus on having a “ta-dup, ta-dup, ta-dup” rhythm down the line rather than counting the number of strides. You want the exercise to be straightforward and easy for your horse so you can concentrate on yourself.
To jump the first fence of the line, pick up the posting trot. Trot a circle and when you come out of the corner, get in your jumping position and maintain it all the way to and over the fence. Stay in your jumping position as your horse canters down the line and jumps the second fence. Let your horse figure out the distance. Then halt him on a straight line after the jump. Turn around and ride the line—trotting in and cantering out—in the opposite direction.
When you’re both comfortable trotting into the line and cantering out, organize yourself to canter into the line. For this exercise, make a circle before going to the first jump, similar to the courtesy circle you make when jumping a course. Pick up the canter, get into the half-seat and immediately ask your horse to go forward so he’s in front of your leg.
This is the first time in these exercises you’ll be riding a true corner, so I want to explain my approach. I like to tell my students that riding through a corner is like playing an accordion. If you don’t pull the accordion together and then let it back out, the accordion can’t make any music. If you don’t pull your horse’s stride together in the corner and then let it back out on the straight line, he won’t be balanced enough to get to the jump nicely. Another way to look at it is in nature when horses are in a paddock and they are running around. Every time they turn, they collect their strides for their own natural balance. As a rider, you need to help that along on the end of the ring and make your horse balance up a bit.
So as you begin to ride into the corner, pull your horse’s stride together: Touch him with your legs to keep him from breaking to the trot, lower your seat a little, which should help him to slow down, then squeeze your reins a little to add pressure to his mouth. As you turn onto the straight line to the jump and get “in the zone,” let his stride out a little by getting in your jumping position and easing your hands forward in front of his withers.
Maintain your position as he canters up to and over the fence and then canters down the line to the second fence. After he jumps the second fence, halt him in a straight line. Then make a circle and canter back over the line.
Repeat this exercise until you feel confident you won’t interfere with your horse’s stride to the jumps.
“In the Zone” Over a Course
When you feel comfortable over a single line, you can practice putting all these skills together over a simple course of fences. Set up a simple figure-eight pattern that you’d find in a hunter round (outside line, diagonal line, outside line, diagonal line).
Until now I’ve had you pull up after each single fence or the second fence in the line. By doing this, you’re effectively reorganizing your horse’s stride with each halt. When you’re cantering an entire course, every time you hit the corner, you need to be proactive in reorganizing your horse’s stride to help him maintain his balance. If you go for too many strides without reorganizing him, pretty soon his stride will get strung out and unbalanced.
On a course, think of every corner as a chance to play your accordion and pull your horse’s stride together. Once you turn straight to the jump and get “in the zone,” just let him go like you’re playing music. For example, on the courtesy circle, pick up the canter and ask your horse to go forward in front of your leg. As you approach the corner preceding the first fence, pull him together like an accordion, then let him back out when you get on a straight line to the fence. Once “in the zone,” get in your jumping position. Repeat this reorganizing process every time you approach a corner until your final courtesy circle.
If at any time in this process, you find your horse isn’t balanced and is chipping in or leaving long, return to an easier variation of the exercise. If you started jumping verticals and can feel yourself getting anxious, return to a crossrail or poles on the ground. The hardest challenge with this system is being patient. Try to not pressure yourself to advance from the pile of poles to a crossrail if you’re not totally comfortable letting your horse jump the poles on his own with a loose rein.
After learning how to allow your horse to jump, you’ll start recognizing when you need to squeeze with your legs a little to move up to a longer distance or squeeze the reins a bit to slow down. These will be soft innuendos of positively influencing your horse—and you’ll be on your way to those smooth and seamless rounds.
Shelley Campf was born and raised in Calgary, Canada. After graduating from the University of Calgary, she rode and taught at the Centre Equestre de la Houssaye in Bonniere, France. For the next two years, she worked as a trainer on the East Coast before joining her future husband, Jeff, in the Portland, Oregon, area. There they built Oz Incorporated, which is now situated on 45 acres in Canby, Oregon, just outside of Portland. They teach all levels of hunter, jumper and equitation riders.
Shelley also rides and competes herself but primarily shows in the hunter divisions. In addition to championships at large national shows, she has been the Northwest Professional World Champion Hunter Rider multiple times.
Feeling it is important to “give back” to the horse world, Shelley is also involved in various facets of the horse industry. She served on the U.S. Hunter Jumper Association board of directors and as chairman of the USHJA Trainer Certification Program, and sits on several local, regional and national committees. She and Jeff have two sons, Chad and Blake.
This article was originally published in the February 2012 issue of Practical Horseman.