The issue of equitation usually comes up in a training session when I’ve reminded an amateur rider to keep her heels down or her body quiet over the fence. The rider pulls up and politely asks, “We’re being judged on how my horse goes around the hunter ring, not on my equitation. So why does my position make a difference?”
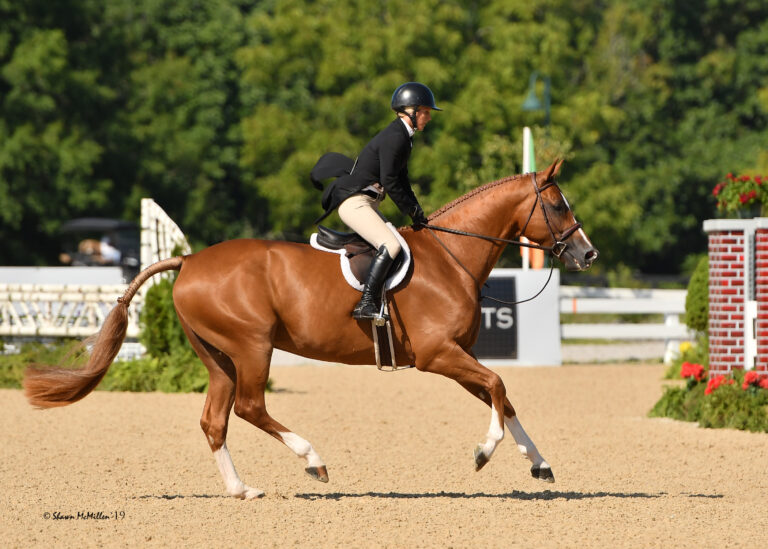
It’s an honest question. But I believe that equitation totally matters. As hunter riders, we present a visual of the horse as our dance partner, flowing elegantly around the ring. When our bodies are doing things that are unattractive or distracting, it ruins that visual ballet. Yes, the horse is the one being judged—but the judge still sees the total picture.
Also remember that form equals function. Classical style doesn’t just make you a prettier rider, it makes you a better rider. If your eyes are up and your shoulders back, you will create a better balance with your horse. Closing your fingers and keeping your reins the right length—with your elbows just in front of your rib cage, forming a straight line to your hands and your horse’s mouth—sets you up to land organized and in balance after a fence and execute a good lead change. Stretching your legs down around your horse’s sides, with weight in your heels and your toes properly aligned with your kneecaps, provides the base of support necessary to keep you in balance and use your leg aids effectively.
So why do we see so many successful professionals riding with less-than-perfect form? Most of them are super talented—they have years of experience and are very accurate to the fences. Plus, many of them are extremely well mounted, riding athletic horses with beautiful jumping styles. Judges are less likely to be distracted from the overall picture by minor rider faults. In contrast, horses with average talent and presence aren’t quite as captivating, so judges are more likely to notice their riders’ mistakes. The classical style, therefore, will always be the most effective way to ride and compete.
Watch the professional riders who embrace good equitation; study their bodies and how quiet they are. Peter Wylde has the most beautiful arms and hands. McLain Ward always rides with a strong leg position, regardless of the size of the fence. And there are some new young professionals, such as Cassandra Kahle and Laena Romond, who ride with beautiful style. The success of these people at the highest level of our sport proves that good equitation works.
Correct equitation means you can make good things happen on course because of—not in spite of—your position. To develop classical style, you need to feel and experience how good form helps both you and your horse every time you perform. In the following exercises, I’ll share my solutions for common equitation problems.
Problem: A Weak Leg Position
As young riders we are all taught, “Heels down, thumbs up.” Your heels don’t have to be stuck to the ground, but having your weight flow down through a soft, deep heel creates a solid base of support. The pressure of the ball of your foot on the stirrup and the weight in your heel create security and flexibility.
Some riders also have the horrible habit of turning out their toes to use their heels or spurs. They are riding off the backs of their calves. It doesn’t look nice and it’s ineffective because pointed-out toes compromise the straight line between the kneecap and the tip of the toe. This undermines the ideal constant connection between your leg and the horse. A properly positioned leg brings the inside of your calf, from the knee to the ankle, against the horse’s side.
Solution: Practice Two-Point
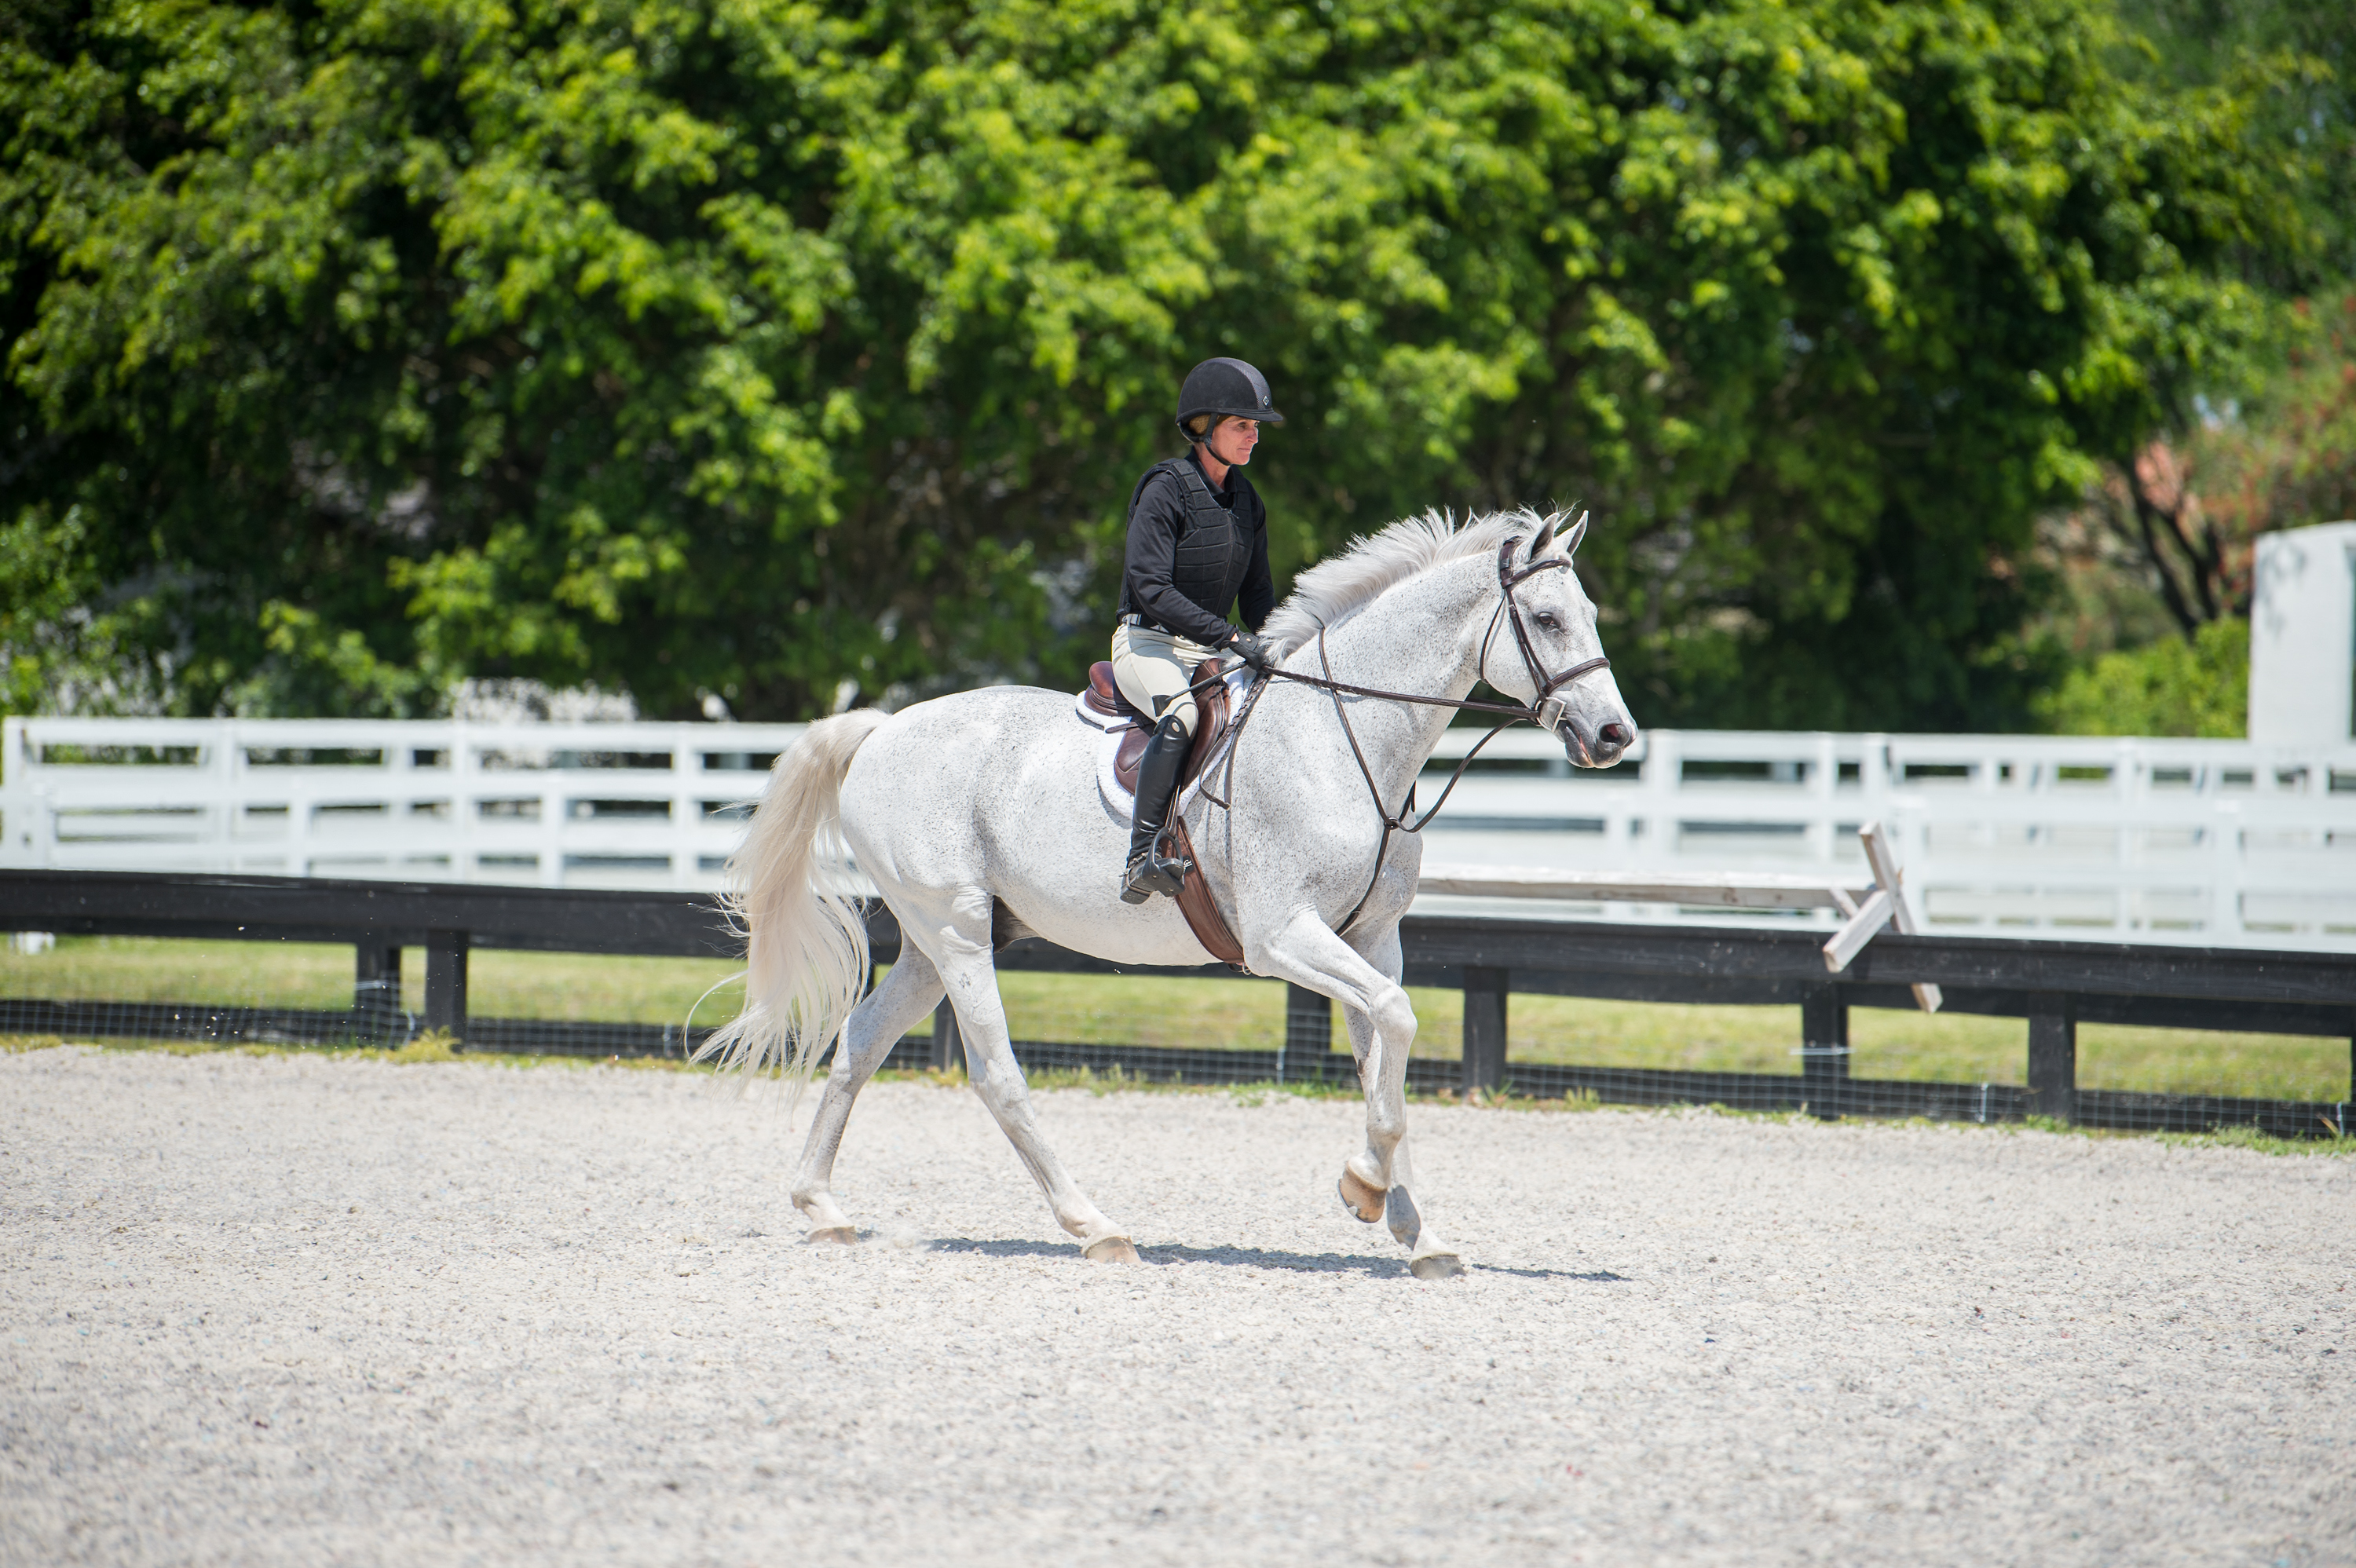
Whenever you can, practice riding in two-point at the trot. This is the same position as the “up” phase of the rising trot: with your seat out of the saddle, your weight balanced over your lower legs, and your hips slightly closed. This will help you learn how to use your weight, energy and core muscles to anchor your leg position. Your back should be relaxed but straight, your eyes should be looking forward and your seat should be only a few inches out of the saddle. Think about dropping your weight down slightly through your heels, still feeling the pressure points on the balls of your feet. Keep your toes pointed forward—but never inward (which takes your ankle off the horse)—with the insides of your lower legs against your horse’s sides.
Even better, practice your two-point while your trainer or a knowledgeable horseperson longes you on a quiet, reliable horse while you try the exercises described in the photos on page 92 and above. Use an enclosed longeing pen if it is available. Or use jumps or hay bales to wall off a section of your ring, enclosing a circle with a diameter of about 50 feet. (Note that while you may longe your horse for exercise on a larger circle, for the purpose of these exercises you want to be on a more controllable track.) Also knot your reins about halfway up your horse’s neck so you can safely drop them during the exercise.
Why This Exercise Works: While riding on a longe line, you can safely drop your reins. When you don’t have a connection to the horse’s mouth, your core muscles must kick in to keep you centered and only the correct leg position will keep you balanced through the exercises. Without reins, all sensation now comes from your legs—that will help remind you to always ride from leg (first) to hand (second).
See also: Holly Hugo-Vidal – Tips for Boosting Your Score in Your Hunter Round
Problem: Incorrect Arms and Hands
To ride correctly from leg to hand, we must adjust our rein length and hold our hands in a position that creates a straight line from elbow to hand to bit while closing our fingers around the reins and maintaining a light, steady connection with the horse’s mouth. Too often that critical connection is compromised by poor arm or hand positions. Here are three common problems:
- Many people have open fingers and long reins, riding with their hands in their laps. They think this looks soft. But this practice is ineffective—the inconsistent communication the horse receives from floppy reins is confusing. And when an adjustment in pace is required, that change is so much more visible because the rider has less control of the leg-to-hand-to-mouth continuum.
- A popular bad habit is riding with hands too low—breaking the straight line from the horse’s mouth to your elbows. The myth is that this will help the horse drop his head. But when you drop your hands, you pull downward. The bit now works on the bars (not the corners) of the horse’s mouth. That actually makes him raise his head.
- Many amateurs ride with “frozen” arms—they pinch their elbows to their sides in an attempt to hold their upper-body position steady. But flexible elbows give you usable arms and more subtle control over the horse, while still keeping your hands in the correct position. If your elbows are stuck to your ribs with superglue, you can’t ride properly!
Solution: Hold a Crop with Both Hands
This exercise creates the muscle memory of maintaining your arms and upper body in a correct, consistent position by having you hold a crop about 18 inches long horizontally between both hands. This will produce a “frame”—a square between the crop, your two arms and your body—while still allowing enough space for your arms to move forward and back and make adjustments and keep a straight line from your horse’s mouth to your elbows.
As you practice this exercise, described in the photos on the facing page, engage your core so you can open your chest and carry your upper body without relying on your reins for balance. Shorten your reins so you have a steady contact with your horse’s mouth and your elbows are slightly in front of your rib cage. When you make transitions, turns, circles, etc., try not to change your rein length or hand position to communicate with him. Instead, feel that your hands, arms and body are one unit that is constantly creating that flow of communication. The leg-to-hand connection should never disappear.
Make sure you keep your chest open and your horse centered beneath you as you turn. It’s just like riding a bicycle: Your hands on the handlebars are on either side of and controlling the front wheel as you turn. On your horse, your hands are on the crop, controlling your horse’s shoulders and front legs.
Why This Works: I love this exercise because it forces riders to maintain a consistent rein length, with their fingers closed and their elbows loose and away from their bodies.
Problem: Jumping Ahead of Your Horse
Many riders erroneously feel they need to help their horses jump the fence. They begin the release, get up out of saddle, bend over and throw their hands up the neck before their horses have left the ground. (George Morris calls this horrible habit “projectile vomiting up the neck of the horse.”) Jumping ahead of your horse serves no purpose and actually puts you in a weaker position. If your distance to the fence is too long and the horse chips, you risk getting your center of gravity too far up his neck (which can lead to a fall). If your distance is too tight, throwing your weight on his forehand will make it more difficult for him to jump.
Solution: Two Exercises in Body Control
These exercises—riding over a line of three cavalletti and jumping a small fence to a ground pole—allow you to experience the difference between jumping ahead of your horse versus engaging key muscles to stay centered over him while he jumps.
Practice both exercises several times to loosen up your horse and get the feel for your correct timing and balance. Then try exaggerating your release in the takeoff, as if you were helping your horse jump: Right before he jumps, push your hands up his neck and throw your upper body forward. Let your lower leg slide back and away from his barrel. (Don’t worry—these are little jumps and your horse will survive!) When you land, you will feel that your body is in front of the center of gravity, your weight pivoting on your knee and your heel slipping up and back. You might also notice your horse jumping flatter, and perhaps speeding up as he goes down the line. Notice how much longer it takes you to get back into the saddle at the end of the exercise to execute a clean halt.
Finish each exercise by jumping through correctly in sync with your horse, focusing on feeling the inside of your leg against his barrel and the pressure of your foot on the stirrup to secure your leg (just like in the longe-line exercise). A few strides ahead of the first cavalletti or jump, think about the sensation of pressing down on the stirrups and pushing your feet a little forward. At the same time, pull in your stomach. These two actions will slow down your upper body and help you go forward in time with (and not ahead of) the motion.
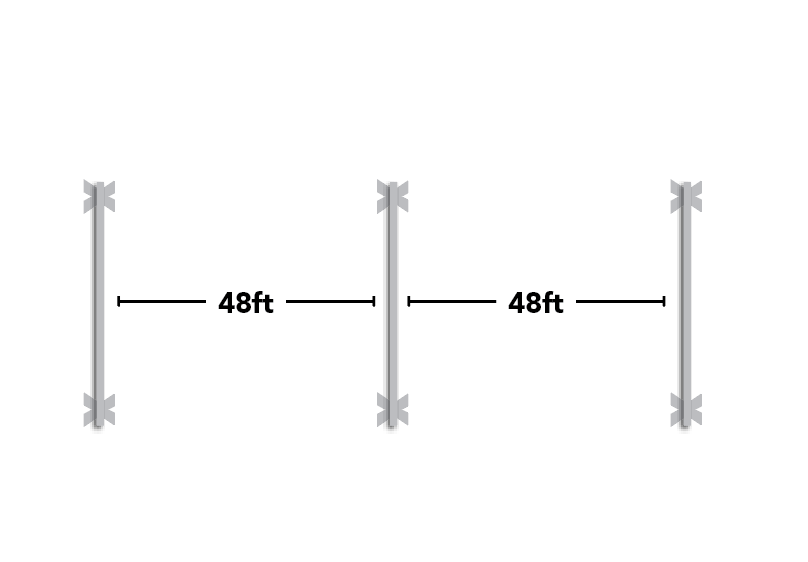
For the first exercise, you’ll place three cavalletti in a row, each three canter strides apart (approximately 48 feet) and no higher than 1 foot tall. You’ll trot into the line and canter three strides to the second cavalletti and three strides to the third. For more information on riding down the line, study the diagram and photos above.
The second exercise, demonstrated in the photos on page 98, uses a small vertical (about 2-foot-6) followed by one stride (about 18 feet) to a ground pole. The pole will encourage you to make a quick recovery after the jump, using good body control to balance and organize yourself and your horse in the very first stride after landing.
Approach the vertical in a nice canter, riding in a light full-seat and focusing on the strong leg position you learned in the longe-line exercise. In the last stride before the jump, concentrate 100 percent on engaging your core and feeling the pressure of your foot in the stirrup. As with the cavalletti exercise, the goal is to stay directly over his center of gravity throughout the entire jumping effort. Your release can be just a bit more generous this time, as the size of the fence is slightly bigger.
Why These Exercises Work: These exercises let you safely experience the downsides of dramatically jumping ahead. And they give you specific tactics to use with your core muscles and feet that support the correct release and timing. Staying centered and slowing your upper body over the jump encourages your horse to spend time in the air and finish his bascule. The more you experience that soft, slow, centered release, the more it will become second nature.
About Sandy Ferrell
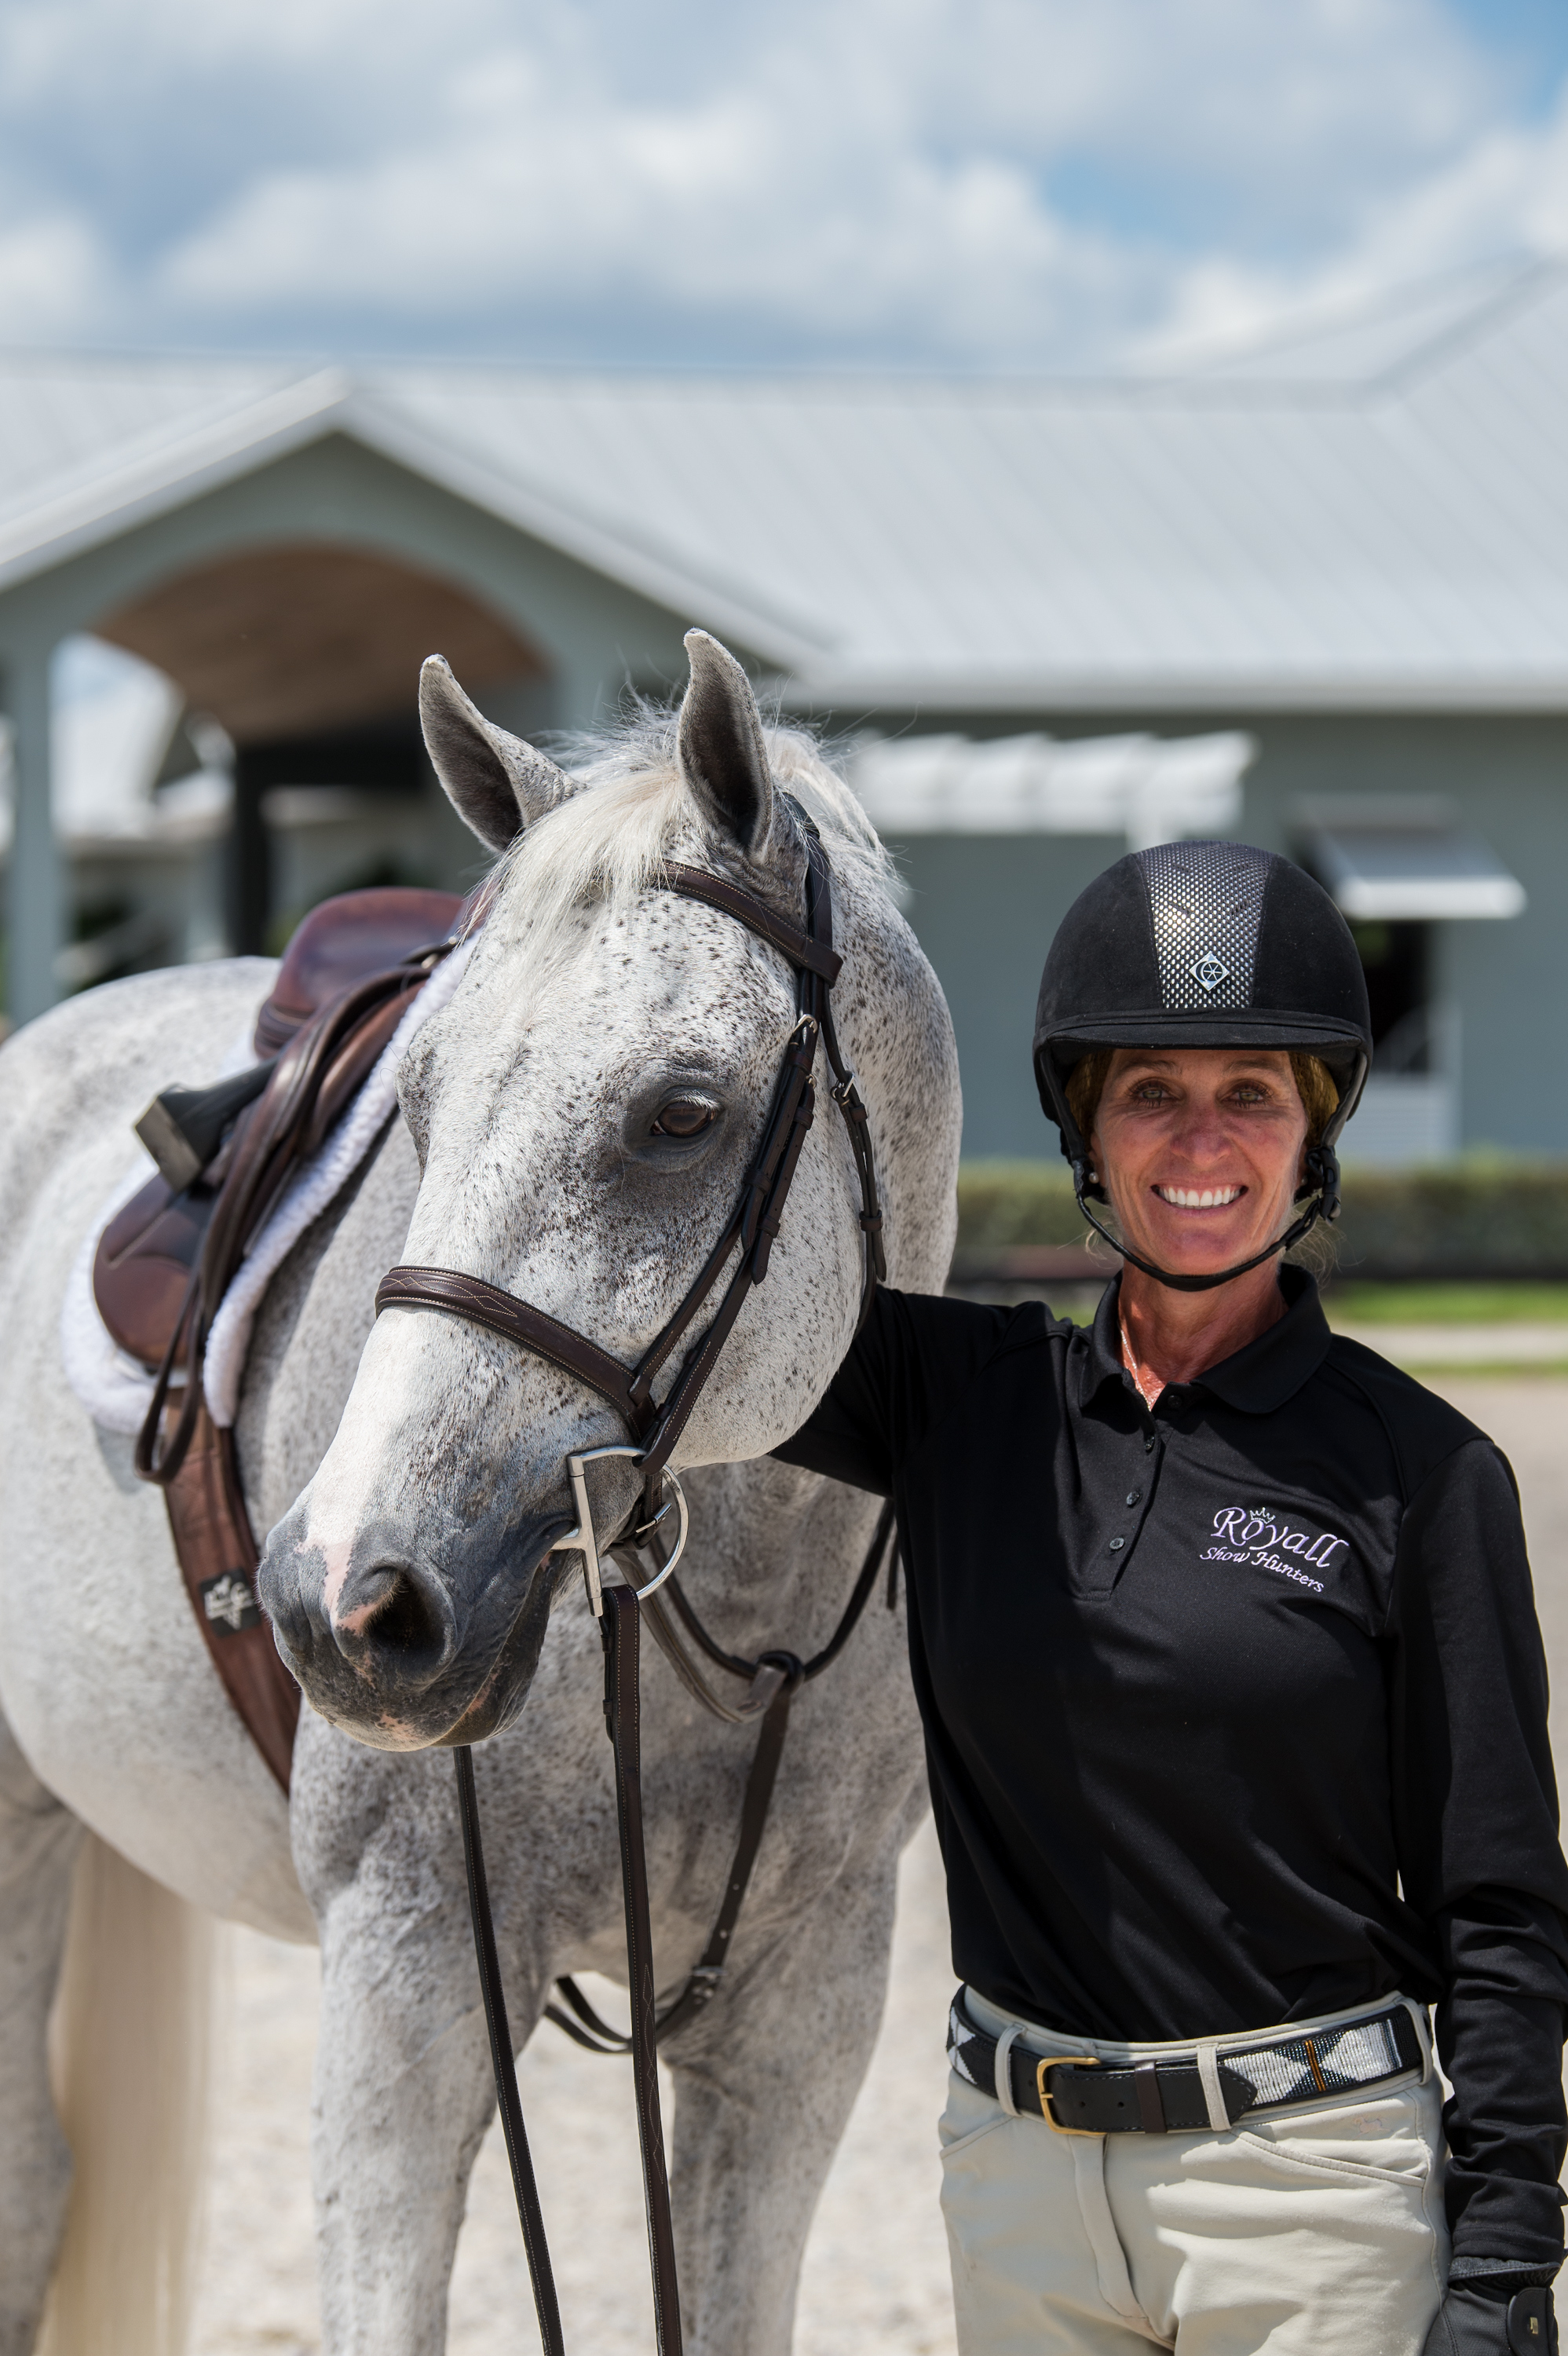
Sandy Ferrell began riding at the age of 4 and progressed through a stellar junior career competing in the pony, hunter/jumper and equitation divisions. She opened her own business, Royall Show Hunters, at the age of 23. Ferrell and her clients have won numerous championships at A-circuit horse shows. She is a six-time regional professional winner of the World Champion Hunter Rider competition and the winner of the 2008 WCHR Hunter Spectacular. In 2018, she won the inaugural U.S. Hunter Jumper Association 3-foot-6 Green Hunter Incentive at the Kentucky Horse Show and the Green Hunter Grand Championship at the Pennsylvania National Horse Show, riding Stephanie Bulger’s Hemingway. She splits her time between Bel Air, Maryland, and Wellington, Florida.
This article was originally published in the Summer 2019 issue of Practical Horseman.