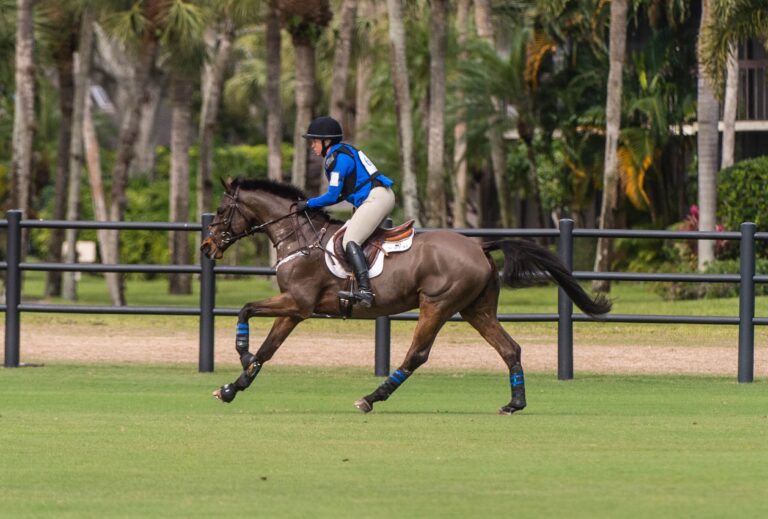
I mentioned last month that we need to go back to basics, and I wasn’t kidding. Over the next several months, I intend to review the fundamental mechanics of each of the three positions used by eventers (dressage, show jumping and cross country) and to provide exercises to improve each. The result of sound basics in each of the disciplines is better communication with your horse, which leads to improved performance. Practicing your basics is hard work, but it is absorbing and intriguing and it pays off in better results
Show-jumper Bill Steinkraus, the first U.S. Olympic individual gold medalist, says the rider’s position “is a stable platform from which the skilled rider can apply his aids with the precision of a surgeon.” This is especially true of our dressage position, where we begin our return to basics.
At the halt, you should sit in the saddle on three points: the two seat bones and the pubic bone. If you are aligned correctly, an imaginary vertical line will pass from your ear through the point of your shoulder, your hip and your heel. In The Gymnasium of the Horse, Gustav Steinbrecht says your upper body will form a right angle with the horse’s back. This explains why upper-level dressage riders appear to sit with their shoulders behind their hips: Their horses are collected, which causes a lowering of the croup. While the relationship between your position and your horse’s back should not change, your horse may change the relationship between his back and the ground.
While seated, maintain a slight forward arch in the small of your back. There are good reasons for this. First, it is the natural shape of the human spine. In addition, it allows you to have the maximum range of motion possible in your waist. Sitting in this position at the halt is easy. The difficult part is maintaining a correct position while your horse is moving. I can take a person who has never ridden, buy her thousands of dollars worth of boots and breeches and put her on a horse at the halt. By adjusting her limbs, I can photograph her exactly in the shape we are discussing. However, the moment the horse moves, that person will dissolve into terrified gripping and pulling.
We can learn to follow our horse’s motion only by ceaseless practice, and the best way to practice maintaining the correct dressage position in motion is on the longe line with no reins or stirrups.
Get Started
I am going to suggest exercises to help you develop a deeper, more balanced three-point position. By moving your arms while keeping your legs still or applying your legs while your arms remain quiet, you will increase the independence of your position.
Before you begin, make sure the horse you use is suitable–he’s quiet, preferably with three good paces. You also need an experienced person holding the longe line. Tack up your horse with a snaffle bridle and elastic side reins.
For safety reasons, practice the following exercises in an enclosed area only. Wear an ASTM-approved helmet but no spurs. A safety vest is optional, as is an air vest. (If you’re wearing an air vest, make sure the lanyard will allow your full range of motion during these exercises; otherwise, you might accidentally cause the vest to inflate with interesting results.)
Some of my more-advanced exercises will test your balance and the security of your three-point position. If your coach or friend holding the longe line suspects that you are even slightly dislodged, he or she should bring the horse to the walk or the halt until you regain your balance.
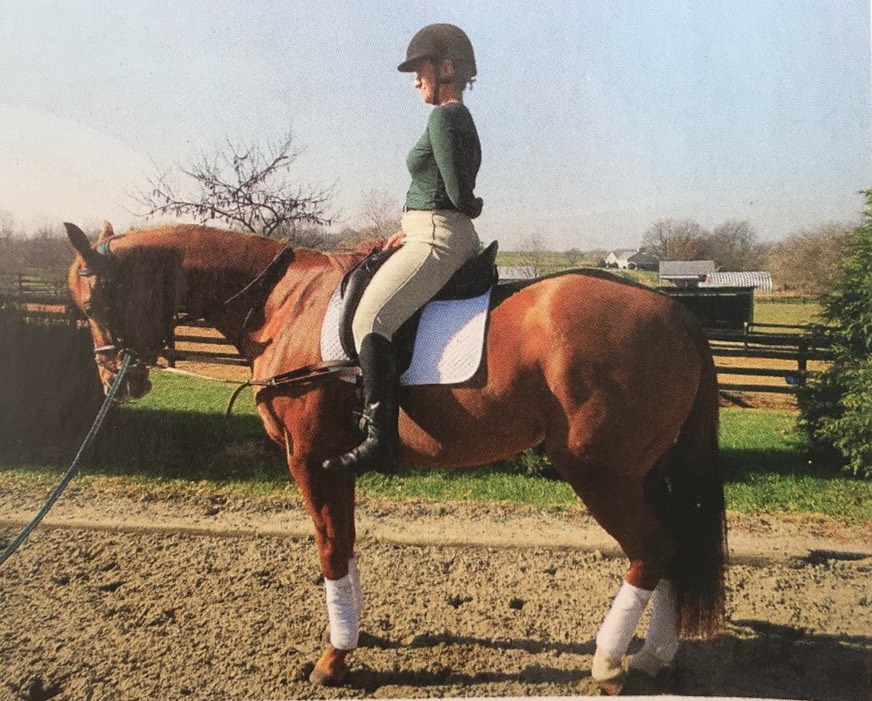
Start each of these exercises by holding the pommel with your outside hand and putting your inside arm behind your waist as shown in the photo on the facing page. You can maintain this position while engaged in leg exercises; however, if you are engaged in your upper-body exercises, you will have to release the pommel and perform the exercise without using your hands for security.
In between exercises or if you feel insecure in the saddle, grasp the pommel to pull yourself forward into the deepest point of the saddle and hold yourself in the correct position. While holding the pommel, allow your legs to hang as straight as possible and let your toes point down. (When you regain your stirrups, have the feeling that the stirrups push your toes up, rather than push your heels down past the stirrup.) At first, you will have to resort to holding the pommel quite often when you work on a longe line without reins or stirrups; use the pommel rather than grip with your legs.
Your ability to maintain your position without either holding the pommel or gripping with your legs will improve with practice. You want to develop as deep a position as possible, and any grip with your knees or thighs will cause your position to become shallower rather than deeper. As your position improves, you will need less and less contact with the pommel until finally you have a dressage position that is truly independent of your horse’s motion, one you can maintain without reins or stirrups.
After you have briefly warmed up your horse, you can begin the following exercises at the halt, walk, trot or canter, depending on your horse, your fitness, the stability of your position and your confidence. Take great care that when you move one part of your body, you keep the other parts quiet. This is easier to say than to do, but it is an essential skill if your aids are to be precise. Once you progress to doing the exercises in motion, practice them for a few minutes in one direction, halt, change your horse’s side reins for work on the other hand and repeat the exercise.
Basic Exercises
Take your time with all of these exercises–be smooth, not fast.
- Roll your ankles: Point your left toes down and your right toes up, and make alternate circles, moving both feet at the same time.
- Keeping your legs straight, swing one leg in front of the knee roll and the other leg as far back as possible. Then smoothly reverse your leg position. You will find this is very difficult to do without compensating with your upper body. Remember to keep the other parts of your body still while you concentrate on moving one part.
- Starting with the following exercise, you will be removing your hands from the pommel and the back of your waist. After doing each, return your outside hand to the pommel and your inside hand to the back of your waist to deepen your seat and solidify your position.
- Bring your right heel toward your buttocks by bending your knee so it starts to point down. When it is close to your right hand, grasp the arch of your foot and pull your heel closer to your buttocks, keeping your knee pointed straight down toward the ground. Remain centered in the saddle with your shoulders level as you stretch your thigh. Hold a pleasurable stretch but release if you feel any pain. Alternate this stretch with both legs an equal number of times.
- Raise both arms straight out to your sides at shoulder height with your fingertips extended and joined, palms facing down. Imagine there is a string from the palm of each hand to both anklebones. Now move one leg at a time up that imaginary string. Keep both arms up, both knees straight and your toes turned slightly down and in toward your horse as you lift each leg. While you move your leg, concentrate on keeping it straight and your shoulders level. Your range of motion will be very small during this exercise,
with your knee lifting only an inch or two away from the saddle. Make your leg movement smooth and controlled up and down the string. - Extend both arms out to the sides to shoulder height, with your fingertips extended and joined. Keep both hands slightly behind your shoulders. In rhythm with the movement of your horse, turn your upper body at the waist until you reach the limit of your range of motion. Then return so you’re facing forward. Repeat, turning in the opposite direction. Eventually you should be able to see your horse’s opposite hip when you turn. Make sure you keep an equal weight in both seat bones throughout this exercise. You will find you have a tendency to tip as you turn. Don’t.
- Describe circles with your arms. Extend both arms straight down at your sides with your fingertips extended and joined, and your palms facing to the rear. Smoothly raise one arm forward and up until it is above your shoulder. At the top of the arc, your palm will be facing forward. Then move your arm back behind you until you reach the starting position with your fingertips again pointed toward the ground and your palms facing the rear. Repeat the exercise, but as you reach the top of the arc and start to move your upper arm back, begin moving your opposite arm forward and up to describe a circle. Time your movement so that when one arm is at the top of the circle, your other arm is straight down. Keep your shoulders level throughout this exercise and your weight distributed equally throughout your three-point seat.
For the More Advanced
The following exercises are for more-advanced students and should not be attempted until you are quite secure in the saddle. During both of them, your longeur must be prepared to stop your horse if there is the slightest concern that you are out of balance and might tumble off.
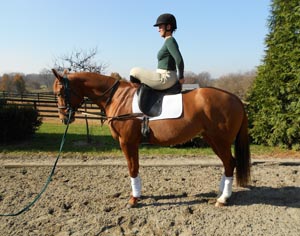
- At the halt on the left hand, hold the pommel with your right hand and swing your left leg over the pommel into a sidesaddle position. Reach back with your left hand and hold the cantle as shown in the photo at right. Allow your right leg to hang straight with your ankle relaxed and your toes pointed toward the ground. This exercise entirely removes your ability to grip and requires you to remain absolutely centered above your three-point seat. During the exercise, do not just hold the pommel and the cantle; grip them very firmly, using the two points of support to pull your hips forward in the saddle, keeping your shoulders level and an arch in the small of your back. While this exercise can be executed at all three paces, I suggest practicing it at the walk and later the canter, as the trot in a sidesaddle position is a difficult pace to follow at first. I usually avoid it during my longe-line lessons. After a few minutes at the walk or canter, change direction and repeat this exercise to the right. Remember to reverse your leg and hand positions to conform to the different direction.
As a rule, I do not ask for the next exercise until my student is getting ready for her first international-level competition.
- At the halt, cross your arms at your chest and bend forward as far as you can while keeping your seat bones on the saddle. Then sit up again and, with your arms still crossed, lean all the way backward until your helmet touches your horse’s croup. Next, using your abdominal muscles only, sit up again. Repeat this five times at the halt and a few times at the walk in both directions. This is a strenuous exercise at the walk; at the canter, it is an extreme test of balance and confidence. It is possible at the trot, but the rhythm of the horse’s paces does not lend itself to the execution of the exercise.
I’ve included these exercises only to show you how far you can progress using longe lessons. I would not expect you to be able to do them until we have worked together for an extended time.
To obtain the full benefit of these exercises, you will need to repeat them daily for one week. Typically, students feel uncomfortable the first day, quite stiff and sore the second, a bit better the third and increasingly stable in succeeding days. These observations are based on students taking a series of longe lessons. Your experience may vary if you are able to take only occasional lessons.
Longe lessons are the bedrock of your dressage basics, and your dressage position must provide a stable platform from which you can apply your aids with the precision of a surgeon. Your dressage results will determine to a great extent your final place in events, so you need to get back to basics and get them right.
Reprinted from the February 2013 issue of Practical Horseman.