One of the most important principles of riding at any level of any discipline is that rein aids should never be used in the absence of leg aids. Many instructors oversimplify the aids when teaching the basics, telling people to use their legs to go forward and their reins to turn and stop. But this is such a challenging habit to correct if you’re taught to use reins without legs as a beginner—and I’m speaking from experience as a rider who had to relearn the right way to use my legs—that I believe all riders should learn how to use their leg aids in conjunction with their rein aids as soon as possible. In this article, I’ll explain why this concept is so important, then will give you a simple exercise for testing and improving your leg aids and your horse’s responsiveness to them.
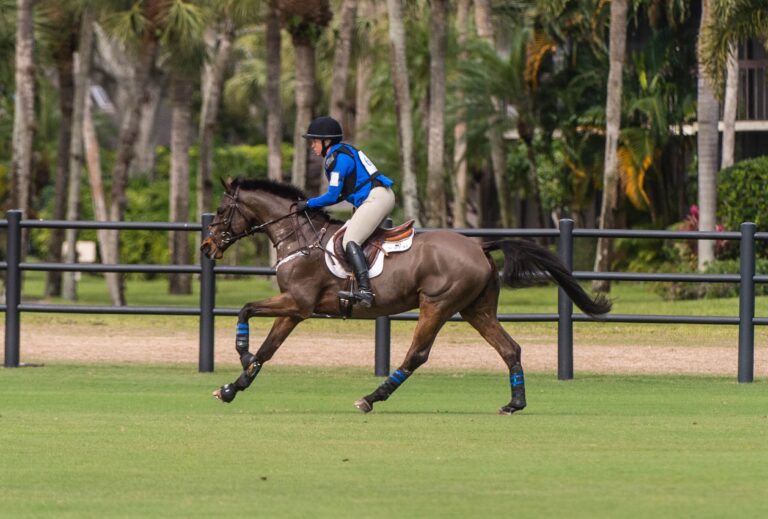
Using reins without legs is like trying to stop a bike with only the front brake and no rear brake. If you’re biking really fast, you risk flipping the bike over by doing this. Similarly, if you use only your “front brakes” (reins) on your horse, he’ll fall on his front end and get heavy in the bridle. Adding your “rear brakes” (legs) engages his hind legs, encouraging them to step further underneath his body. This helps him stay balanced while using his entire body to respond promptly to your cues, whether you’re asking him to turn, circle or make a downward transition. For example, if you’re turning him to the right, you use your right leg to ask him to bend his body on the turn, then add left leg to ask him to square up onto a straight track after the turn. This way he exits the turn as balanced as he was when he entered it.
The more you use your hand aids without accompanying leg aids, the more your horse leans on his front end and the heavier he’ll become in the bridle. That’s why many horses need stronger and stronger bits. Clients often send horses to my barn for training with really big, strong bits. It may sound counterintuitive, but these are the horses who need riders to use more leg, not less. My goal is always to send them home in a simple snaffle. That’s the best proof that you’ve trained a horse to respond properly to leg aids.
To do this, you need to teach yourself a new habit of using your legs every time you use your hands. Even when you’re not making a change in your pace or track, you’re still probably doing something with your hands, such as maintaining a light contact with your horse’s mouth. You should be using your legs in a similarly constant, measured way. At the very least, there should always be a light connection between your calves and your horse’s sides. This applies to all horses, no matter how hot or sensitive they are. Conconcreto Believe, the mare with whom I won the Rolex U.S. Open Grand Prix at the 2015 Central Park Horse Show, is a perfect example. She is a very “bloody” horse (she has a lot of Thoroughbred blood) and I have to ride her with a lot of leg. If you have a very sensitive horse, consider riding him with smaller spurs or no spurs at all, but understand that using your leg is essential.
One great way to test that you’re using your legs properly and that your horse is responding to them appropriately is to perform a rein back. A horse who backs up obediently in response to your rein and leg aids with no signs of tension truly understands your aids. As an added benefit, practicing rein backs engages, strengthens and relaxes your horse’s back muscles. So this is an excellent exercise to incorporate into his regular training and conditioning program.
Exercise 1: The Test
Use the following technique to ask your horse to back up five steps in a straight line (Caution: Do not attempt to do this if you are riding with any sort of assisting reins or head-restricting gear, such as draw reins, a de Gogue system, standing martingale or chambon):
1. Begin at the walk. Sit quietly and squarely in the middle of the saddle, staying relaxed in your upper body while holding a light contact on the reins.
2. Next, apply a little more leg aid to increase your horse’s forward “intention”—creating a sense that he’s moving more actively forward into the bridle. How you use your legs and how strongly you use them depends on your horse. Some horses may require a slight squeeze with your calves while others may need you to tap their sides a few times with your legs or spurs.
3. When you feel that forward intention, increase the pressure on both reins evenly until your horse stops, all the while continuing to apply your leg aids. Imagine you’re filling up a bike tire with a hole in it. Your legs are putting air in the tire. Your hands have to apply pressure to the hole to prevent the air from escaping. How much pressure you apply with your hands depends on how much air you put into the tire with your legs.
4. Once your horse has come to a halt, reapply your leg and hand aids the same way you did to ask for the halt, still keeping the rest of your body quiet, centered and relaxed in the saddle. Squeeze or tap your legs while applying pressure on the reins to stop him from moving forward. Continue both of these aids until he takes a step backward. Then repeat the aids, using your right and left legs and hands equally so he backs up in a straight line.
When you apply these rein-back aids, a typical horse will do one of three things: He will either back up, run forward or brace against your hand, blocking his shoulders and giving you the feeling that he’s turned to stone. If he runs forward, apply more rein aid. If he freezes, don’t try to force the issue. He clearly hasn’t learned to back up properly yet. If you press him further, you could provoke a dangerous reaction, such as a rear. Instead, ask a ground person to help you perform the exercise I describe in Exercise 2.
Some horses may take only two or three steps backward and then stop. These horses are blocked in their bodies because their muscles aren’t used to moving this way. This motion may even be painful for them, just the way your muscles would hurt if you didn’t go to the gym for a long time and then suddenly tried to do a big workout.
If your horse blocks like this, immediately go forward and let him relax his muscles. Then stop him and ask for just a few more backward steps. Never push it to the point where he gets aggravated or upset.
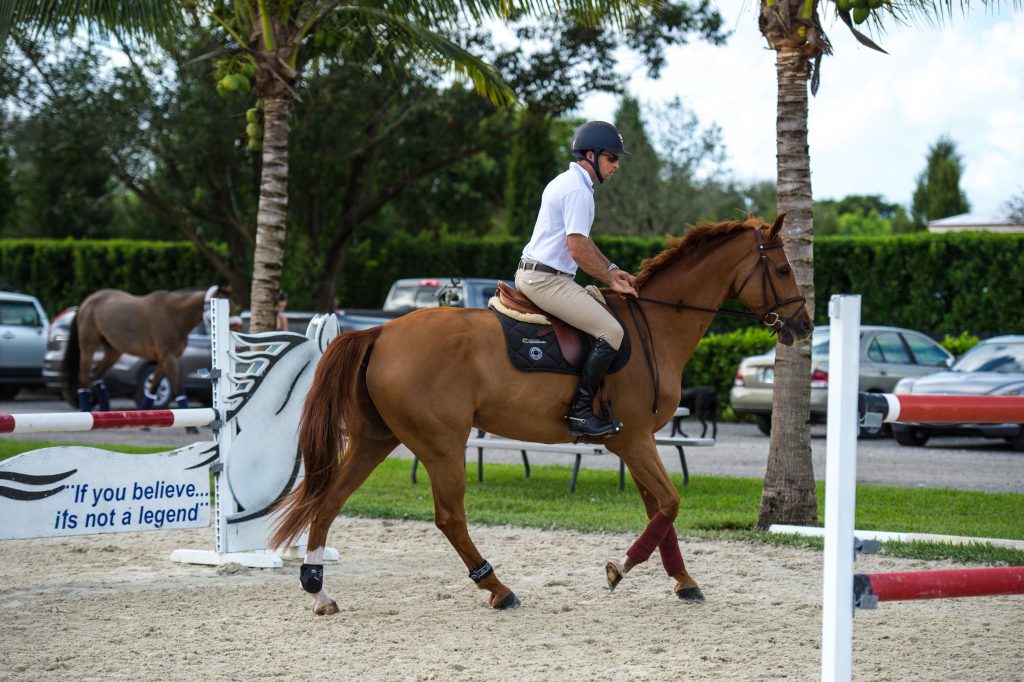
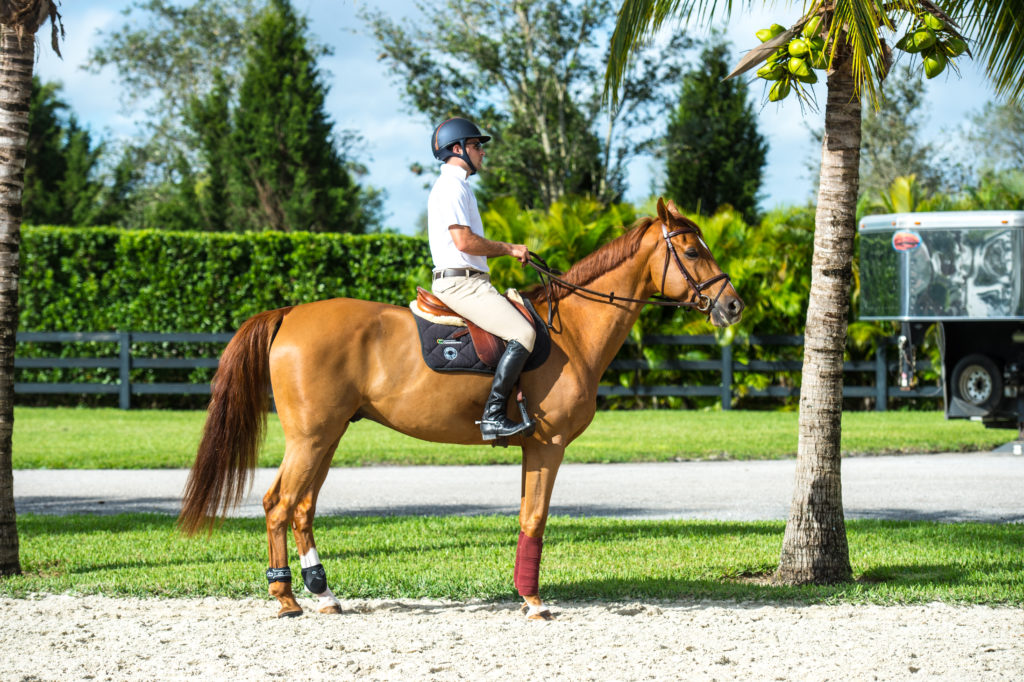
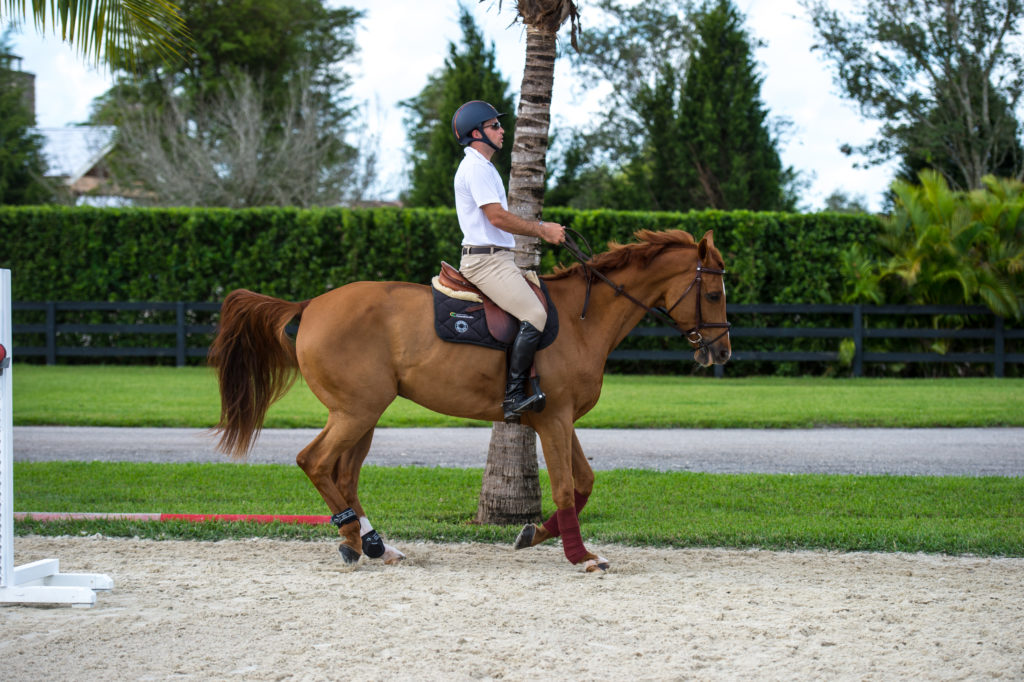
1. To test 9-year-old Westfalen gelding Casual Pleasure’s understanding of my leg aids, I practice a simple rein-back exercise. I begin at the walk, sitting quietly and squarely in the middle of the saddle and staying relaxed in my upper body while holding a light contact on the reins. Next, I apply a little more leg aid to create a sense that he’s moving more actively forward into the bridle. He’s responding nicely to these aids, as you can tell by his hind leg, which is stepping far underneath his body.
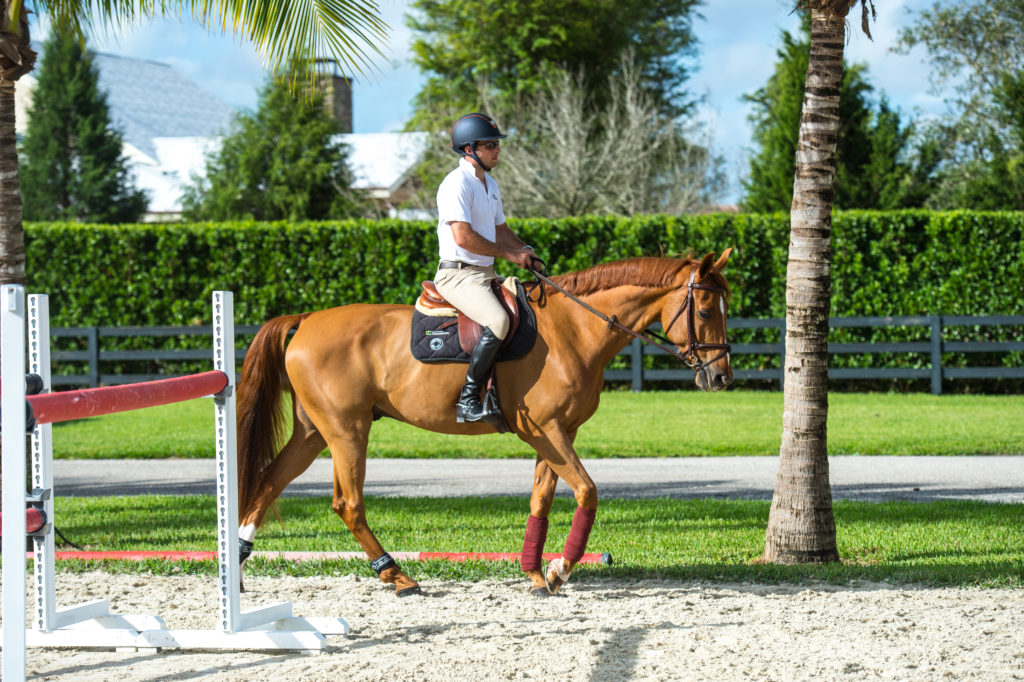
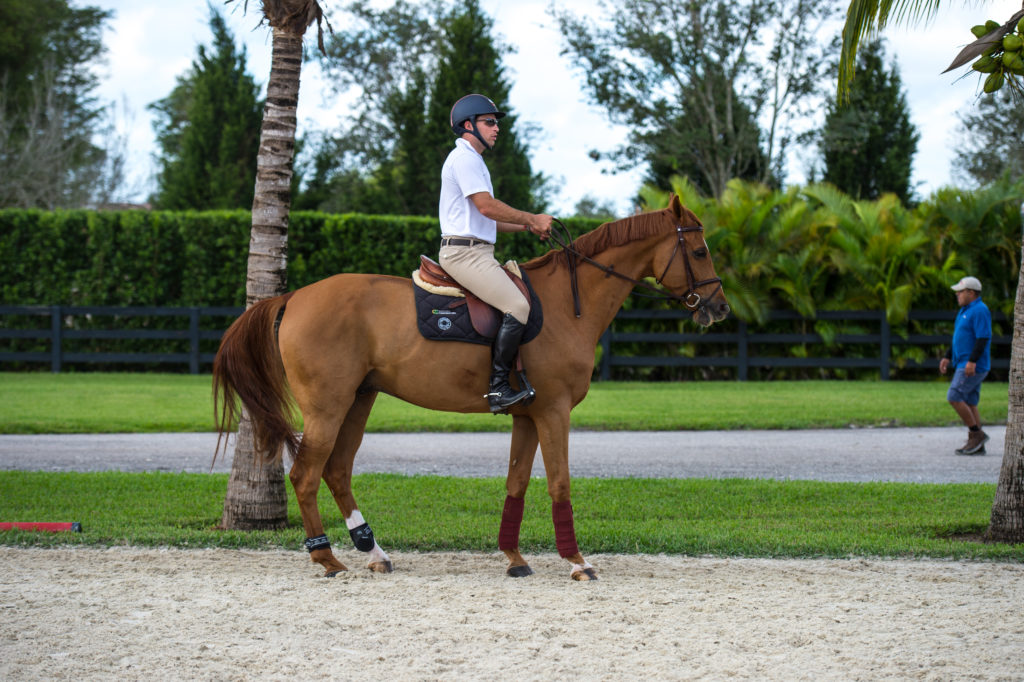
3. Once Casual Pleasure comes to a full halt, I soften the reins for a moment to reward him for responding to my aids correctly. His head is still raised, but many people make the mistake of focusing too much on their horses’ head position. This can be misleading. A horse with a low, round head carriage can still be weak over his back and out of balance. You’ll see a wide variety of head carriages in the horses of top-level riders. But one thing these horses all have in common is an engaged hind end.
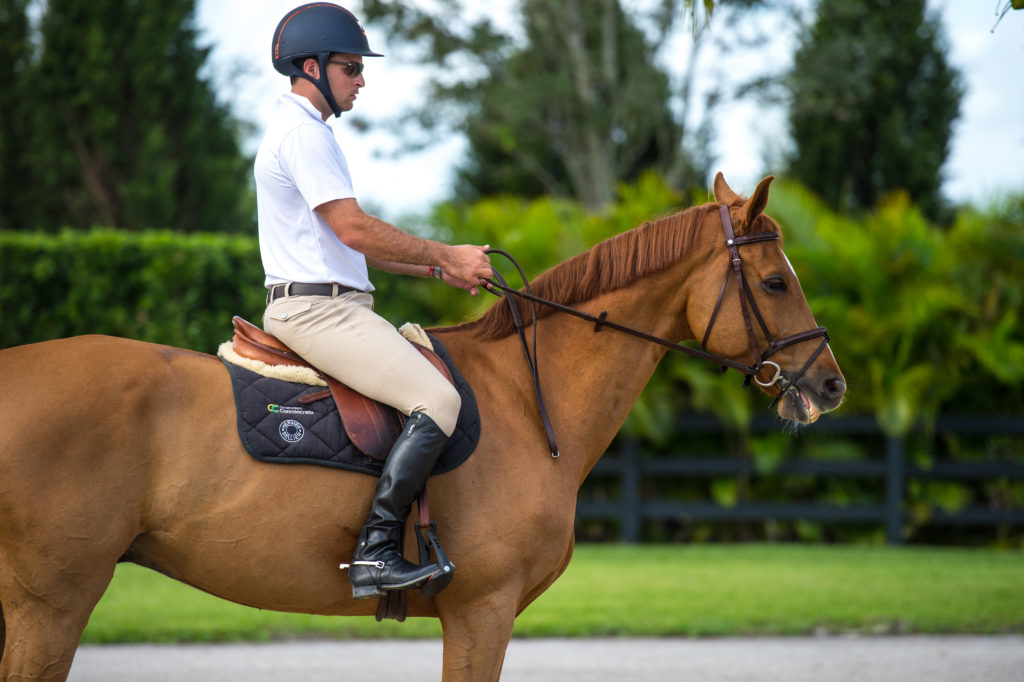
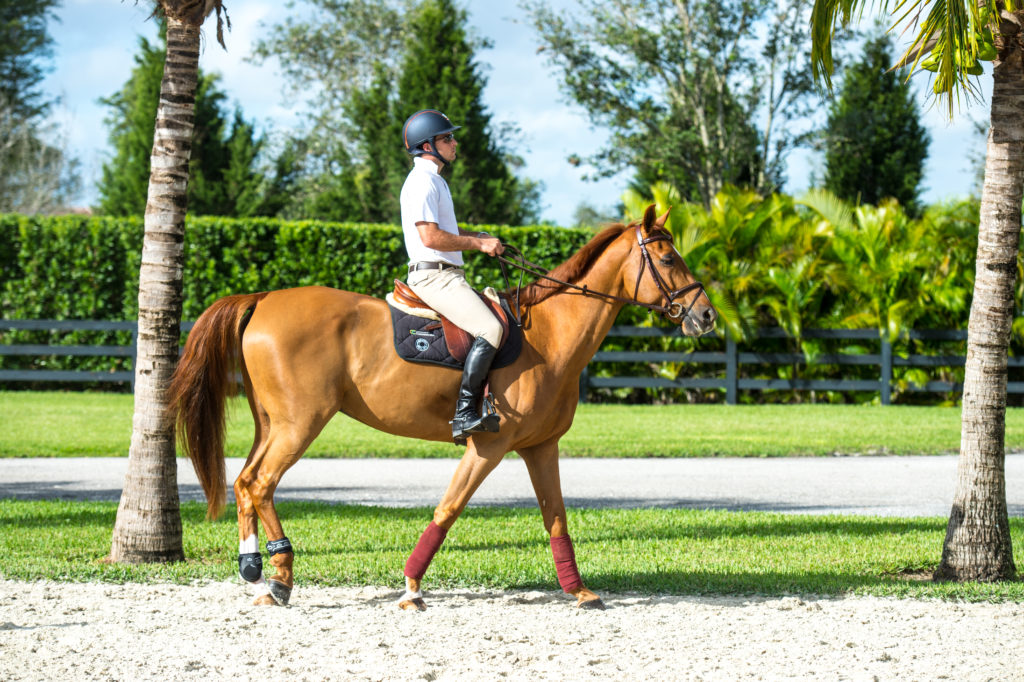
4. Next, I tap my legs on Casual Pleasure’s sides while at the same time applying pressure on the reins to stop him from moving forward. Notice that I’m keeping a straight line between my elbow and his mouth and am using my two hands equally, ensuring that my intentions are very clear. Even though this horse hasn’t been with me long, we practice rein backs frequently. So he’s already very familiar with these aids.
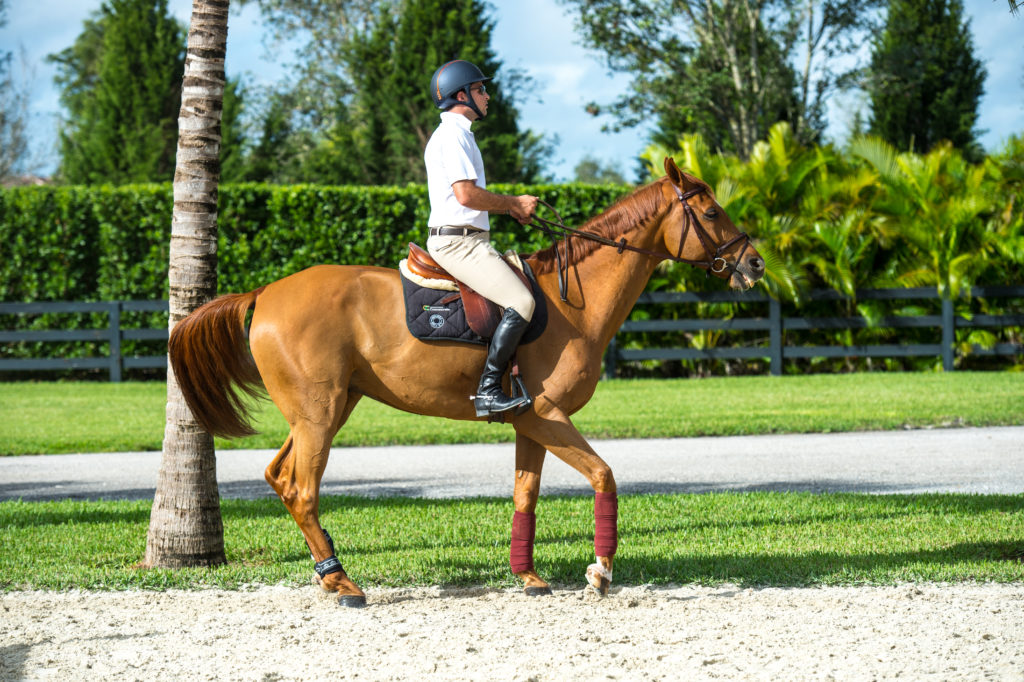
5. He responds immediately by taking a step backward. I repeat the same leg and hand aids to ask him to continue backing up smoothly in a straight line. Again, I don’t worry about his head position at this stage. He’s producing something much more important: an obedient response to my aids, a soft, round back and engaged hindquarters.
Exercise 2: Teach Your Horse to Back
To improve your horse’s understanding of the aids if he refuses to back or backs with a great deal of resistance, try the following exercise. Do it only if you’re an experienced rider with a secure seat. Otherwise, introduce the concept to him unmounted before trying it mounted—or ask a professional to teach your horse the initial lessons.
1. Set up a triangular chute with two verticals spaced 5 or 6 feet apart on one end and coming together on the other end to form the apex of the triangle. Alternatively, you can form a triangle with the arena fence or wall and a single vertical placed at an angle to it with one of its standards next to the wall. Make the jumps 3 or 4 feet high, so there’s no risk of your horse tripping over them.
2. Have your ground person stand at the point of the triangle, holding a longe whip and pointing it at the ground.
3. Ride your horse into the open end of the triangle at a walk. Using the same aids I previously described, ask him to halt a few feet away from your ground person.
4. Next, apply the aids I’ve described to ask your horse to step backward. At the same time, have your ground person make a clucking sound and move the lash of the whip on the ground in a snake-like manner, just vigorously enough to startle your horse slightly so he takes a step backward. If he doesn’t step backward, have your ground person wiggle the whip lash closer to his front feet. If this still doesn’t do the trick, have her touch him with the solid part of the whip very lightly on his chest. Be patient and take care not to escalate the situation to the point where your horse gets aggravated or upset.
5. When he finally takes a step or two backward, immediately pat him and stop applying your leg and hand aids. Then ask him to take a step or two forward to relax his back muscles again.
6. Repeat the exercise a few times to reinforce the concept. Then end the session for the day.
With practice, you will be able to do this exercise without the help of a ground person and will be able to ask for more backward steps in a row. Always focus on keeping your horse straight and relaxed. As his muscles strengthen, he’ll find this easier to do. He’ll also begin to respond better to your leg aids in general.
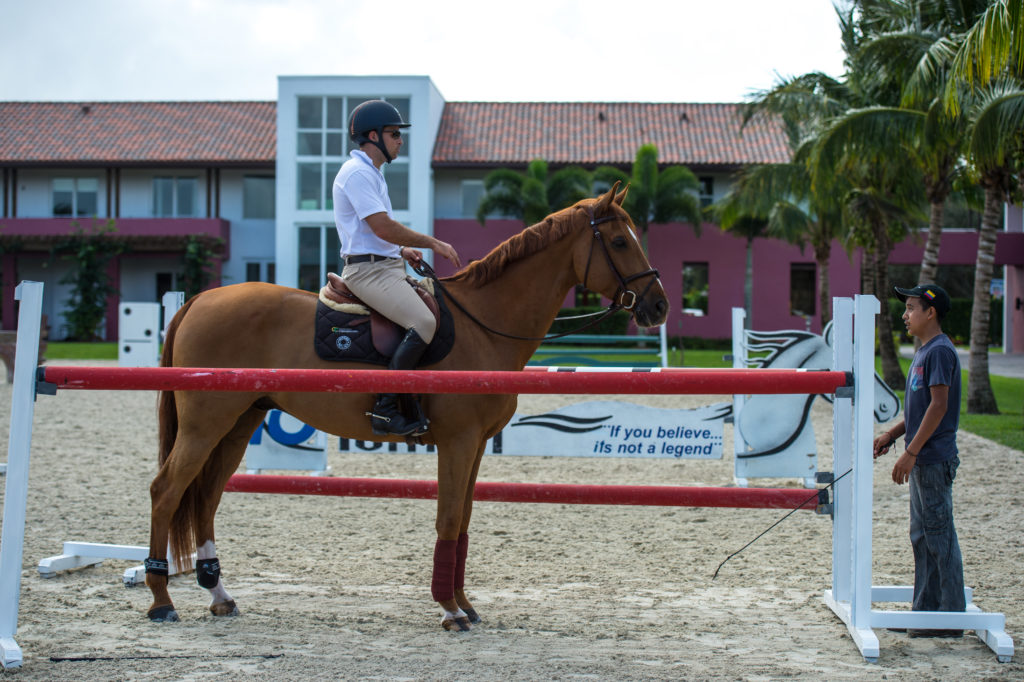
1. A great way to teach your horse how to rein back properly in response to your aids without bracing in his body is with a chute built out of standards and rails. To demonstrate, I ride Casual Pleasure into this makeshift chute and give him a little time to relax and get used to it. My helper, Eric Molina, stands directly in front of us with a whip pointed toward the ground.
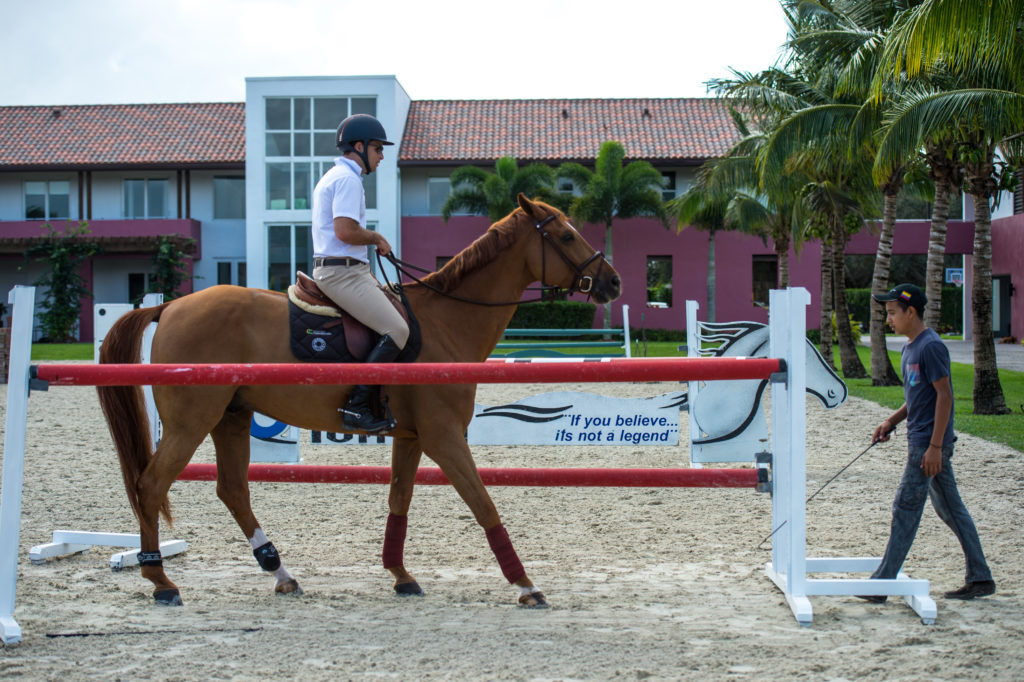
2. Next, I apply my rein and leg aids simultaneously to ask Casual Pleasure to step backward. At the same time, Eric makes a clucking sound and moves the lash of the whip on the ground in a snake-like manner, just enough so the horse takes a step backward. Because this particular horse is already familiar with my rein-back aids, I barely need any rein pressure at all. (If this were a less experienced horse, I would use the direct, even rein pressure I demonstrated in Exercise 1.) As soon as he starts backing up, I immediately let the reins get loopy to reward him. Eric will step toward us, prepared to follow us through the chute, using his presence and the whip to reinforce my aids.
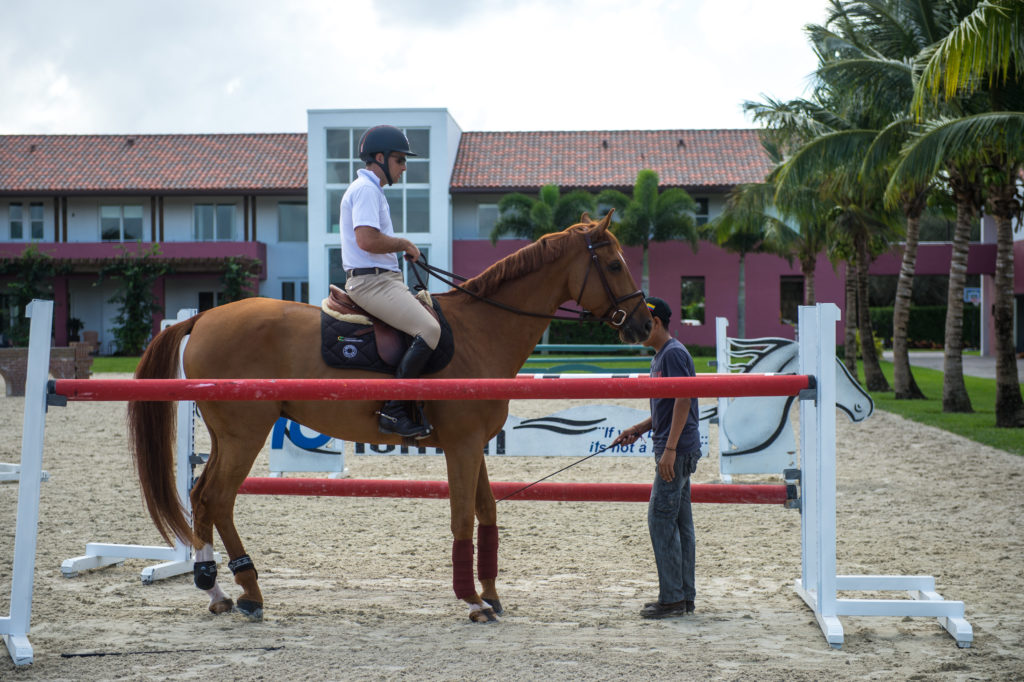
3. If your horse doesn’t step backward immediately, have your helper tap his legs or chest with the whip, as Eric is demonstrating here. Notice how comfortable Casual Pleasure still looks. It’s very important to never frighten or upset your horse during these sessions. To truly benefit from the exercise, he needs to stay relaxed, both physically and mentally.
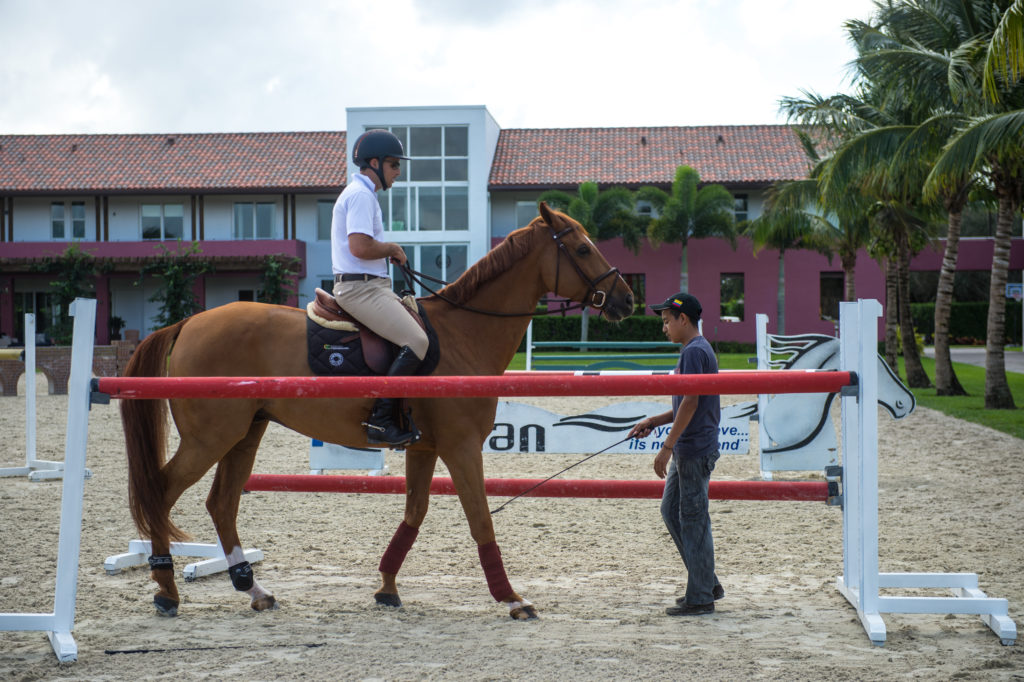
4. When your horse finally takes a step or two backward, immediately pat him and stop applying your leg and hand aids. Then ask him to take a step or two forward to relax his back muscles. Repeat the exercise a few times to reinforce the concept. If necessary, have your helper continue tapping on his chest or legs with the whip each time you ask for the rein back to reinforce your aids, as Eric is doing here. Once your horse is performing the rein back well with the help of a ground person, you can try it on your own.
Exercise 3: Transition from Trot to Halt
When he’s backing well, take this concept to the next level by practicing downward transitions, always asking him to come forward into your hand before applying your rein aids. Use enough leg to make it feel like your horse is grabbing the bit. (Don’t worry about overdoing it. You can never use too much leg.) Then use an equal amount of rein pressure to ask for the downward transition. Start with simple transitions, such as trot to walk and canter to trot, then graduate to canter to walk and trot to halt. Remember, no hands without legs.
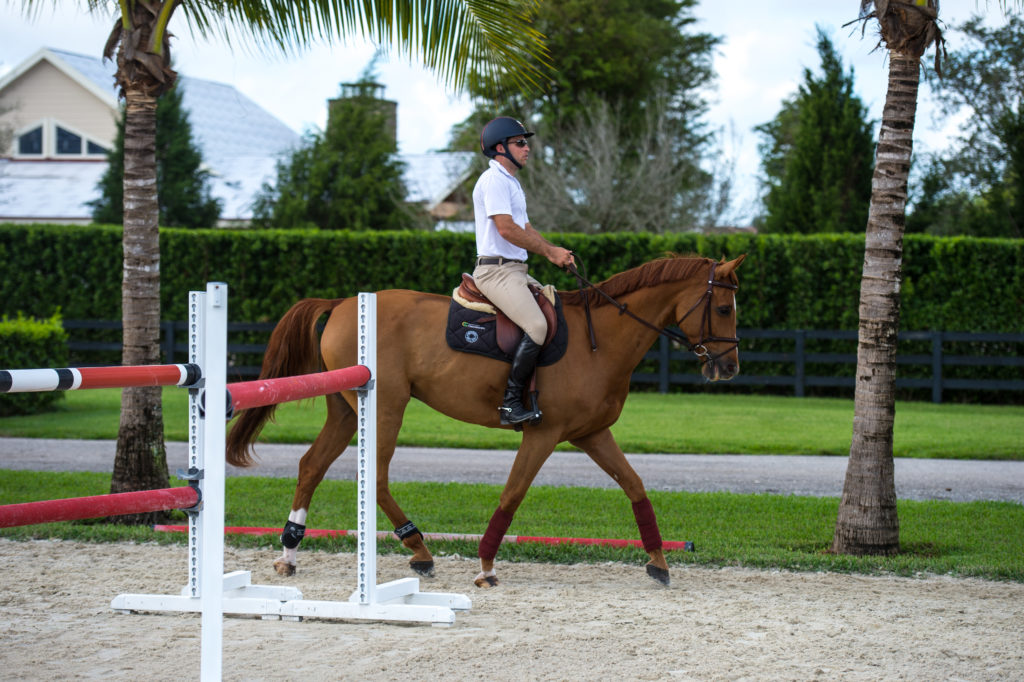
1. Downward transitions are another great way to reinforce your horse’s correct response to your leg aids and to strengthen his back muscles. In preparation for a transition from trot to halt, I close my legs to ask for the same forward intention I asked for in the rein-back exercise. Because I have the added benefit of forward motion here, it’s easier to keep him round over his topline.
About Daniel Bluman
Grand prix jumper Daniel Bluman was born in Medellin, Colombia. He started riding at the age of 3 and competed in Colombia, Germany and the United States as a Junior. In 2007, he moved to Wellington, Florida, and became a professional rider. Representing his native Colombia, he competed in the World Equestrian Games in 2010, the Pan American Games in 2011 and the Olympics in 2012. In 2015, he won the $212,000 U.S. Open CSI*** Grand Prix at the Rolex Central Park Horse Show with Conconcreto Believe and last year competed in the Olympics with Apardi. Daniel credits most of his education to two legendary Olympic riders: Canadian Eric Lamaze and Brazilian Nelson Pessoa. He now spends about half his time in Brussels, Belgium, and the other half in East Norwich, New York, where he and his cousin Ilan run their business, Bluman Equestrian.
This article was originally published in the January 2017 issue of Practical Horseman.