[PHOTOGALLERY uniquename=”galleria-azur”]
At The University of Findlay, we’ve developed a jumping exercise that benefits all of our team’s riders, from beginner to advanced, competing in equitation, hunters and jumpers. We call it “The Ins and the Outs.” It consists of a simple grid of three jumps: a crossrail, vertical and oxer. The grid can, of course, be ridden as a gymnastic exercise to improve your horse’s jumping style and allow you to concentrate on your jumping position. But add a touch of creativity?jumping the fences at angles in a looping figure-eight-like pattern?and you’ve got a fun lesson, which
- improves straightness, by requiring you to visually line up the centers of the jumps with objects in the distance.
- teaches track-riding skills, by encouraging you to use your eyes throughout the exercise.
- improves turning skills, by asking you to make smooth, efficient turns from one jump to the next.
- helps you balance your horse, by teaching you to press him from your inside leg to your outside rein.
- lets you focus on your jumping instead of worrying about getting over the fences, because the jumps are low and easy.
- teaches your horse to land comfortably on either lead, by incorporating turns in both directions after the jumps.
- through repetition, helps you maintain a steady rhythm on course, without feeling the pressure to “find a distance” (judge the take-off point) to the fences.
- encourages your horse to pay attention and jump in his best form, through the novelty of the angled jumps and ?frequent turns.
- prepares your horse for equitation and jumper classes in which you will need to angle jumps smoothly and consistently.
- helps you identify and correct equitation faults, such as jumping ahead on take-off, because the flow of the exercise is disrupted each time you make such a mistake.
- is easy to set up, requiring minimal materials?four sets of standards, 11 or 12 rails and three “sighting” cones or cans.
Setting Up
Set up the grid in a straight line down the middle of your arena. (To make these courses safely navigable, your arena’s dimensions should measure at least 100 by 150 feet.) Begin with a crossrail, then measure 18 feet to a vertical, then 21 feet from the vertical to an oxer. If you are indoors, shorten the distances to about 16.5 feet and 20 feet.
Set the fences at a height at which you and your horse are comfortable jumping. For example, if you regularly jump 2-foot-6 to 2-foot-9, make the crossrail about 18 inches high at the center, the vertical about 2 foot or 2-foot-3, and the oxer about 2-foot-6 and square (with parallel rails), so that it can be jumped safely from both directions. (You can also start out by lowering one side of each rail of the oxer to the ground, so it looks like a wide crossrail.)
Add ground lines on either side of each jump, without any fill (walls, flower boxes, etc.). I like using colored rails, preferably the striped variety, which, as I’ll explain later, can be very useful for helping you stay centered. (I avoid natural rails, because horses don’t seem to see them as well.) Be sure there’s plenty of room around the grid to make smooth, looping turns from one jump to another.
Next, set up three “sighting” cones, each five to six strides (60 to 72 feet) away from the jump landings, as ?illustrated in Diagram 1 at right. Or, alternatively, set cans on the arena wall or fence. Set each cone or can in line with the track you’ll ride so that, as you approach the center of the jump on a 45-degree angle, the cone or can will be directly centered in your field of vision.
Finally, before tacking up, walk the course you see in the diagram. Follow the exact track you plan to ride, using obstacles around the arena to help you visualize the lines and turns. Meanwhile, double-check that you can make each turn without ?running into a jump or disrupting the flow of your ride. Ask an experienced rider or trainer to help you confirm that the course is safe and rideable if you’re unsure.
Course #1: The Basic Course
Before starting this exercise, warm up your horse thoroughly at the walk, trot and canter. If you are or he is a beginner jumper, practice trotting and cantering straight to a simple jump set elsewhere in the arena. Be sure he’s jumping obediently and staying in front of your leg (responding promptly to your leg aids when you ask him to go forward) before advancing to the grid.
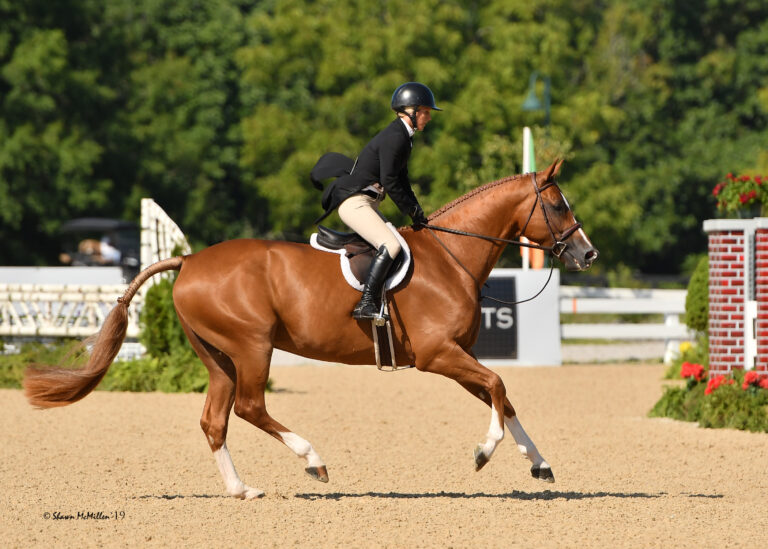
Start “the ins and the outs” by ?picking up the trot and heading ?toward the crossrail from left to right in the direction away from the other two fences in the grid. Line up the center of the jump, where the rails cross, with the sighting cone or can. Pass close to the standard of the vertical with your right shoulder, so your horse has plenty of time to focus on the crossrail before take-off (Photo 1).
Trot over the crossrail, maintaining a 45-degree angle. and keeping the cone between your horse’s ears ?before, during and after the jump (Photo 2). Throughout this exercise, avoid making the angle to the jumps more extreme. It won’t be any more beneficial, and it can be dangerous.
After landing, canter straight for a few strides. If your horse lands cantering on the left lead, great! If he lands on the right lead, change to the left by bringing him briefly to trot and picking up the correct lead?or make a flying change, if he’s more experienced.
Keeping your eyes up and following your planned track, begin a smooth left turn back toward the grid (Photo 3). Slow down slightly as you enter the turn, much as you would when driving a car. Then, as you exit the turn and find your track to the next fence, return to a steady pace without braking or accelerating. (My students sometimes find it helpful to think “don’t pull back out of the turn” to remind themselves not to take away their pace.)
On this and all of your turns, think of your outside rein as both your steering wheel and brakes. If your horse gets too quick, make gentle pull-and-release half-halts with your outside rein to ask him to slow down without leaning on your hands. Otherwise, maintain a steady contact to control the outside of the turn and prevent your horse from bulging his shoulder and losing his balance. If he falls in on the turn, use more inside leg to push him out toward your outside rein.
Meanwhile, focus on maintaining a steady rhythm around the turn. Listen to the footfalls of his strides and try to keep them as regular as possible. It may help to count strides (one, two, three, four ?) in your head or out loud. And remember to take deep, slow breaths to keep yourself relaxed and clear-headed.
Complete your turn far enough away from the oxer to have plenty of time to straighten your horse. To do this, even your rein and leg pressures and square your shoulders with his. Look ahead to the oxer and line it up with the landing cone, again placing it between your horse’s ears. Aim him for the center of the jump (Photo 4). (As I mentioned at the beginning of this article, if you are using striped rails, use the center stripe to your advantage by lining it up with the sighting cone.) Ride to the oxer just as you did to the crossrail, thinking about your rhythm, balance and straightness. Don’t worry about the distance. Whether your take-off is a little deep, a little long or just right, concentrate on staying on your track and making the ride smooth (Photo 5).
Proceed to and around the next cone before beginning your right turn (Photo 6). Again, make a flying change or change through the trot, if necessary. ?(After doing this exercise a few times, your horse will start to anticipate the turns and will probably land on the correct lead.) As soon as the vertical comes into view, line up its center with the landing cone (Photo 7). Jump (Photo 8), and after landing, finish by cantering straight on, just to the right of the cone, then smoothly bring your horse back to the walk.
After you’ve ridden the course a few times, ride its mirror image. (Move the cones as needed?or have a second set in place from the beginning.)
You can increase the difficulty of this exercise for both you and your horse by shortening the distances from the jumps to the cones?but no shorter than about 36 feet. Still be sure to ride straight lines to the centers of the fences, jumping each at about a 45-degree angle, and ?allowing your horse to land and take a few strides on the straight track before asking for each turn. Once you master that, you can further test yourself by riding this ?exercise without the cones to assist you.
Course #2: Add Transitions
If you compete in either the equitation or jumper divisions, and if you feel comfortable and confident to this point, try adding a downward transition to a variation of this course (see Diagram 2 at right). This is an excellent exercise in patience and control. Equitation riders face tests like this in the show ring, but it’s a good challenge for horses and riders of all disciplines. Remember, it’s about riding the track, keeping a consistent pace and, above all, communicating with your horse so that the turns and downward transitions are smooth and seamless.
Start by cantering the oxer from right to left back toward the grid. Circle right around the crossrail, staying fairly close to it, to jump the vertical, then make a left turn around the oxer, again staying fairly close, and set your line for the crossrail. Just after you pass the oxer, ask your horse to make a smooth downward transition to the walk, then jump the crossrail from the walk. Try to maintain a true four-beat walk, and don’t anticipate the jump by leaning forward or prematurely closing your legs.
This article originally appeared in the December 2008 issue of Practical Horseman magazine.