When you canter to your first fence on course, do you wonder if you have the correct canter? Amateurs and Juniors commonly struggle with this dilemma for good reason: When you have the right canter—your horse is traveling in the correct balance and frame at a suitable pace for the fence—he’ll be able to jump it to the best of his ability. If he’s on his forehand, inverted, too slow or too fast, he can’t jump his best. Having a good-quality canter also allows you to see your distances better, so it should be every rider’s top priority for multiple reasons.
There’s more to it than just having a well-balanced canter, though. In the jumpers, different types of jumps and lines require different canters. For example, you might need to approach a spooky fence or a large oxer with a much more forward canter than you’d want for a pair of verticals.
Knowing what type of canter you need for each situation comes with experience, but that doesn’t mean you have to put lots of wear and tear on your horse’s legs by jumping over and over again. In this article, I’ll describe a very simple exercise I practice frequently at home with all of my horses—even my top Nations Cup mounts. Although it requires only two cavalletti or two sets of poles and plastic blocks, it mentally and physically engages both horse and rider by continually challenging you to adjust the canter in different ways.
Riders and horses of all levels can do this exercise—and everyone can benefit from it. The obstacles are small enough that there will be no harm done if you miss a distance now and then. As you practice shortening and lengthening your horse’s stride, he will grow more alert and attuned to your aids. He’ll learn to respond to lighter leg aids and your half-halts will become smoother and easier to achieve. The constant variety will keep things interesting for you, too.
Practicing this exercise frequently is a great way to improve your horse’s fitness. Additionally, it will reveal both his and your weaknesses. Knowing these will not only give you specific things to work on in future training sessions but will also provide valuable information to keep in mind while you’re walking courses for a competition.
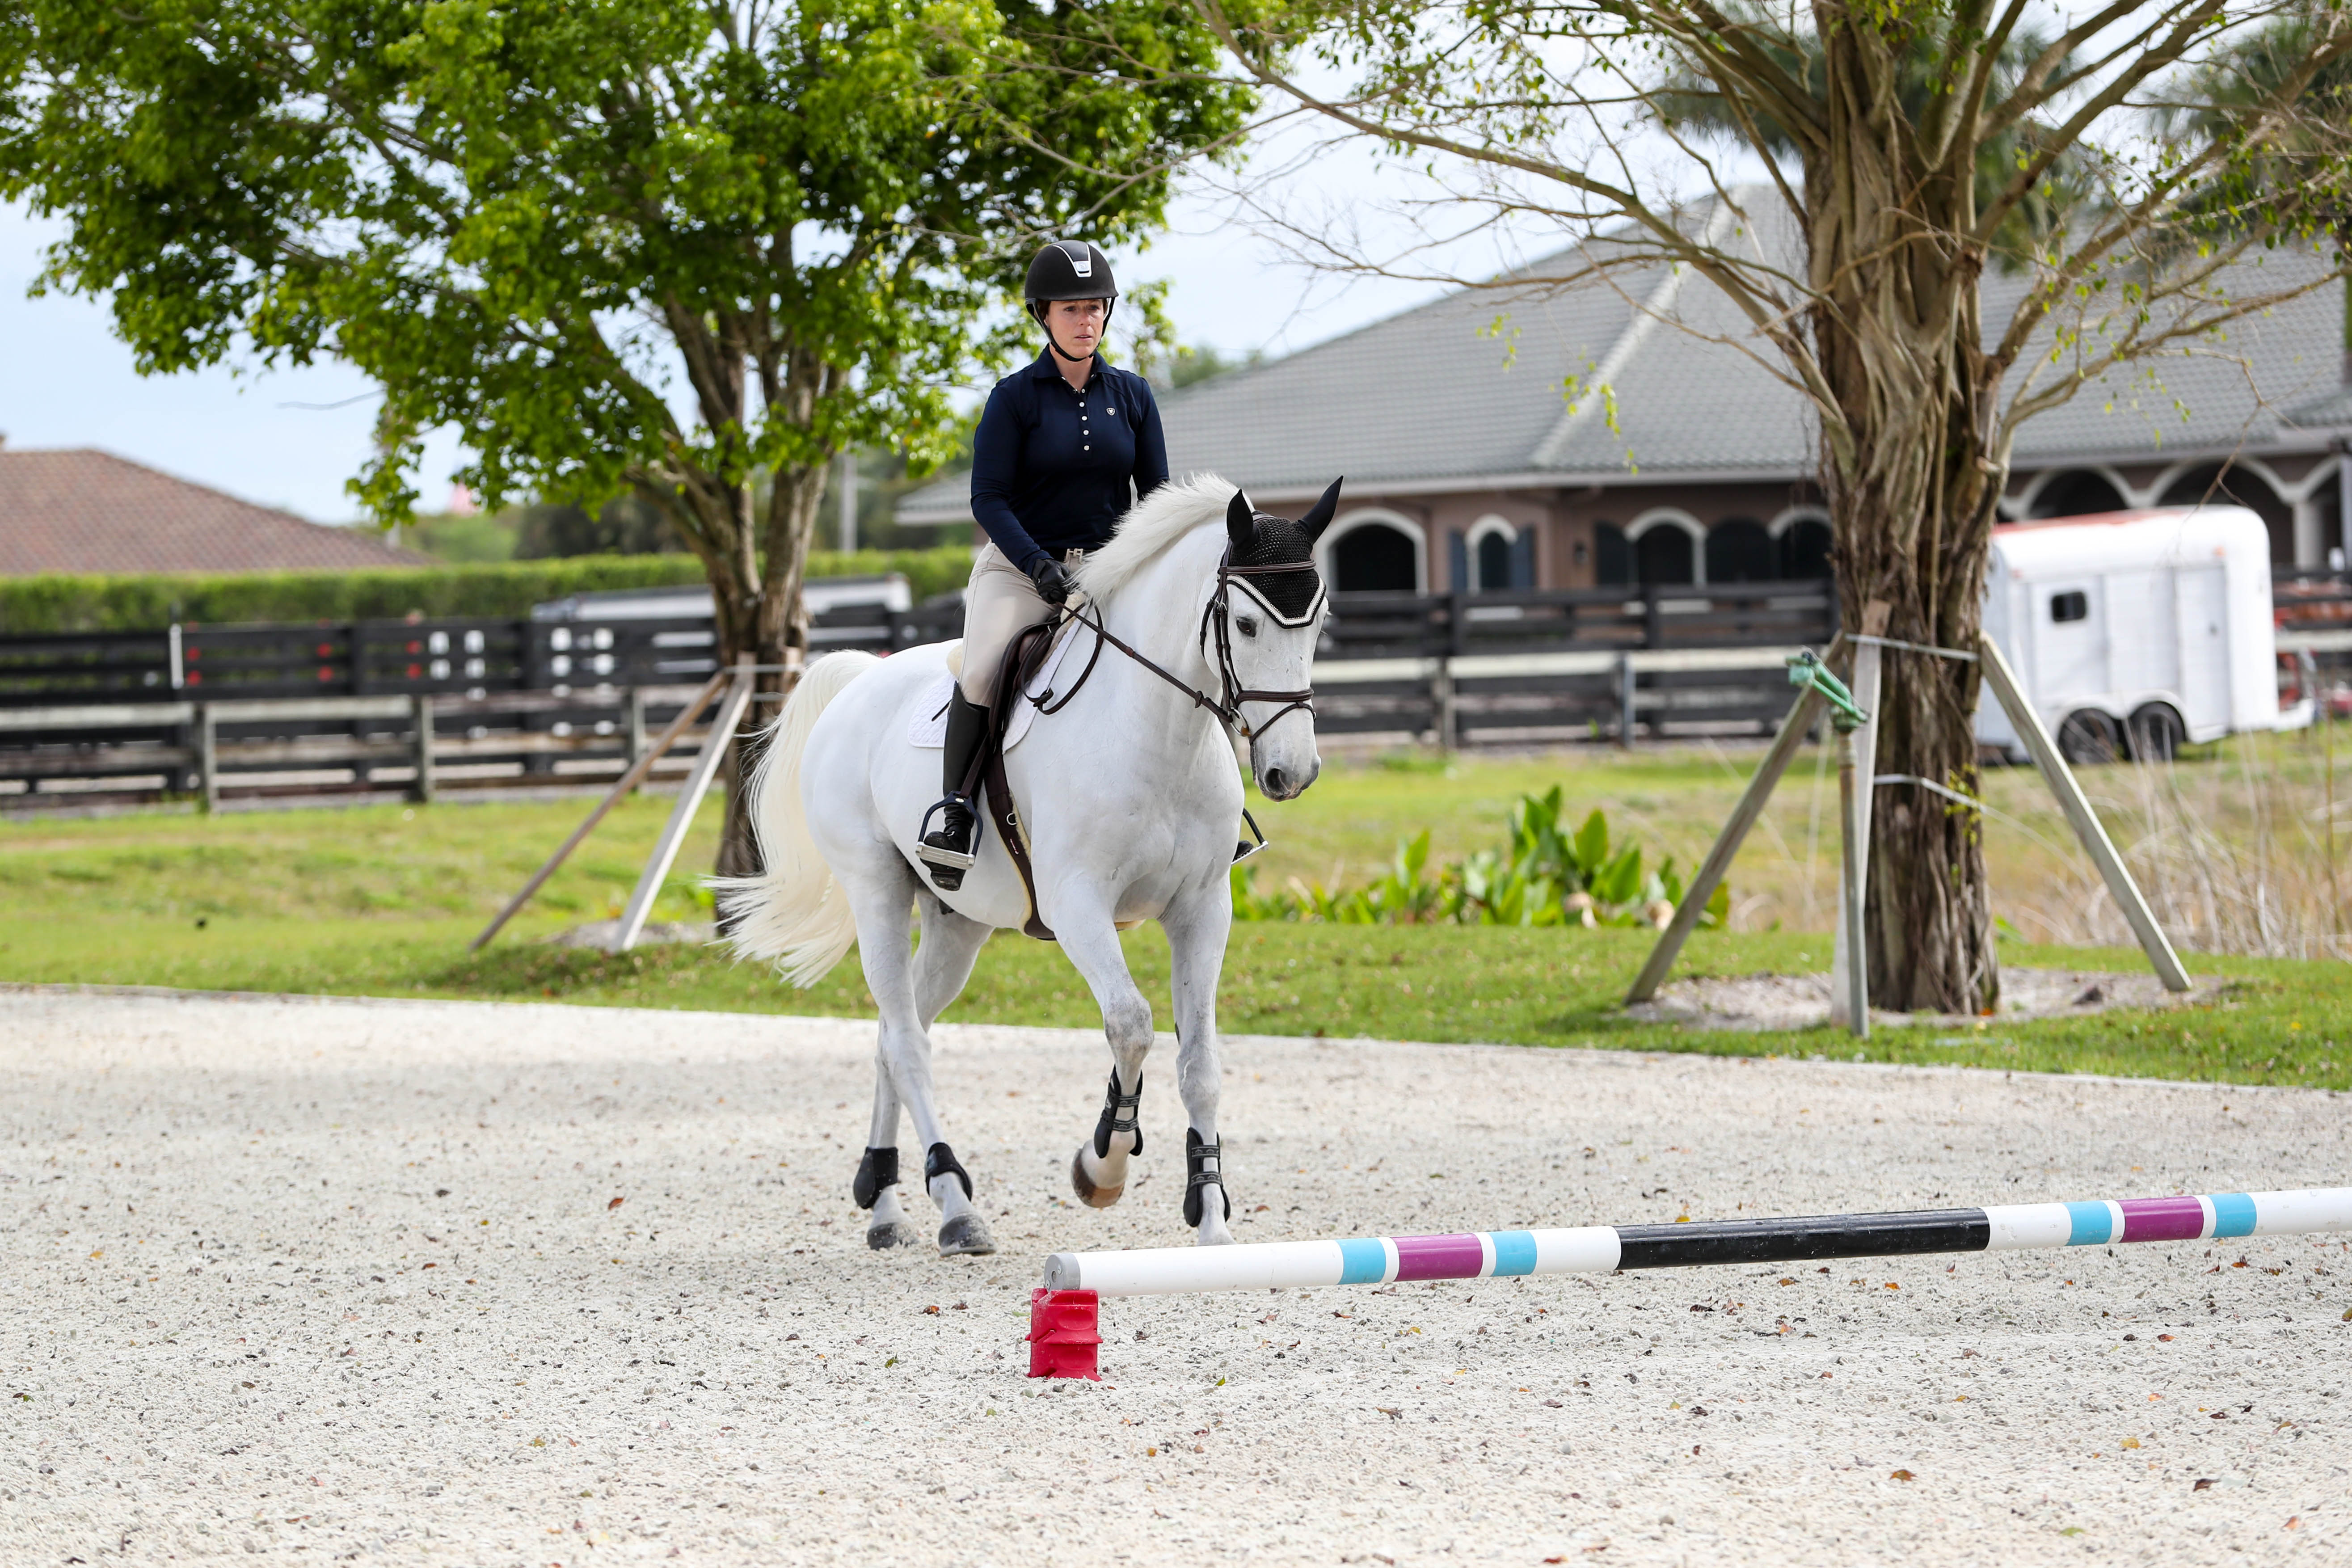
Yes, it’s that simple! Set two cavalletti or two poles on plastic blocks—adjusted to their middle height—on a straight line five to eight strides apart, depending on what is most comfortable for the size of your arena. (If your arena is small, for example, a five- or six-stride line is fine.) Don’t worry about getting this distance exactly right. The idea behind the exercise is to adjust the canter to suit each circumstance, whatever it may be. Use striped poles if you can, as they will help you aim for the center of each “jump.”
Step 1: Make a Plan
Before starting the exercise, make a mental plan for how you want to execute it. Plan to ride the line five times in one direction without stopping, then plan to take a quick break and do the same in the other direction. For each of those five times, decide exactly how many strides you will ride the line in. Start with the striding that is most comfortable for you and your horse and then increase the difficulty by adding or subtracting strides in subsequent passes.
If you or your horse are relatively inexperienced, make the progression smooth and gradual. Begin in his comfort zone by riding the line two or three times in a nice regular canter. Next, plan to ride the line in a more forward canter, aiming to subtract a stride. Then plan to ride it in the comfortable striding once more before collecting the canter to add a stride.
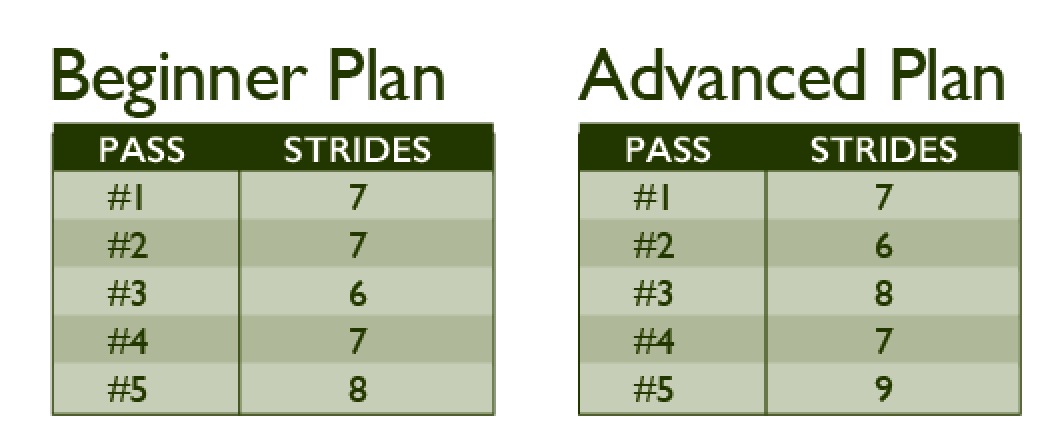
For example, if you set the cavalletti up on a regular 72-foot five-stride line, depending on your horse’s natural stride, it will probably ride comfortably in six or seven strides (since the cavalletti are so small). So ride it in that comfortable number of strides two times. The third time, go more forward to leave a stride out. Then ease back to the comfortable striding for your fourth pass. Finally, collect the canter to add a stride.
If you and your horse are more advanced and your horse is extremely adjustable, make your plan more challenging by going to extremes. Ride through the line in the comfortable striding just once. If that comfortable striding was seven strides, for example, then ride it next in six strides, then eight, then back to seven, then nine. There are obviously many variations you can play with. Just be sure you know exactly what you intend to do before you begin.
As you’re making your plan, also think about your position. Initially, it’s best to do the exercise in whatever position is most comfortable for you, whether that’s two-point or sitting more deeply in the saddle. When that’s going well, you can challenge yourself by changing your position. So, for example, you might plan to ride the line in two-point for the first three passes, then ride the last two in a deeper seat. If it’s too confusing to change your striding and your position at the same time, adjust one or the other for each pass. As you get the hang of the exercise, you’ll be able to challenge yourself by adjusting both.
Also plan to start the exercise on your horse’s better lead. Although we all try to train our horses to be more ambidextrous, most of them naturally prefer one lead over the other. You’ll make more progress if you ride the first five passes on his favorite lead, then repeat the exercise in the opposite direction.
If your horse is very fit, you can add a second—or even third—set of five repetitions in each direction, playing with the striding however you think will best benefit both of you.
Step 2: Ride the Line
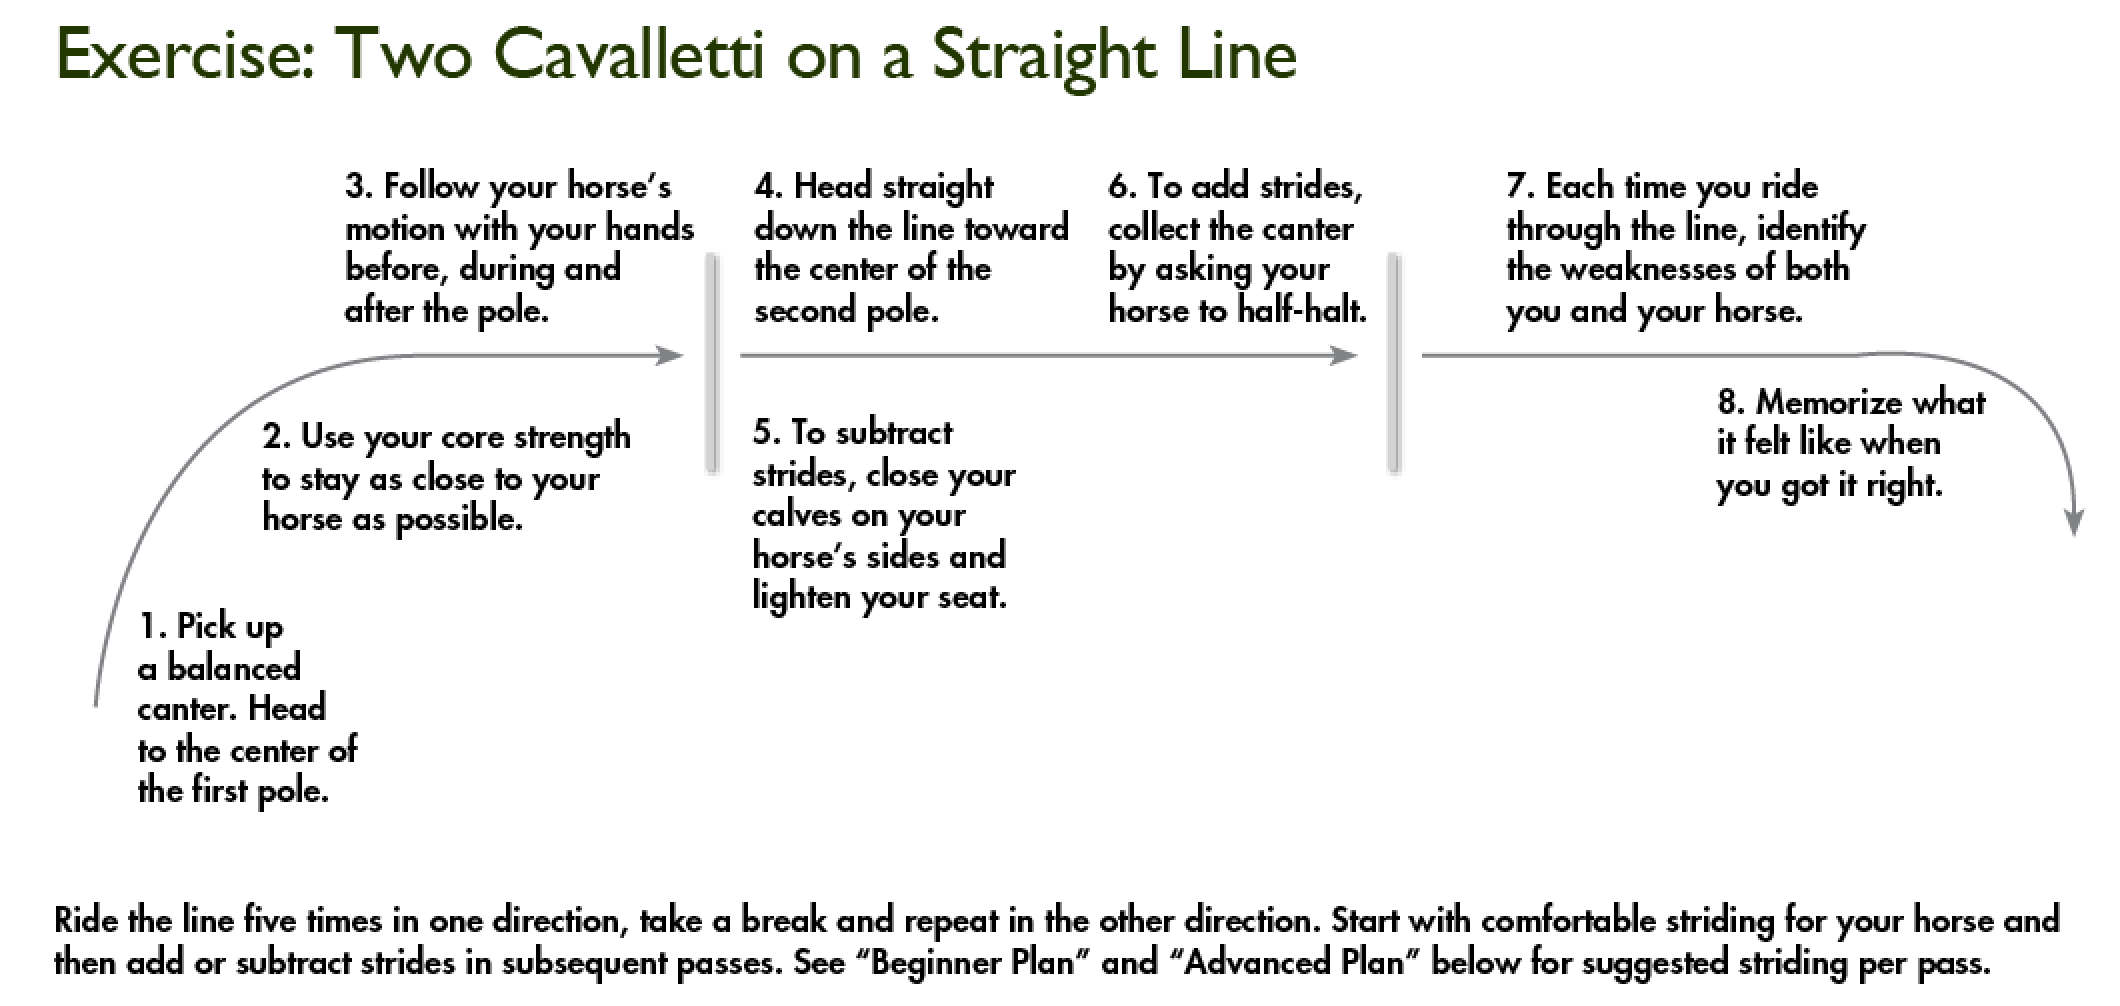
Once you have a good plan in mind, execute it! Pick up a nice balanced canter and head to the center of the first raised pole. Whether you’re riding in two-point or a deeper seat, use your core strength—your stomach and inner-thigh muscles—to stay as close to your horse as possible without clamping your legs on or collapsing your upper body. Don’t worry about whether he jumps the pole or simply steps over it. Either way, follow his motion with your hands before, during and after it, then head straight down the line toward the center of the second pole.
To subtract strides, close your calves on your horse’s sides and lighten your seat to encourage him to open his stride and cover more ground. Follow his motion with your hands and body without tipping your shoulders too far forward.
To add strides, collect the canter by asking your horse to half-halt. Do this by putting more pressure on the reins while sinking into your thigh and lightening your calf pressure. Make sure you don’t take your leg completely off so your horse doesn’t break into the trot. I like to use what I call a “flutter leg”: a leg that is there to nudge the horse, asking him to shorten and quicken his step.
Each time you ride through the line, ask yourself how it went: “Did my horse stay on the correct lead? Did he stay straight and maintain a good rhythm? How was my position? Did I sit up tall and stay in the center of my horse? Or was I leaning too far forward and twisting my body?” Try to identify the weaknesses of both you and your horse so you know what you need to practice and improve.
If your horse isn’t meeting the poles on a comfortable stride, adjust your canter. Try adding a little more impulsion or steadying him a bit more. Ask yourself, “Is his balance too long and low?” or “Is it inverted?” Sometimes it’s helpful to have a trainer get on your horse to produce the right canter so you can learn to recognize it. But this exercise can often help riders learn how to fix the canter themselves, which is a valuable tool to have both in training and in the competition ring.
Take a moment to try to memorize what it felt like when you got it right. Think about how the canter felt and what your body was doing when you maintained a lovely canter all the way down the line while getting the correct counts.
Listen to your horse throughout the exercise. If he feels sluggish, take a break and think about what might be affecting him. He could be fatigued—it’s a lot of work for a horse to adjust his body so much. Or you might need to encourage him to give you a better-quality canter.
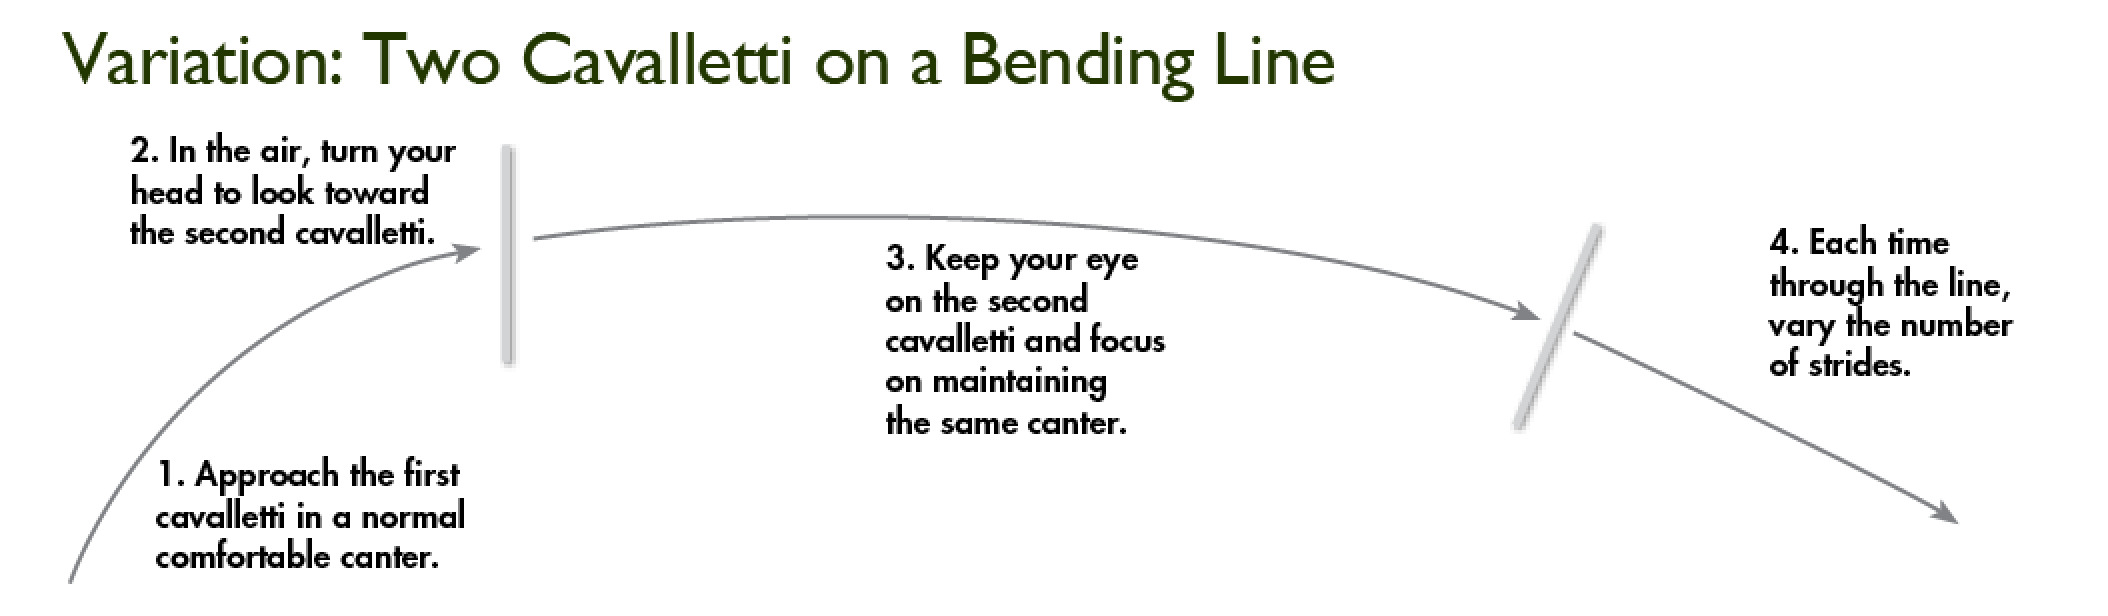
Once the exercise is going well, try a small variation: Set the raised poles up on a bending line, still five to eight strides apart. Just as you did before, make a plan to ride the line about five times in each direction, varying the number of strides in whatever way you think would benefit your horse the most. Ride to the center of each pole on the same track every time, making adjustments in your canter—rather than to the track—to produce the desired number of strides.
This, too, will give you lots of valuable information about your horse’s tendencies. For example, he may be harder to turn in one direction than the other. In practice at home, we all try to correct these weaknesses, but horses often revert to what is more comfortable for them, especially in the show ring. So the better you know your horse, the better plan you can make for him in the competition arena.
Ride by Feel
Keep all of this information in mind when you walk your course at a show. Remember the feeling of the canter you had when practicing at home and the difference between adding and leaving out strides.
Also note where turns and bending lines might be more challenging—or easier—for your horse’s particular tendencies. If he’s hard to turn left, for example, left turns on course might come up more quickly for you than for other riders.
It’s important not to overthink once you enter the show ring, so do most of your thinking when walking the course beforehand. Study it thoroughly and make a good plan suitable for you and your horse. Once you are mounted, take a moment to clear your mind and then enjoy the ride!
About Elizabeth Gingras
Canadian native Elizabeth Gingras competed in her first grand prix at age 18. Since then, she has represented Canada on many Nations Cup teams, both in North America and Europe. Among numerous international successes, she won the 2014 $100,000 Spirit of the West Cup at the inaugural CSI*** Royal West Show Jumping Tournament in Calgary and the 2015 $2,250,000 MXN Veracruz Grand Prix at Coapexpan and was the highest-placing Canadian at the $3 million CP International last fall. She and her current top mount, Zilversprings, were the traveling alternates for Canada’s 2015 Pan American Games team. Elizabeth is now based part-time in Wellington, Florida, and part-time in Belgium.
This article was originally published in the October 2017 issue of Practical Horseman.