Editor’s Note: Kevin Babington suffered a serious spinal-cord injury from a fall in August 2019 while competing his grand prix partner Shorapur, who was not injured. For updates on Kevin’s condition and for more about fundraising efforts, please see “Babington Strong,” our feature on the Babingtons in the Summer 2020 issue.
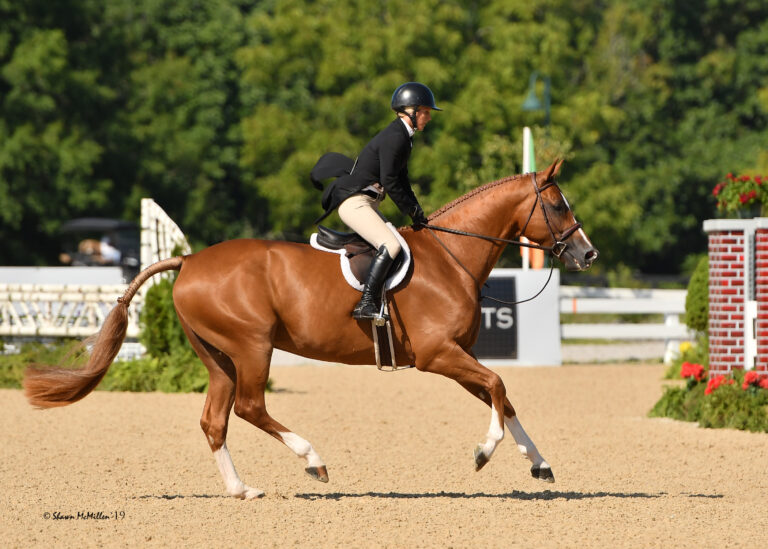
Is your horse straight? I mean really straight: traveling on two tracks—each hind foot following the track of its corresponding forefoot. Does he jump the center of his fences, or does he drift to one side or the other? Does he accept equal contact on the reins or lean on one more than the other? All of these questions are critical for jumpers at any level. The straighter your horse is, the better he’ll be able to push off his hind legs equally to produce bigger jumping efforts, the more correct his technique will be in the air (square shoulders, even legs, no twisting), and the easier it will be to stay on track to the next jump.
Crookedness most commonly results from natural one-sidedness. Just like humans, horses are usually stronger on one side than the other. Unfortunately, riders often perpetuate the problem by working constantly on circles and turns, sometimes even over-bending their horses’ bodies to the point where they grow tense and muscle sore. They also make the common mistake of approaching every schooling fence on a turn, which allows a horse to “cheat” by jumping on a slight angle. All of these habits strengthen a horse’s strong side, while neglecting his weak side.
Working on lateral exercises and adjustability (asking your horse to lengthen and collect his stride) before your horse is straight is also counterproductive. Not only does this reinforce his strength imbalance, but it also creates evasions that require much more training to correct.
In this article, I’ll describe a simple straightness test I use on every new horse I ride. Then I’ll give you two simple exercises for improving straightness on the flat—where the bulk of your correction should occur—and two over-fences exercises easy enough to do in your warm-up at shows. First though, if your older, experienced horse suddenly develops a straightness problem, for example, jumping to one corner of every jump, he may be dealing with physical pain. Ask your veterinarian to examine him before attempting these exercises.
The Test
Try walking straight down the centerline or quarterline of your arena toward either a helper on the ground or a mirror. If your horse is straight, you or your helper should see his head and neck exactly in the center of his chest and should not see his haunches drifting to one side of his body or the other. This may sound incredibly simple, but it’s harder than you think.
This test will give you an idea of where your horse’s weaknesses lie: whether he swings his haunches consistently to one side, drops or bulges his shoulder to one side or leans on one rein more than another. More often than not, a crooked horse will do all three of these things. For example, if his haunches tend to swing right, his shoulder also will drop left and he will lean on his left rein, avoiding contact on the right rein.
To test your horse even further and to begin to improve his straightness, build a chute out of ground poles along the centerline or quarterline. Place three pairs of poles, each separated by about 4 feet, flanking and parallel to your chosen track. Space the pairs at 30- to 40-foot intervals along the length of the arena. Walk through the center of the chute several times, gradually narrowing the space between each pair of poles until they’re only about 18 inches to 2 feet apart.
The Correction
Using leg to push your horse’s haunches back in line with his shoulders is next to impossible because his body is so massive, particularly in the very short time you have between jumps when you’re on course. Horses also naturally run from pressure, so you may inadvertently produce a forward reaction—making your horse run faster—rather than a straightening reaction. Bringing his shoulders in line with his haunches is usually more effective. It requires much less strength on your part and is also less likely to create tension in your horse. Here’s how to do it:
1. In the beginning of the ride, walk your horse quietly around the ring until he takes a deep breath and relaxes. When he seems comfortable, continue in an active, working walk on the rail in his “stiff” direction (the direction in which he’s difficult to turn). For the example described above of the horse who drops his shoulder left, you’d track left.
2. Keeping a straight line between your elbows and the bit, take your outside right rein a few more inches to the outside. This will encourage your horse to accept some contact on that right rein and move his shoulders outward to fill in the gap created by the slightly opened rein. Meanwhile, be ready with both legs to maintain the impulsion should your horse lose energy at any point. You must always go forward to be straight.
3. When you feel contact on the right rein, ask for a mild inside bend—just enough to see the corner of his eye—by closing your left leg on the girth, supporting with a passive right leg behind the girth, and bringing his nose slightly to the inside with your left rein. This will help to lift and lighten his left shoulder.
4. If your horse resists the bend, turn him in a 10-meter circle, gently repeating the slight opening outside rein and inside bending aids. Again ask for just enough bend to see the corner of his eye. Exaggerating the bend or swinging his head from side to side will allow the energy to escape through the outside shoulder (or through both shoulders), destroying your forward momentum. After one circle, return to the track and repeat the straightening aids described in steps 1–3.
5. Continue working quietly on this shoulder-alignment exercise for the first 10 to 15 minutes of your warm-up, always using the entire ring, encouraging relaxation and avoiding getting into a wrestling match with your reins. Practice these aids on the ground-pole chute, too, correcting any loss of straightness in between each pair of poles and using the mirror or asking your helper to monitor your improvement.
Most horses respond best to this exercise at the walk. If your horse is extremely lazy, however, try doing it at the trot.
Advanced Correction: Counter-Canter
If you and your horse are comfortable performing a countercanter, it can be your best straightening and suppling tool. Doing it in his stiff direction forces him to use and strengthen the weak side of his body. For example, if you have trouble turning him right—he bulges his left shoulder to the outside and throws his right hip to the inside—practice tracking right on the left lead. This will help to unlock his stiffness and carry his hips in line with his body again.
If your horse has trouble doing this initially, ask for just a little bit at a time. Ride him several feet off the rail so he doesn’t have to go so deep into the corners. As his strength and alignment improve, he’ll find it easier to go into the corners and maintain the countercanter longer.
To make this exercise even more challenging, add a slight change of bend on the long side of the arena. So, for example, if you’re cantering on the left lead and traveling to the right, ask for a slight right bend on the straightaway—just enough to challenge him but not so much that he breaks to the trot or switches leads. Before the next corner, resume the left bend and continue the countercanter around it. I find this helps with alignment and suppleness.
Long and Low
Next, to reinforce the straightness you created in the above exercise and begin to build your horse’s suppleness and engagement, spend up to 10 or 15 minutes doing “long and low.” A horse who is supple in his body is less resistant in the contact and moves straighter in his body.
1. Still using the entire ring, pick up a regular working trot. Close your legs to encourage him to come forward into the contact. When you feel more pressure in your hands, play with your fingers on the reins to move the bit a little in his mouth. If he responds by reaching his nose forward and down, immediately release the rein pressure, allowing the reins to slide through your fingers as far he will take them. At the same time, reduce your leg pressure.
If he responds by raising his head—and many horses will try this at first if they’re not familiar with this exercise—imagine you’re holding ski poles in your hands. Immediately separate the “ski poles” to take up the slack in the reins. Maintain the contact until he lowers his head again. With repetition, he’ll learn quickly that stretching forward and down is the only option that offers a consistent reward.
2. At first your horse may not stretch more than a few inches. To teach him to reach lower, be persistent. After rewarding him, apply your leg and hand aids again to ask for even more stretch. It may take several weeks, but your goal is to have him stretch so far that you slip the reins all the way to the buckle.
3. Even as he stretches down into the contact, keep an eye on his alignment. If he drops one shoulder, open the opposite rein to encourage him to fill in the “gap,” just as you did in the previous walk exercise. When he straightens his shoulders, reward him by following his head forward again with your hands, encouraging him to stretch even more over his topline.
Don’t worry about your horse falling on his forehand while you’re doing long and low. If he quickens at first, resist the temptation to hold him back with your reins. Instead, slow him down with a series of half-halts until you feel him rebalance himself and then repeat the long-and-low aids, including the rein release the moment he stretches. This gives him the freedom to find his balance without your help, which is exactly what you want! If he continues to quicken, bring him back to walk and start over.
Eventually, if you continue to offer him the reins every time he reaches forward into them, he’ll start to “look” for your legs—relaxing so much that you need to close your legs to send him forward again. This is a great sign. With this newfound balance and acceptance of your leg, you can begin to ask for more engagement of his hind legs.
Once he’s doing long and low well at the trot, if you feel comfortable, try a little at the canter as well. When you’re ready to move on to other work, your horse will feel much straighter and suppler through his body and less resistant in the contact.
Work on Yourself, Too
Remember to focus on your own balance and straightness throughout every ride. When you jump, concentrate on keeping your hips and shoulders very square. Check that you’re not overturning in the air and/or shifting your seatbones sideways. (Again, your ground person can be a great help in spotting any bad habits.)
If you identify any of these habits in your jumping position, try to find a corrective reminder that works for you. For example, if you tend to overturn your body to the right and shift your seat bones left (which opens the door for your horse to drift left), focus on keeping your left shoulder or hip back in the air. If that doesn’t work, try concentrating on leading with your right hip. Something as simple as focusing on keeping your chin up over the fence may even help. Different position reminders work for different people, so experiment until you find something that works for you.
Be more disciplined in your approach to fences, too. Instead of cantering to each one on a nice bend, turn your approaches into squares: Canter past the jump, make a 90-degree turn, canter straight for several more strides, then make another 90-degree turn onto the straight track to the center of the jump. In the last few strides of the approach, straighten your hips and shoulders and check that your legs and reins are even to encourage your horse to straighten his body, as well. Make this checklist a habit every time you jump a fence.
In between the jumps, pay closer attention to your horse’s straightness and rein contact. If he leans on one rein, use the opposite opening rein to straighten the shoulders the way you practiced at the walk. It may take some time to learn the ideal “feel” for your particular horse. Some horses get so heavy on the rein on their stiff side that it’s impossible to maintain a steady contact on that rein without feeling like you’re holding up a ton of bricks. In this case, make your elbow on that rein as elastic as possible, gently giving and taking the contact so he doesn’t have a chance to brace against it.
For example, if you make a right rollback turn to a jump and your horse tends to bulge his shoulder to the left, stay active in your outside elbow by giving and taking the contact so he can’t lean on your left rein. This will help to keep his shoulders in line so you can straighten him to the jump more easily after the turn.
Continue working on these skills while using the following exercises to improve your horse’s straightness over fences.
Reverse Psychology
This exercise takes advantage of the fact that horses are creatures of habit. If your horse tends to drift one direction over his fences, he’ll do that predictably until you make a change. Here’s how to replace that bad habit with a good one:
1. In your warm-up, canter to a small vertical on the opposite lead to which he normally drifts. So, for this example, if he drifts left over the jump, approach it on the right lead.
2. In the air over the jump, use an opening right rein to ask him to turn right on landing.
3. Turn right after the jump and ride a square back around to jump the fence off the right lead again. Repeat this about three times.
4. Finish with one or two straight approaches to the jump—making a longer, direct approach and cantering away straight upon landing—to be sure you haven’t overcorrected. (Sometimes repeatedly turning in one direction over a jump will backfire, causing your horse to begin drifting in the opposite direction over the jump.)
Guide Rail on Landing
Here’s another simple tool you can use in the warm-up to remind your horse to take off, jump and land straight. Place a ground pole at least 10 feet away on the landing side of a small vertical, perpendicular to the jump and about 4 feet from the center track, on the side toward which he tends to drift.Your goal is to make the rail easily visible so it encourages him to stay on the center track without risking having him step on the rail, which could cause an injury.
Canter to this jump several times off of each lead, always focusing on squaring your body and his in the last three or four strides before takeoff. Instead of trying to guide him around the ground pole with your reins, let it do the straightening for you.
Depending on your horse’s degree of crookedness, how consistently you ride these exercises and how square and balanced your own body is, it can take anywhere from one day to several weeks to correct the problem. Some horses will always be a little one-sided naturally, but by making this a top priority, you can teach any horse to travel and jump straight. Remember to start from a state of relaxation and never try to force the issue. And always demand as much perfection from yourself as you demand from your horse.