I never really wanted an office with a view; I wanted a view for my office. That explains why my window looks out at the Blue Ridge Mountains and why fall is one of my favorite times of the year. By this time I’m a little burned out on competitions, and I’m starting to make plans for the coming year. The leaves are turning, and I’m scheming how to make sure my students win absolutely everything. I know they won’t, but as the song says, “you gotta have a dream,” or “… how you gonna have a dream come true?”
I have been thinking about the horses and riders I’ll be working with this year, and it occurred to me some of my riders might need better tools for the job.
At first I just concentrated on their horses, as I’m afraid some of them will not be suitable for their riders’ goals. There will be some painful conversations, but that is part of my role. Riders who are involved in ambitious careers must have the tools to do the job, starting with the appropriate horse. That led me to think further about the tools we use to ride—the existing tools we can improve and the entirely new tools we can develop during the winter.
When I say “tools,” you might naturally think about equipment essential to riding such as saddles and bridles and wonder if I am about to suggest you need a different bit or saddle or maybe (shudder) a noseband more forceful than a plain cavesson. Nope, please put the tack catalog away and stifle your disappointment. By tools, I mean something you acquire by the investment of learning and time: the language we use to communicate with our horses. Of course that language entails whips, spurs and bits, but at its most basic it’s legs and hands, your position, your voice and—maybe most importantly—your knowledge of horses and their responses to various stimuli.
Let’s Start with Your Position
You need to maintain your posture in the saddle to communicate efficiently and clearly with your horse. When your legs close, it must mean something to him. If you squeeze your fingers, he must respond. But he must know what it is you want him to respond to. Excessive, undirected movement on your part leads to misunderstanding on his part. If you are closing your heels, but your arms are flapping like a screen door in a hurricane, your horse will always listen to the tool—the aid—you didn’t want him to hear. That’s where position comes in.
When you look at successful dressage riders, you notice they sit as regally as kings and queens. Regardless of your discipline, you need a good dressage position because dressage is the tool you use to teach your horse how to respond to your aids, the aids you will use to communicate with him whatever the sport. Ask someone to look at you from the side while you are at the halt with your stirrups adjusted for dressage. Have them check that you have a vertical line from your ear through your shoulder to your hip and down to your heel. Distribute your weight equally on your two seat bones and your pubic bone. Make sure you have a slight arch at your waist so that when your horse moves, the alignment of your skeleton moves your body. This means you will not need to grip to stay with your horse. Once you’re aware of these criteria, you will begin to notice that every world-class dressage rider conforms to them and sits correctly.
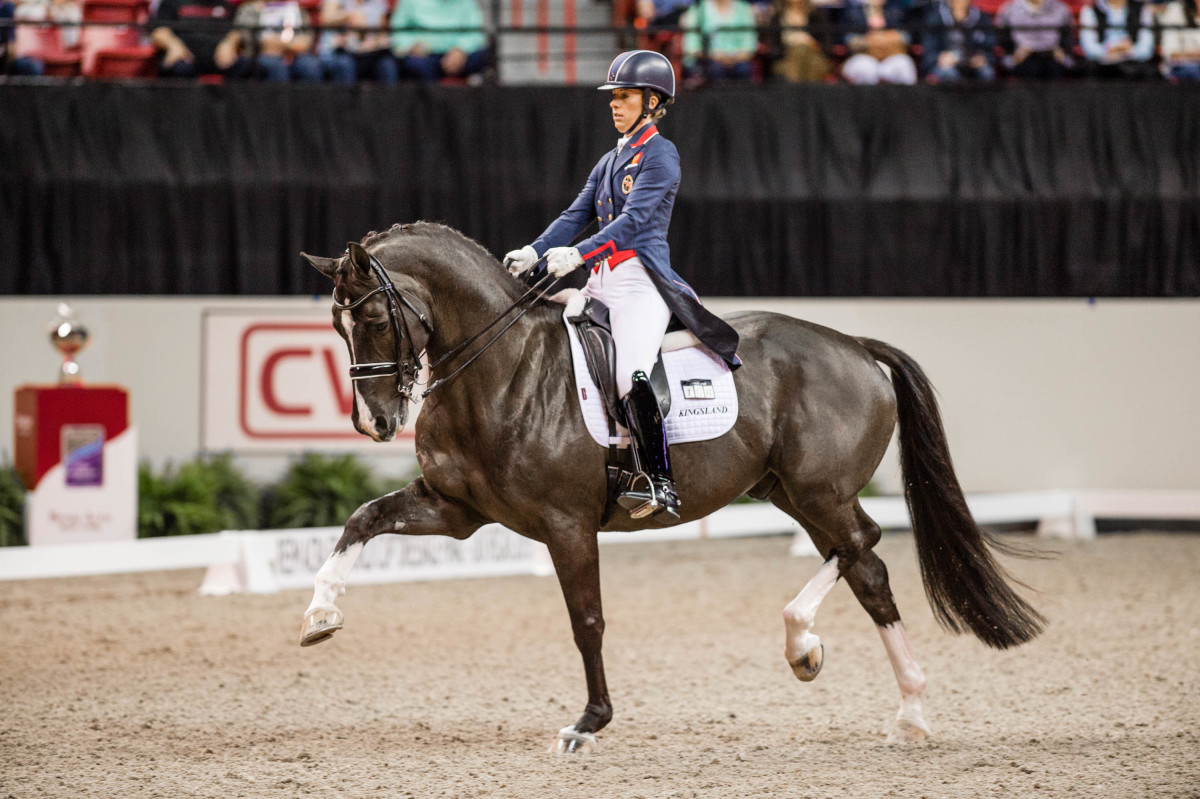
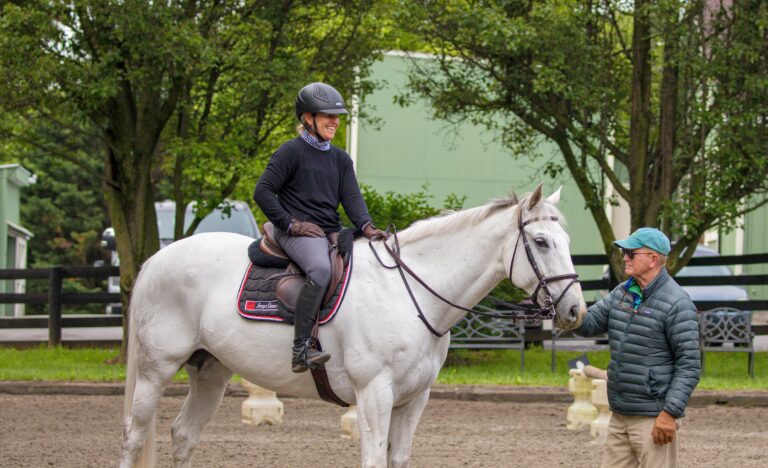
Amy K. Dragoo/AIMMEDIA
Almost every world-class show jumping rider has a world-class lower-leg position. Elite cross-country riders jump up banks and down maximum drops without ever losing their balance because their position is so good they can deal with sudden changes of terrain and balance. There is no way to separate how you ride from how your horse goes.
You have a wide range of aids available when you are in the saddle. You should understand each of them and use only the one(s) you need at that instant—and no other. A good position with an independent seat will enable you to do that.
It All Comes Down to …
I understand the Training Scale, but I was taught dressage before the scale was invented, and my lessons consisted simply of “calm, forward, straight.” Simple, yes … but not easy.
If your horse is not calm, he will learn the wrong lessons from your aids; you will be training him to misbehave rather than to improve. You need a calm approach with your horse from the moment you tack him up every day.
If we accept “calm, forward, straight” as a guiding principle, and your horse is calm, then the next step is the correct use of your lower leg. Although horses vary widely in their response to leg aids, you must ride with very simple rules. If you close your legs, your horse must immediately move forward. If you close one leg, your horse must immediately step away from the pressure. The leg pressure you use should be applied in the following sequence: a slight, almost imperceptible heel pressure, then spur, then a tap with your whip behind your leg to enforce what was an invisible aid a nanosecond before the whip arrived. Your horse absolutely must respond to your leg aid; end of story.

Practical Horseman Archives
Note that if your horse does not respond to your first aid, each of your aids is stronger than the one before and follows quickly. Notice also that in this sequence, there is no place for a nagging, repetitive heel aid or for lifting the heel and gripping with the spur. (You’ll quickly realize that doing this also messes up your lower-leg position.) Obviously, each horse is different in his sensitivity to the leg aid, but the final result must be that you can create forward movement from an invisible aid. Horses who are ultra-sensitive to your leg—or, alternatively, are nearly impervious to your leg aids—are difficult to train but become much easier once you commit to my simple sequence.
It goes without saying, so I’ll say it anyway, that an ultra-sensitive horse already satisfies my rule that he must be in front of your leg. To train him, you should continue to ride with subtle leg aids and teach him to accept the inside-leg to outside-rein connection that I’ll explain in a moment. Your outside rein controls the speed. If you have a horse who goes willingly forward to that connection, you are well on your way to having a delightful, well-trained horse to ride. All you need now is time and dressage.
Like ultra-sensitive horses, ultra-sluggish horses are hard to ride. However, they become easier once you make the commitment to riding forward. The key to riding them well is to insist on forward motion while riding with extremely soft hands. “Clashing” your aids—kicking and pulling at the same time—is the most common error I see riders make when riding sluggish horses. Admittedly, strengthening your leg aids without tensing your upper body, arms and hands is difficult, and requires a truly independent position. (Yes, that again.)
Keep in mind that you have no chance of getting a sluggish horse correctly on the bit until you have activated his hindquarters. Don’t try to do this using the kick-and-pull approach; instead, ride him forward into a soft hand. Sluggish horses are a challenge to train, not so much because they are dead to your leg aids, but more because they are too ready to listen to your hands by slowing down. You should ride sluggish horses in a plain snaffle with a loosely fitted cavesson. To help you to ride forward with very soft hands, carry your reins in a “bicycle” grip, holding the reins between your thumb and index finger, rather than under your ring finger. This will make you more aware of the weight of your contact with your horse’s mouth. If you don’t open the door, your horse will not step willingly through it.
I’m not a big fan of modern spurs, many of them with rowels or exaggerated lengths or shapes. I prefer a pair of Prince of Wales spurs, correctly adjusted. If your horse does not respond to a sharp prod (notice I said “a” sharp prod, meaning just one) with these spurs, you must do two things: Make sure your hands are soft and then immediately support your leg with your whip … and I mean immediately. If you repeat the same aid twice, you are not riding—you are nagging.
Got ‘Forward, Straight and Calm’? OK, Next …
The movements and paces you ask from your horse should be precise, clear and understandable. If you ask for leg-yield before you have taught turn on the forehand, you may disturb his equanimity. Why are leg-yield and (later on) shoulder-in so important? These are the first exercises we use to teach your horse to go forward from one leg to the opposite hand. In that configuration, you have your horse between the accelerator and the brakes; you have taught him to accept your ability to control impulsion and speed. Now all you need is time … and the right tool for each job.
My experience is that once you develop a truly independent position, you can make progress with horses of every type. By using very clear aids, and insisting on a correct response to those aids, you will begin to understand the interrelationship between your aids and your ability to train horses. The more you learn about horses, the more calm you will become and the more effective in your riding. Remember … calm, forward, straight.
This article originally appeared in the Winter 2019 issue.