Riding and working around horses can be dangerous, so why not lessen the odds of an accident? While there are plenty of tried-and-true ways to safely handle horses, many people don’t practice them because they are either in a hurry or have found a shortcut. In this article I’ve detailed what I consider the safest ways of doing everyday tasks, from taking your horse out of his stall, to tacking up, dismounting and putting him away.
These are not original ideas of mine. They have been around for ages, as have I. And because I plan to continue to be around, I practice and believe in them.
Leading
When leading a horse, even if it’s just from his stall to the grooming area, put a halter on him and use a lead shank. If you just hold on to the halter with your hand without a lead, reasoning that you’re only walking a few yards away, you lack control. If your horse spooks or decides he doesn’t want to go into the grooming area and starts to pull backward in the aisle, you can sustain a serious injury—your hand could get caught in the halter. Also, if your horse gets away from you, he could hurt himself or nearby people and horses.


Tacking Up
Once your horse is standing still in the cross-ties and you’ve groomed him, to tack him up, put on the saddle first. Going to his right side, attach the girth to the saddle billets, then walk to the left side, pass the girth under his belly and loosely attach it to the billets on that side.
To put on the bridle, stand on the left side of your horse. Hold the bridle in your left hand or rest it on your forearm, then slip the halter off his head and secure it around his neck with the cross-ties still attached. Put the reins over his head and put on the bridle. Then remove the halter. I advocate this approach because you have more control with your horse still attached to the cross-ties as you put on the bridle. Next, walk to the right side and make sure the tack is correct—the noseband is inside the cheekpieces, for example—and the bridle straps are centered and on the same holes on each side and the ends are in their keepers. It’s easy to miss something on the right side when you put the bridle on from the left.
I know many people completely remove the halter when putting on the bridle. This is not wrong, but I think it’s safer to secure the halter around your horse’s neck first so you have something to hold on to if he spooks or misbehaves.
In addition, I strongly advocate using a leather halter. If you use a nylon halter, it should have a leather crownpiece. The leather will break under stress, whereas the nylon won’t. Similarly, the cross-ties should be the breakaway type in case your horse runs back or rears up. In this situation, something has to give, and you don’t want it to be your horse’s neck. Other options are attaching the cross-tie to the screw-eye with twine or snapping the cross-tie onto a loop of yarn on the halter. The braiders do this if they tie a horse after they braid him.
Finish by hanging the halter on a hook, instead of letting it dangle at the end of one of the cross-ties. Not only does it look sloppy, but a horse could get caught in the hanging halter.


If you ever need to stand your horse in the cross-ties with the bridle on, be sure to put a halter over the bridle and attach the cross-ties to the halter. People sometimes think it’s OK to attach the cross-ties directly to the bit, but if the horse spooks and pulls back hard on the cross-ties, he could seriously injure his mouth.


Leading a Tacked-Up Horse
To lead your tacked-up horse out of the grooming stall, pass the reins over his head and hold them in your right hand, which gives you the most control. If you leave the reins over his neck and hold just one or grasp both under his neck, your horse will be able to more easily get away from you if he spooks.
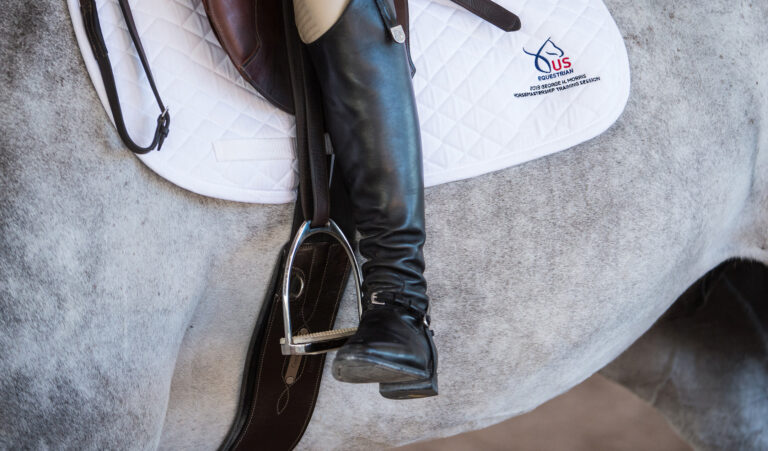
Also, be sure to keep the stirrups run up. Dangling stirrups are a liability—they can get caught on something or bang against his sides, scaring him. Another safety tip that I often see being disregarded: Whenever you’re around horses, wear boots made of heavy material such as leather or thick rubber, which offer the best protection if your horse steps on your foot. Wearing flip-flops or delicate footwear while working around horses is a recipe for disaster.


Mounting
When mounting, you are in a vulnerable position. If your horse walks off or spooks before you have the chance to swing your right leg over the saddle and sit securely, you could fall. So use good judgment. I prefer using a solid three-step mounting block and, if available, a person to hold the horse and the right stirrup. The mounting block helps you avoid uncomfortably pulling the saddle against your horse’s withers while the person holding the right stirrup also helps keep the saddle—and the horse—in place.
Before you mount, tighten your girth. Then lead your horse to the mounting block, positioning him so that the left side of the saddle is above the mounting block. Put the reins over his neck and hold the left rein as you climb the mounting block. Make sure the stirrup leather is flat against the saddle with the iron hanging down, then take both reins evenly in your left hand. Maintaining a light feel, place that hand on the crest of your horse’s neck to keep him straight and prevent him from walking off. Put your left foot in the stirrup and, being careful not to poke your toe into his side, turn your heel inward so your foot is parallel to your horse’s side and the stirrup iron’s inside branch is against it. Briefly place your right hand on the cantle of the saddle, then move it forward to the right side of the saddle as you swing your right leg over your horse’s back. Make sure your leg clears his rump so you don’t brush him with it and startle him. Place your right foot into the stirrup and ease down on his back.
Some people mount from the ground, which isn’t wrong, but I think that approach makes it difficult to avoid pulling the saddle against the withers. It also encourages your horse to walk as you mount because it’s difficult to maintain a steady feel of his mouth.


Tightening the Girth
After mounting and walking for a few minutes, I believe in tightening the girth again. Some horses tense and expand their sides when being tacked up, and walking causes them to relax and breathe, so the girth loosens. Also, the rider compresses the saddle pads when she sits, also causing the girth to loosen. And some horses simply dislike having their girth tightened too much all at once. For these reasons, I snug the girth one last time after I’ve mounted.
As with mounting, tightening the girth from the saddle puts you in a vulnerable position. To do it safely, keep your left foot in the stirrup as you raise your leg up and in front of the saddle. Bridging the reins and holding them in your right hand, use your left hand to lift up the saddle skirt and tighten the girth. Then return the skirt to its original position and lower your leg back to its correct place.
I don’t like to see riders dropping the reins on their horses’ necks and taking their left feet out of the stirrup while reaching down with both hands to raise the skirt to adjust the girth. In doing this, the stirrup always ends up behind the saddle and dangles. If a horse spooked or took off, the rider would have no control and, more than likely, would fall off.


Adjusting Stirrups
Another technique to think carefully about is adjusting the length of your stirrup leathers. I was taught to keep your foot in the stirrup and hold the reins in your off hand. With the other hand, reach in front of your thigh to pull the leather and undo the buckle. If you’re lengthening the stirrup, simply step down on the iron to ease the leather down a hole or two and then secure it. You may feel awkward if you’re not used to doing it this way. This method can be more difficult if the leathers are new and stiff. To shorten your stirrup, use your thumb and forefinger and pull the leather up a little to the desired hole, then step down on the stirrup to secure it.
If you adjust the leathers by dropping the reins, taking your foot out of the stirrup and using both hands, you’re a goner if your horse decides to take off. Another bad habit to get into is putting on spurs while mounted, using both hands and raising your foot. A safer alternative is to strap them on before you mount and ask for help in removing them while mounted.


Talking on the Phone
Talking or, even worse, texting while mounted is unsafe. The problem is talking or texting takes just about all of your attention. At a recent show, I saw a rider texting with both hands, leaving his reins to dangle on his horse’s neck. A loose horse ran up from behind and the texter’s horse spooked. The rider went flying—maybe he was able to dial 911 as he soared through the air! Thankfully, he wasn’t hurt and went on conducting business on the phone from the ground. Many trainers use the back of a horse like their office, citing a lack of time to make calls. Listening to music through earpieces probably falls under the same category of an unsafe distraction.
Dismounting
There are two ways to dismount: sliding or stepping down. I prefer to slide. To do this, take your right foot out of the stirrup and swing that leg over and above your horse’s hindquarters. When the right foot is next to the left, take the left out of the stirrup and slide down. You also can take both feet out of the stirrups at the same time, swing your right leg over your horse’s hindquarters and slide down. This method is quicker and removes any possibility of being caught with a foot in the stirrup should your horse spook. It does, however, require some athleticism.
To step down, you keep your left foot in the stirrup iron until your right foot touches the ground and then slip the left out of the stirrup. I think this is dangerous because if your horse moves quickly, your foot could get stuck in the iron and you could be dragged.
Putting Your Horse In His Stall
After you’ve untacked and groomed your horse and he’s ready to go back to his stall, first make sure the door is open wide. Walk into the stall ahead of him and quietly turn him around to face you and the door. Remove his halter and walk out.
If you just stand at the stall door, let your horse walk past you and then pull on the lead rope to quickly turn him toward you to remove the halter, you will encourage him to rush, and he could bump his hip as he turns around.
The same applies to turning out a horse in the paddock. First turn him around to face you before removing his halter instead of slipping off the halter or unsnapping the lead rope as the horse runs off. Allowing a horse to bolt in the paddock is very dangerous for both him and his handler. You could get dragged and the horse could leave with the lead shank still attached. Also, it is a difficult habit to break.
Similarly, I have seen people turn out a horse and immediately wave the halter to make him run off. The horse could unintentionally kick the person and develop the bad habit of rushing through the gate because he is so excited.
Putting On or Taking Off Blankets
When putting a blanket on, fasten the front buckles before attaching the surcingles. When removing, undo the surcingles first and then the front buckles. If the surcingles are done up first and something spooks your horse before you get to the front buckles, the blanket or sheet could slide back, causing the surcingles to act like a bucking strap. I have seen this happen. I often see braiders unbuckle the front of the sheet and blanket and push them back to access the mane.
If you have horses in your life, you’re a busy person. But as you care for your horse and ride, take a few minutes to review the habits you’ve developed for the most basic horse-handling situations. If needed, take a little more time, stay safe and enjoy your horse.
About Holly Hugo-Vidal
Based in Alpharetta, Georgia, Holly Hugo-Vidal judges and gives clinics around the country. Her mentors include former husband Victor Hugo-Vidal and show jumper Rodney Jenkins. She is also the author of the book Build Confidence Over Fences!
Thanks to Peter Lombardo for providing the beautiful background at Frontier Farms, in Moorpark, California, for the photos.
This article originally appeared in the 2015 issue of Practical Horseman.


