Whatever type of riding you do, the more correctly you use your leg, seat and hand aids to communicate with your horse, the better he’ll perform. Many riders don’t even realize that they’re unconsciously sending their horses confusing and contradictory signals and messages. In this article, I’ll describe some of the most common rider problems I see in the hunter, jumper and equitation rings and will offer some exercises for fixing them. Although I divide these exercises into three groups—for hands, legs and seat—keep in mind that your aids are always interrelated. Each one works best if you use it in coordination with the others.
When doing these exercises, ask a ground person to help identify your weaknesses and offer feedback. Or do them with another rider, taking turns observing each other and calling out instructions. Some of the exercises require an extremely steady, tolerant horse. If you’re not sure your horse fits this bill, try them first in a smaller, enclosed area, such as a roundpen, or on the longe line with the help of an experienced horseperson.
Remember, horses are creatures of habit. Whenever you change how you apply an aid, it will take many repetitions for your horse to learn to respond properly to it. Don’t expect immediate results. Just keep repeating the correct aids until he begins to associate them with the appropriate response.
Similarly, your own body will need plenty of repetition to develop the muscle memory and strength required to perform these new skills correctly. So incorporate the exercises you’re trying to build on into your daily rides. Do each one for a certain amount of time or in a certain number of sets.
One more general tip before we get started: Add more walk and canter to your training sessions. Most riders spend the majority of time at the trot. As I’ll explain below, you may improve some of your skills even more by focusing on them in the walk and canter.
Improve Your Hands
When people learn to ride, the natural tendency is to try to control everything with the hands. The opposite is actually more effective: The less hand you use, the better the results. By learning to use your legs and seat to communicate basic cues, such as “slow down,” you save your hands for more sophisticated skills, such as bending and getting your horse on the bit. Here are some hand errors and exercises to fix them:
Problem: Too-stiff hands/arms. If your shoulders, elbows and wrists aren’t soft and elastic, you can’t follow your horse’s mouth smoothly enough to maintain the ideal steady, consistent contact. When a horse gestures with his head and neck (moves it forward and back), if your hands freeze in place, they will pull on his mouth when he extends his head forward and create loops in the reins when his head comes back.
Fix 1: At the walk, separate your hands so they are about 1.5 feet apart. Focus on your horse’s head and neck gesture, which happens twice with every walk stride. Keeping a light, steady contact—not heavy pressure—concentrate on opening and closing your elbows to allow your hands to follow his mouth. Think of the reins as rubber bands, trying not to let them droop down or snap in his mouth. Meanwhile, keep your legs on his sides to prevent him from slowing down or stopping.
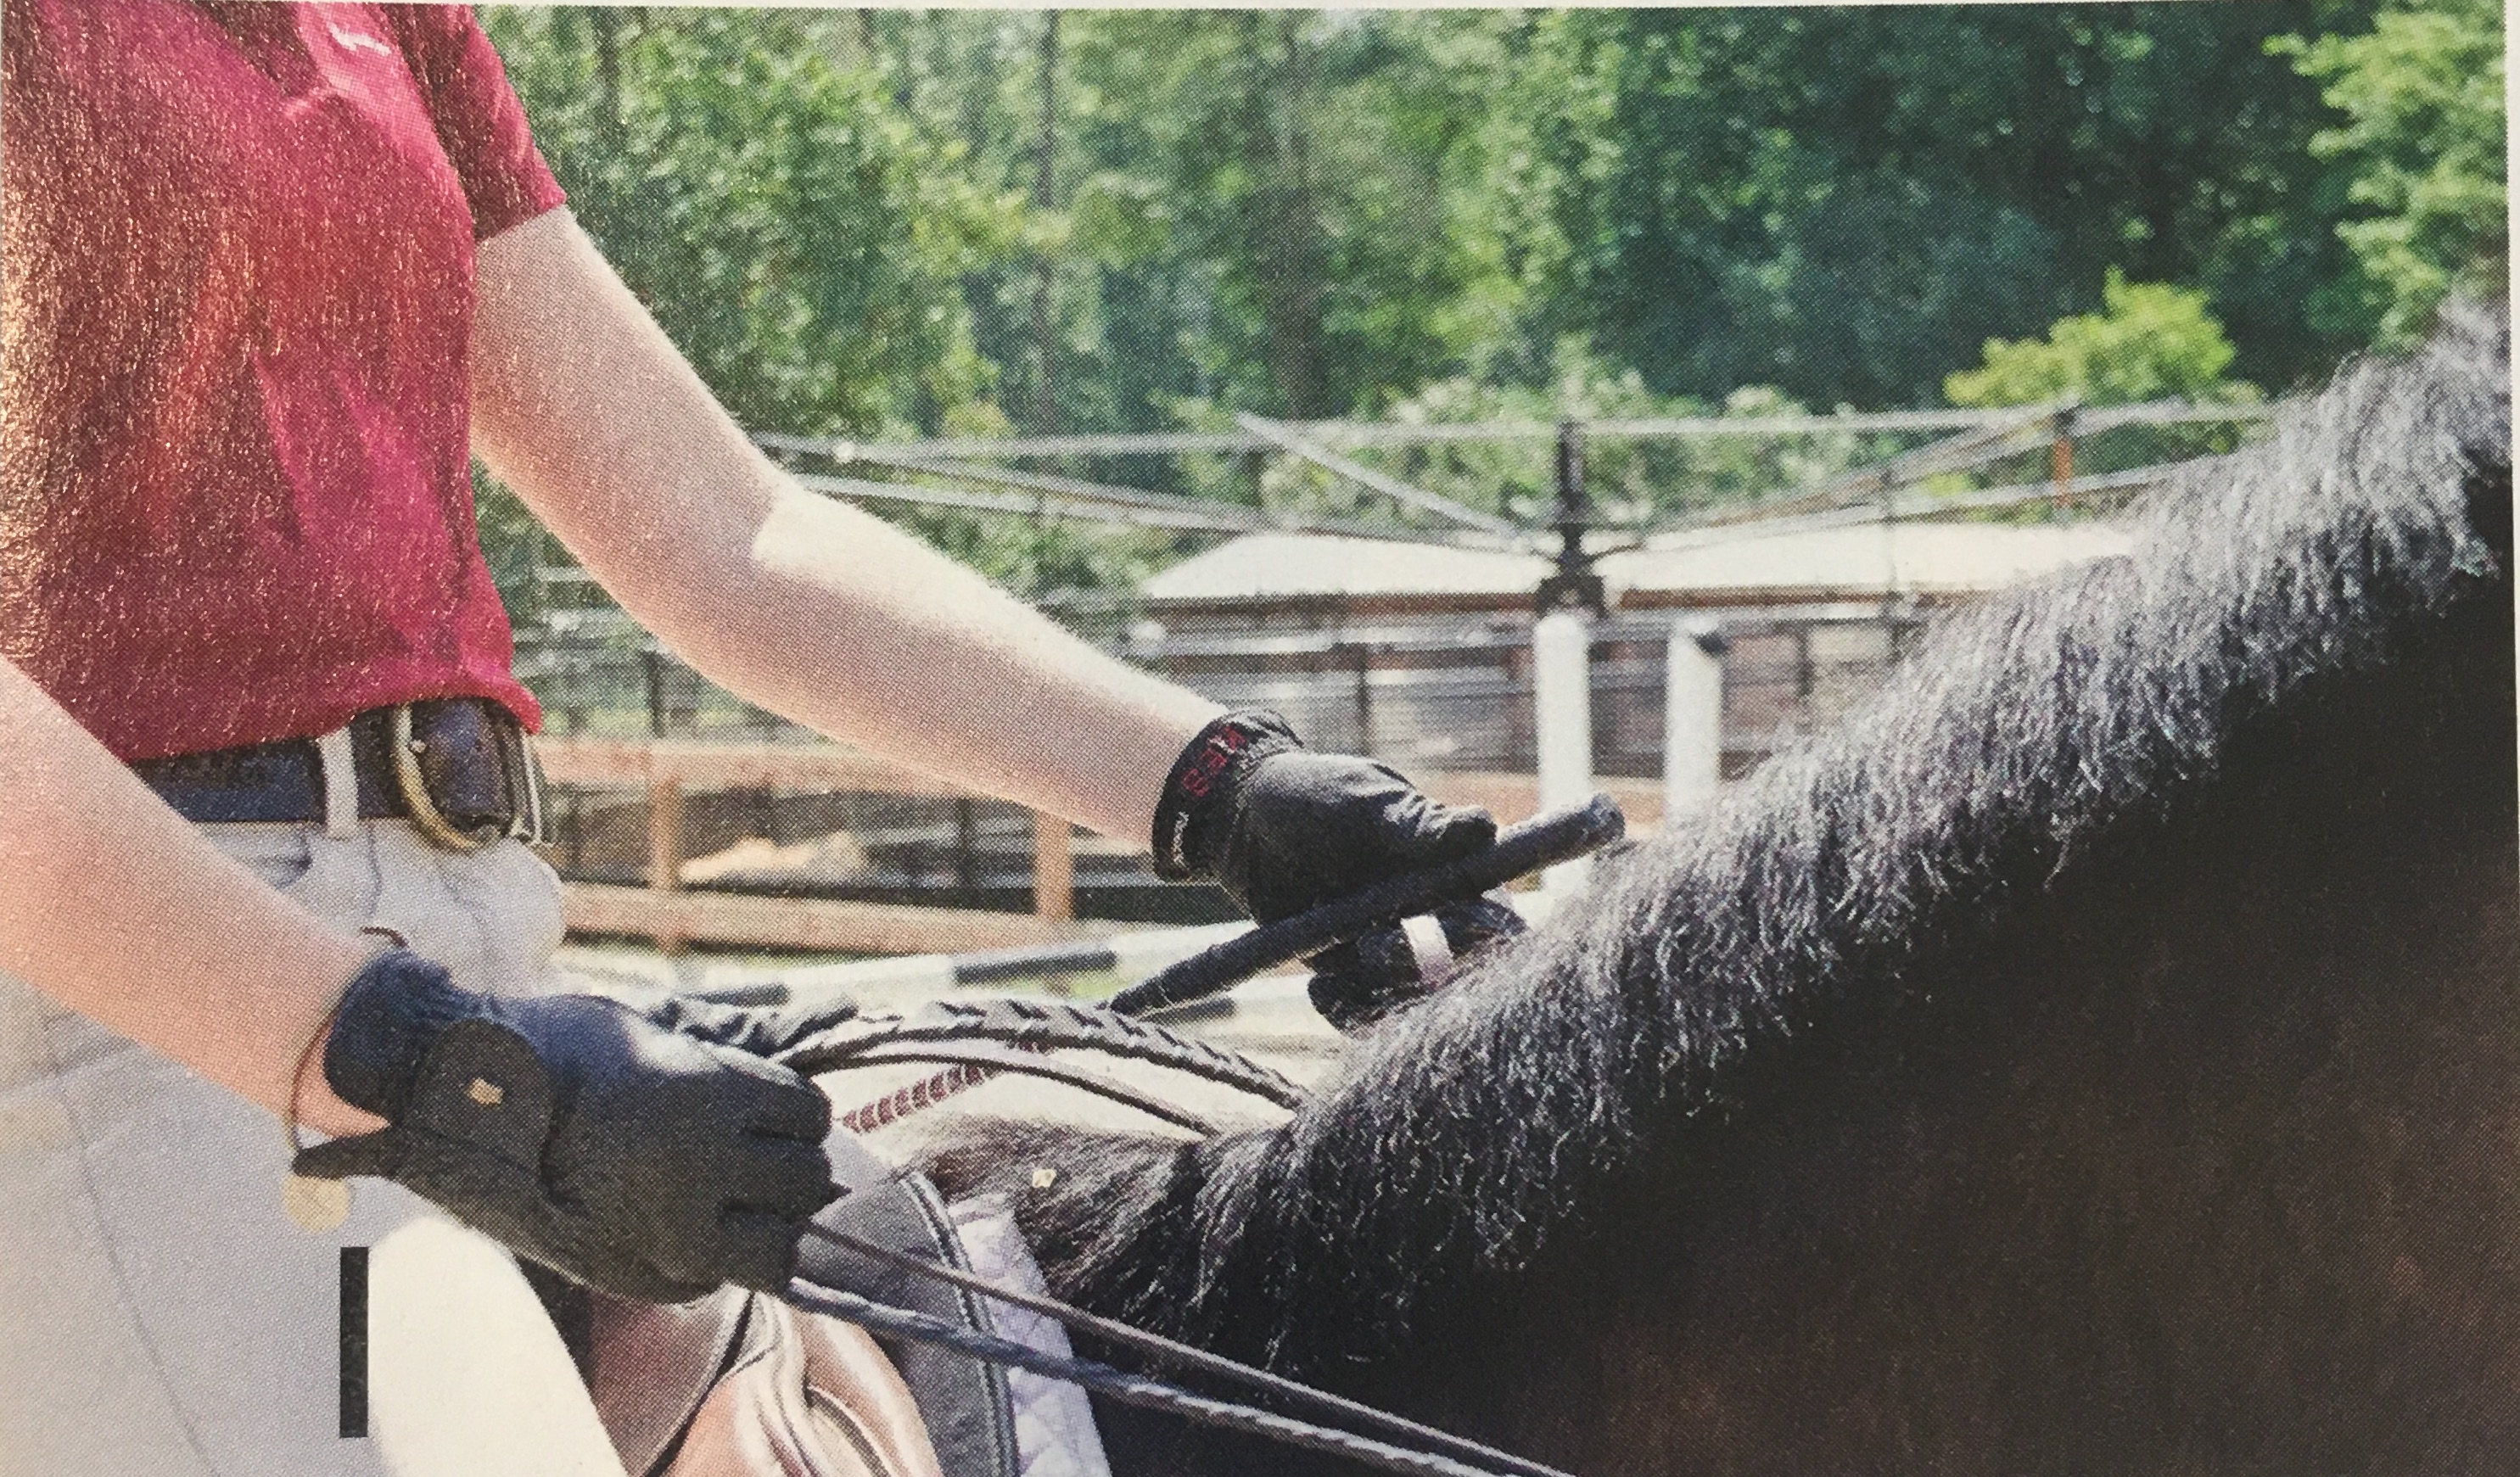
© Juan Blas
As you walk around the ring, make turns and circles, never allowing either rein to touch your horse’s neck. Then do the same thing at the trot and the canter. Horses don’t gesture their heads in the trot, but they do in the canter, once with every stride. Focus on following that gesture with your hands, staying relaxed and elastic in your shoulders and elbows. Ask your ground person to watch the reins as you ride and let you know if they sag or snap.
When you go back to riding with your hands in the correct position (4–5 inches apart), remind yourself to continue following the motion with your arms.
Problem: Clutchy or too-strong hands. Riders often pull too hard on their horses’ mouths because of nerves (for example, from a fear of being run away with), lack of balance (using the reins for balance instead of the legs and seat) or an uneducated leg (more on that later). Most horses react by leaning their weight onto the bit. And a 1,200-pound horse will win that pulling match every time.
Fix 2: To teach yourself to ride with more sympathetic hands, try holding your reins backward in your fists, the way people hold the reins of driving horses. Instead of threading the reins between your third and fourth fingers and up out of the tops of your fists, thread them first between your thumbs and forefingers, then down through your fists. You have less strength holding your reins this way, so you’re not as susceptible to getting into a pulling match with your horse. Try riding in all three gaits like this. If you’re worried about dropping the reins, tie a knot in them just below the point where you hold them.
You can practice this and Fix 1 at the same time.
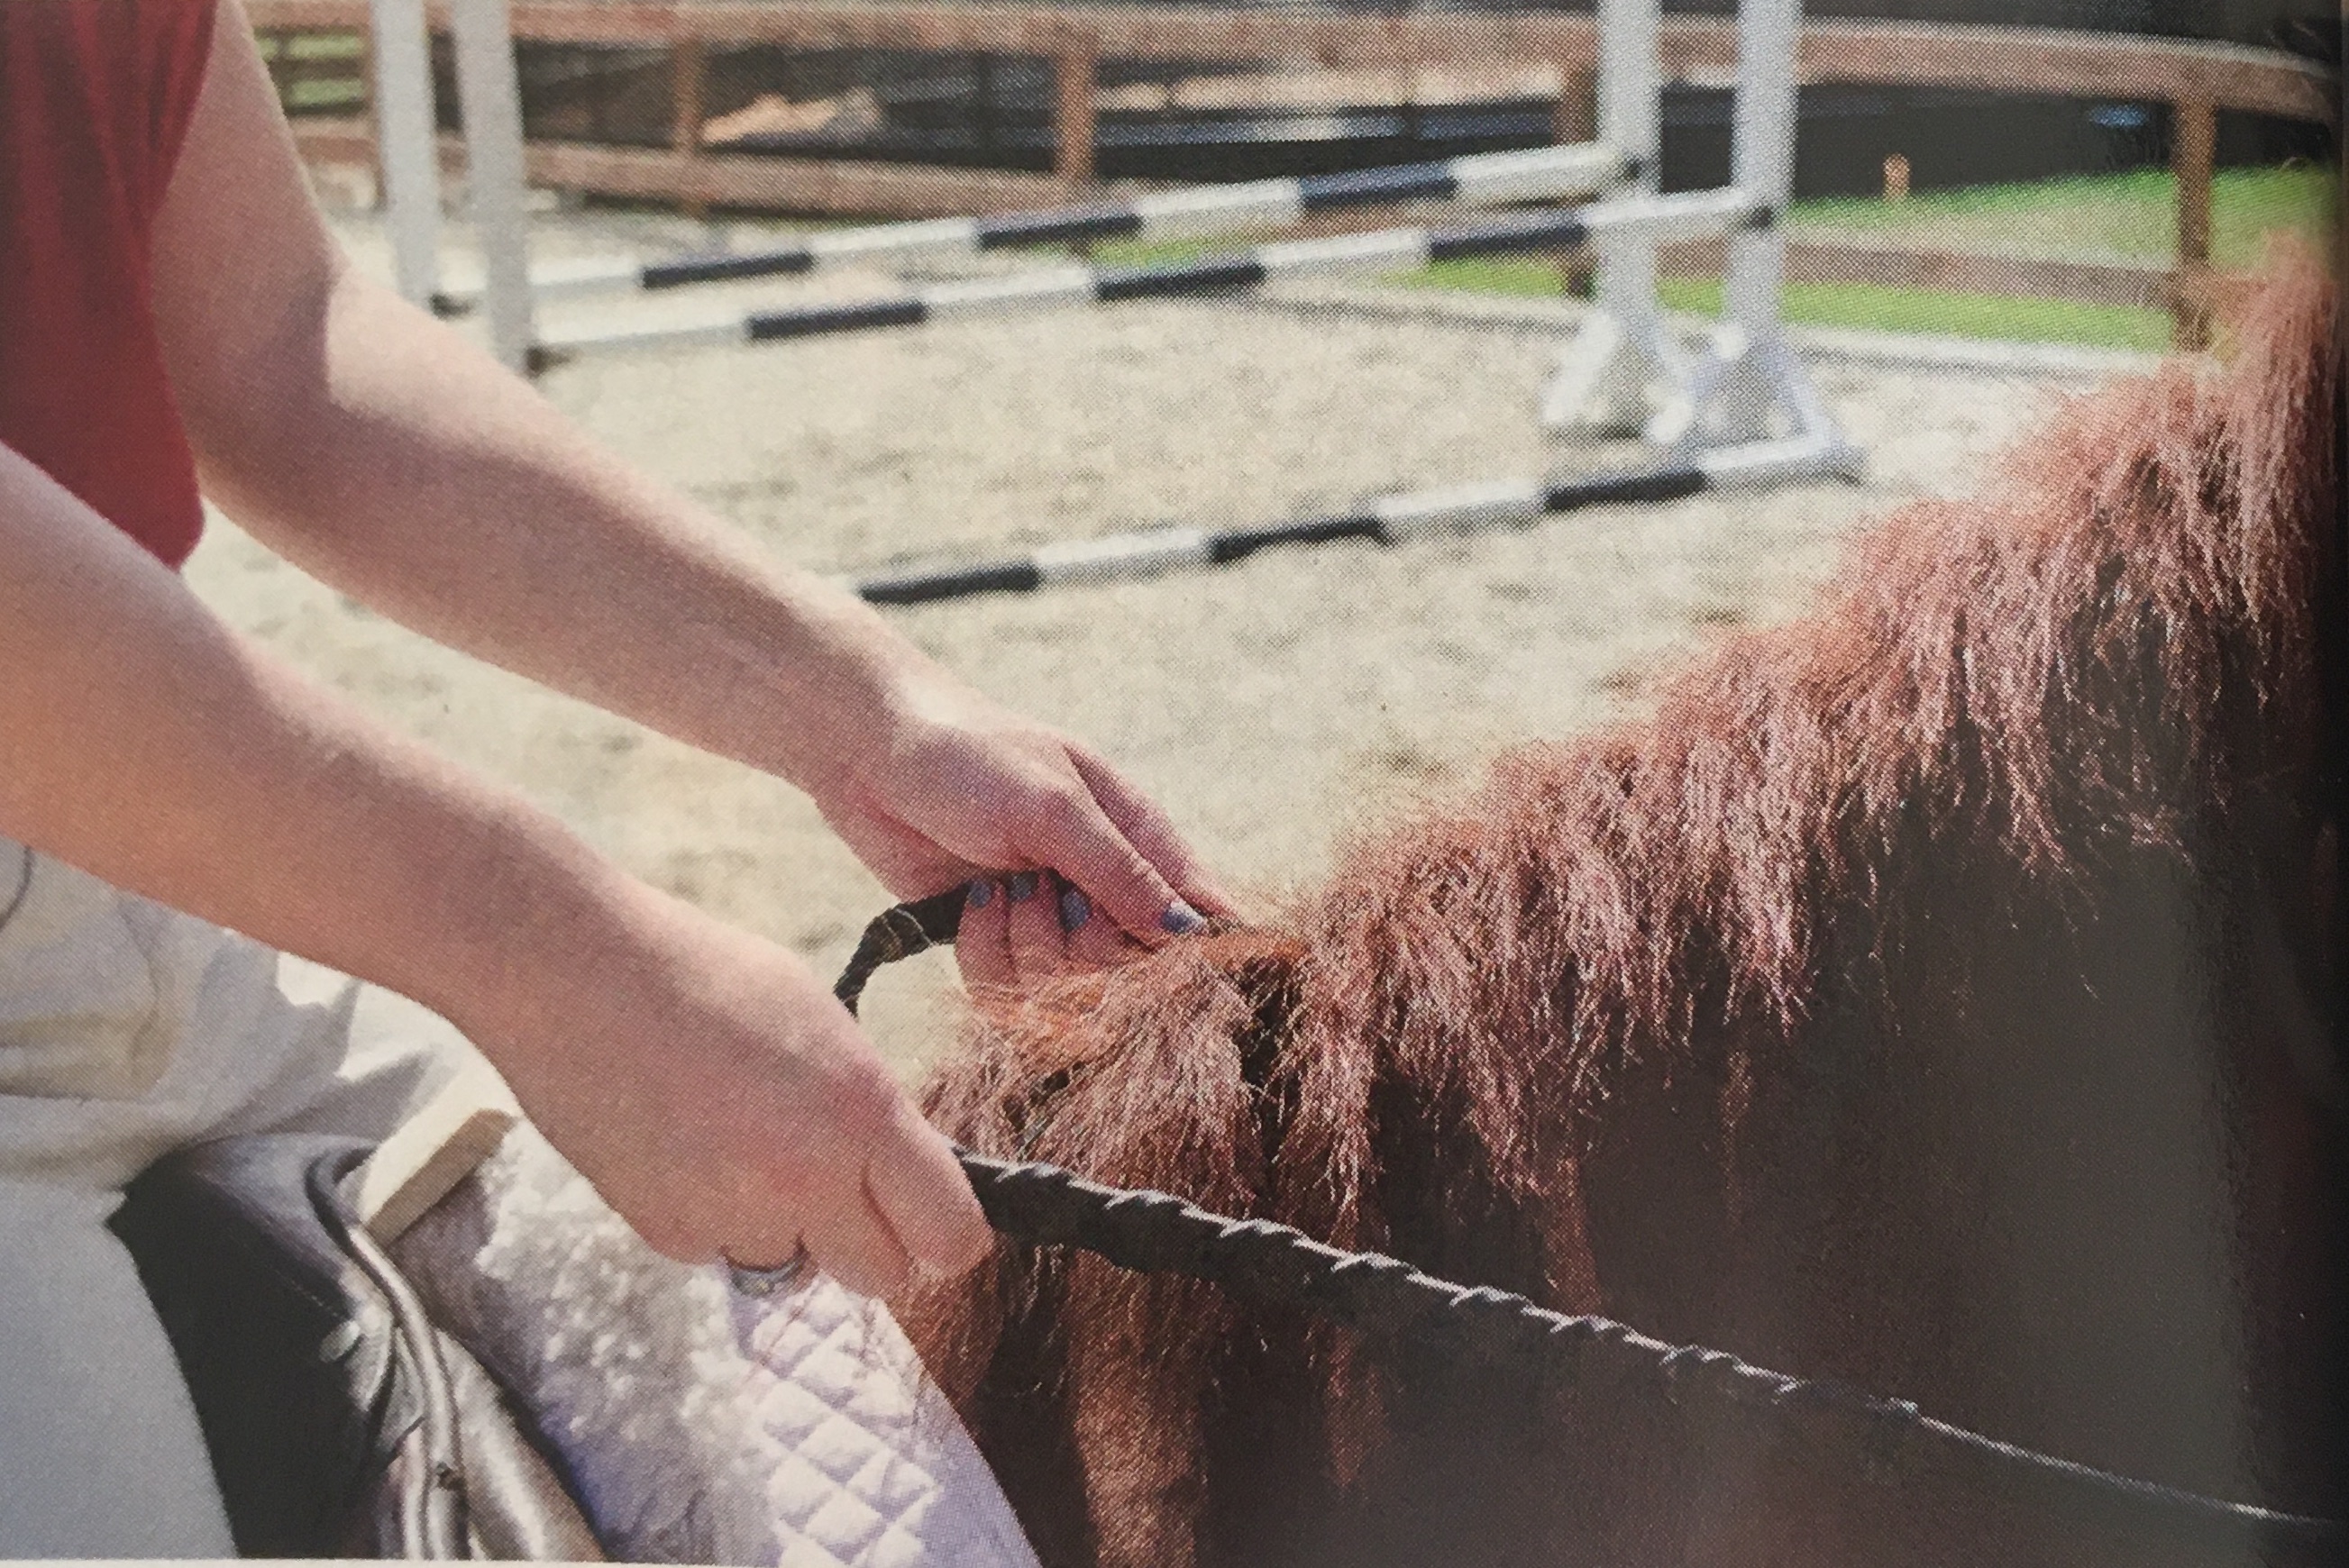
© Juan Blas
Problem: Busy/bouncy hands. Any excess hand movement can distract, confuse and hurt your horse.
Fix 3: Practice riding while holding a bat (very short whip) horizontally with one end pressed against the palm of each hand. This will keep your hands steady and parallel to your horse’s neck.
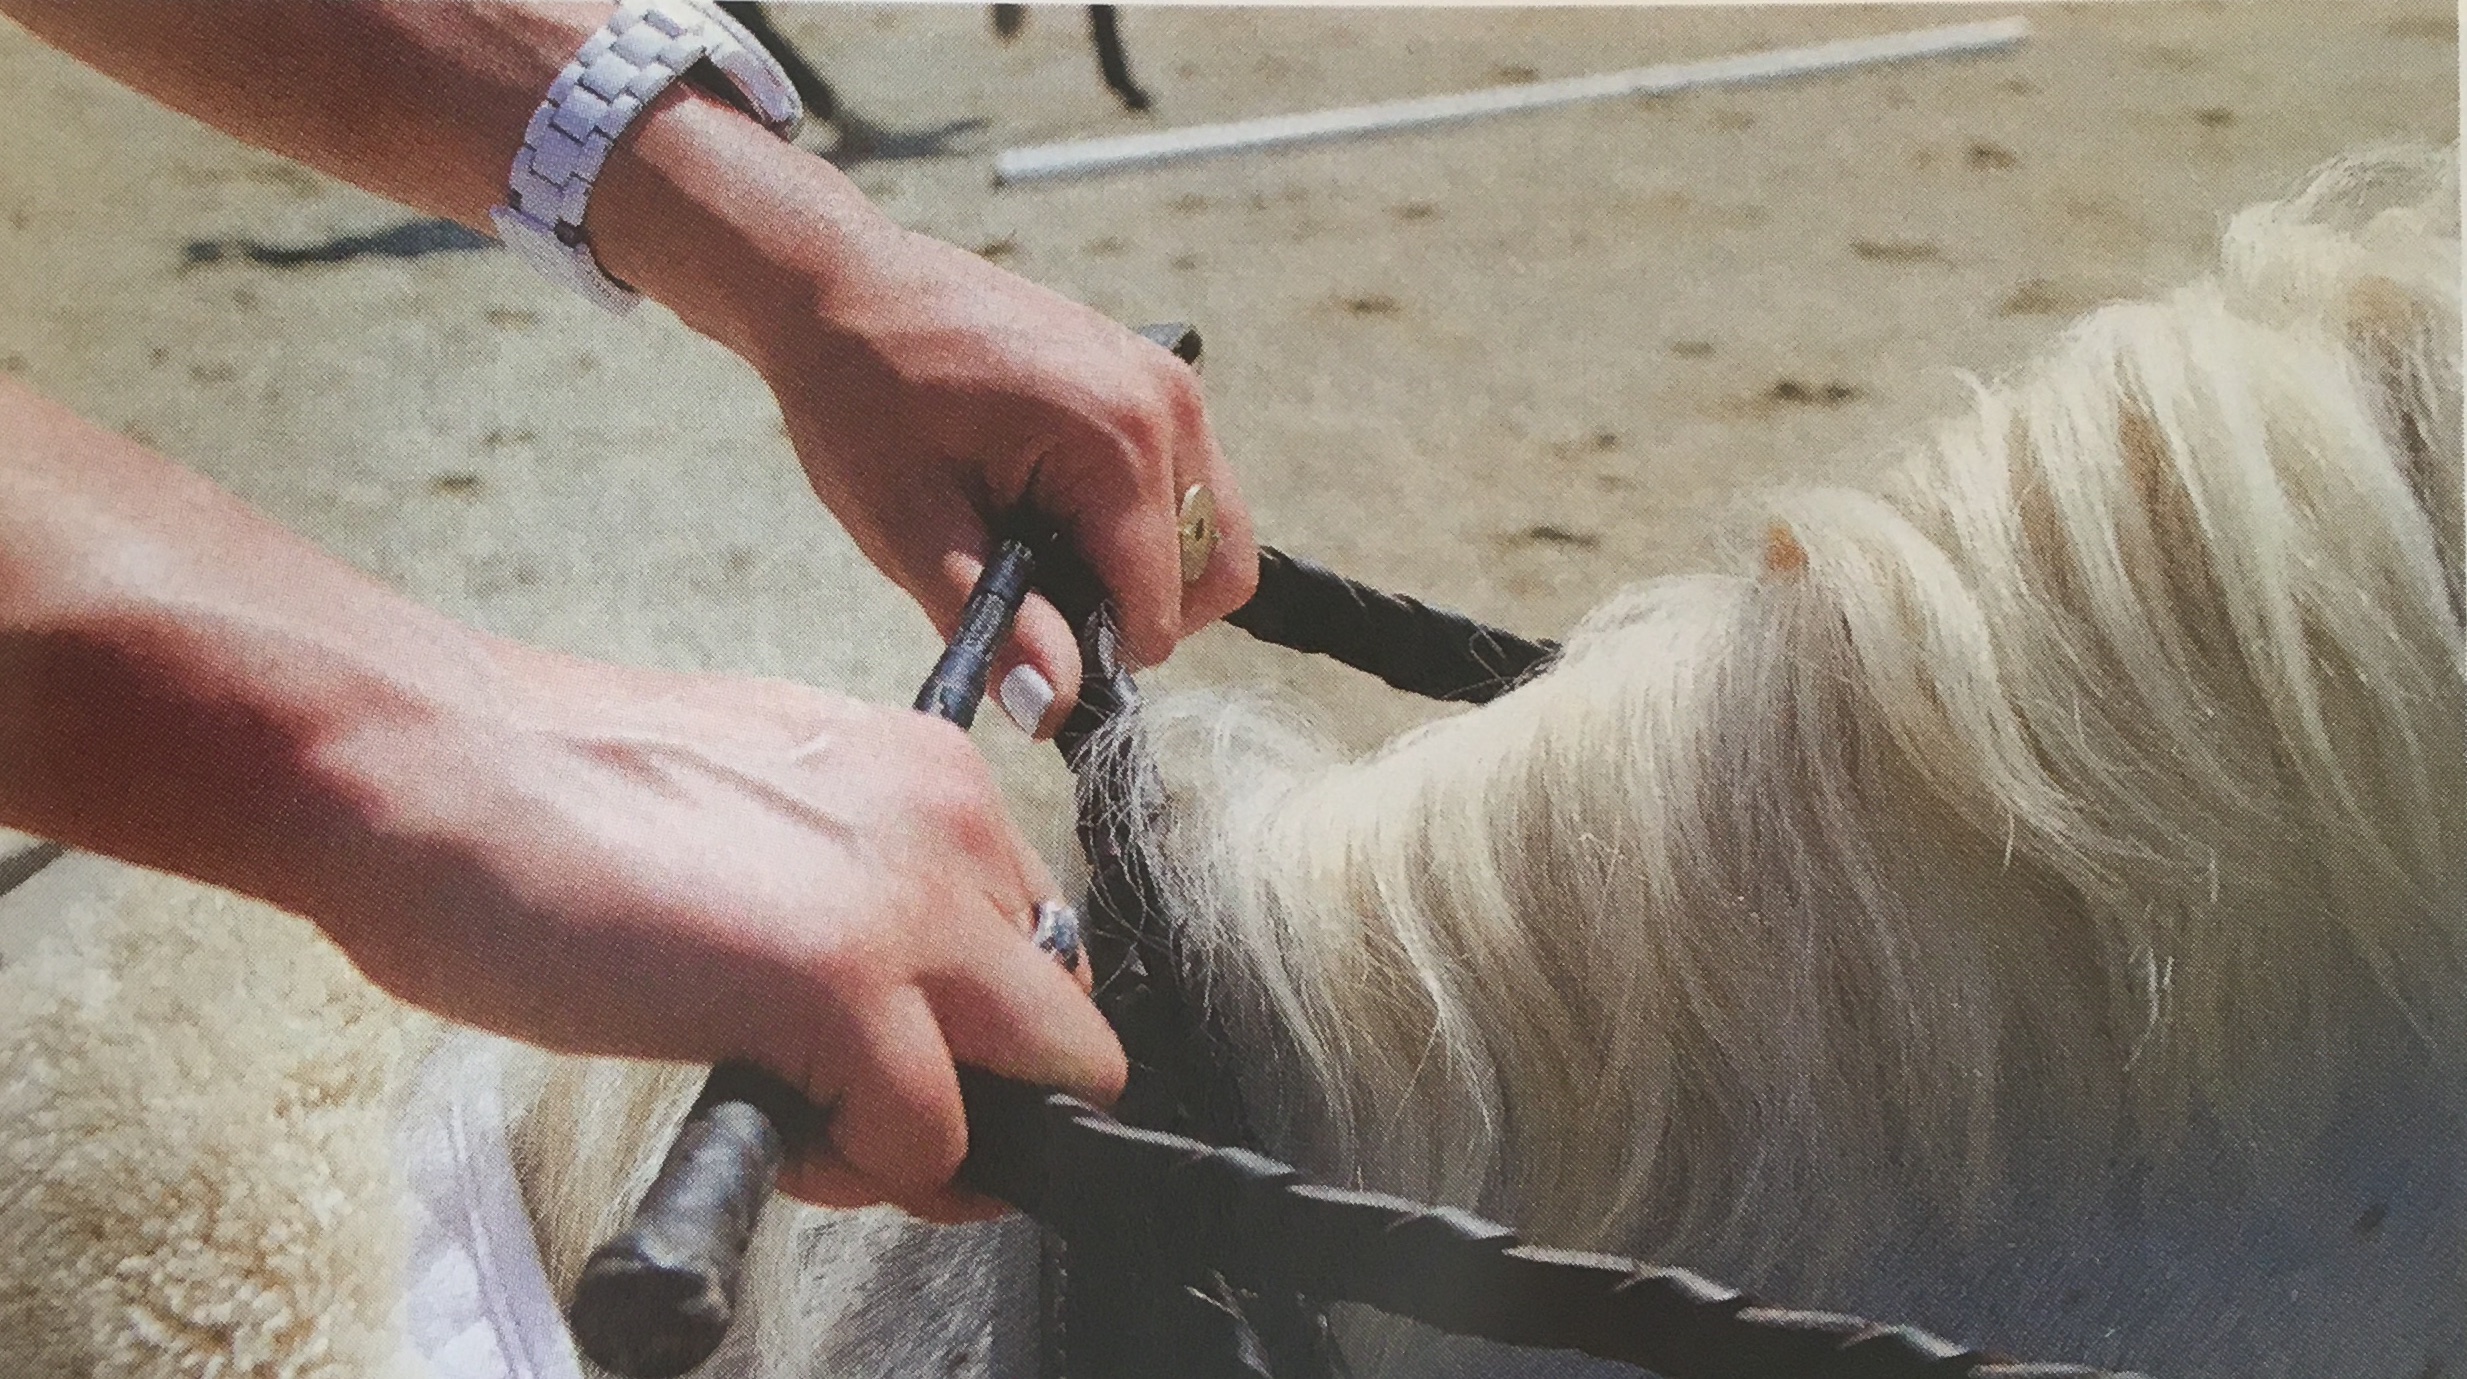
© Juan Blas
Problem: “Broken” wrist. Bending your wrists in either direction inhibits your ability to give smooth, direct rein aids and follow your horse’s motion fluidly.
Fix 4: Place a tongue depressor along the inside of your wrist, parallel to your forearm, with the end against the palm of your hand. Affix it there with tape or a bandage. Alternatively, buy a wrist bandage/ splint at the pharmacy or a rollerblading wrist guard. Practice riding with it until you’ve retrained your wrist to stay straight.
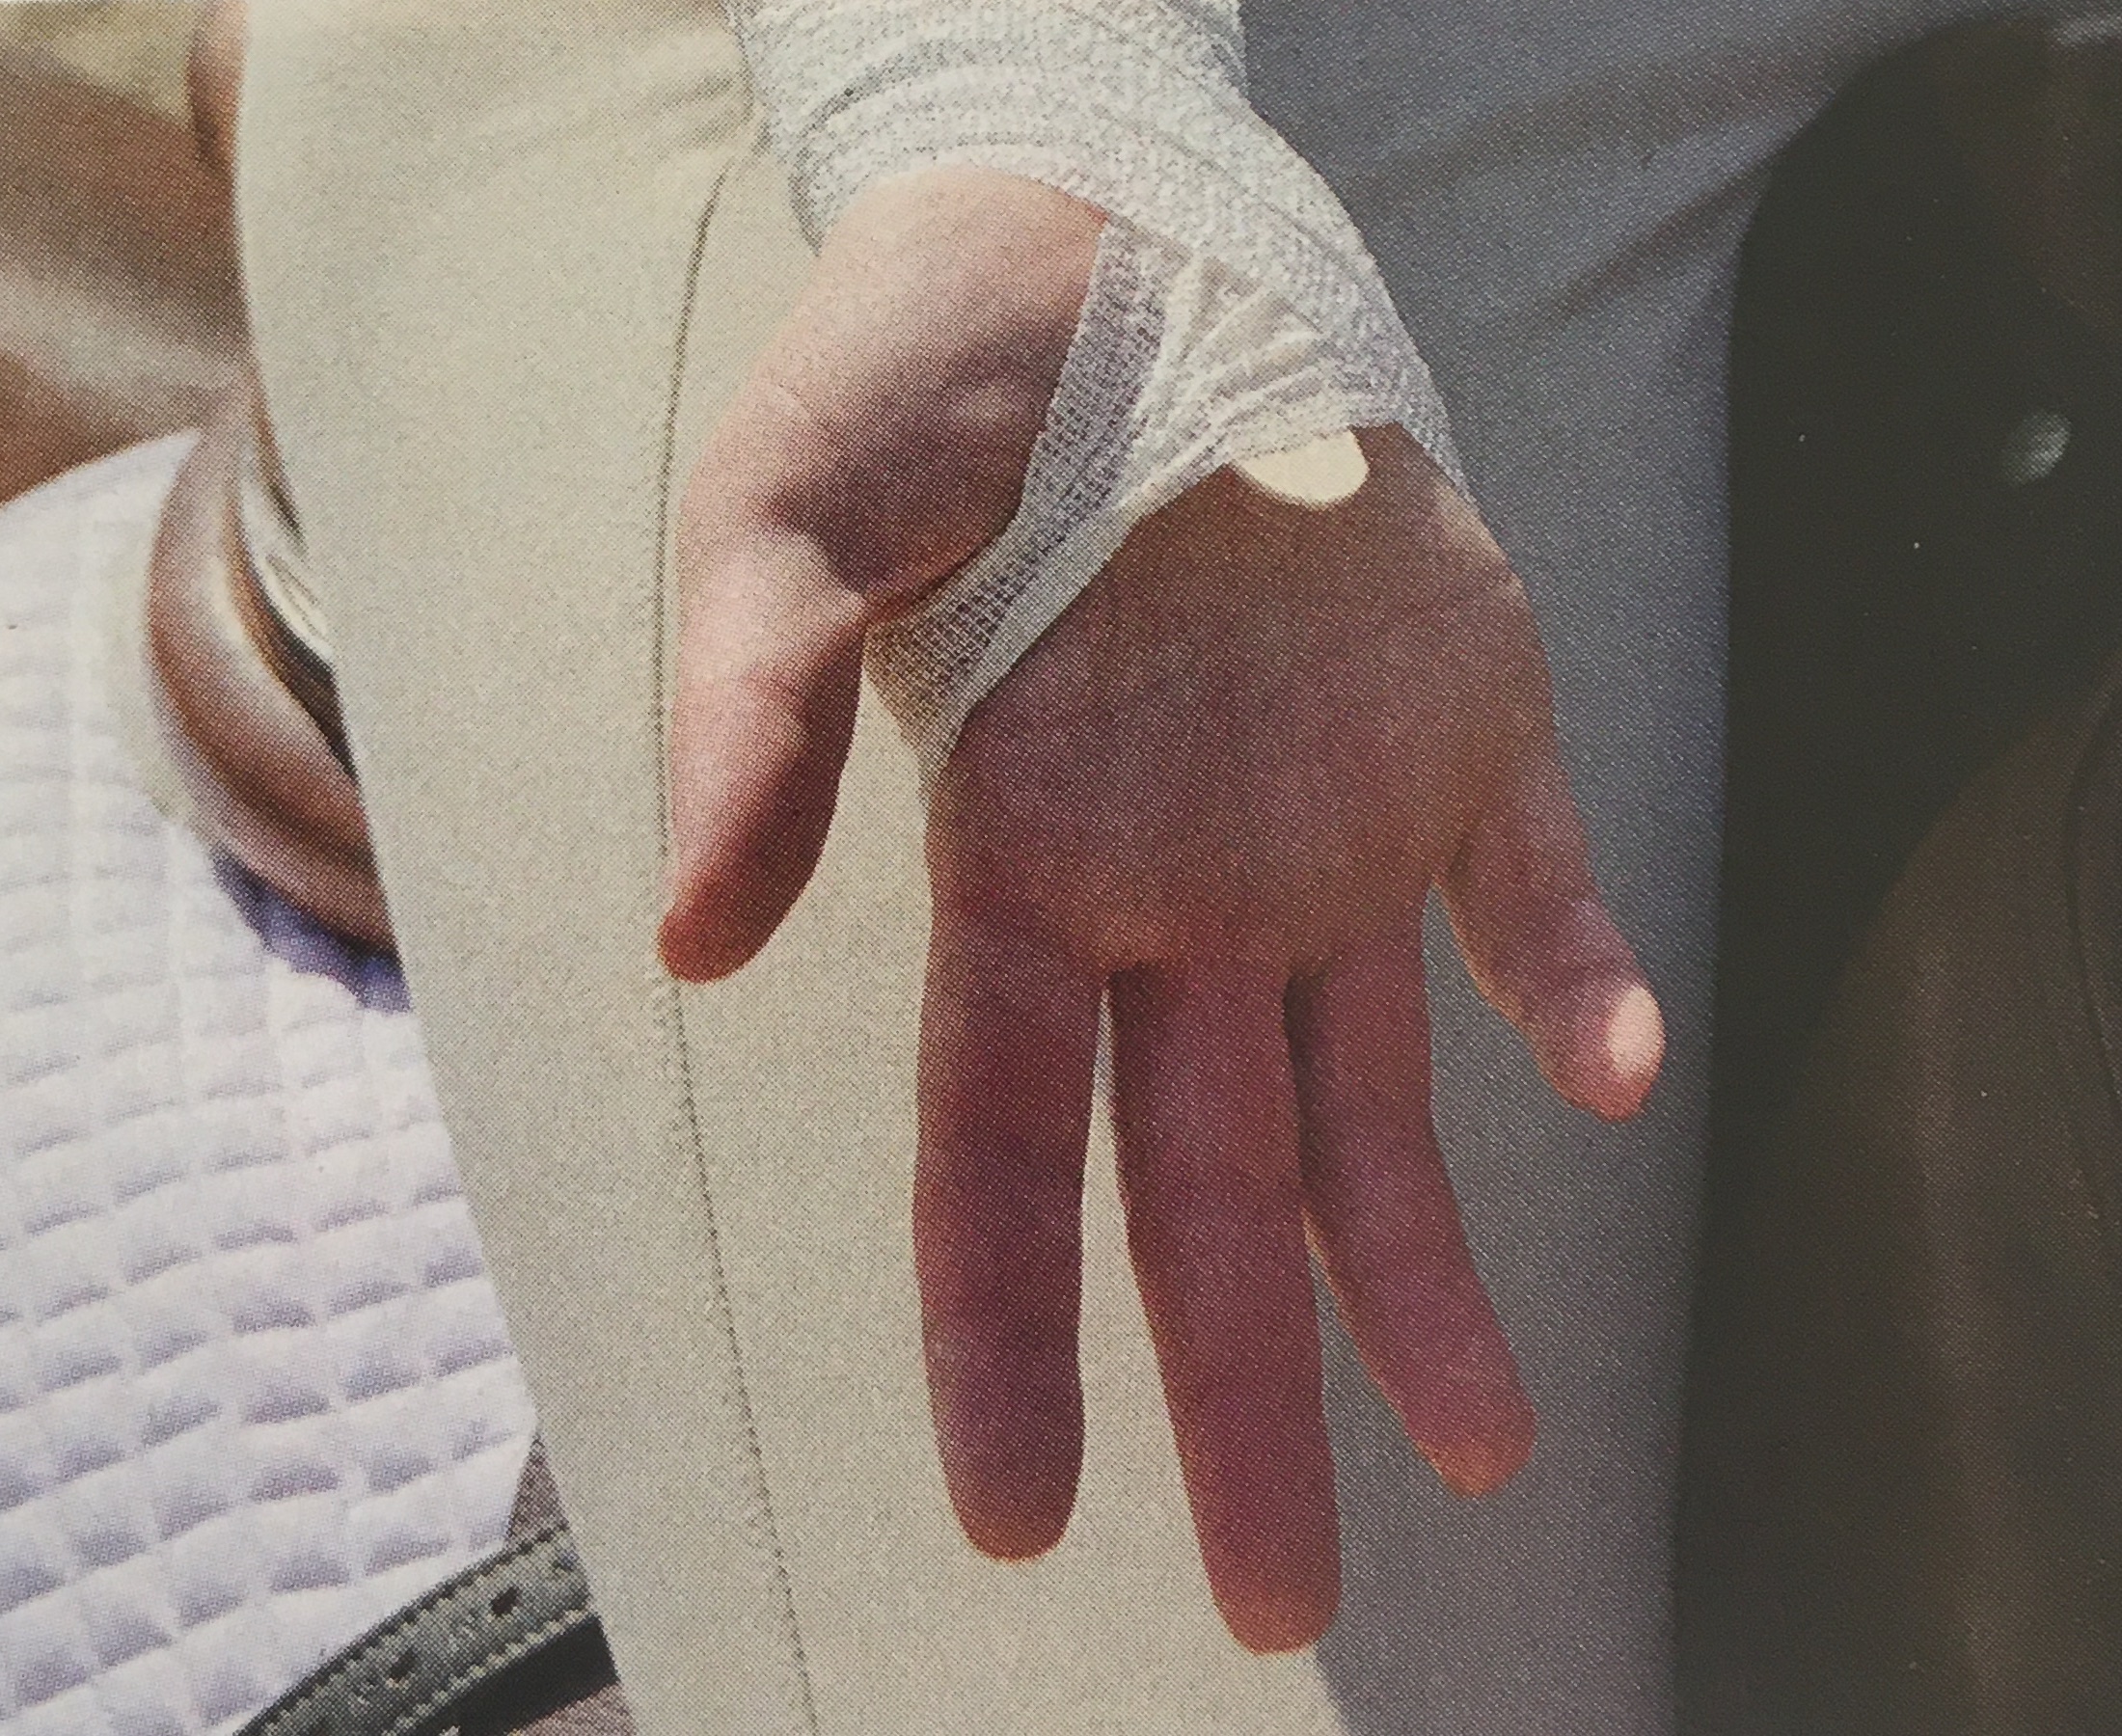
© Juan Blas
Problem: Too-long reins. This prevents you from maintaining a consistent contact with your horse and thus creates gaps in your communication.
Fix 5: Wrap a strip of tape around each rein in two places, marking either end of the section where your hands should be, beyond which your reins would become too long or too short.
© Juan Blas
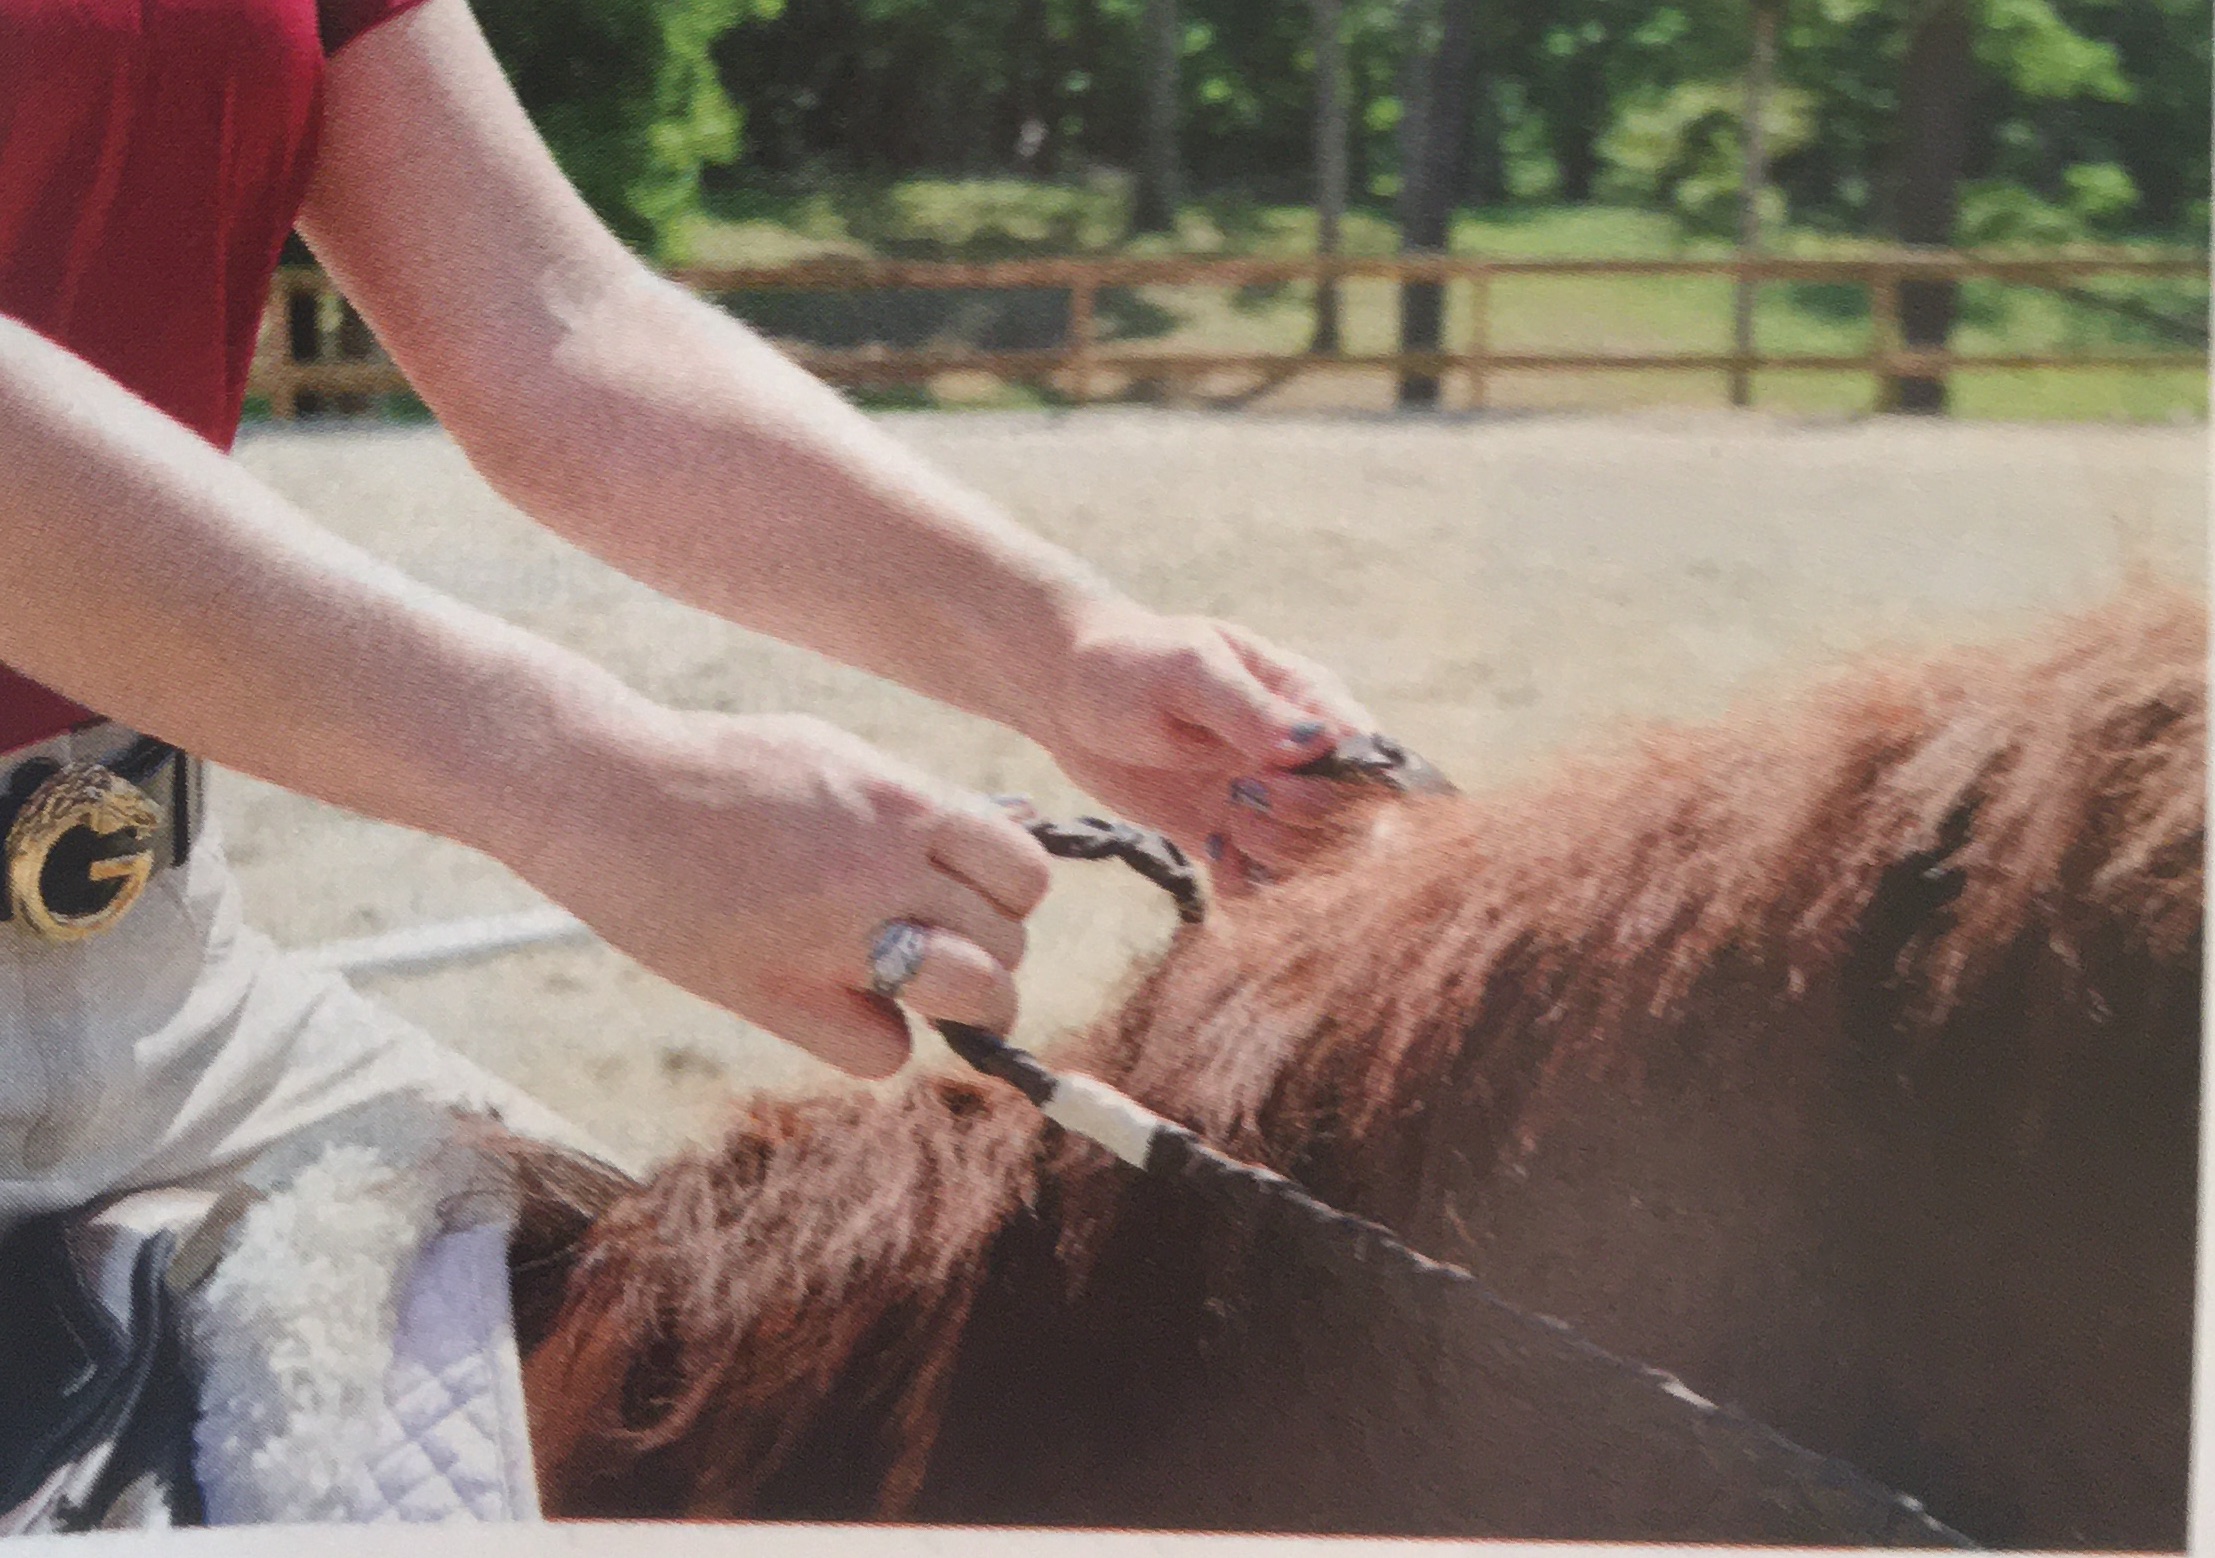
Problem: Too-wide hands. When viewed from above, your forearm and rein should create a straight line from your elbow through your wrist to your horse’s mouth. If you habitually carry your hands farther than 4 or 5 inches apart, you’ll break that straight line and reduce the effectiveness of your direct rein aids.
Fix 6: Practice riding while holding a bit—something with rings but no shanks, such as a dee-ring or eggbutt snaffle—between your hands, with all of your fingers or just your pointer and middle finger wrapped around the rings. Don’t worry, it is possible to hold the bit and the reins at the same time.
© Juan Blas
Improve Your Legs
Developing a stable, educated leg is key to rider progress. By fine-tuning the placement and timing of your leg aids and teaching your horse to respond more promptly to them, you can reduce the need to apply the aid as hard or as often—and can achieve more accurate, polished performances.
Problem: Leg in front of or behind your body. Ideally, your leg should be positioned directly underneath your body. If it swings backward, your upper body will fall forward. If you do that enough, you’ll eventually fall off your horse! And because a leg aid applied behind the girth has other specific purposes, such as a cue to pick up the canter or to move your horse’s hindquarters sideways, you may unintentionally give him conflicting signals.
If your legs swing forward, your upper body will fall backward. Your legs also will come off your horse’s sides, which may make him worry about when they might return suddenly. Horses are much happier if they feel constant, light leg contact and don’t have to anticipate surprise aids. With your upper body behind the motion, you also may unconsciously tell your horse to slow down. Even on a hot, nervous horse, it’s important to always convey the message to move forward. Your backwardtipped upper body may have the opposite effect if your seat is pushing into the saddle, too. This creates a driving seat, which we will discuss in more detail later.
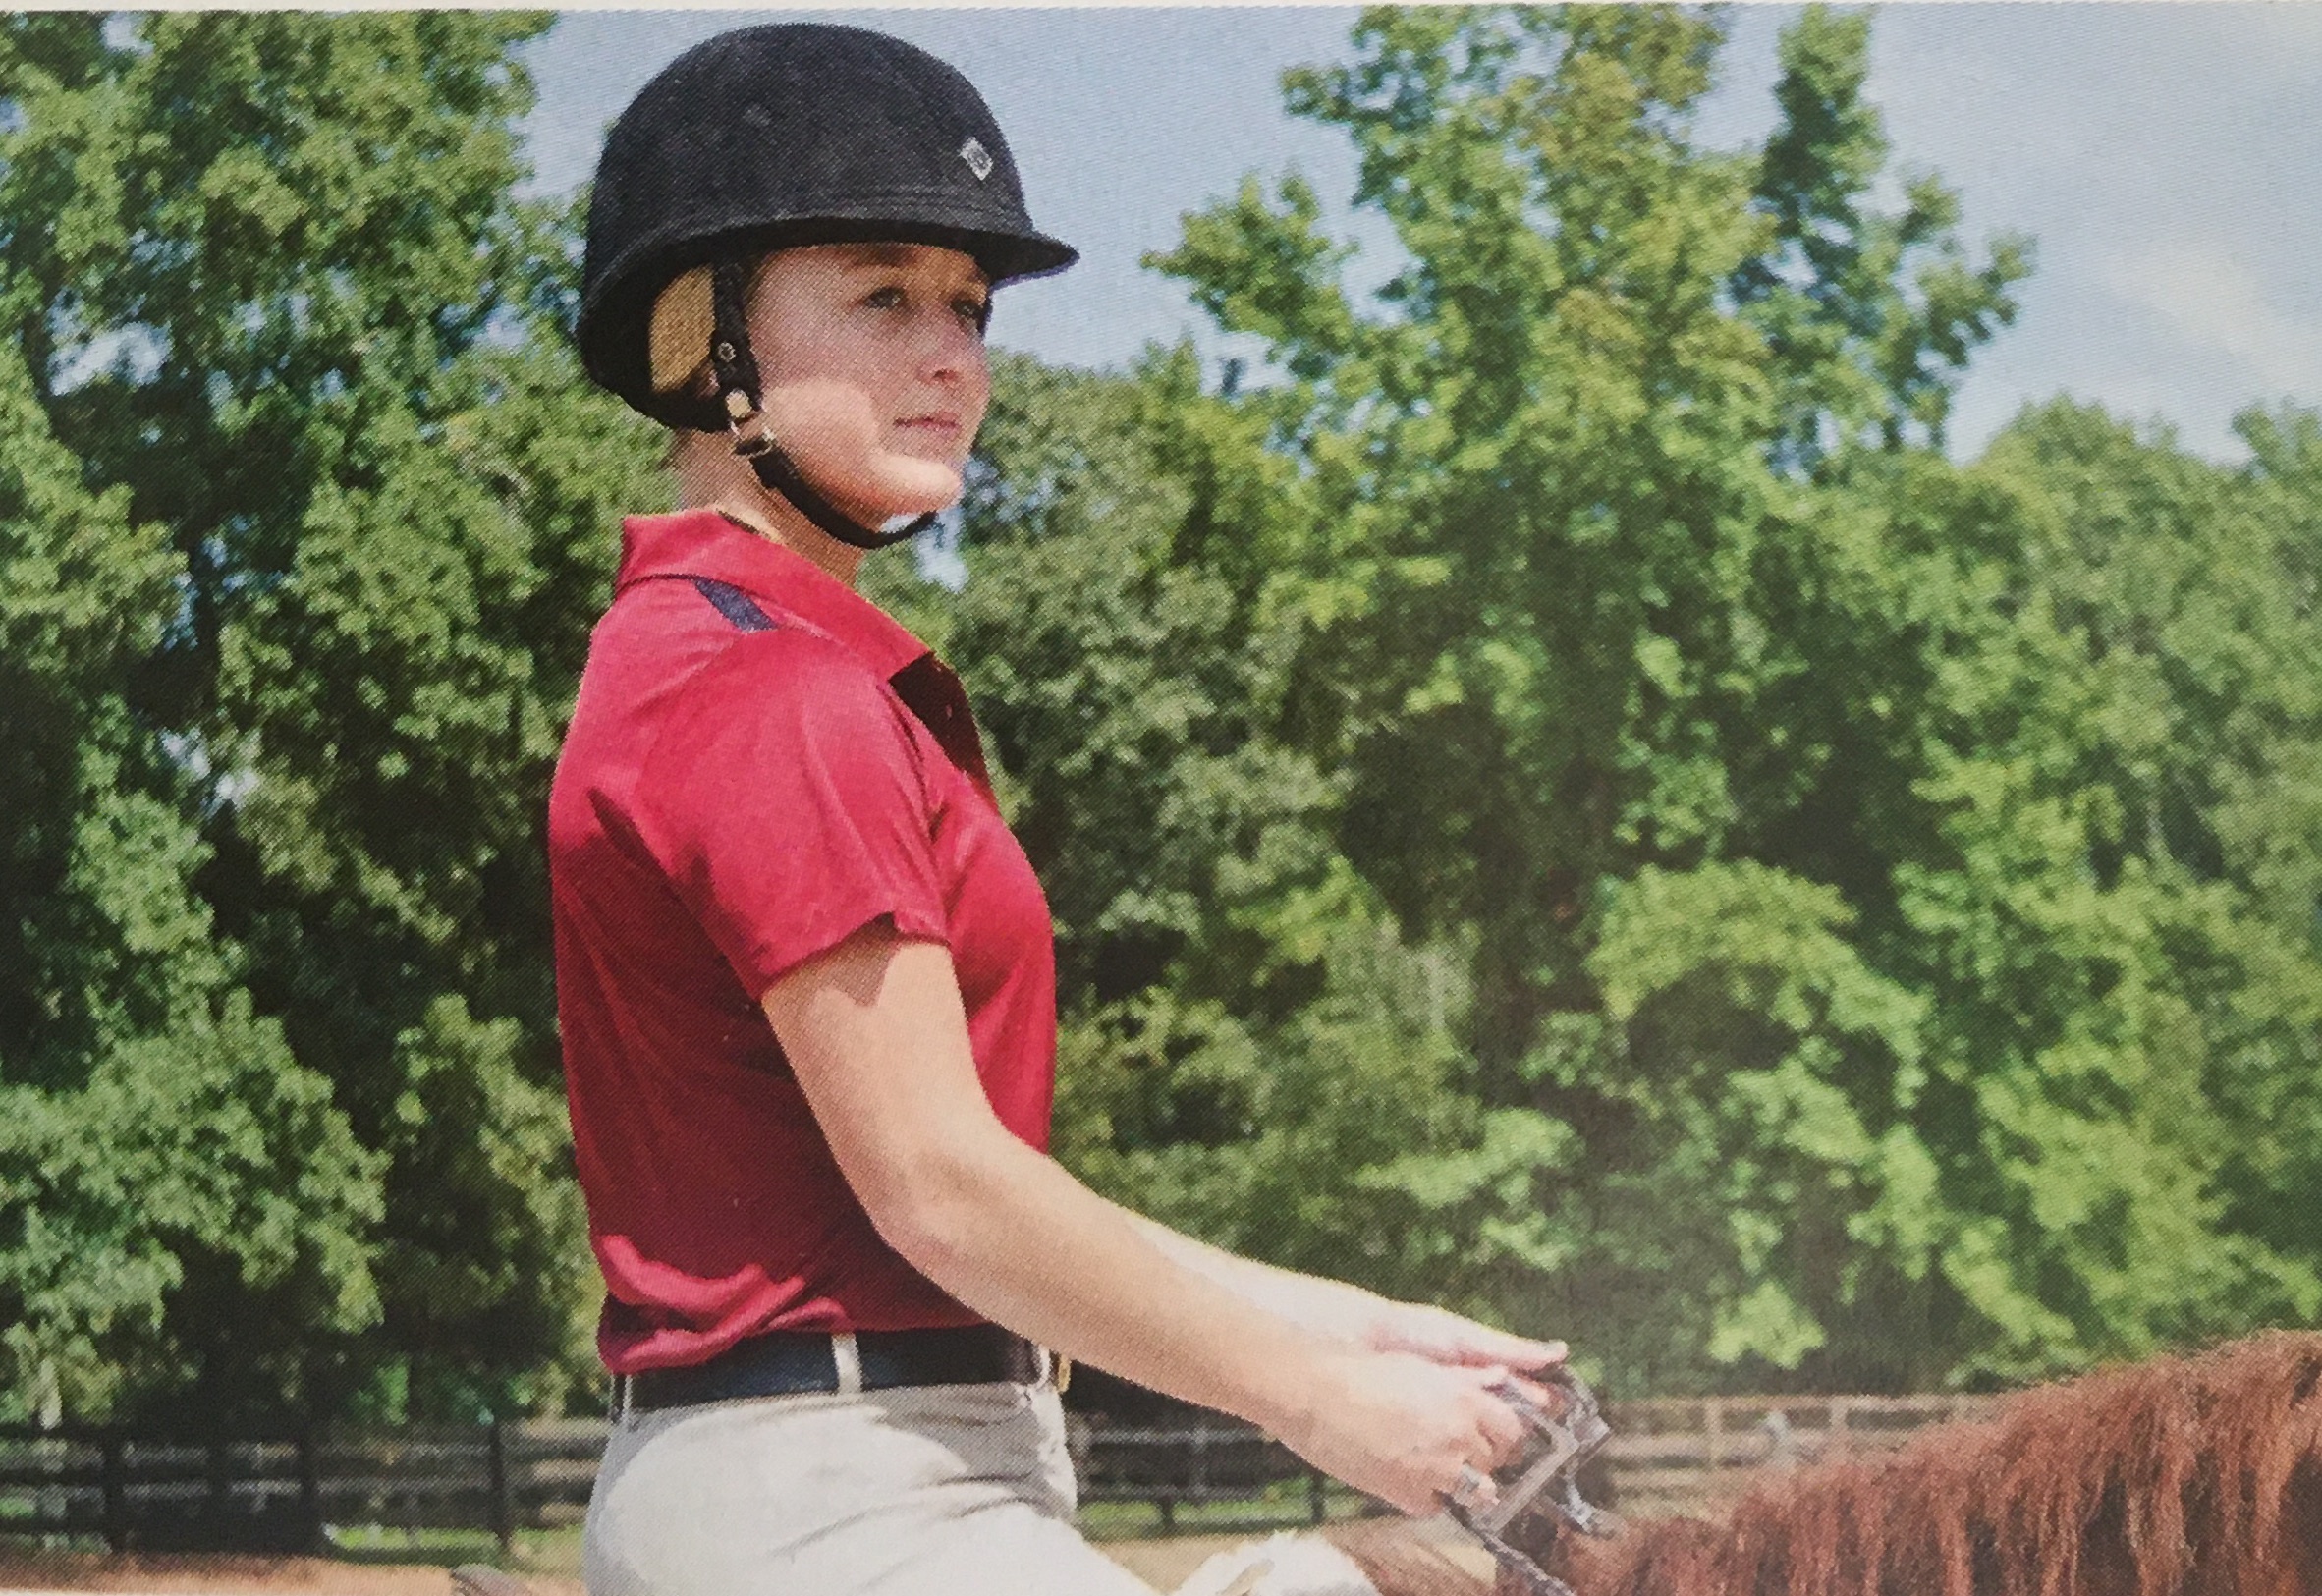
To influence your horse effectively, you cannot allow your upper body to tip in front of or behind the motion. The following three fixes will help you stabilize your legs in the correct position while simultaneously improving your upper-body control.
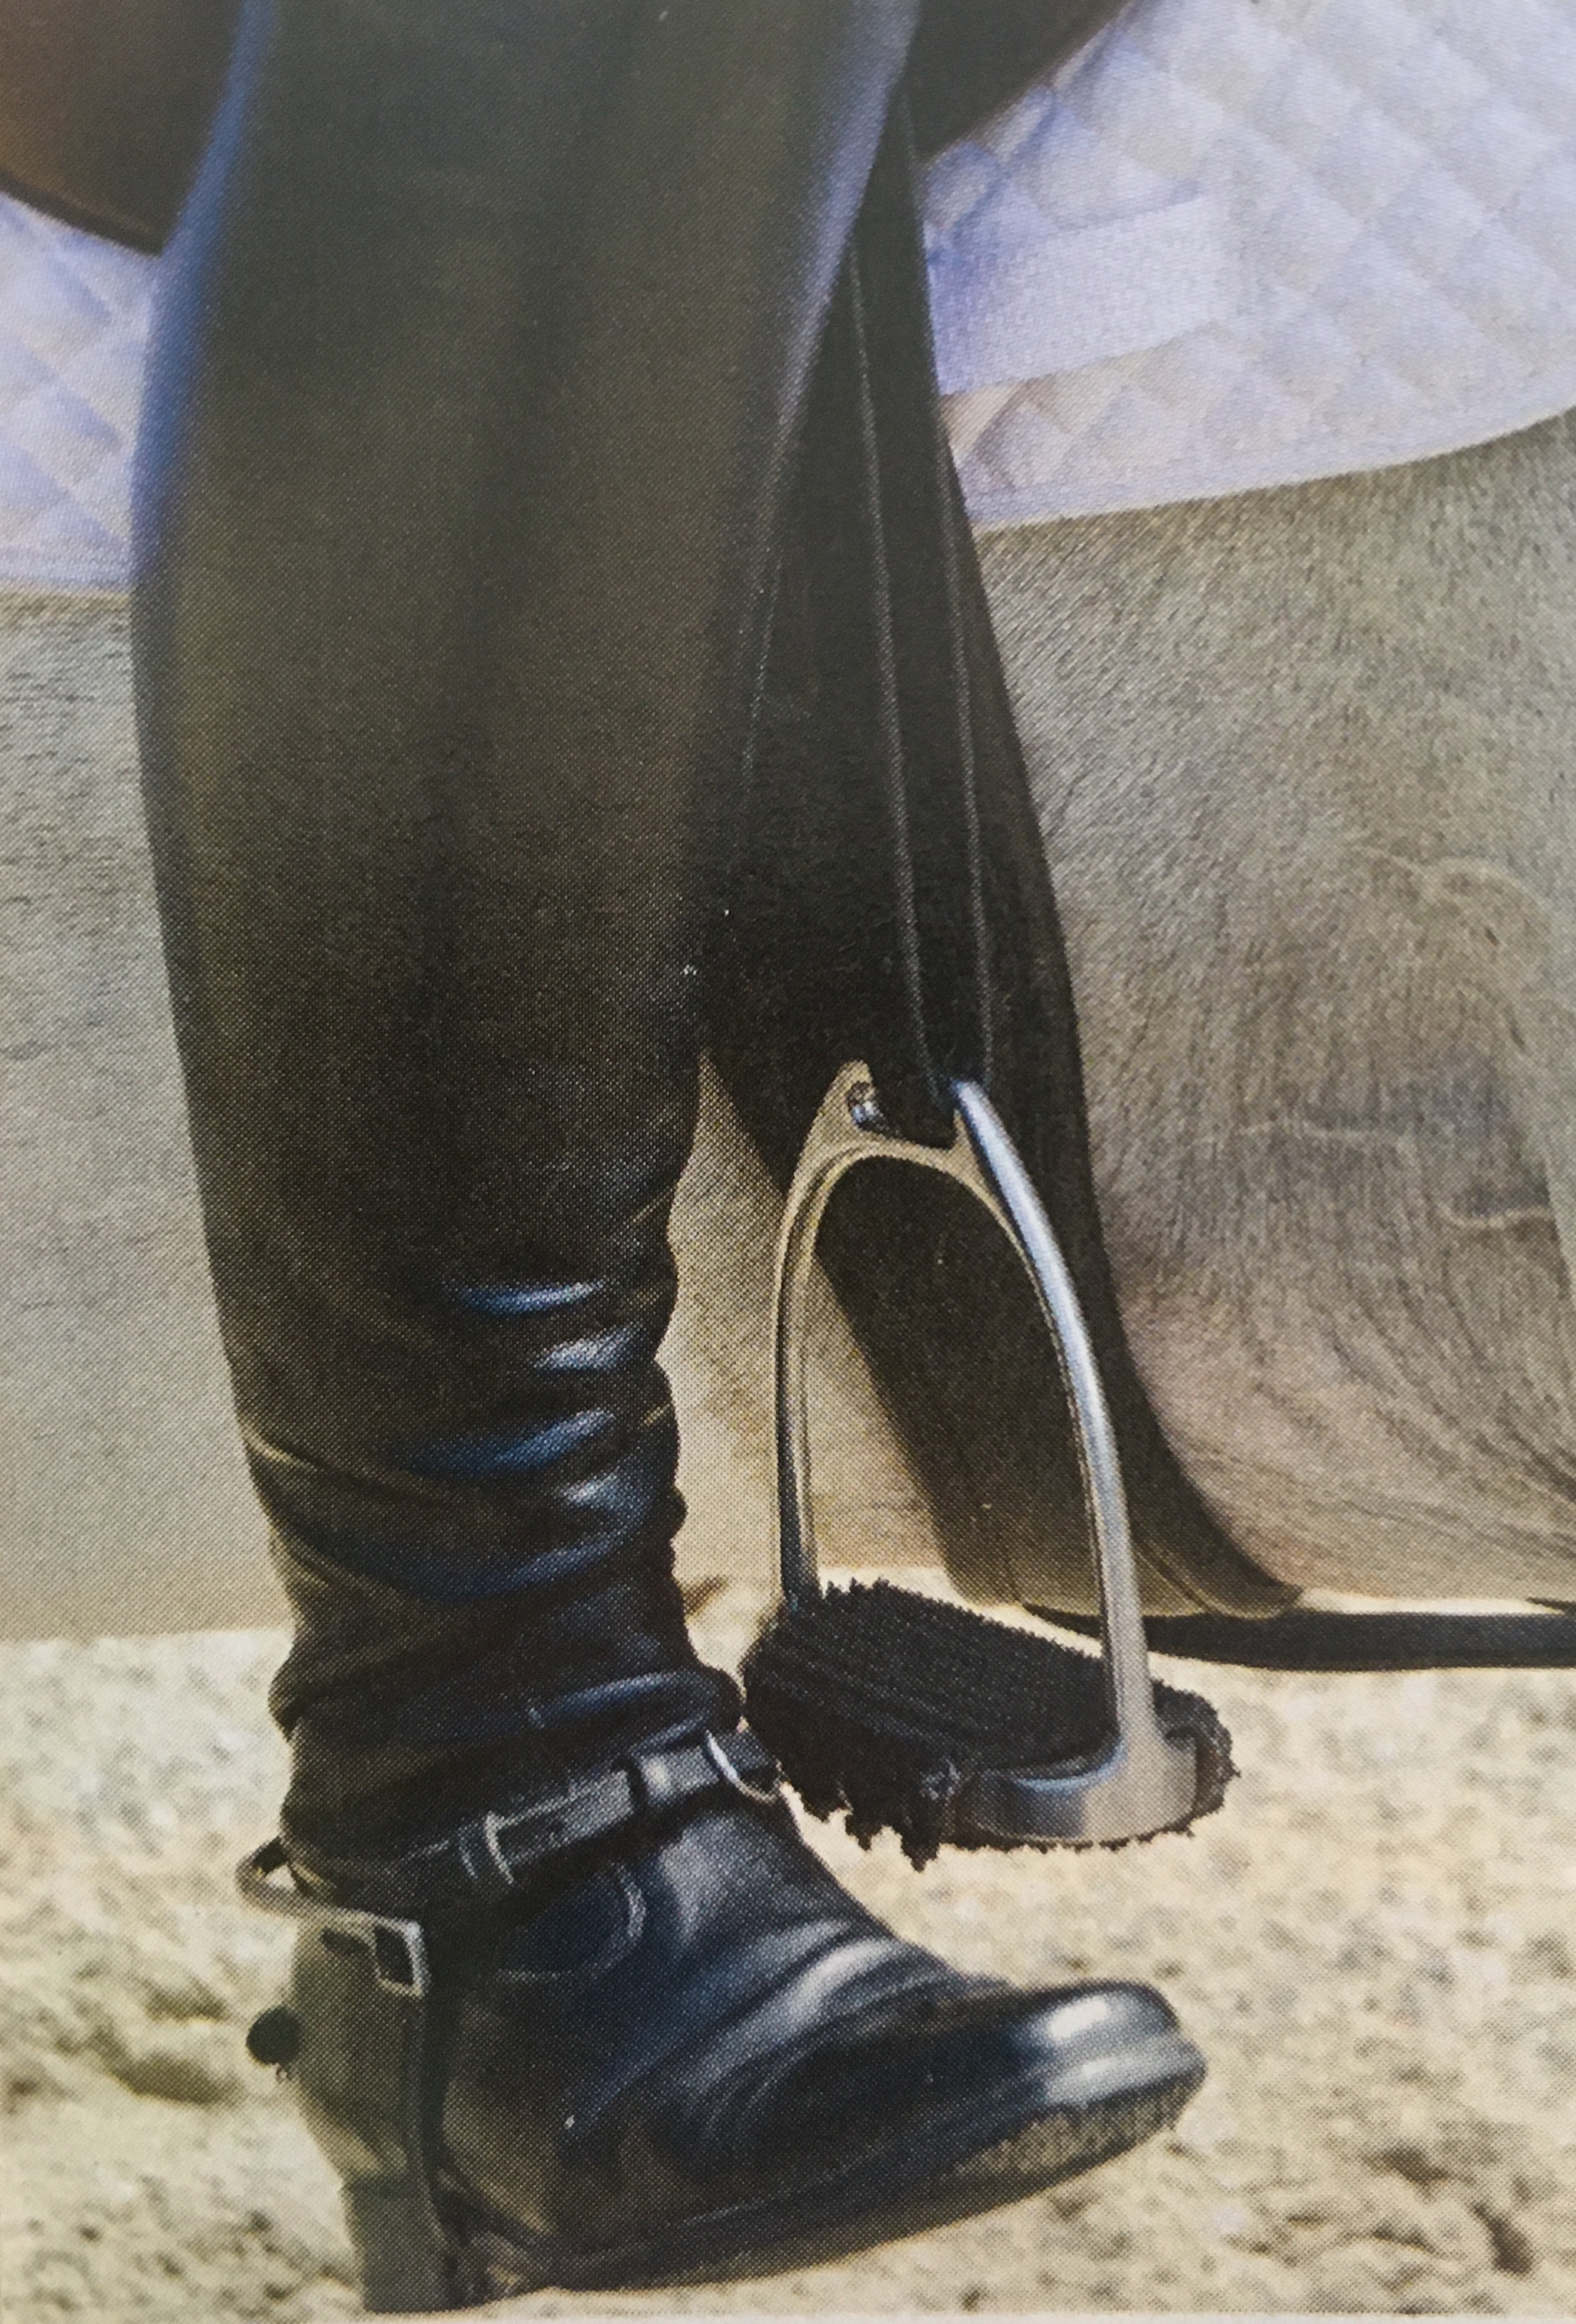
Fix 7: First check your stirrup length. In general, when your feet are out of the stirrups and your legs hang down your horse’s sides relaxed, the bars of the stirrups should hit your ankle. This ideal length may vary somewhat from person to person. If your leg tends to slip in front of you, your stirrups may be too long. If it slips backward, they may be too short. If you’re a Junior, remember that your stirrup length will change as you grow, so check it frequently.
© Juan Blas
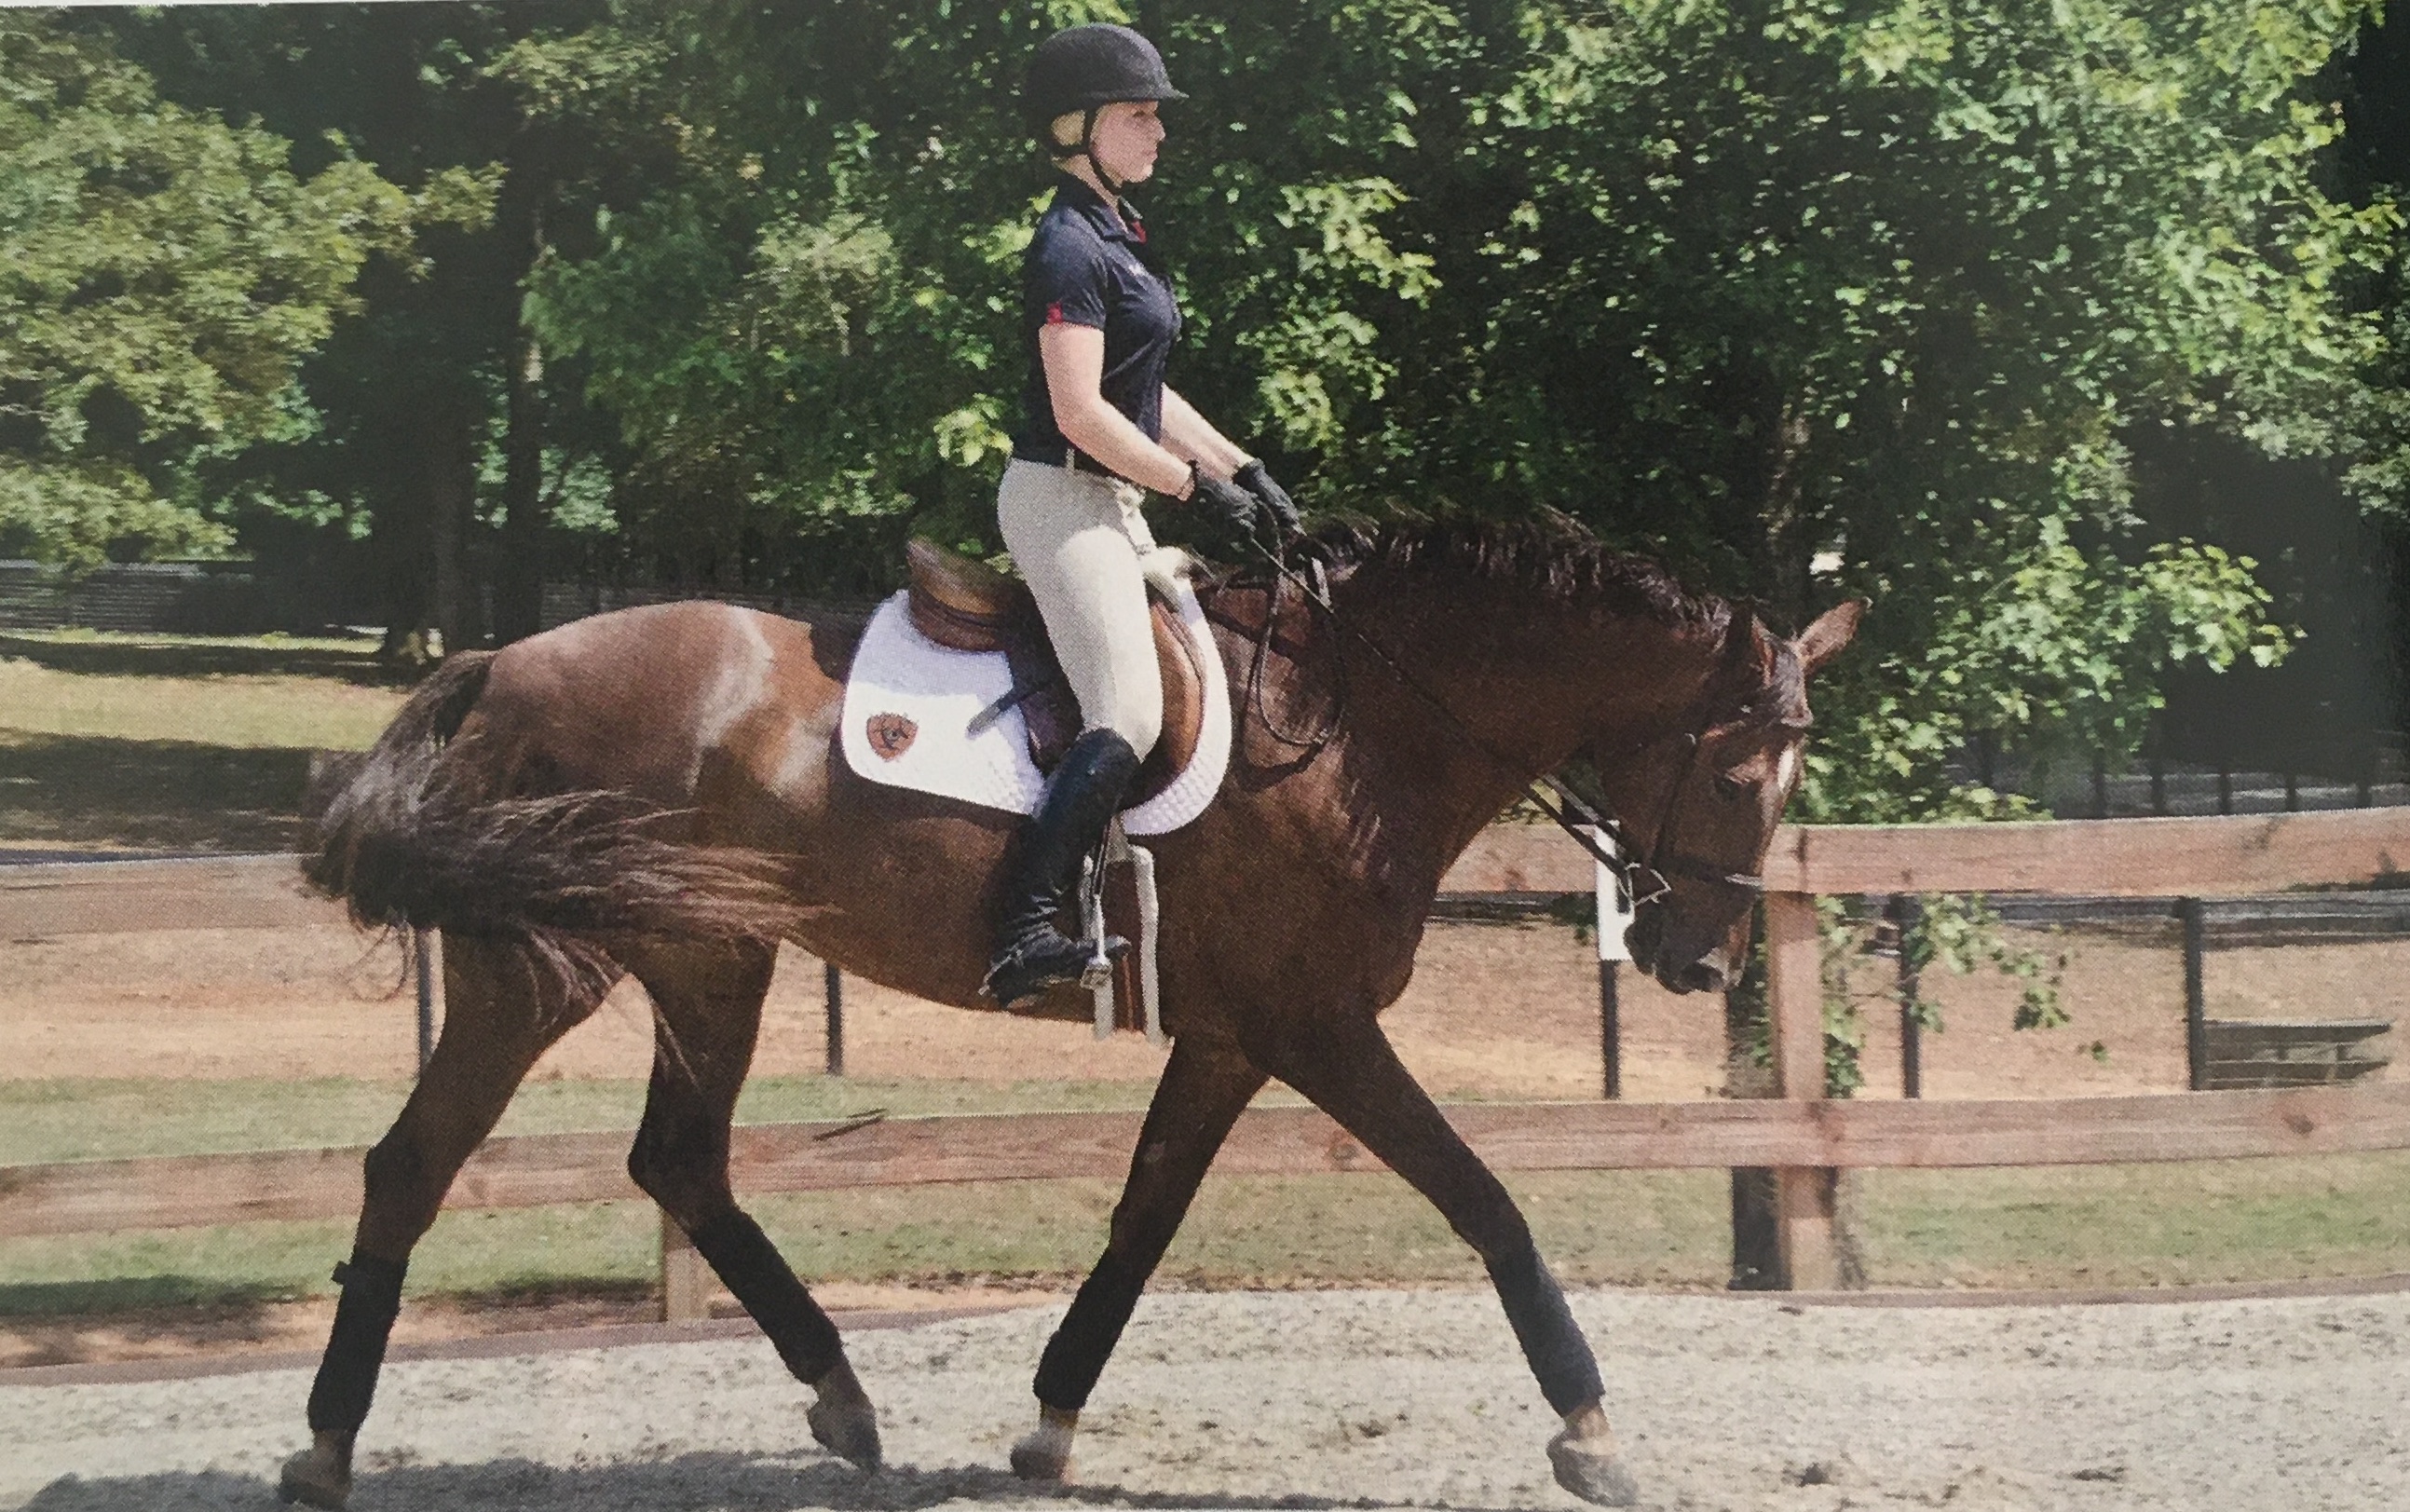
Fix 8: Try both of the following posting exercises to test your body control and work to improve it while also strengthening your leg position: At the trot, alter your posting sequence so that you change diagonals every stride. First do it by sitting for two beats and rising for one, over and over. This will teach your body not to get ahead of your horse’s motion. Then practice staying out of the saddle for two beats and sitting for one. This will teach your body to avoid falling behind the motion.
© Juan Blas
Fix 9: Next, try this counting exercise, which is terrific for improving your balance, getting your legs positioned correctly underneath you and strengthening your hamstrings and back. Start at the halt in your two-point position, with your seat out of the saddle and your weight balanced over your lower legs and heels. Grab some mane to help you balance, then slowly and rhythmically count to four as you gradually stand up in the saddle, pressing the balls of your feet against the bars of the stirrups as you straighten your ankle, knee and hip angles. Then slowly count to four again as you lower the weight back down into your heels and bring your body back into twopoint position.
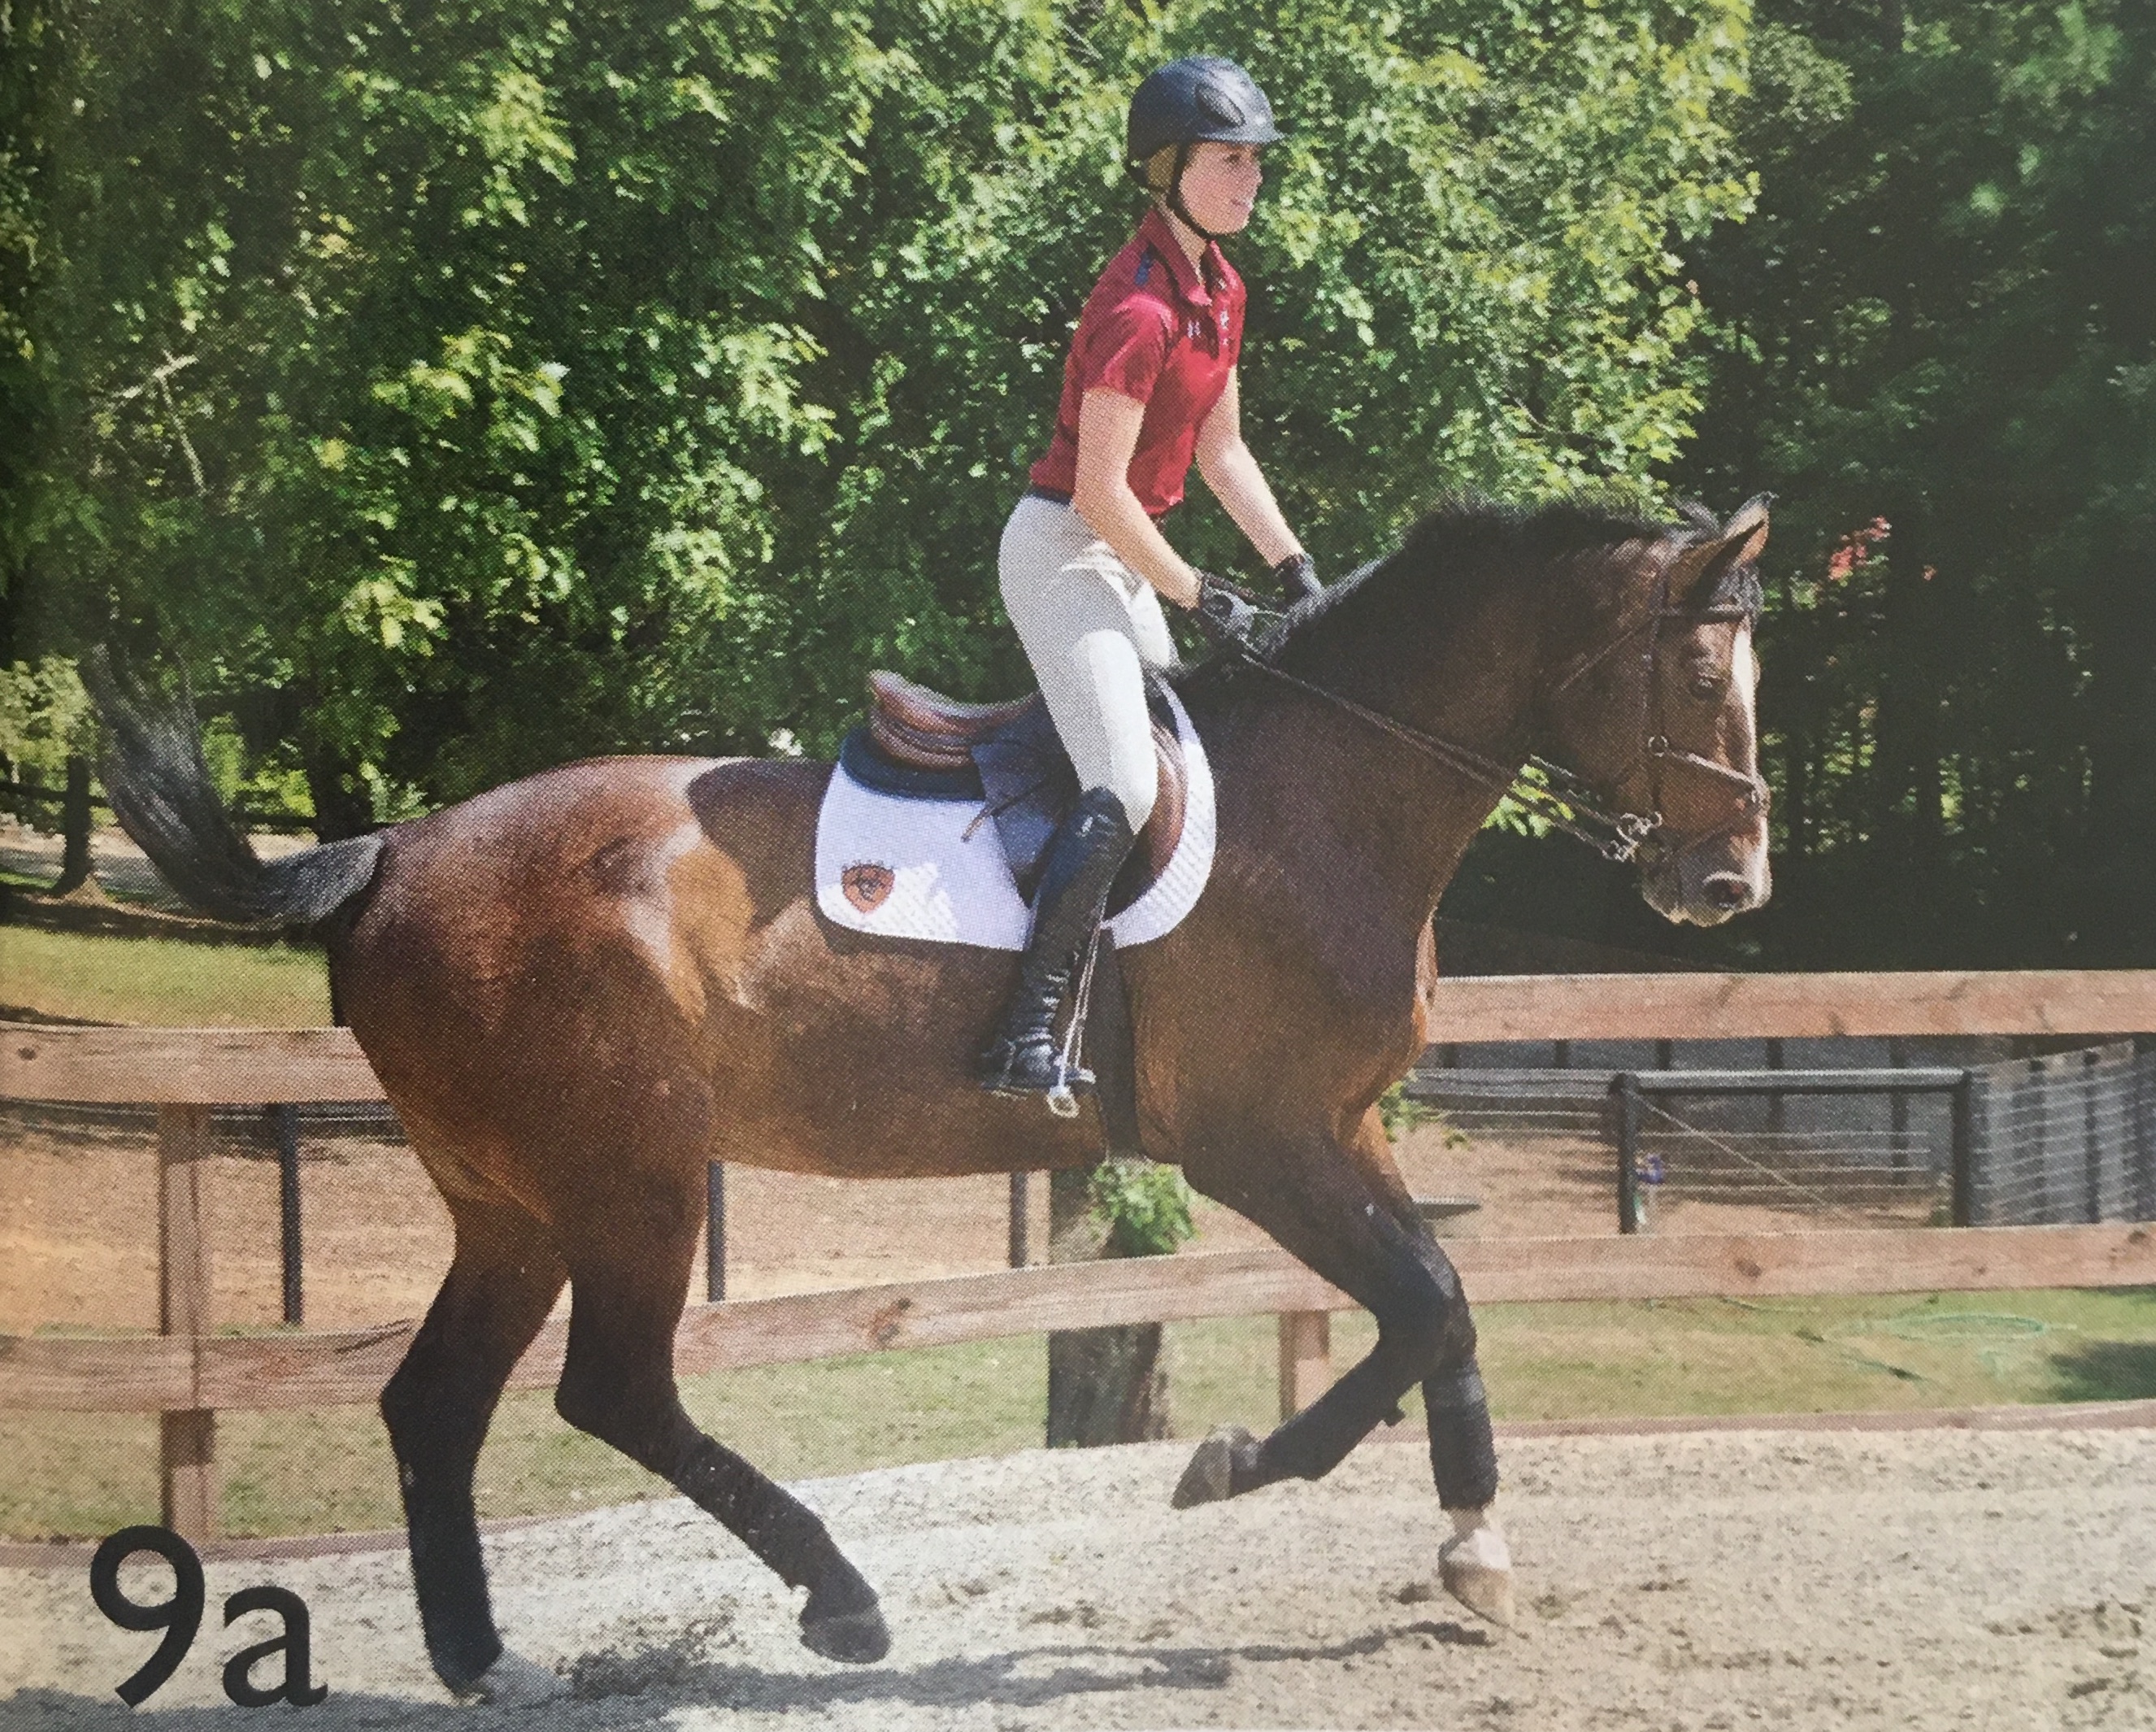
© Juan Blas
Now count to four as you lower your chest down to your horse’s neck, extending your arms forward along his crest toward his ears while maintaining your legs in a secure position underneath your hips. If you can keep your balance without leaning on your horse’s neck for support, follow his mouth with your hands so you have loops in your reins. Think of bending from the hip rather than through the spine. Again, count to four as you raise your body back up to two-point position. Throughout this entire exercise, be sure to avoid yanking on your horse’s mouth accidentally as you change position.
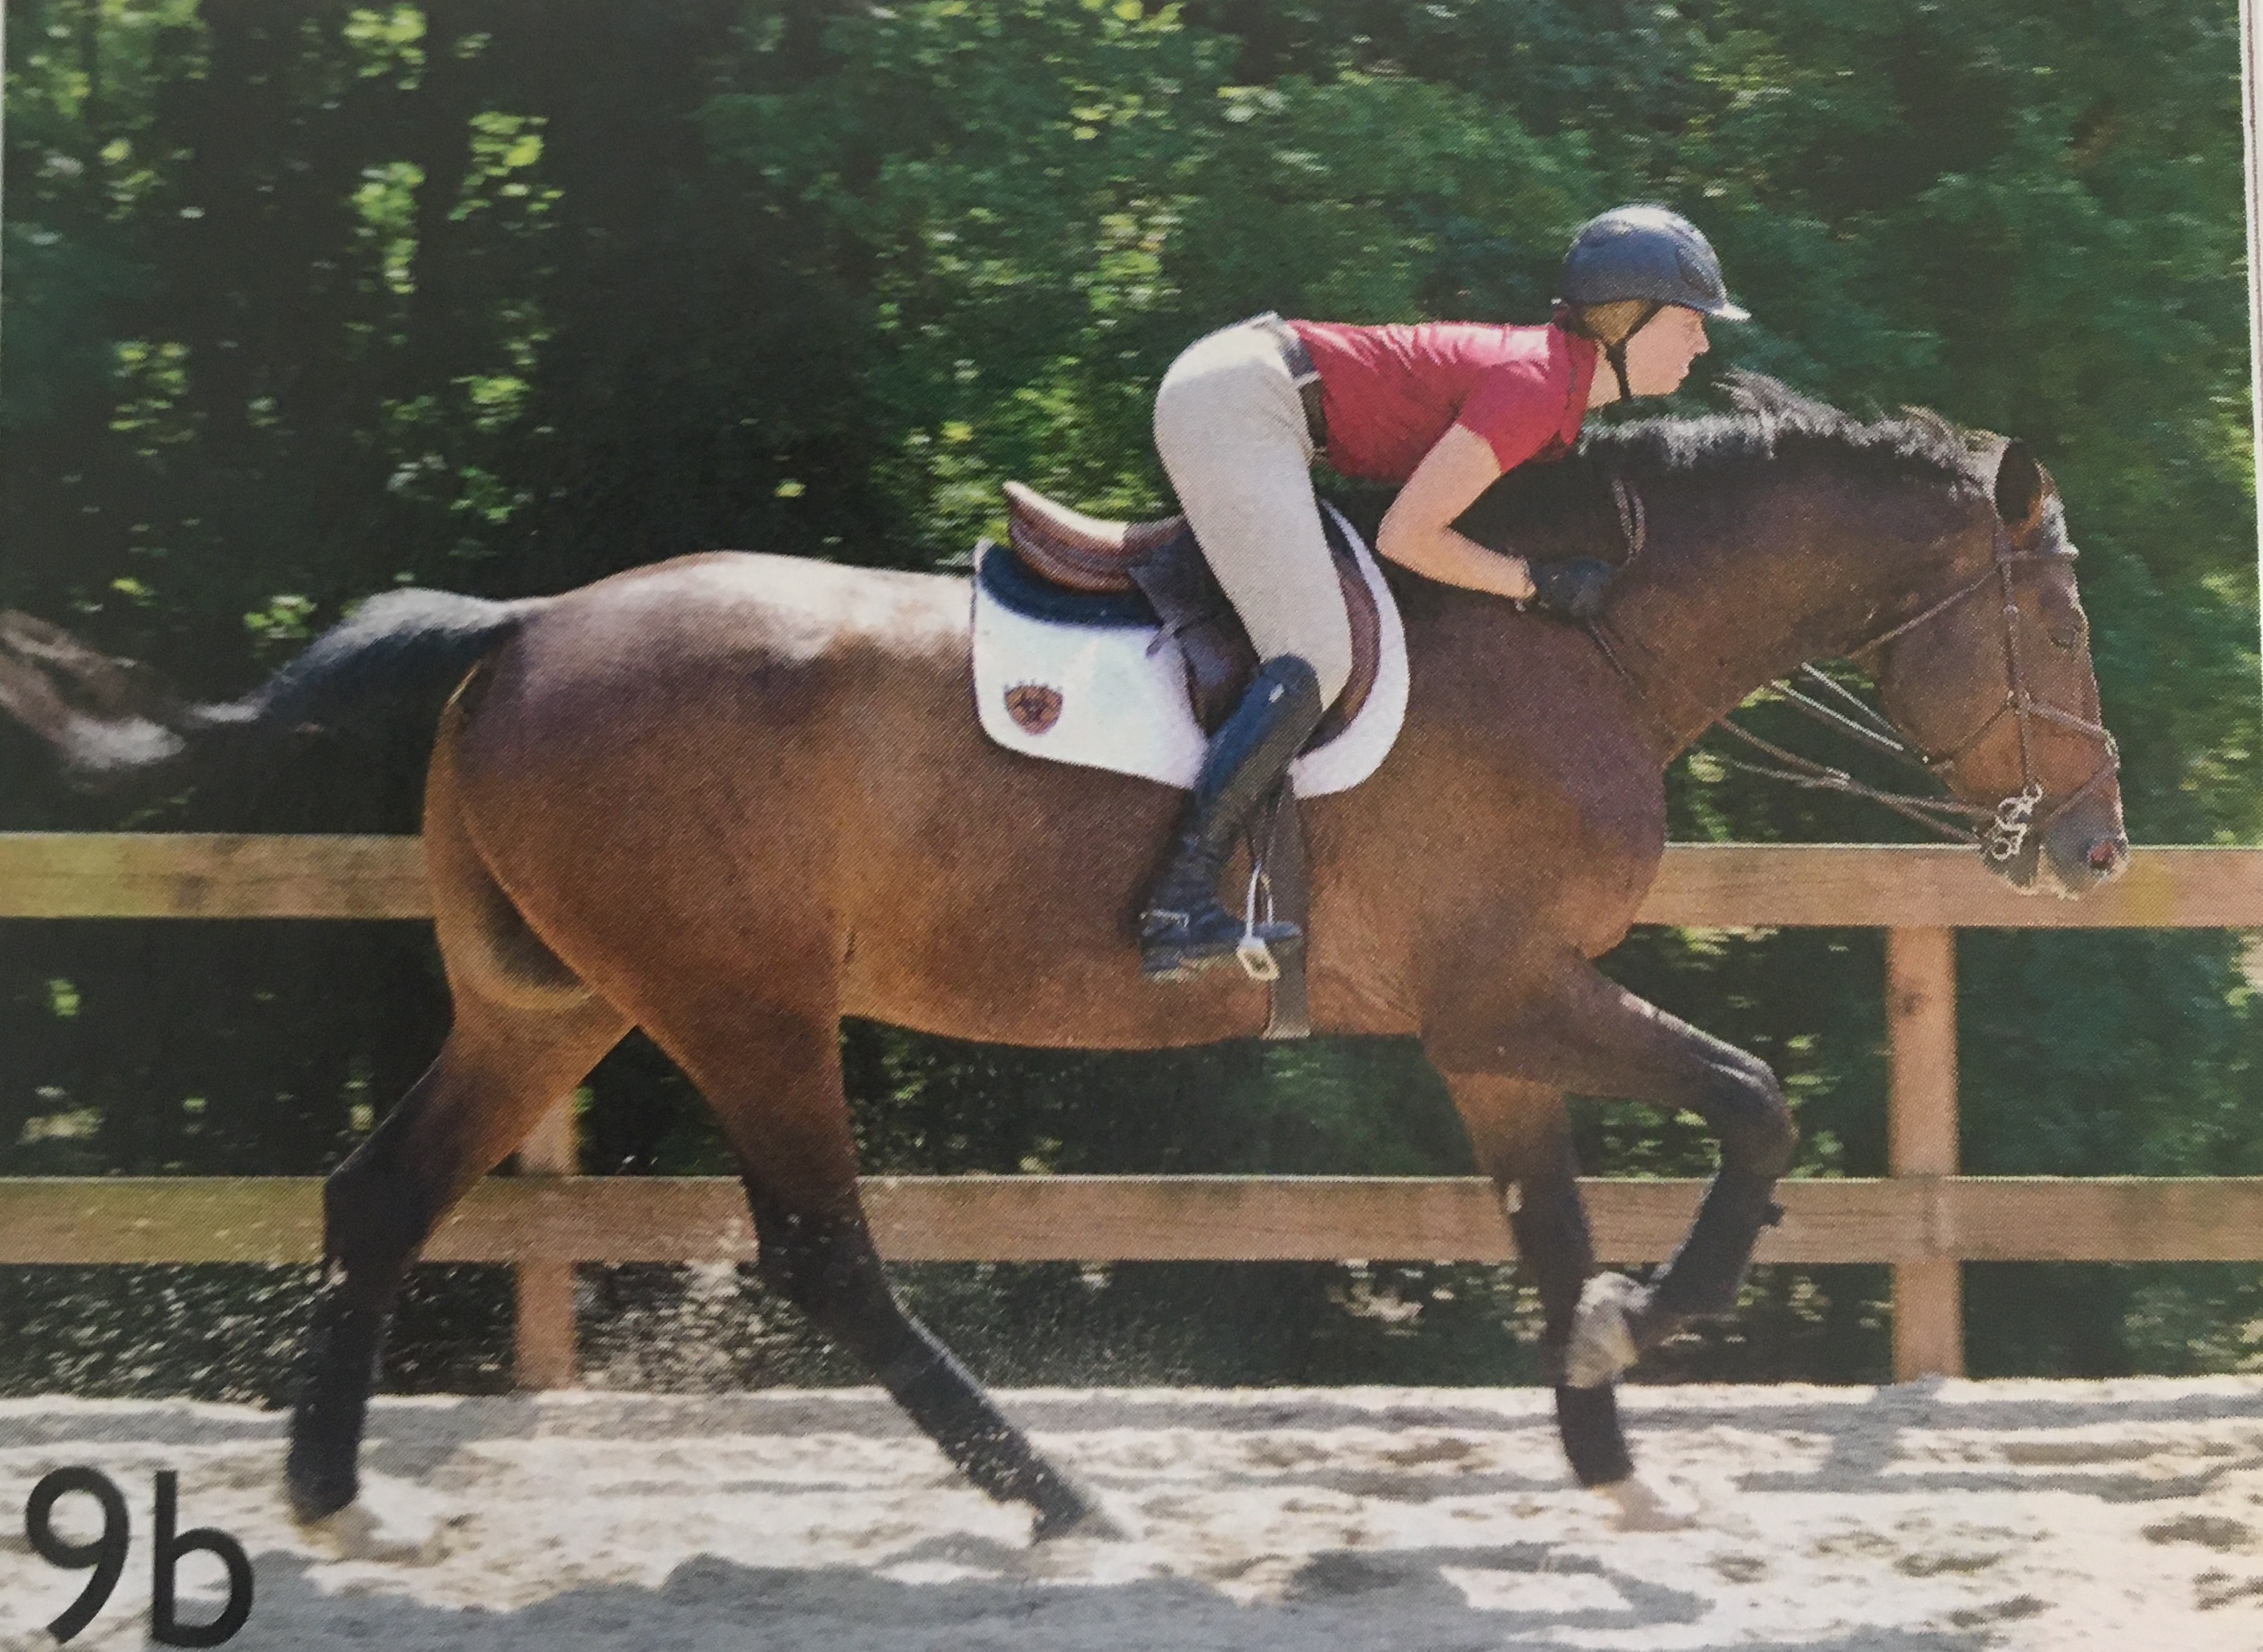
© Juan Blas
Repeat this several times. Then try it at the walk, trot and canter if you’re comfortable. Play with the speed of your counting, too, going faster and slower. More advanced riders can finish up the exercise at the canter, counting in time with their horses’ strides.
Problem: Horse not responsive to leg aids. This can result from a horse’s laziness and lack of respect for the rider, which, in turn, can result from the rider’s nagging leg aids or over-reliance on spurs. The clearest sign of a problem is a mark developing on your horse’s side where you rubbed his hair off with your spur.
Fix 10: Try riding without spurs but with a whip. Be sure your horse is accustomed to the whip before trying this exercise. When you ask him to go forward, gently squeeze or kick your legs a few times. If he doesn’t respond, smack him with the whip just behind your leg while simultaneously clucking with your tongue. It’s very important that he associate the cluck with the whip; otherwise, the cluck won’t mean anything to him.
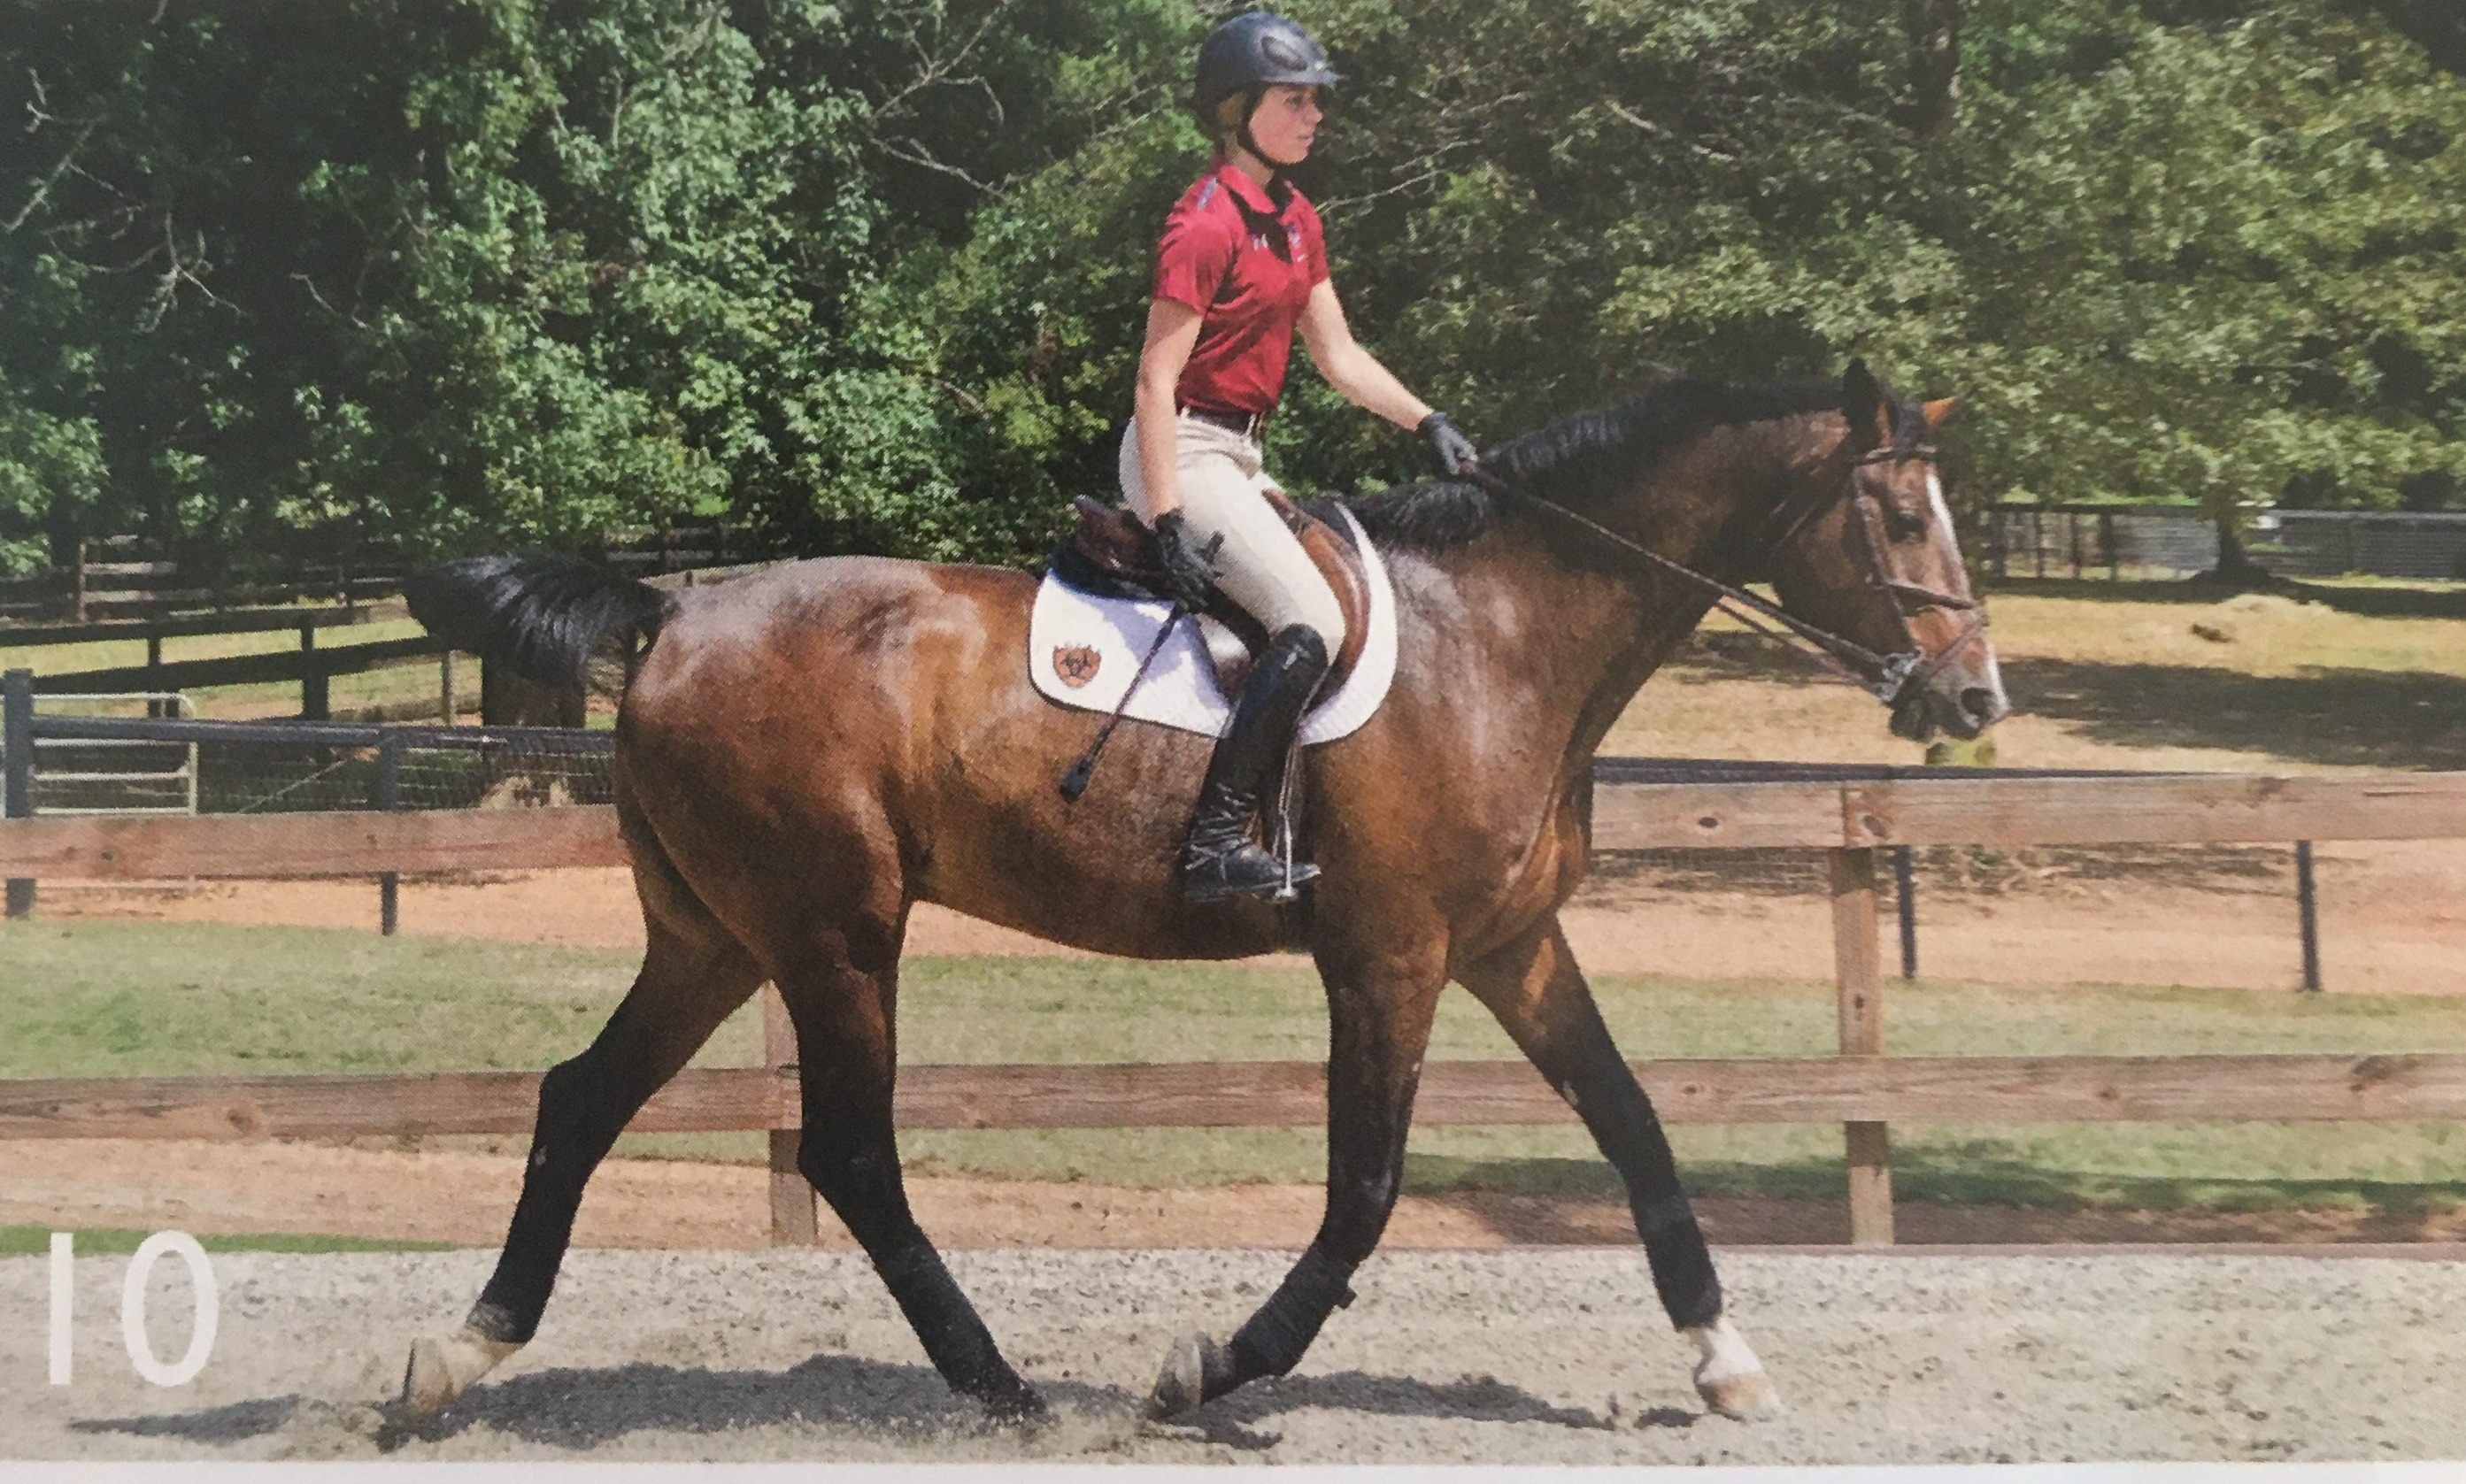
© Juan Blas
If your horse responds, return to the milder leg aid the next time you ask, giving him the opportunity to show he’s learned the lesson but also being prepared to follow up with your whip and cluck if he doesn’t move off promptly. You may need to repeat this several times over a period of days or even weeks before he begins to respond consistently to a normal leg aid. And it may take you some practice to ensure that whenever you cluck or give a leg aid, you convey the clear message that, “When I say go, I mean go!”
Improve Your Seat
Riding with an effective seat—using your body weight and position in the saddle to communicate with your horse—is not as mysterious as you might think. It can be a simple matter of lightening your seat—shifting some of your weight up and out of the saddle or going all the way into two-point position—to encourage your horse to go forward. Or it can be shifting your weight slightly backward by opening your hip angle to signal him to slow down. As your riding advances, you’ll learn to use your seat in coordination with your legs and hands to balance your horse on the turns, collect his stride and perform more advanced skills, such as lateral work.
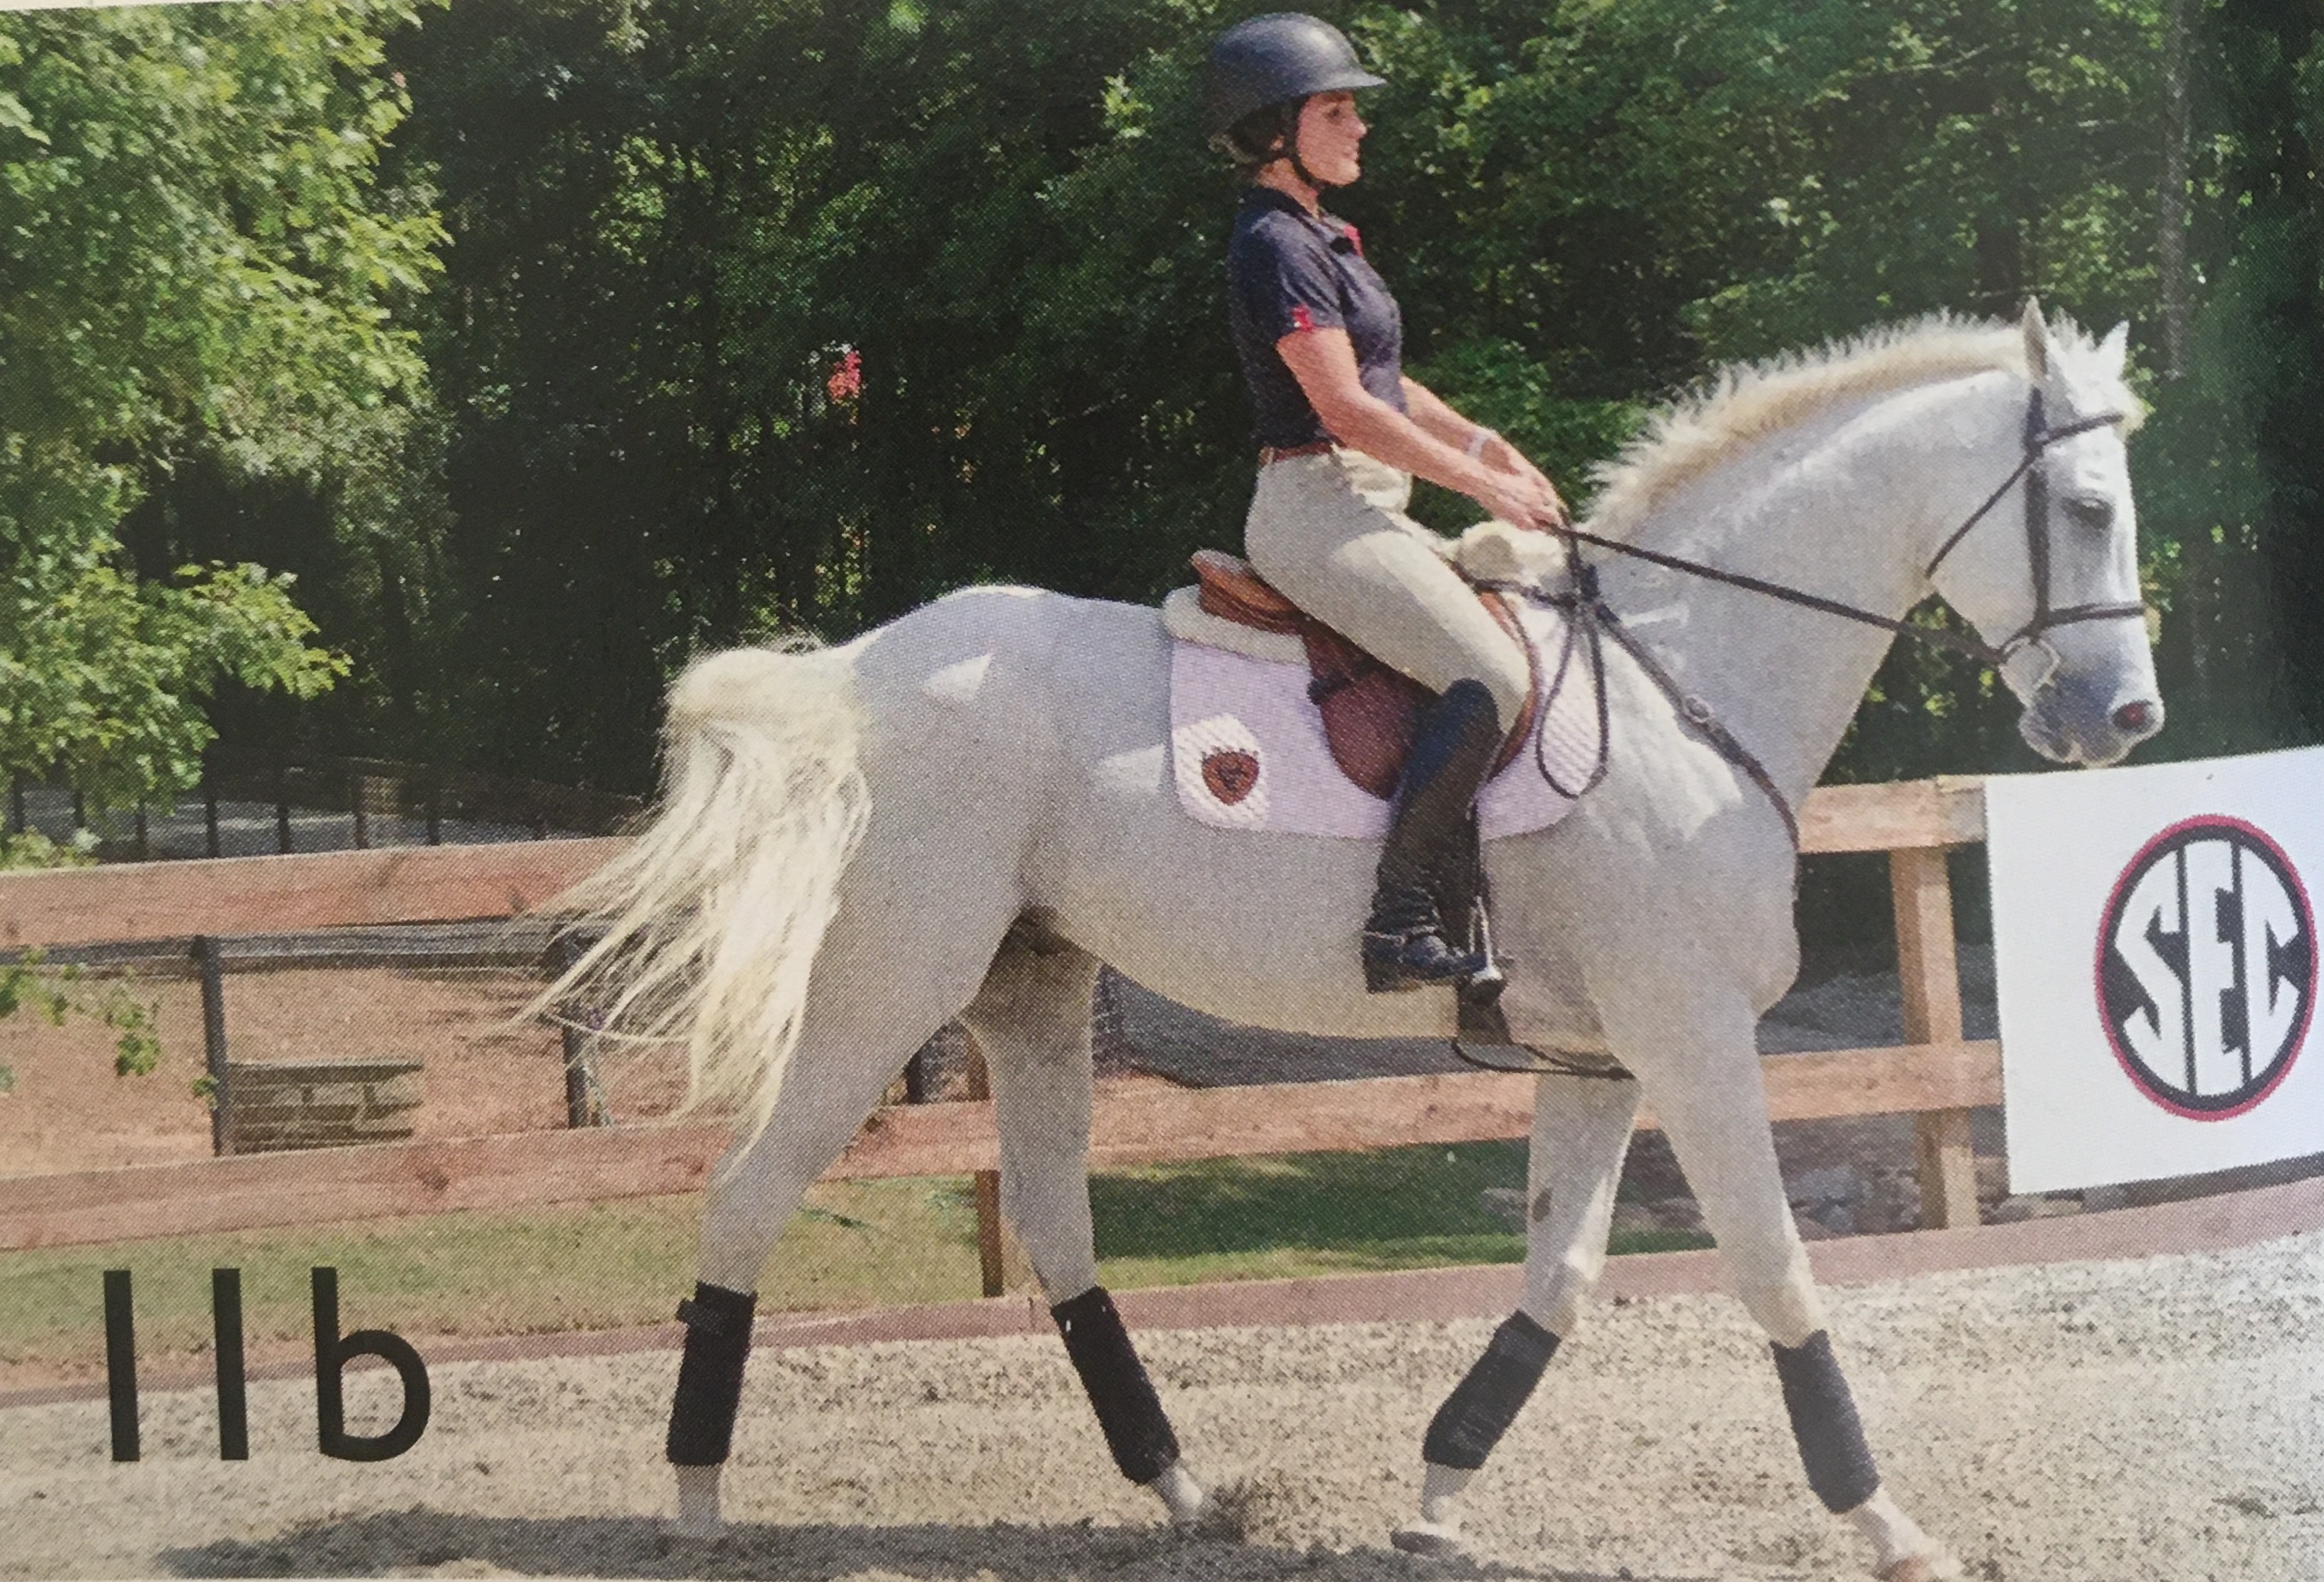
Problem: Using too much rein and not enough seat to slow your horse and make downward transitions. If you can’t make a transition from trot to walk without relying heavily on your reins, you need to work on your seat.
Fix 11: Starting in a posting trot, sit up a little taller and try to slow your posting down slightly. With each stride, sit a split second longer in the saddle. Meanwhile, keep your legs in contact with your horse’s sides. After several strides, if he doesn’t slow down, add enough rein pressure to bring him to a walk. You can add a verbal cue, too, such as “walk” or “whoa.” Repeat this frequently, always using the seat aid before the rein aid, until he starts to respond to just your seat.
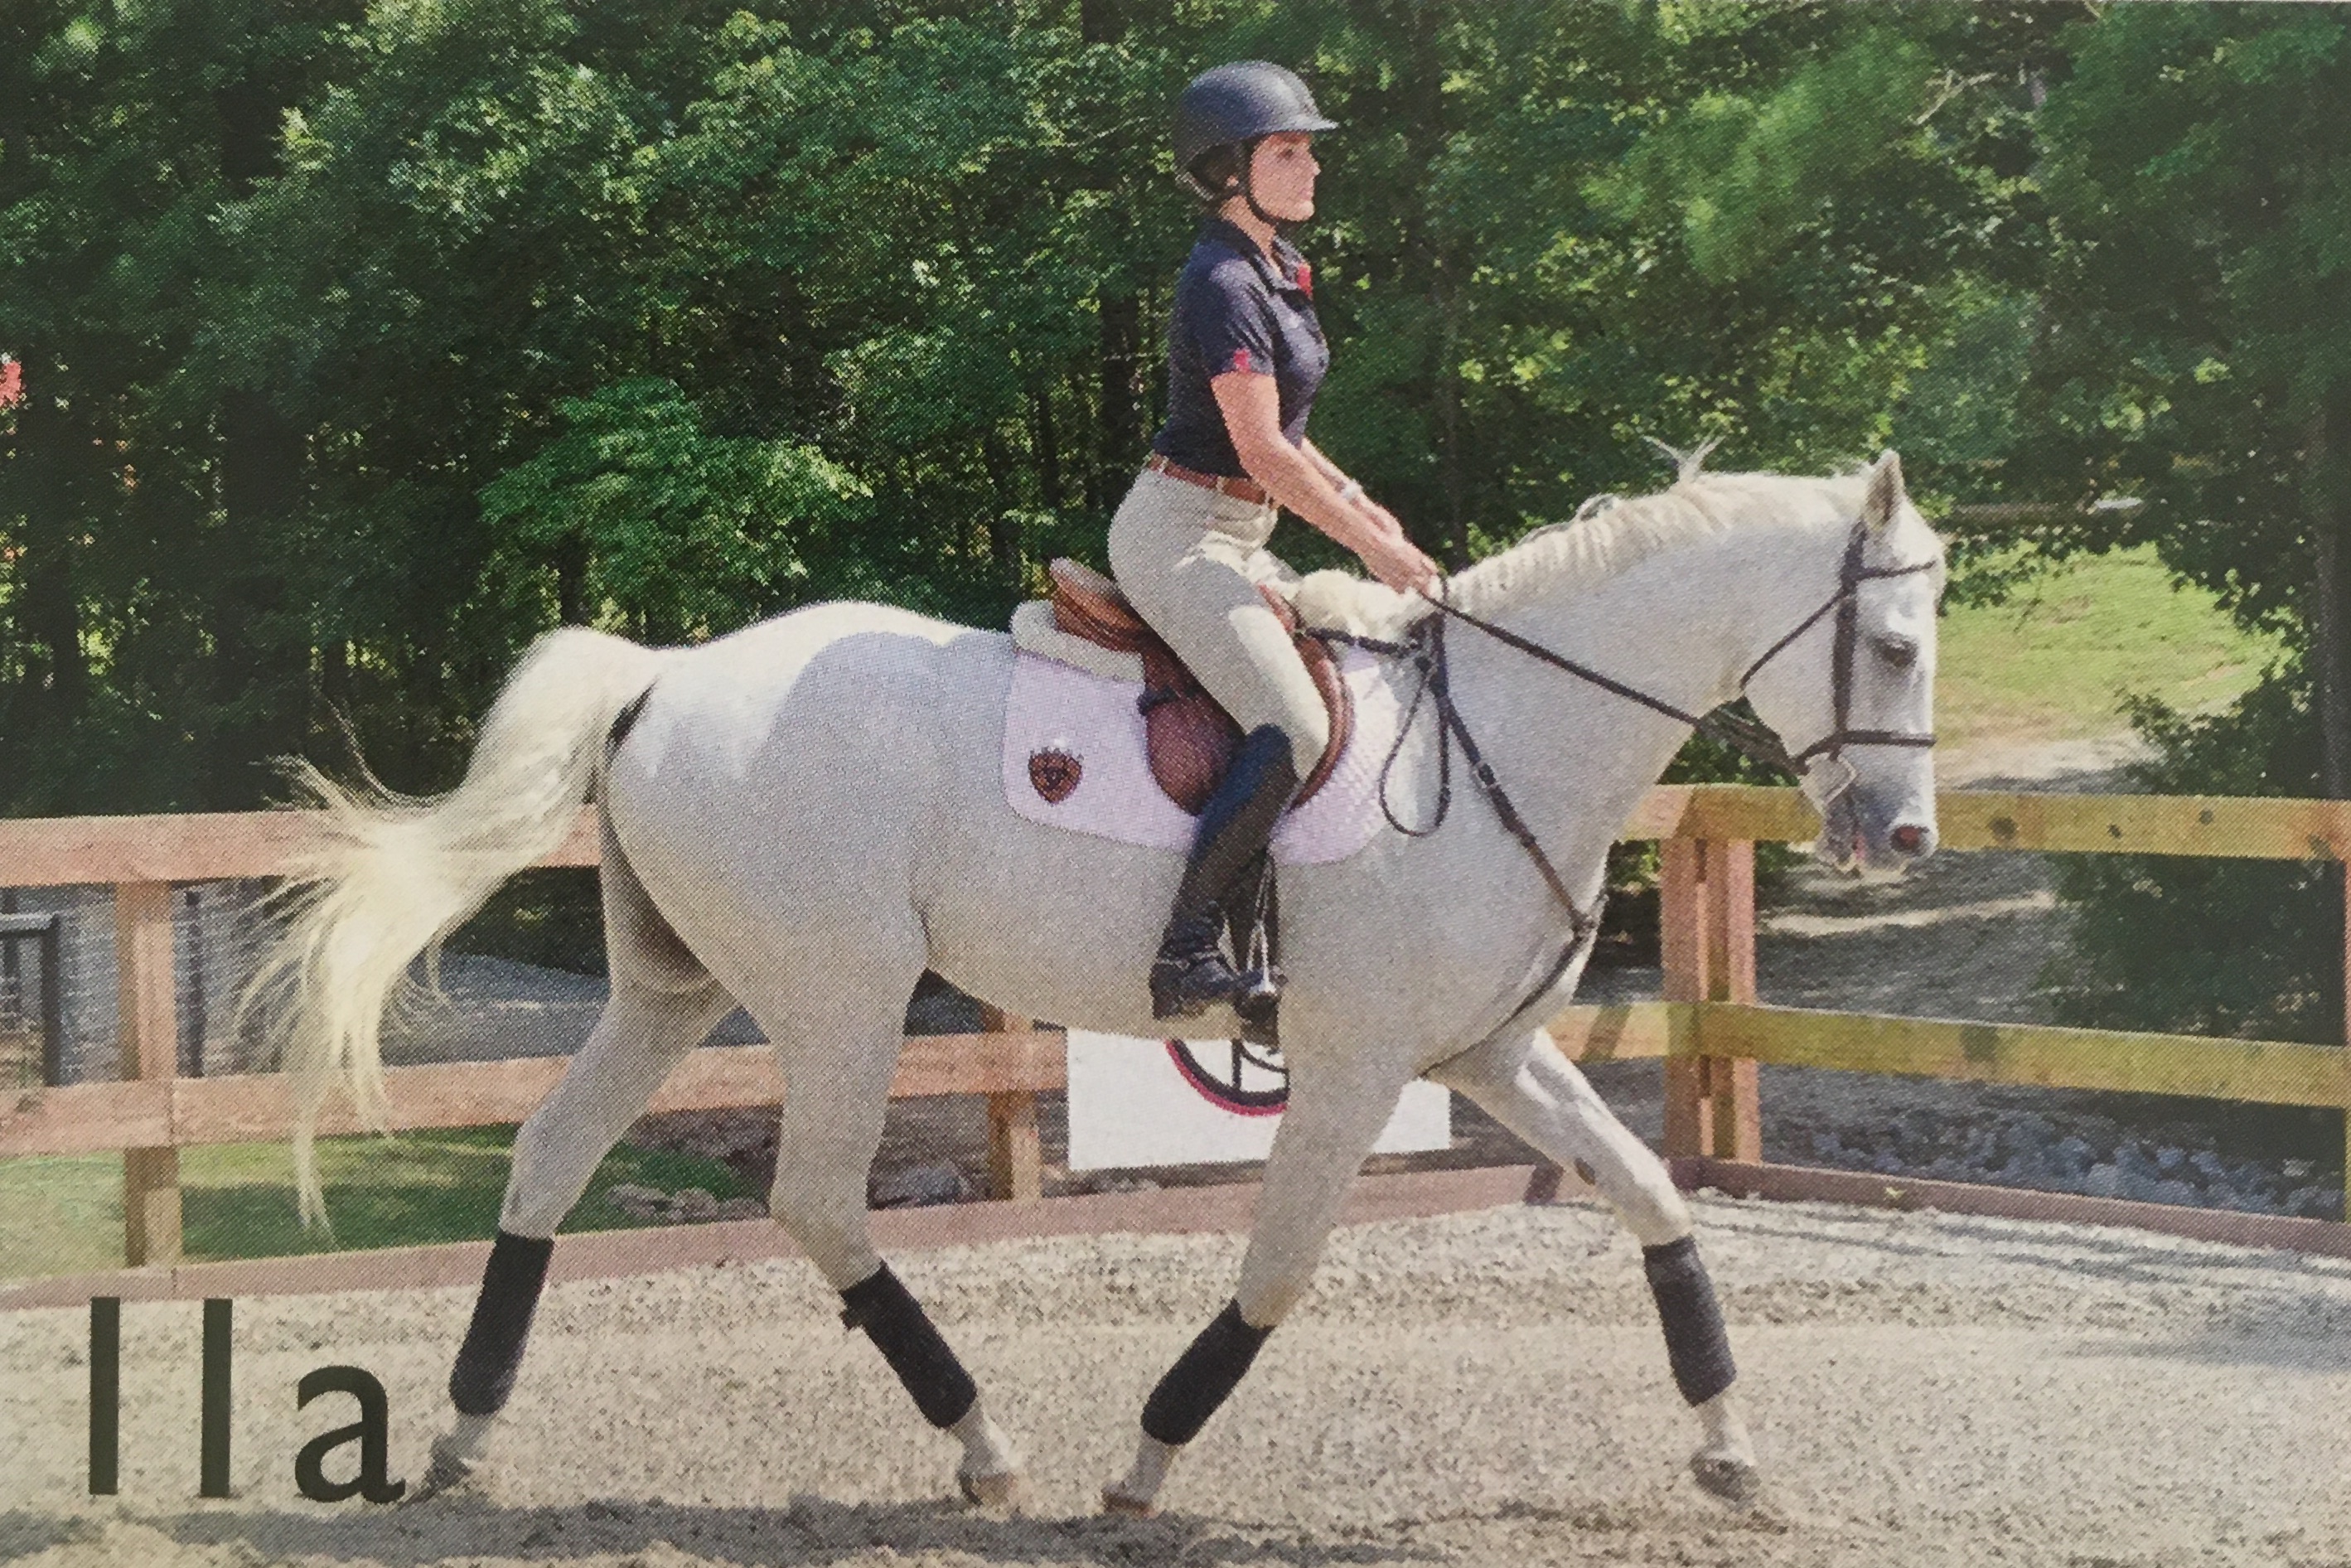
© Juan Blas
© Juan Blas
Problem: Too much driving seat. The driving seat—sitting deep in the saddle and leaning back slightly behind the motion— is a good tool to use, for example, if you’re on a spooky horse or approaching a jump your horse might refuse. But you’ll be penalized for using a driving seat in the hunter ring because it indicates a lack of trust in your horse.
Fix 12: Use the earlier-mentioned leg exercises (Fixes 7–10) to tune up your horse to your leg and cluck aids.
Problem: Too much riding in two-point position. Practicing in two-point is a great way to strengthen your legs and improve your balance, but it won’t help you develop your seat.
Fix 13: Practice riding on the flat with no stirrups. Without them to balance on and press against, you’ll be forced to spend more time sitting in the saddle and shifting your weight to influence your horse.
Over Fences
All of the above exercises will improve the effectiveness of your aids both on the flat and over fences. Here are two jumping exercises that I also find especially helpful:
Problem: If your horse scoots off or bucks after jumps, he’s probably trying to tell you you’re using too much hand on landing—for example, to signal him to slow down or turn—or that he’s anxious about making the next lead change.
Fix 14: Turn on landing. To rebuild your horse’s trust, forget about courses for a while and practice jumping single fences, one at a time. On the landing side of each jump, concentrate on not pulling the reins. Instead, after a few strides, gently turn in a circle. The turn will slow him down.
Repeat this several times, alternating the direction you turn each time. Then incorporate more single jumps around the ring. After each jump, turn and continue cantering until your horse is quiet, then head to another one. Keep your sessions this simple until he starts to land and steady himself without you needing to turn him. Then gradually build other demands into your practice sessions—adding lines, lead changes, etc.—one new demand at a time, so you never overwhelm him.
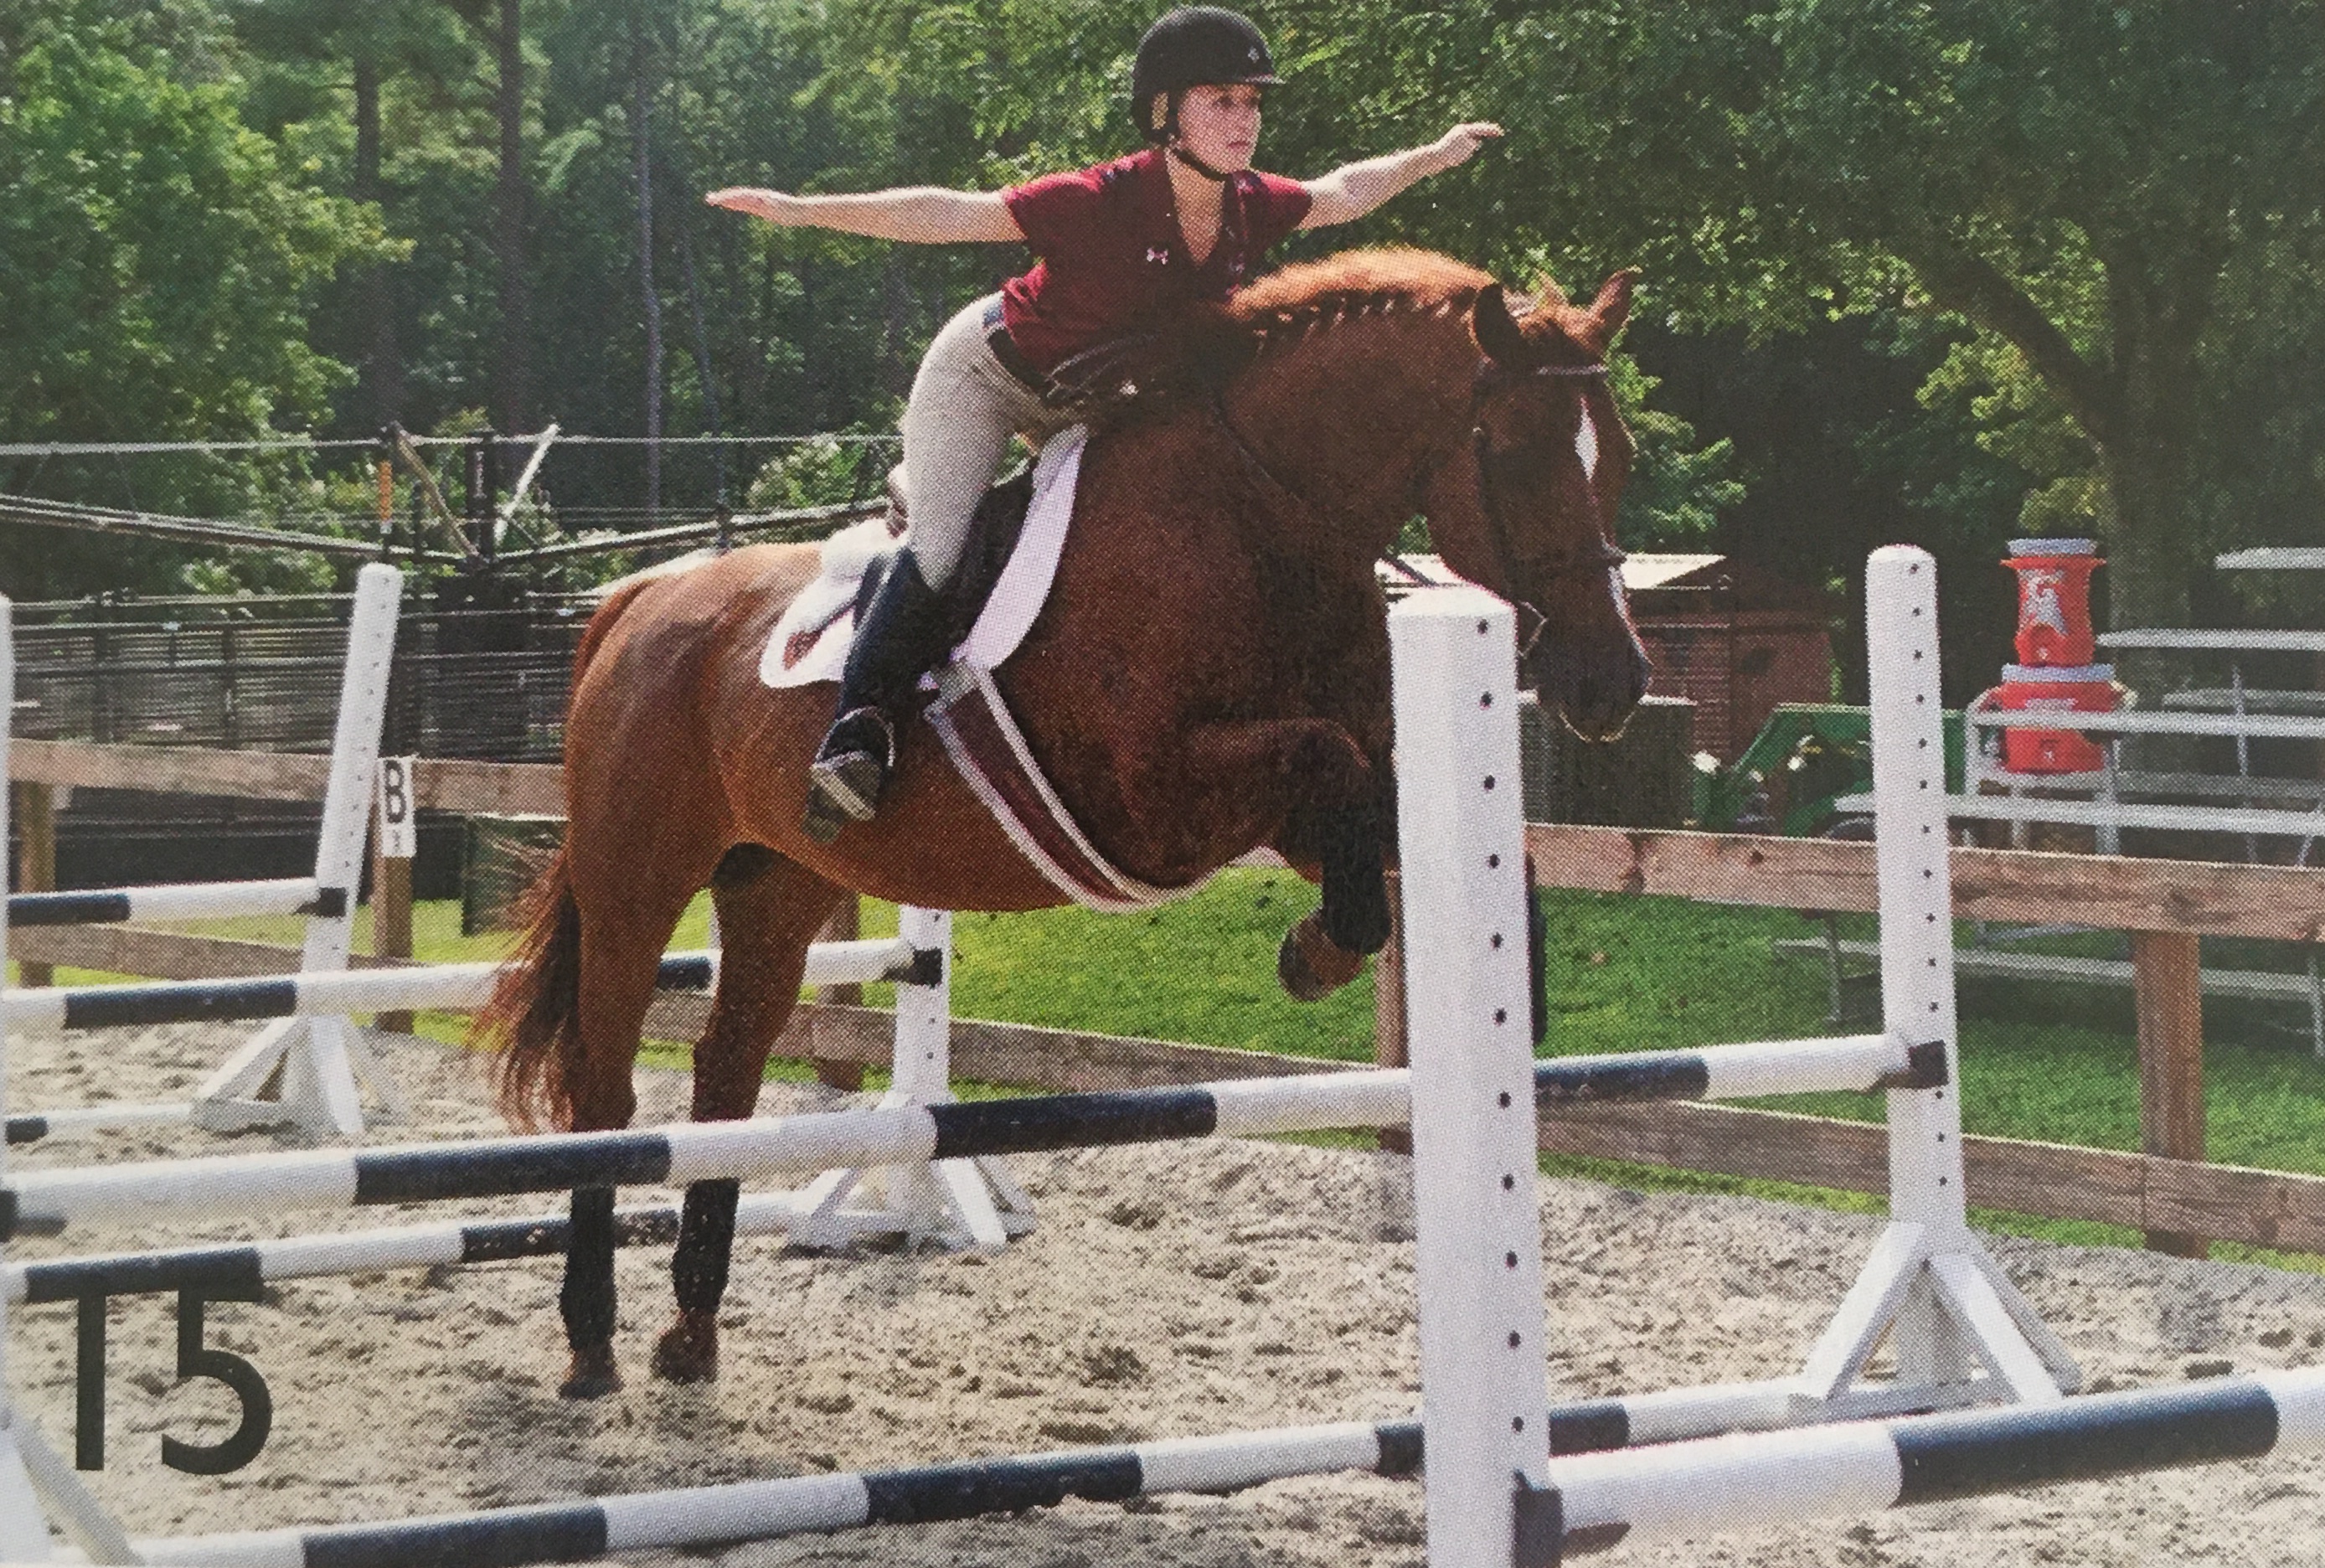
Fix 15: Ride a line of trot bounces. Practicing bounces will help you center your body over your horse and develop the balance necessary to avoid getting ahead of or falling behind his motion. Doing it without reins is also a great way to learn to rely less on your hands. You’ll need a ground person to help you adjust the distances and build the jumps as you progress through this exercise. If you don’t trust your horse to jump through the line without reins, replace the verticals described below with cavalletti turned to their highest height, set at bounce distances, and ask your ground person to longe you over them. Or set up a chute with extra standards and rails lining each side of the bounce line, creating barriers high enough to prevent run-outs.
© Juan Blas
In the middle of the arena, set up a line of three or more low verticals, each about 10 feet away from the previous jump. You can do as many as six. Put the poles for all but the first two jumps to the side. Add a ground pole about 8 feet in front of the first jump or build a series of three or four trot poles or cavalletti, set 4 feet apart, with the last one 8 feet away from the first jump. Also add a ground pole on the landing side of the final jump, between the standards of the next jump, so your ground person can evaluate its placement and adjust the distance as necessary.
Approach the jump at the trot. If you are less experienced, get in your two-point position before making the turn to the jump. This will keep you from getting left behind on takeoff. If you wait until you are only a few strides in front of the jump before going into two-point, you may accidentally signal your horse to speed up. As you go over the last cavalletti, grab mane for added security.
Each time you go through the line, alternate the direction you turn afterward. After you’ve jumped through the first bounce once or twice, have your ground person build the next bounce and place a new ground rail on the landing side of that, in between the next set of standards. Continue doing this until you’ve built and jumped through the entire line of fences.
Next, if you trust your horse to jump through the line without reins (most experienced horses will), tie your reins in a knot far enough from the buckle so they won’t dangle dangerously near his legs when you let them go. Then approach the line of bounces again, holding the end of the knot. When you reach the last cavalletti, let go of the reins and put your arms out to the sides like airplane wings. The next time through, put your hands on your head—this is great if you tend to collapse your shoulders. Or reach them forward in front of you toward his ears—good if you tend to fall behind the motion. You also can fold them behind your back—good if you tend to get ahead of the motion.
More-advanced riders can try these two exercises: If you tend to jump ahead of the motion, circle one arm backward in the air over one jump, then circle the other arm backward over the next, and continue alternating as you jump through the rest of the line. If you tend to fall behind the motion, do the same exercise, circling your arms forward.
This is a great exercise to practice with another rider. Take turns calling out commands to each other as you jump through the line, adding a new command every other jump: “Hands on your head! Airplane!” and so on. Make it fun!
Hunt-seat trainer Boo Major has been the head coach of the University of South Carolina’s equestrian team for 16 years. In her first seven years there, she guided 22 riders to the Intercollegiate Horse Show Association National Championships, including 2004 national champion Tara Brothers. Since the current National Collegiate Equestrian Association format was adopted in 2005, Boo has guided students to 50 NCEA victories and 17 individual and team national championship wins, including Kristen Terebesi, the first rider to win two individual NCEA championships in a single season. Last season, the University of South Carolina won the inaugural Southeastern Conference Championship.
As a member and former chair of several National Collegiate Athletic Association Varsity Equestrian committees, Boo has been a strong proponent of making equestrian an NCAA championship sport. She helped to establish the rules and regulations for the NCAA emerging sport of equestrian. Boo is a U.S. Equestrian Federation technical delegate and ‘r’ eventing judge whose background includes eventing, dressage and foxhunting. She also owns a small farm in Blythewood, South Carolina, and is the mother of 13-year-old Robert “Mac” McDow Duncan III.
This article originally appeared in the December 2013 issue of Practical Horseman.


