In most riding disciplines, rideability accounts for about 50 percent of success. A rideable horse responds to your aids promptly and reliably, just the way the brakes, accelerator and steering work in a high-performance car. He can slow down and accelerate rapidly and negotiate sharp turns at speed without drifting off track.
An extremely rideable horse is very adjustable: He readily shortens and lengthens his stride in response to subtle aids. This is an essential skill, particularly in today’s upper-level jumper and equitation courses, which often include challenging distances between jumps.
Some horses are naturally more adjustable than others and don’t require as much focus on this skill in training. Just like any other athlete, though, regardless of their natural talents, all horses need to practice adjustability exercises periodically. These exercises must progress in a logical, achievable manner that builds both your and your horse’s confidence every step of the way. Knowing that you have accomplished every test you faced at home will make it easier to tackle challenges in the ring, even if they are questions you have never seen before.
Because horses vary widely in terms of their emotions, experiences and physical abilities, each one must be trained as a unique individual. Improving any horse’s rideability requires a combination of identifying his strengths and weaknesses, choosing equipment that best suits him and practicing exercises that target his individual needs. In this article, I’ll guide you through all of these steps. My exercises will help you both evaluate and improve his rideability, starting with basic flatwork and advancing to cavalletti and jumps.
I use these exercises for all of my horses and riders, from Juniors to adults to grand-prix jumpers. Anyone can work on the flatwork and cavalletti exercises as long as you and your horse both have a certain degree of balance—you can stay with his motion without holding yourself in place with the reins and he can maintain his pace without constant correcting. You also need to be able to coordinate your aids—your hands, legs and seat—effectively and in unison so that they communicate one clear, concise messages to your horse.
To tackle my gymnastic jumping exercises, you and your horse also should be jumping small courses, at a minimum. The final exercise over an oxer–crossrail–crossrail–oxer line is quite challenging—even with small jumps—so only experienced riders should attempt it.
One final prerequisite: To achieve positive results, you must remain calm, unemotional and patient throughout the training process. Don’t expect to perfect these exercises overnight. Work on them at your own pace and resist the urge to skip steps. Remember, confidence is key.
These exercises are physically and mentally demanding, so take plenty of walk breaks and avoid doing too many repetitions. Whenever your horse does an exercise well, immediately praise him and move on to the next exercise. If he doesn’t master all of the skills in one session, break it into multiple sessions, always ending on a positive, confident note.

Choose the Right Tack
Let’s start with a quick evaluation of your equipment. Is your horsegenerally on the lazy side? You may need bigger spurs. Is he on the sensitive, hot side? Choose smaller spurs and a milder bit to encourage a sense of trust between his mouth and your hands—a rubber or plain snaffle, such as a loose-ring. Or is he less sensitive and strong in the bridle (possibly also traveling with his head and neck too low)? Consider a bit with leverage, such as a two-ring or gag bit that can bring him to a normal or higher balance.
Always err on the side of using too mild a bit rather than too severe. The former may encourage your horse to lean on your hands sometimes—a habit you must correct—but that is better than scaring him away from the connection, which can happen with the latter. Similarly, the bit you choose should make you feel as if you can always hold a steady connection. Be aware that with a too-mild bit, it’s easy to get in the habit of leaning on your horse’s mouth for balance. Again, this is an easier problem to fix than the loss of connection caused by over-bitting.
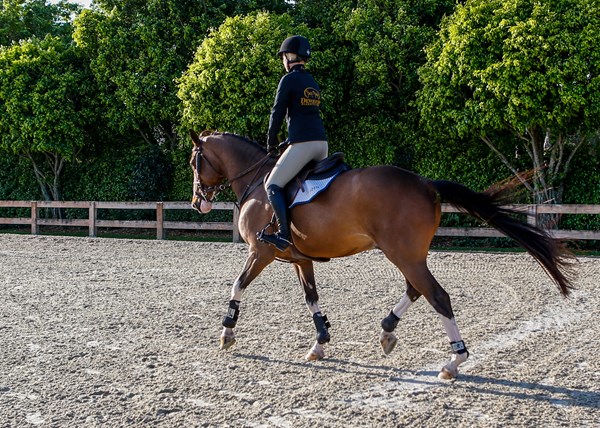
Flatwork
Begin working on rideability on the flat. After walking once or twice around the ring on a loose rein, apply slightly stronger leg aids to create more impulsion in the walk, asking for a working walk—more than a leisurely pace but not an overly excited pace. Gradually increase your leg aids to push your horse forward to the bit. Then gently work the bit by squeezing and relaxing your hands alternately—right, left, right, left—with the same motion you’d use to squeeze a lemon. These small half-halts will encourage him to accept a soft connection between his mouth and your hands.
How much leg and rein aid you use will depend on his sensitivity. If he gets too excited, back off the leg a little. If he drops behind the bit—brings his nose behind the vertical and loses the connection with your hands—loosen up your rein contact. Never fully release the rein contact, however. Whether your horse is strong and needs a firmer hand or sensitive and needs a lighter hand, you must have a connection to him at all times.
Continue doing this until you produce a nice balance between your leg and rein aids, so you’re using a comparable amount of pressure and frequency with both aids and don’t feel as if you’re communicating entirely with your hands or entirely with your legs. It should feel like he is completely focused on you and ready to respond immediately to very light aids.
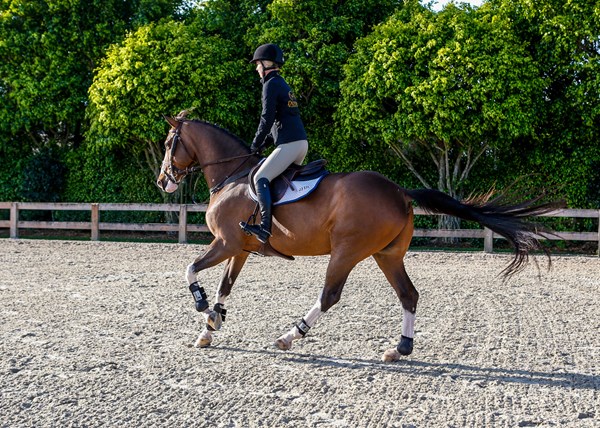
Next, pick up the rising trot and check that your hands are very steady. Then repeat the same aids you gave at the walk, pushing your horse up to the bit with your legs while using gentle half-halts to establish a nice connection. When that feels good, begin asking for longer strides on the long sides of the arena. Apply stronger leg aids and soften your hands to encourage him to open up his stride without going so forward that he loses his balance.
On the short sides of the arena, use steady rein pressure to shorten his stride again while keeping your weight balanced in the middle of the saddle. Think of collecting the energy in your hands so you can release it again in the lengthening on the next long side.
Repeat this same process at the canter. If your horse resists the rein aids at any point (leans on the bit and refuses to collect his stride), apply firm rein pressure, supported by a strong, solid feeling in your core and upper body. Use just enough pressure to elicit a response, without ever resorting to being rough—yanking sharply on the reins, for example.
If your horse is on the lazy side and reluctant to lengthen his stride, reinforce your leg aids with first the spur and then, if necessary, a tap of the stick just behind your leg. Give a cluck simultaneously with the whip so he will associate the two signals with going forward when you cluck in the show ring.
When your horse is obediently lengthening and shortening, incorporate circles (about 50 feet in diameter, depending on the size of your ring) in opposite corners of the arena to test his suppleness. If he leans on your inside leg and tries to cut the corners, raise your inside hand a few inches and open your outside hand a few inches—so if you’re traveling to the left, raise your left hand and move your right hand to the right. Add more inside-leg aid—your left leg, in this example—to push his balance toward your outside hand.
Next, introduce some lateral exercises to fine-tune his responses to your leg aids even further. If you are not familiar with lateral work, ask your trainer if you are ready to learn it. Start with leg-yielding, asking him to move sideways away from your leg, and then progress to shoulder-in. Stay within your horse’s comfort level, asking for only as much lateral movement as he can produce easily and only doing a little bit at a time.
Depending on your horse’s natural balance and skills, these exercises may take several sessions to master. When they begin to feel comfortable, proceed to the next exercise.

Develop Adjustability Over Cavalletti
Set-up (see diagram above): Place two cavalletti 60 feet apart on one long side of the arena to create a simple canter line. On the other side of the arena, create a canter-trot-canter line by placing three trot cavalletti halfway down the side, set 4½ to 5 feet apart, depending on your horse’s trot stride. Then place a single cavalletti on either side of the three trot cavalletti, 60 feet away on a straight line. On the quarterline closer to the first pair of cavalletti, add two more cavalletti set on diagonals, which you will jump while changing directions.
Adjust the height of the cavalletti according to your skill level. If your horse is green or you are a beginner, turn all of the cavalletti to their lowest setting. If you are more experienced, turn them to a higher height. Whatever height you choose should feel easy to both of you. The challenges posed by these exercises should result only from the track, not from the heights of the obstacles.
Canter line
After warming up with the flatwork exercises described above, approach the single pair of cavalletti in two-point position at a medium canter. In this and every exercise you do, focus on keeping your horse as straight as possible, from the turn, through the line, and to the next turn. Use your eyes to help you arrive at the center of each obstacle. Always look ahead to what’s next, whether it’s a cavalletti, trot pole, jump or turn.
Stay in two-point as you canter over the cavalletti. For most horses, this distance will work out to a comfortable five strides. If it feels too short or long, adjust the distance to suit your horse’s individual stride length. This is a critical point for all of the exercises in this article. By making the initial distances all very easy and comfortable for your horse, you set him up for a safe, positive experience. Don’t worry about what lead your horse lands on after the final cavalletti. If you intended to turn right and he lands on the left lead, make a flying or simple change a few strides after the jump.
Make a point to straighten your horse for at least three to four strides in both the approach to the line and after landing from the final cavalletti. This will discourage him from rushing around his turns. If you have trouble staying straight, add cones or poles on the corners to guide your track. If your space is limited (for example, in a small indoor arena), bring him to a halt after the final jump, still straight on your line, then turn him around and pick up the canter again.
After cantering over this line two or three times, change direction by looping around to one of the cavalletti on a diagonal, and then repeat the line a few times on the other lead.
Next, on the opposite long side of the arena, pick up the pace and approach the line in a more forward canter. Follow your horse’s motion with your body, keeping your hands above his withers and asking for the same stride lengthening that you practiced on the flat. Think jumpoff pace. Settle a moment as you go around the turn, then close your legs again to the cavalletti. This should produce four forward strides in the line. If it doesn’t, don’t be afraid to use even more leg on the opposite long side before trying the line again.
When the forward four feels easy, sink your weight into a deeper seat and ask for a collected canter in the approach to the two cavalletti. This should produce six steady strides. Repeat it until that feels comfortable. Then change direction over a diagonal cavalletti and repeat the forward four and steady six in the other direction.
Canter-trot-canter line
Take a break and then canter the first line again in five strides. Maintain this pace as you change direction over one of the diagonal cavalletti and then approach the line on the opposite side. After the first cavalletti in the line, drop your weight into your heels, stay balanced in the middle of the saddle and tall in your upper body, and use all of your aids together, including your voice (saying something calming like “whoa”), to make a transition to trot. If you tip up on your horse’s neck, you won’t be able to bring him back in time for the trot cavalletti. If you get into too deep a seat, you may unconsciously drive him too forward.
Ride over the three trot poles in posting trot. After that, make a transition back to canter. Focus on staying straight on your line to the final single cavalletti and balanced in the middle of the saddle. Don’t worry about how many strides he takes to the final cavalletti. Rushing to the takeoff spot may force him to leave long or chip in. If you remain quiet in the saddle, he will stay calm enough to find a good distance to the obstacle, adding a stride if necessary to produce a nice effort.
This is an important lesson to emphasize in all of your work at home. Professionals spend most of their hours at home building their horses’ gymnastic abilities, encouraging them to power off the ground from closer takeoff spots. Many people see professional hunter riders at shows occasionally asking their horses to take big, athletic leaps from long spots. Spectators may not realize that these are rare moments.
Safety and common sense always go a long way. It’s generally safer to choose closer takeoff spots than longer ones. Allowing your horse to get in the habit of going too fast and long teaches him to arrive at fences at the end of his stride limit—the longest stride he can naturally and comfortably produce. He then has to really reach to get across the jump or cavalletti, which puts him at a greater risk of tripping over it. This turns a simple, safe exercise into a difficult and potentially dangerous one.
If your horse tries to canter over the trot poles—as many green horses do the first time they try this exercise—don’t panic. Allow him to canter out of the line and then come around to it again. This time, instead of making a transition to trot after the first cavalletti, bring him down to the walk. With a little repetition, he’ll learn to think more about where his feet are.
By this point, you should have a good idea of his strengths and weaknesses. If he’s on the hot side, he’ll probably have trouble with the canter–trot part of exercise—and will benefit most from it. If he’s on the lazy side, you may need to reinforce your leg on the second part of the exercise, the trot–canter, with a cluck and tap of the whip, which will help to improve his responsiveness for future courses.
These cavalletti exercises are plenty for a single day’s work. Wait for another day to move on to the next exercises.

Improve Adjustability With Gymnastics
Set-up (see diagram below): On one long side of the arena, set an oxer–vertical–oxer line, with 62 feet between the first oxer and the vertical and another 62 feet from the vertical to the second oxer. On the other long side, set an oxer–crossrail–crossrail–oxer line, with 62 feet from the first oxer to the first crossrail, 28 feet between the crossrails, and 62 feet from the second crossrail to the second oxer. If you had to adjust the striding of the first cavalletti exercises to match your horse’s stride, do so with these distances, as well. The goal is still to begin each exercise with very comfortable striding before testing his adjustability.
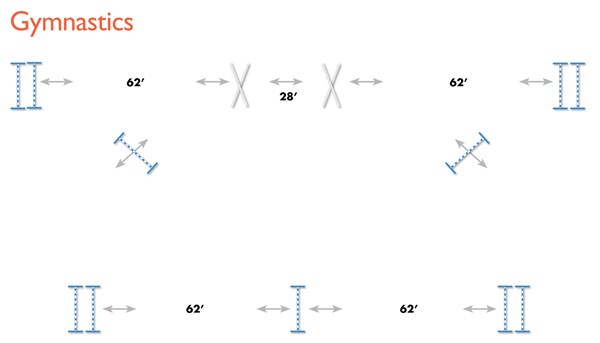
Set two verticals diagonally on the quarterline where you placed the angled cavalletti in the previous exercises.
As with the cavalletti exercise, the test of these exercises will be the track, not the fences. So set all of the jumps at a very comfortable height for your level. (Even for grand-prix horses, I set them no higher than 3-foot-9.) If you are less experienced, make the oxers very narrow or even change all of the fences to crossrails. Make all of the oxers square so they can be jumped in both directions, and place ground poles on both sides of each obstacle.
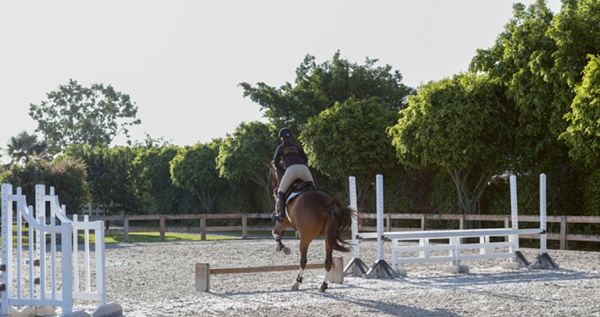
Oxer–vertical–oxer line
Start this session with the same flatwork warm-up you did earlier. Then canter over one of the verticals on the diagonal a few times. When you’re ready, approach the oxer-vertical-oxer line in a medium canter, focusing on straightness. The distances should each ride in four strides. If they don’t, adjust them as necessary to make them comfortable. Repeat the line a few times and then approach it in a more collected canter. This time, after he lands from the first oxer, drop your weight into your heels, tighten your seat—without sitting too deeply in the saddle—and bring your hands toward your belly (think of bringing your horse’s neck a little closer to you) to ask for a steady five strides to the vertical. After the vertical, ask your horse to open his stride again to produce four forward strides to the second oxer. Repeat this until it feels comfortable.
Next, approach the line in a medium canter again and ask for four forward strides from the first oxer to the vertical. When he lands from the vertical, drop your weight in your heels to ask him to shorten for five steady strides to the second oxer. Repeat this a few times before changing direction over a diagonal vertical and repeating the same exercises on the other lead.
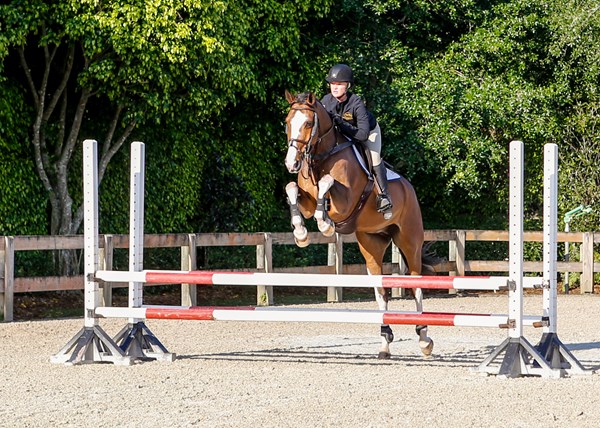
Oxer–crossrail–crossrail–oxer line
As I said earlier, this exercise is much more challenging—even with small jumps—so it should be attempted only by riders with experience jumping combinations and gymnastics with difficult distances. Approach the first oxer in a forward canter, planning to ride the line to the crossrail in four normal strides. This momentum will carry you through the crossrail in-and-out in one stride and the distance to the final oxer in another four normal strides. Repeat this until it feels comfortable.
Next, approach the line in a more collected canter, still maintaining enough impulsion to help your horse clear the back rail of the first oxer. When he lands, drop into your heels and stay tall in your upper body to help him balance for five strides to the crossrail, followed by a steady two strides to the second crossrail. After the in-and-out, stay balanced in the middle of the saddle to help him produce a steady five strides to the last oxer. If your horse is on the lazy side, he may lose impulsion here, so be ready to close your leg firmly and give a cluck to help him clear the back rail of the final oxer. Repeat this a few times and then do the same exercises in the other direction.
As you progress through this program, you’ll get an idea of how adjustable your horse is and what he needs to work on. Repeat the exercises now and then to gauge his improvement over time. No matter how talented he is, you can always make him more rideable. Your work will pay off in the show ring.
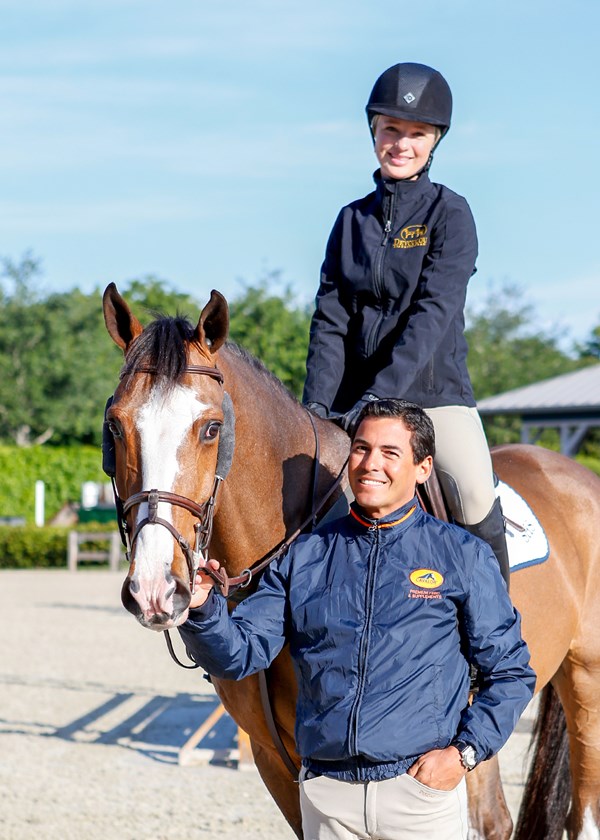
Jumper/equitation trainer Max Amaya began his career in his native country, Argentina. He competed extensively at the grand-prix level in South America before moving to North America in 1992. He trained with Canadian grand-prix rider Mario Deslauriers before working closely with Frank and Stacia Madden of Beacon Hill Show Stables. Today, Max runs his own business, Stonehenge Stables, in Colts Neck, New Jersey. He has competed in multiple international competitions, including the 2006 World Equestrian Games in Aachen, Germany, the 2007 Pan American Games in Rio de Janeiro, Brazil, and 15 Nations Cups. Many of his students have succeeded at the top levels in the Junior, amateur and professional divisions. They include Jessica Springsteen, winner of the 2008 ASPCA Maclay National Championship and the 2009 Pessoa/USEF National Hunter Seat Medal Final, and Brianne Goutal, the first rider to win all four equitation finals (one in 2004 and three in 2005). Max and Beacon Hill assistant trainer Krista Freundlich married last December.