A course set on the mildest of grades can seem much more challenging than the same course set on perfectly flat ground. Uphill lines require slightly more forward rides and downhill lines require more upper body control to maintain your horse’s pace and balance. Turns on unlevel ground also require careful, precise balancing.
To understand how sloping ground affects your horse’s momentum and balance, imagine riding a bicycle over a gentle hill. You have to pedal a little harder up the hill to keep the forward pace. Going down, though, the pedals practically turn themselves and you probably will have to brake. If the road has any curve in it, you must hold your body especially steady to avoid tipping the bike over.
It’s the same on a horse, with the added bonus that most horses have a natural instinct to balance themselves on hills. Just like us, some horses have better natural balance than others, but all horses can improve their balance on uneven ground with practice.
Mastering skills such as maintaining your horse’s pace and balance will make you safer and more confident in many situations, such as trail riding and schooling in open pastures when you probably will encounter uneven terrain. In the show ring, it will help you smooth out the flow of your trips, giving you an advantage over other riders who haven’t practiced riding on unlevel ground.
As an added benefit, working on a grade will strengthen your horse’s muscles (particularly in his hindquarters) and improve his agility and coordination. Without even realizing that you’re doing it, you’ll be enhancing his jumping style and making him more adjustable and rideable.
Your primary job when riding on unlevel ground is to maintain your own balance well enough that you don’t interfere with your horse. As your skills on hills advance, though, you’ll be able to help him make minor adjustments so that every distance rides as smoothly as if you were on flat ground.
Anybody with basic steering skills and the ability to stay fairly balanced in the saddle at walk, trot and canter can learn how to handle uneven ground. I grew up riding in open, unlevel pastures. For beginners, it’s best to do it only in enclosed areas. But more experienced riders should take advantage of every opportunity to ride on varied terrain. As you practice the following exercises, keep them as simple as they appear here. My experiences have taught me to trust my instincts and make my riding as uncomplicated as possible. That way, skills such as riding on uneven ground become natural very quickly.
In the first exercise, riding a simple rectangle on unlevel ground at the trot will teach you how to make adjustments with your aids and upper body, which will help your horse maintain his rhythm and pace without interfering with his balance. Next you’ll apply these skills over a single fence and then over a line of two fences.
Exercise 1: Ride a Rectangle
You’ll ride the rectangle exercise at the trot and then the canter. The adjustments with your aids and upper body will feel easy at the trot and slightly more challenging at the canter and over jumps. Progressing gradually through each step is the best way to make them second nature, even if that means spacing these lessons out over days or weeks.
1. Find a nice pasture or open area with a very gentle grade. If you’re flatland-locked, you may need to trailer your horse to suitable uneven ground. Warm up on the flattest part of the arena.
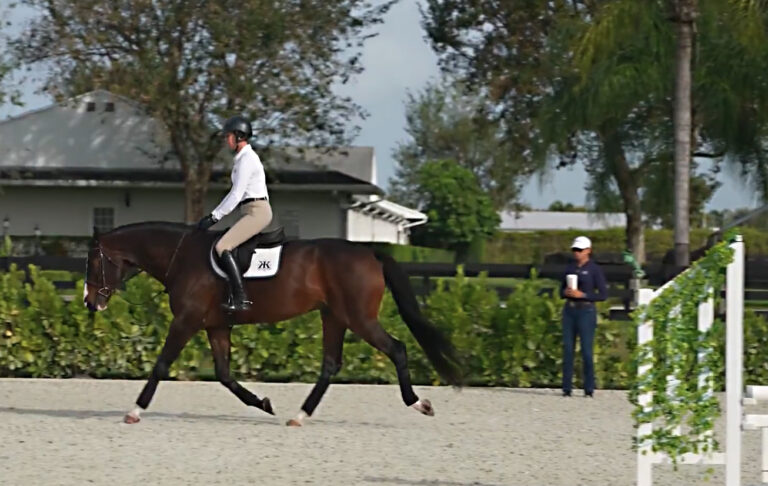
2. Pick up a normal posting trot and check that your upper body is a few inches in front of the vertical, then head straight up the grade. Maintain your upper-body angle all the way to the top (the “hill” should be so gentle that it doesn’t require you to change your hip angle). Meanwhile, keep your legs gently closed on your horse’s sides to encourage him to maintain the same trot up the hill.
3. At the top of the hill, prepare to turn your horse to travel perpendicular to the grade by using balancing aids: Look around the corner first, then step into your outside stirrup, add a little more pressure with both legs, and bring both hands toward your outside hip, creating an indirect inside rein aid. This will help balance him on the turn. Maintain a steady pace across the top of the hill and then prepare for a turn back down the hill, using the same balancing aids. If you’re comfortable doing sitting trot, sit in the saddle, which helps you feel yourself balancing your horse, before focusing your outside hip to signal him to slow down. Coming out of the turn, use your outside aids to straighten him and keep his hind legs on the same track as his front legs.
4. As you travel downhill still sitting, bring your upper body back so you’re only slightly in front of or on the vertical. Keep your shoulders balanced over you hips all the way down, allowing your horse to shift his own balance back over his hind-quarters. Keep your legs closed on his sides to bring him into the bridle, which helps him maintain his pace and balance down the hill.
5. At the bottom of the hill, turn your eyes again before balancing your horse around the corner and completing the rectangle. Reestablish your original upper-body position, a few inches in front of the vertical, as you trot perpendicular to the grade, back to your starting point.
Repeat this rectangle a few times both directions until closing your legs on the uphill, balancing on the turns, and “sitting away” from your horse on the downhill feel natural. Then pick up a regular canter and repeat the exercise in both directions, riding the uphills in two-point position and the downhills sitting lightly in the saddle. Think same pace all the way around the rectangle. More advanced riders can increase the pace to a gallop on the uphills.
Problem Solving
- If your horse rushes down the hill and/or leans on the bit, you may be tilting your shoulders too far forward, throwing his balance onto his forehand. Think about sitting just a hair behind the vertical.
- If you feel the pace quicken going downhill, be sure to keep your legs closed. Some horses shorten their strides going downhill and lag behind their riders’ legs. They need extra support to maintain the flow down the hill.
Exercise 2: Add a Jump
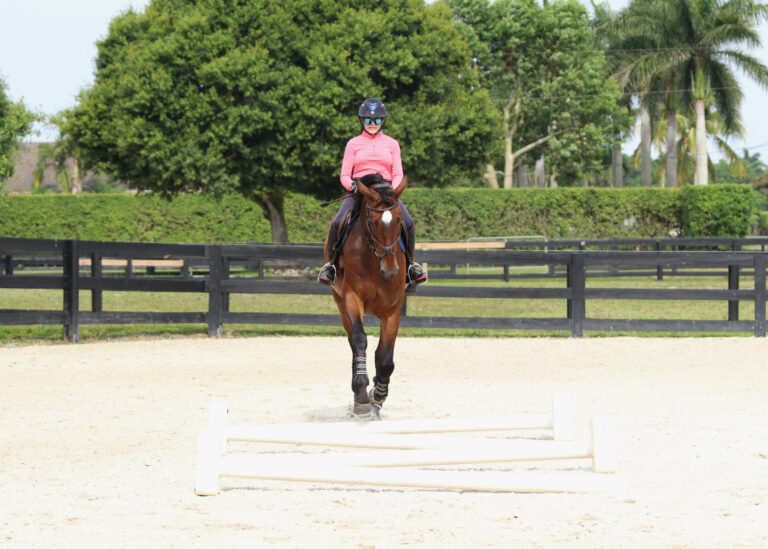
Now you’re ready to test your skills over a jump. If you and your horse are experienced jumpers, set a raised cavalletti or a small vertical (about 2 feet high) on a line perpendicular to the grade of the hill. If you’re less experienced, use a ground pole in place of the jump.
1. Pick up a regular canter, getting in a two-point position, with your heels down and shoulders a few inches in front of the vertical. Head uphill toward the jump or pole, with your legs closed on your horse’s sides just a s they were in Exercise 1. As you approach the jump, be careful not to “throw” your upper body toward it. This might cause your horse to chip in (add an extra awkward stride just before the jump) or “reach” for the distance, which might cause you to get left behind the motion over the jump. Instead, continue supporting your horse with your legs and wait for him to take off at the base of the jump.
2. After he lands from the fence, allow him to go straight for several strides. Then ask him to turn as you did on the flat (see Exercise 1, Step 3).
3. Circle back down the hill, shifting your upper body backward, and approach the uphill jump again. Repeat jumping the uphill fence several times.
4. Reverse your circle and practice cantering downhill over the jump. As you make the turn to the jump, close your legs, bend your elbows and apply an indirect inside rein aid to bring your horse into the bridle, balance and slow him. Coming out of the turn, use your outside aids to straighten him. Bring your upper body back so you’re only slightly in front of or on the vertical and lower your seat so you’re sitting lightly in the saddle. A stride or two in front of the jump, lean away from it bringing your upper body slightly back even more. This will help your horse keep the weight off his forehand in preparation for takeoff. Be sure to follow his mouth with your hands once he’s in the air.
Problem Solving
- If your horse makes an awkward “pop” jump over the downhill fence, he may be running past the distance, getting too close to the jump on takeoff. To correct this, use firmer balancing aids (closing your legs, bending your elbows and raising your hands to bring him into the bridle) and double-check that your upper body isn’t slipping too forward. If he continues to pull you past the distance, consider schooling him with a slightly stronger bit until he learns to stay balanced over downhill fences.
- If he rushes over the downhill jump, place a ground pole next to the jump. Canter back and forth over the pole until he settles down. Then approach the jump at the trot. From several strides out, your horse won’t know whether you plan to jump the pole or the jump, so he should begin to slow down and wait for you. Alternate trotting the jump and cantering the pole until he’s slowed down, then try cantering the jump again.
Jump a Line
When your horse is comfortably cantering up and down over a single jump, add a second fence about six or seven strides apart (84 feet or 96 feet) to make a straight line. Again if you’re less experienced, use ground poles in place of the jumps.
Maintain the same closed leg going uphill and upright upper body going downhill. If he repeatedly chips at the uphill “out” jump, you may not be supporting him with enough leg–or you may be seeing one fewer stride than is really there and pushing your body at the jump too soon. In either case, go back to cantering a single uphill rail and try to increase your pace slightly without making any changes with your upper body. Then go back to the jumps and try counting the strides in your head to feel the rhythm. Stay conscious of your hip angle, being sure it doesn’t decrease as you progress up the hill, causing you to throw your upper body in front of the motion.
If your horse starts to rush down the line, place a ground pole next to the second jump and bring him back to trot after the first jump and guide him to the pole instead of the second jump. Then alternate jumping the pole and jump until he slows down.
If you feel your horse quicken going downhill, be sure to keep your legs closed to support him as you did on the rectangle exercise.
At the Show
Using these skills at horse shows requires careful analysis and observation of the courses. Sometimes the slope of the ground is so subtle that you won’t notice it from the ground. Watching other riders, especially the experts, can help. You’ll see them ride more forward to uphill lines and and sit up more on downhill ones. You may even notice them making wider-than-normal turns, particularly on grass or wet footing, which can make a slope slippery. Even a slight grade can make questionable footing dangerous. If the uneven ground is especially hard or muddy, save your horse (and yourself) for another day.
When it’s your turn in the ring, aim to keep the same pace throughout the course. Stay forward up the hills without leaning ahead of the motion or making a big move with your body before takeoff. Balance your horse early for the downhill lines and control your upper body to avoid “burying” him at the out jumps. Use your balancing aids for every turn, uphill and down.
USEF hunter and equitation judge Rachel Kennedy showed horses for Jack Trainor’s clients both as a Junior rider and as a professional, earning seven USEF Horse of the Year titles. After earning a fine arts degree from the Philadelphia College of Art, Rachel started her own business, ESP Farm, in Brookeville, Maryland, which she operates with her husband, Oliver, in addition to raiding their son, Will. Among the many ribbons won by ESP horses and riders on the AA-Circuit, Rachel finished 12th in the 2009 USHJA International Hunter Derby Finals riding Holly Bossert’s Ebony.
This article, “Survive the Slant,” appeared in Practical Horseman’s February 2010 issue.