What is the purpose of draw reins and side reins? When and how should they be used, and should I be taking any precautions when using them?
Draw reins and side reins are training aids that can help your horse learn to maintain light contact with the bit while moving forward freely into the bridle, and to carry himself straight and in balance. Draw reins are used for schooling under saddle; side reins are used primarily for work on the longe and in hand.
As an Amazon Associate, Practical Horseman may earn an affiliate commission when you buy through links on our site. Product links are selected by Practical Horseman editors.
Before I explain their use, though, let me clarify what side and draw reins are not: They’re not shortcuts to force a horse’s head down or force his nose to the vertical, or to “muscle him up” or “make him flex” on one side or the other. Used improperly, side reins and draw reins can cause a horse to habitually shorten his stride, stiffen or overbend to evade contact, and become heavy on the forehand; They can also make him sore in the neck and back. And with side reins in particular (not draw reins, which are easy to lengthen or drop in an emergency), a horse unaccustomed to their restrictive feel may bang himself in the mouth and panic, then run backward, rear, get a leg caught in the reins, or even flip over.
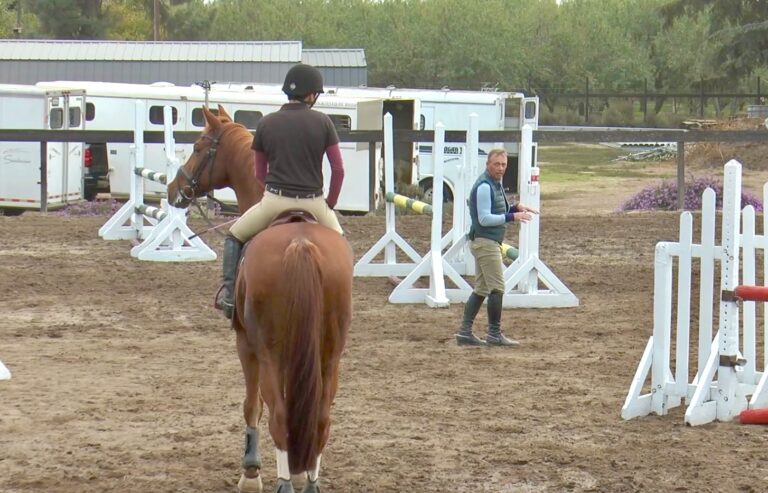
Because of these risks, introduce your horse to draw reins or side reins only after you thoroughly understand their “what, why, and how” – which I’ll explain – and only with the supervision of a trainer who can tell you whether you horse will benefit from these aids. (For instance, draw reins may be useful for reschooling an older horse who’s stiff and habitually carries his head high and his nose out. But they should never be introduced to a young horse until after he’s learned to walk, trot, and canter steadily in straight lines and circles, and to execute basic upward and downward transitions.) And if your horse is excitable or nervous, let your trainer be the one to introduce him to draw or side reins; that way, he’ll get a calm, reassuring first experience and you’ll get a good look at what you’re trying to accomplish.
Protect your horse’s legs with exercise boots and bell boots when you begin working with draw or side reins, just in case he missteps during this new part of his training. And, at least until the two of you are accustomed to these new aids, use them in an enclosed area (a ring or arena) so he can’t bolt if there’s an accident.
One more thing: If your horse tends to toss his head when you ask for contact, hold off on using draw or side reins until your veterinarian has ruled out physical problems that might be causing him pain.
Using Draw Reins for Horses
All set? Let’s start with draw reins. They’re used only while the horse is being ridden under saddle, wearing a bridle fitted with a snaffle bit and regular reins. (I’ll tell you how to manage the two sets of reins.)
Draw reins are a continuous strap, 15 to 17 feet long, buckled in the center, with ends that loop around the girth on both sides of the horse. Position the loop ends halfway between his elbow and the bottom of the saddle flap. (Some professionals attach the loops to the center ring of a breastplate yoke, or to the girth between the legs, but I don’t. That’s a severe use of draw reins that can overflex the horse.) The draw reins go from the girth, up through the bit rings – remember, use only with a mild snaffle – and back to the rider’s hands. Draw reins don’t have much stopping power; use them together with the regular snaffle rein on your horse’s bridle, holding the two sets of reins as you would the reins of a double bridle (draw reins on the inside, snaffle reins on the outside).
I recommend using draw reins for flatwork only. However, if you and your trainer wish to use them for jumping, you MUST run them through a neck strap (a stirrup leather buckled around the neck) to keep them out of the way of your horse’s legs.
Draw reins are available in cotton webbing, leather, or nylon. I recommend against nylon; it’s slippery when wet, and it can “burn” your hands if your horse pulls. I like webbing reins, particularly those with hand stops to help you place your hands consistently – so, for instance, your trainer can tell you to “put your hands on ‘two.'” Correct hand placement is critical for straightness; yes, your legs encourage straightness, too, but correctly used draw reins unmistakably communicate the feeling of straightness to you and your horse by aligning him from withers to poll through a “tunnel” created by your hands.
Draw reins (and side reins) also let your horse know he can lower his head under saddle. If he’s unfamiliar with stretching down, draw reins let him feel contact as he stretches forward and down while you have your leg on and your fist closed around the reins. But you’re not “cranking” his head down; you’re encouraging him to lower his neck and head, with his nose just a little ahead of the vertical, by guiding him to that position with your fingers softly closed on the draw reins. When his head is where you want it (here’s a moment where your trainer’s input is valuable), your draw-rein contact needs to be giving, even loose.
Draw reins show your horse the way, but you don’t want him to depend on them once he’s there. Constantly riding with draw reins may teach him to hang or lean on them; when you take them off, he may be less on the bit than before because they were “holding” him there. He may even throw up his head or poke out his nose – the very things you were trying to teach him not to do. So keep draw rein sessions short: Warm him up in regular reins, ride five or ten minutes with draw reins, and then ask him to maintain the proper neck and head position with regular reins. If he pokes his nose forward, close your hands and legs for one or two strides and see if he responds by coming back. If he doesn’t reinforce the lesson with another five or ten minutes with draw reins, and then ask him to maintain the proper neck and head position with regular reins. If he pokes his nose forward, close your hands and legs for one or two strides and see if he responds by coming back. If he doesn’t, reinforce the lesson with another five or ten minutes using draw reins. Finish your schooling session with a free rein to let him stretch his neck.
Don’t use draw reins every day. Use them periodically, as a reminder – for instance, at times when your horse is offering more resistance, or when you introduce a new or more difficult exercise.
Using Side Reins For Horses
Unlike draw reins (which you use only when mounted), side reins are a training aid you can use with a horse under saddle or on the longe line, or for in-hand work. That said, I don’t recommend riding with side reins unless your horse is on a longe line and under your trainer’s control. If he isn’t and if he stumbles, spooks, or bucks, you or he could get a foot tangled in the side reins – which you can’t easily release from the saddle. The difficulty of lengthening or shortening the side reins while mounted is another reason they’re best used while you’re on the ground or being longed. And a horse who slips while in side reins won’t be able to use his head and neck to regain his balance – so be sure the footing is level and dry if you’re schooling in them.
Choose leather side reins with rubber donuts; they’re no more expensive than nylon side reins (many of which come with elastic inserts that eventually stretch as much as three or four insches – too much to be effective). Another plus for inexpensive leather: It breaks in an emergency; nylon doesn’t.
You can use side reins with a saddle or a longeing surcingle. The reins loop around the girth or surcingle at one end (position them as with draw reins) and snap to the bit at the other. Buckles on each rein allow you to adjust them independently; numbered holes take the guesswork out of adjusting evenly.
Some safety tips: Don’t let the snap ends of the side reins dangle; they could get tangled around the horse’s leg or stepped on, pulling the saddle or surcingle around. When side reins are on but not in use, snap them to the saddle’s D-rings or to the surcingle. And don’t let a horse in side reins scratch himself or rub against an object; he could get hung up.
To prepare your horse for a school in side reins, tack him up and snap the side reins safely out of the way. Warm him up at the walk and trot to let him stretch; then halt and check that the girth or surcingle is tight (you don’t want it slipping forward if he pulls on the side reins).
Now attach the side reins to the bit – loosely at first, even if he’s highly schooled. Give him a few minutes to get used to the contact as he walks and trots some more. Then halt him and shorten the side reins so that his nose is just in front of the vertical.
No one setting is appropriate for all horses; conformational differences between breeds as well as differences in size mean you’ll need to adjust carefully. (Always begin your session with the side reins not attached; if you snap them on in the barn, your horse could snag them on something – or, when he takes those first steps off the crossties or out of the stall and feels his head restricted, he could panic.)
Side reins are an effective way to keep your horse’s body straight (especially his outside shoulder) while he’s working on the circle as you longe him. Or, if he’s already straight, side reins adjusted a hole or two shorter on the inside encourage an inside bend on the circle. As a starting point, adjust both reins to the same length. If your horse is stiff on one side, that rein will be very taut; if he’s hollow on one side, that rein will be loose. You may have to shorten one side or the other by a hole or two for him to feel the pressure evenly on both sides; if you’re not sure about the adjustment, have someone else longe him while you stand back and watch him move. If he’s going evenly and straight, he’ll carry his tail evenly and his back will look relaxed and round.
Other uses of side reins include working your horse in hand (for upper-level movements such as piaffe) or long-lining, but this is advanced training.
For more on the basics of longeing with side reins, see Lendon Gray’s “Create a Good Longe Partner” (Practical Horseman, February 1997) and Holly Hugo-Vidal’s “Longe Safely, Longe Well” (Practical Horseman, December 2000). And be sure to end your longeing session by unsnapping the side reins and letting your horse stretch.
Lisa Zinger competes in dressage at FEI level and is an East Coast clinician. She is based in New Jersey.
Updated from Practical Horseman, August 1998.