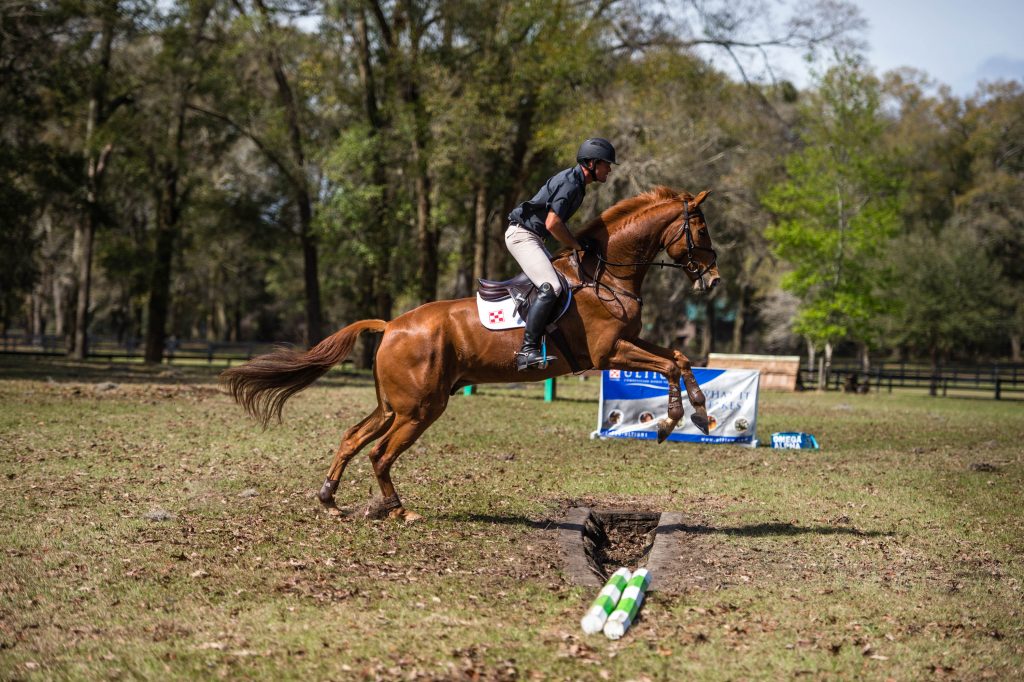
Horses have a natural aversion to jumping a cross-country ditch. So do riders! But that doesn’t mean teaching this skill has to be a miserable experience for everyone involved. I’ve developed a system that does it in a gentle, progressive way guaranteed to produce successful results from the very beginning. In the years that I’ve been using it, I’ve never had a horse refuse to jump the ditch in the first attempt.
Before developing this system, I spent many years retraining students’ “problem” horses who routinely stopped at or were eliminated at ditches. I got on the horses and schooled them until they were jumping ditches successfully again. It was an ugly process that I didn’t enjoy—I hated feeling that I had to dominate them. And no matter how well I got them going, the problem always crept back again, sometimes within just a month’s time.
I finally realized that the riders needed more education than the horses. No matter what level you are, you need to see yourself as your horse’s trainer, always aiming to inspire confidence in him—not to crush his will—so that he looks through that bridle happily. Instead of blaming him for his natural instinct to be cautious near ditches, you want to instill a new instinct in him: to trust and obey you. You have to create a relationship of faith, always thinking through the best ways to communicate with your horse without relying on your trainer to get on and “fix” him.
To do that with ditches, you first have to break the lesson down into easy, understandable steps. Second, you have to give your horse the exact same ride every time you approach a ditch, whether it’s a 2-foot-wide Novice ditch or a 9-foot ditch at the Kentucky Three-Day Event. The worst thing you can do is try to trick him by approaching the ditch as fast as possible with the hope that he won’t notice the ditch until it’s too late. That might work once or twice, but it won’t continue working as you progress up the levels (believe me, there’s no way to sneak up on the Kentucky Three-Day ditch). More importantly, it will destroy your horse’s trust in you.
On the other hand, your job is not to validate his feelings. If he spooks or backs away from the ditch, don’t stroke his neck and tell him that everything’s going to be OK. (As you’ll see later, my system avoids such situations altogether.) Instead, give him a consistent ride that provides all the information he needs, telling him, “There’s a ditch coming up. Be ready. I know you can do this!”
The following step-by-step system will build those critical communication skills, whether you’re introducing a green horse to ditches or retraining an experienced horse after a setback. In most cases, you can progress through all the steps in a single session. Don’t rush! If you can only accomplish some of the steps in a reasonable amount of time (20 or 30 minutes—but don’t put a clock on it), call it a day and finish the steps in your next session.
What You’ll Need to Jump a Cross-Country Ditch
The most important prerequisite for this training system to jump a cross-country ditch is having a horse who comes off the leg willingly. That means he lengthens his stride obediently when you close your legs on his sides. To be truly effective, you should be able to lengthen and shorten his stride in any gait by about 30 percent.
He also needs to be comfortable walking in the open on a soft rein. If he jigs frequently or otherwise shows signs of nervousness, get to the bottom of that before tackling this system.
I don’t recommend incorporating these lessons into a long cross-country schooling session involving numerous obstacles and questions. Warming up over a few straightforward natural fences (10 to 15 efforts max) is fine—but not necessary—if it will help to get you and your horse in a forward, positive mindset. Otherwise, keep the session simple and focused on the task at hand. (I’ll have more detailed warm-up instructions below.)
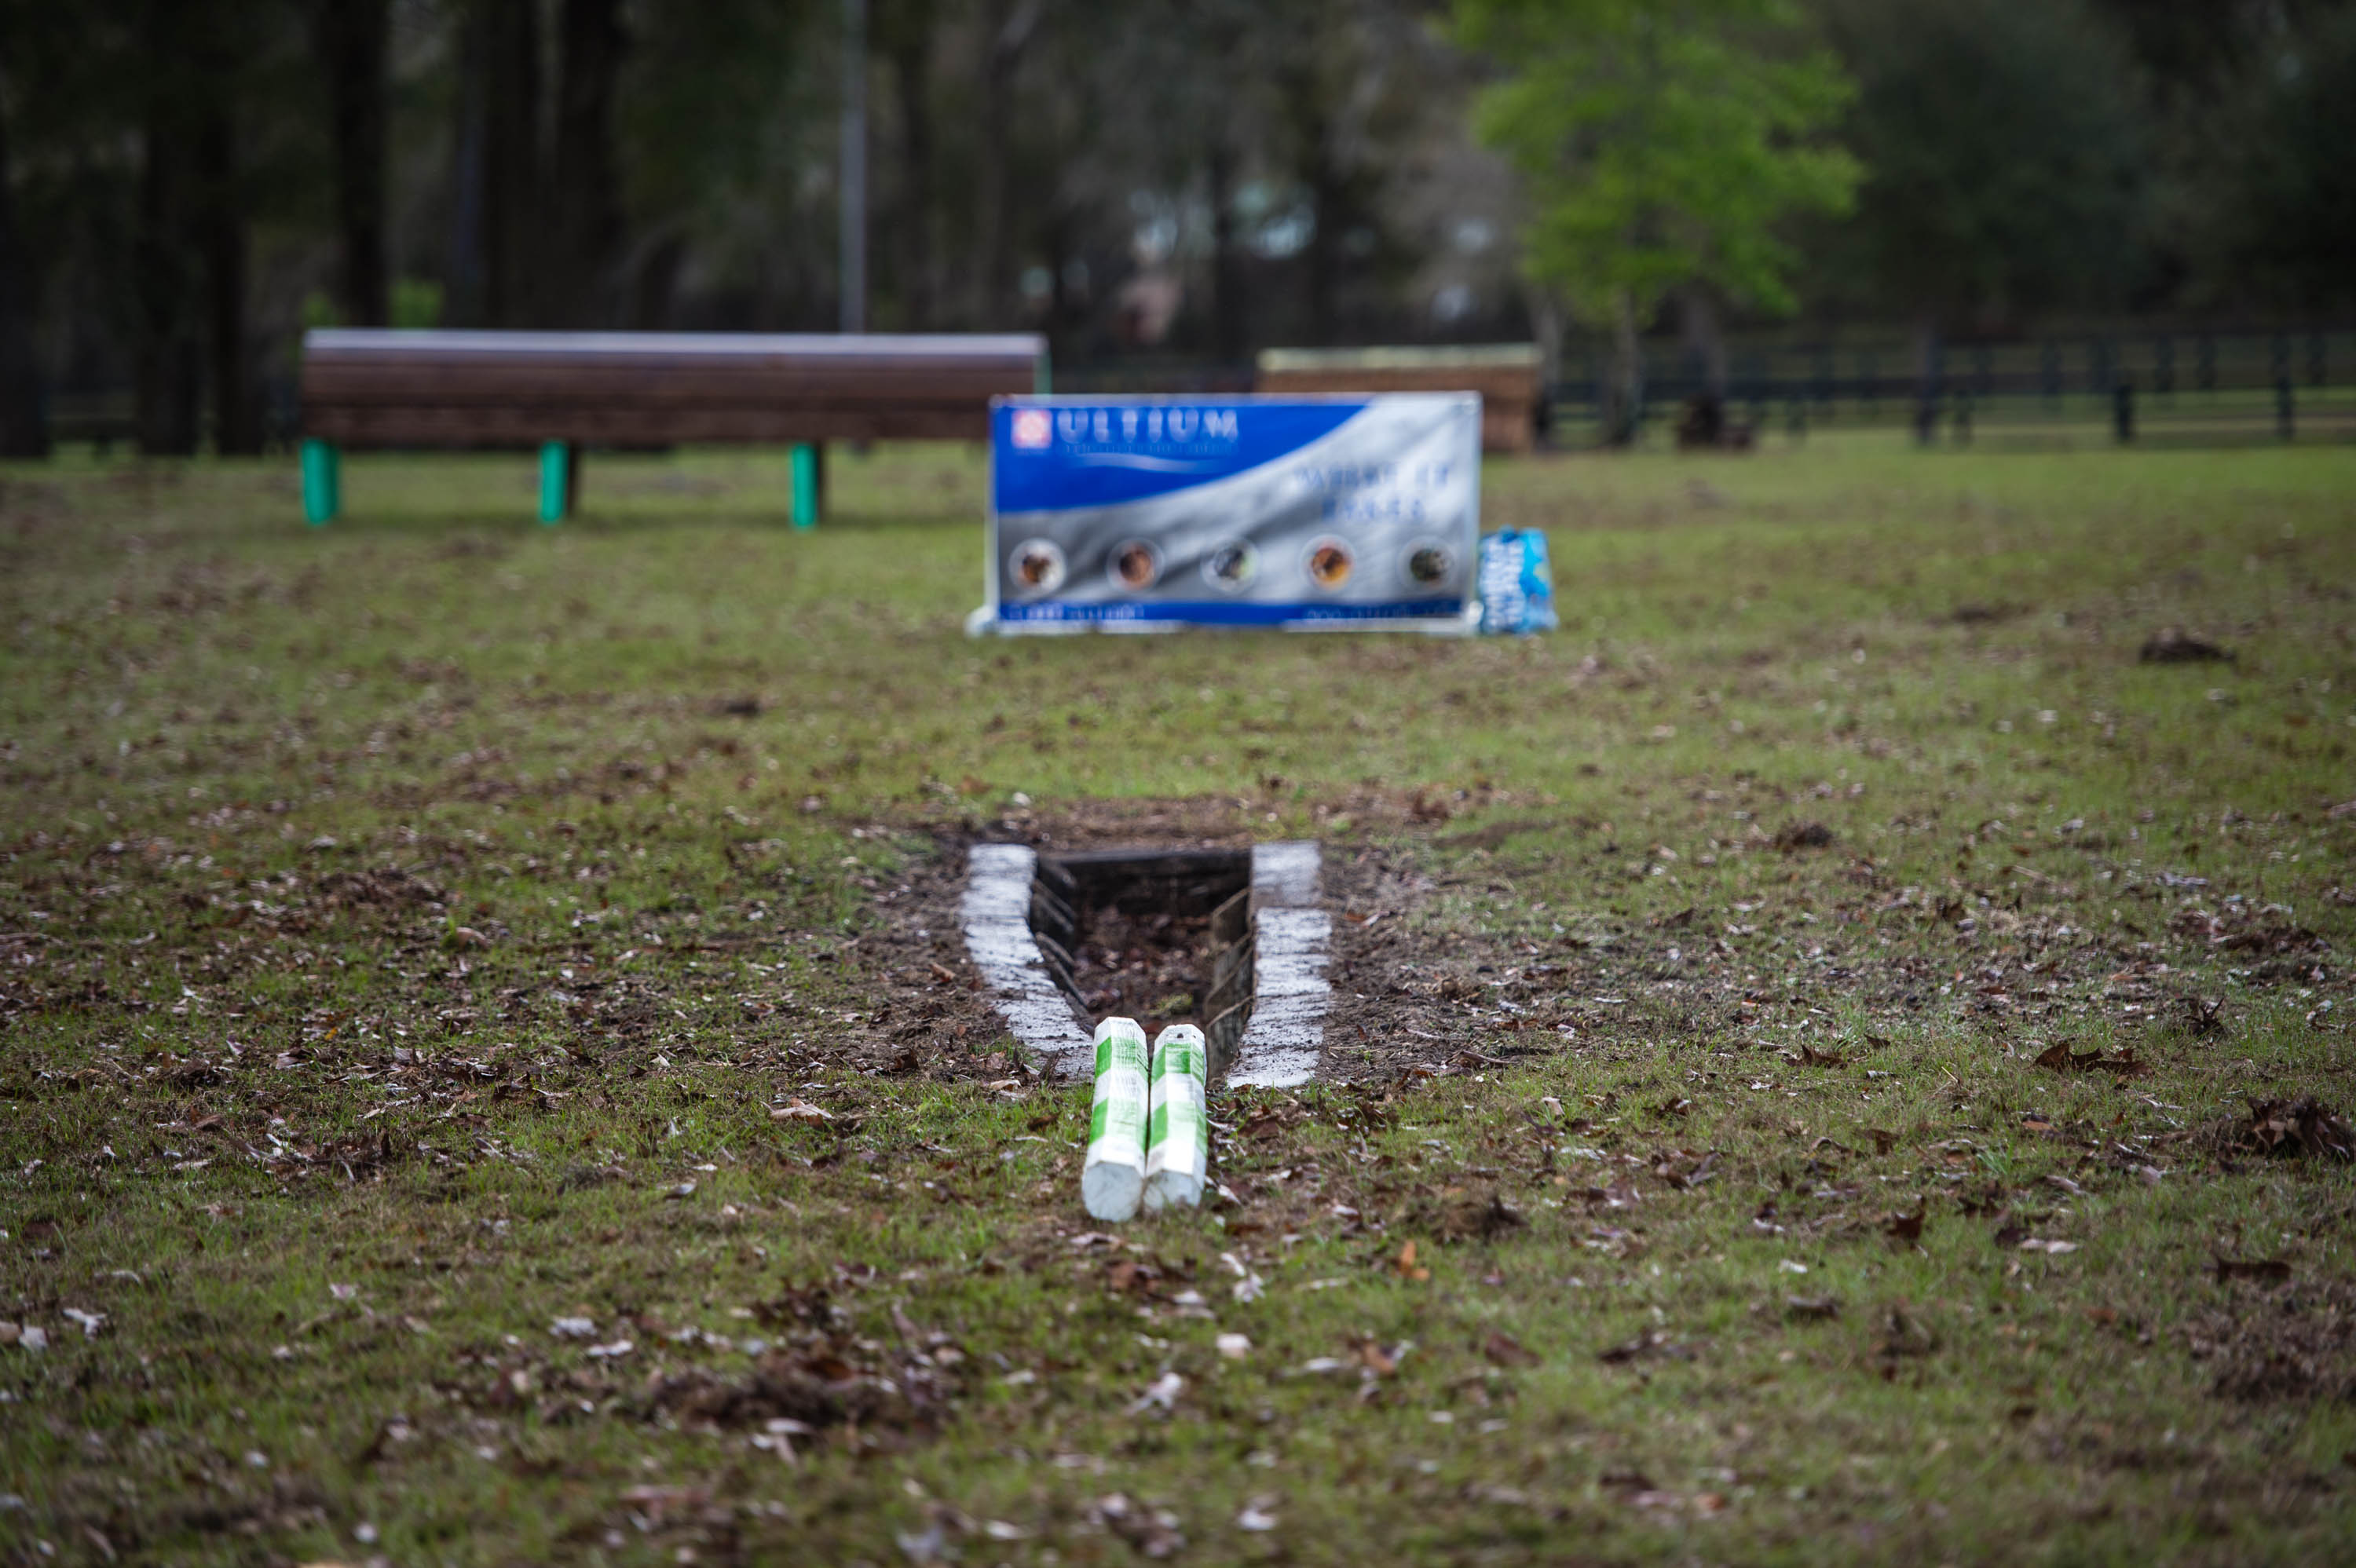
The ideal ditch for this system has a defined edge on both sides—usually revetted with railroad ties or telephone poles. It cannot have wings and should be no wider than about 1½ feet. The surrounding ground should be flat with plenty of open space on one or both ends of the ditch where you can maneuver. The ditch I use is about 20 feet long. It narrows from about 2 feet wide on one end to about 6 inches on the other.
You’ll also need two colorful 12-foot show-jump poles, ideally with stripes that can help you aim for their centers, plus a traffic cone, ground pole or some other easy-to-move visual marker.
Finally, as with all jump schooling, having a ground person is crucial. He or she will not only adjust the poles but give valuable feedback on your ride.
Step 1: Walk Parallel to the Ditch
Warm up your horse far enough away from the ditch to prevent it from being a distraction. Pay special attention to his rideability, asking him to shorten and lengthen his stride in all three gaits. Be very clear with your aids and insist that he respond promptly every time.
When he is moving off your leg well, bring him back to a quiet, comfortable walk. Then approach the ditch from a distance at the walk, preparing to ride a line parallel to it but still several feet away. Your goal is to walk as close as you can get to it without having to force the issue—even if that’s 10 feet away—while bending your horse’s head slightly away from it. He will be able to see the ditch out of the corner of his eye, but you will not be showing it to him. Instead, you’re going to prove to him that he can get gradually closer and closer to it without any traumatic negative experiences.
As you approach the ditch for the first time, be sure to have your horse’s body parallel to it before you are about two horse lengths away. Using your normal leg aids to ask him to continue walking straight forward, use a single rein to gently turn his head 5 or 6 inches in the direction away from the ditch. Don’t overthink this bending component of the exercise. Simply turn his head to the side while allowing his energy to continue going forward. Resist the urge to kick or squeeze your legs dramatically. That would make your horse feel threatened and would numb him to your aids, which is exactly what we’re trying to avoid. You should still be far enough away from the ditch that he can walk peacefully along without a struggle.
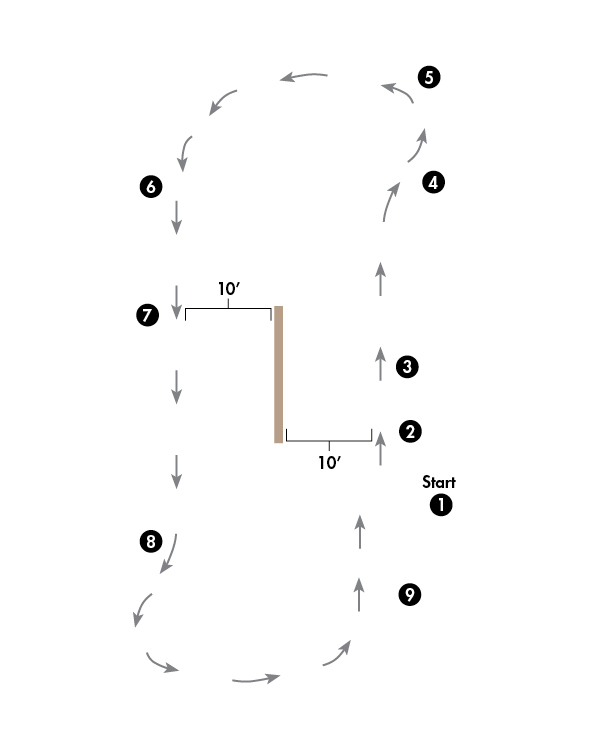
After you’ve walked past the ditch, turn your horse away from it. Then make a large circle in the other direction, giving yourself plenty of room to approach the far side of the ditch in the same manner as you did before. (See diagram, at left.) As you maneuver to that side of the ditch, be very careful to never turn your horse to face it directly. Walk past the back side of the ditch, again riding parallel to it at a comfortable distance while turning his head slightly away from it.
So, for example, if the ditch is on your left side on the first approach, turn to the right after you’re past it. Then make a large circle to the left and walk past the other side of the ditch, which will still be on your horse’s left side.
Repeat this process several times, gradually moving your parallel lines closer and closer to the ditch until you’re within 2 or 3 feet of it. As you do so, remember that it’s your job to determine the line you travel. This exercise should never get so difficult that you have to ride aggressively, but you must still make it understood that your horse needs to stay focused on you at all times.

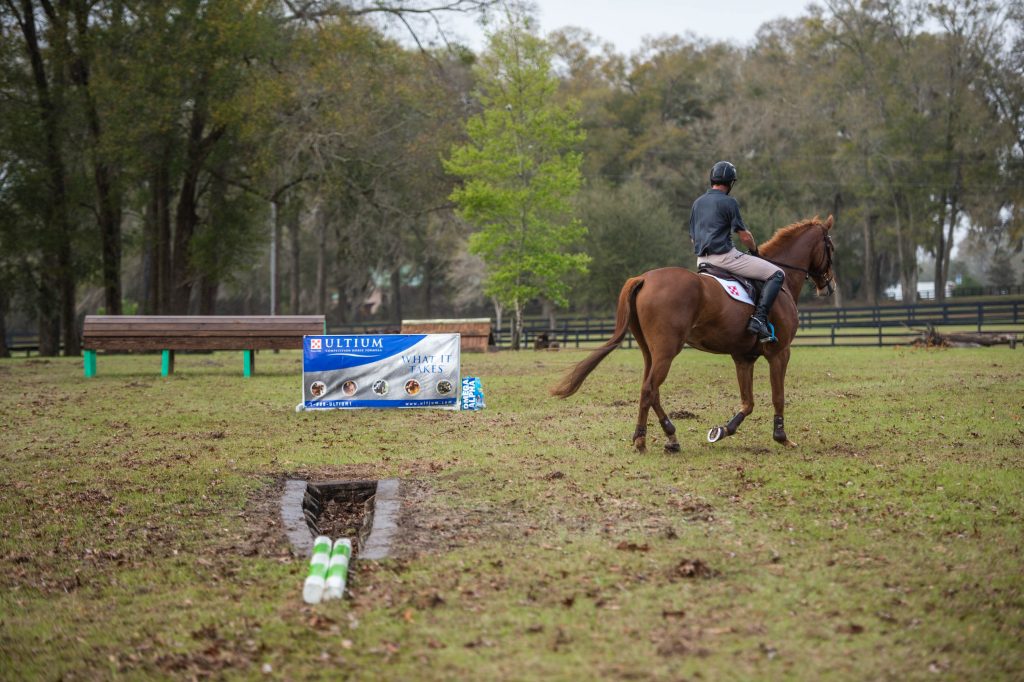

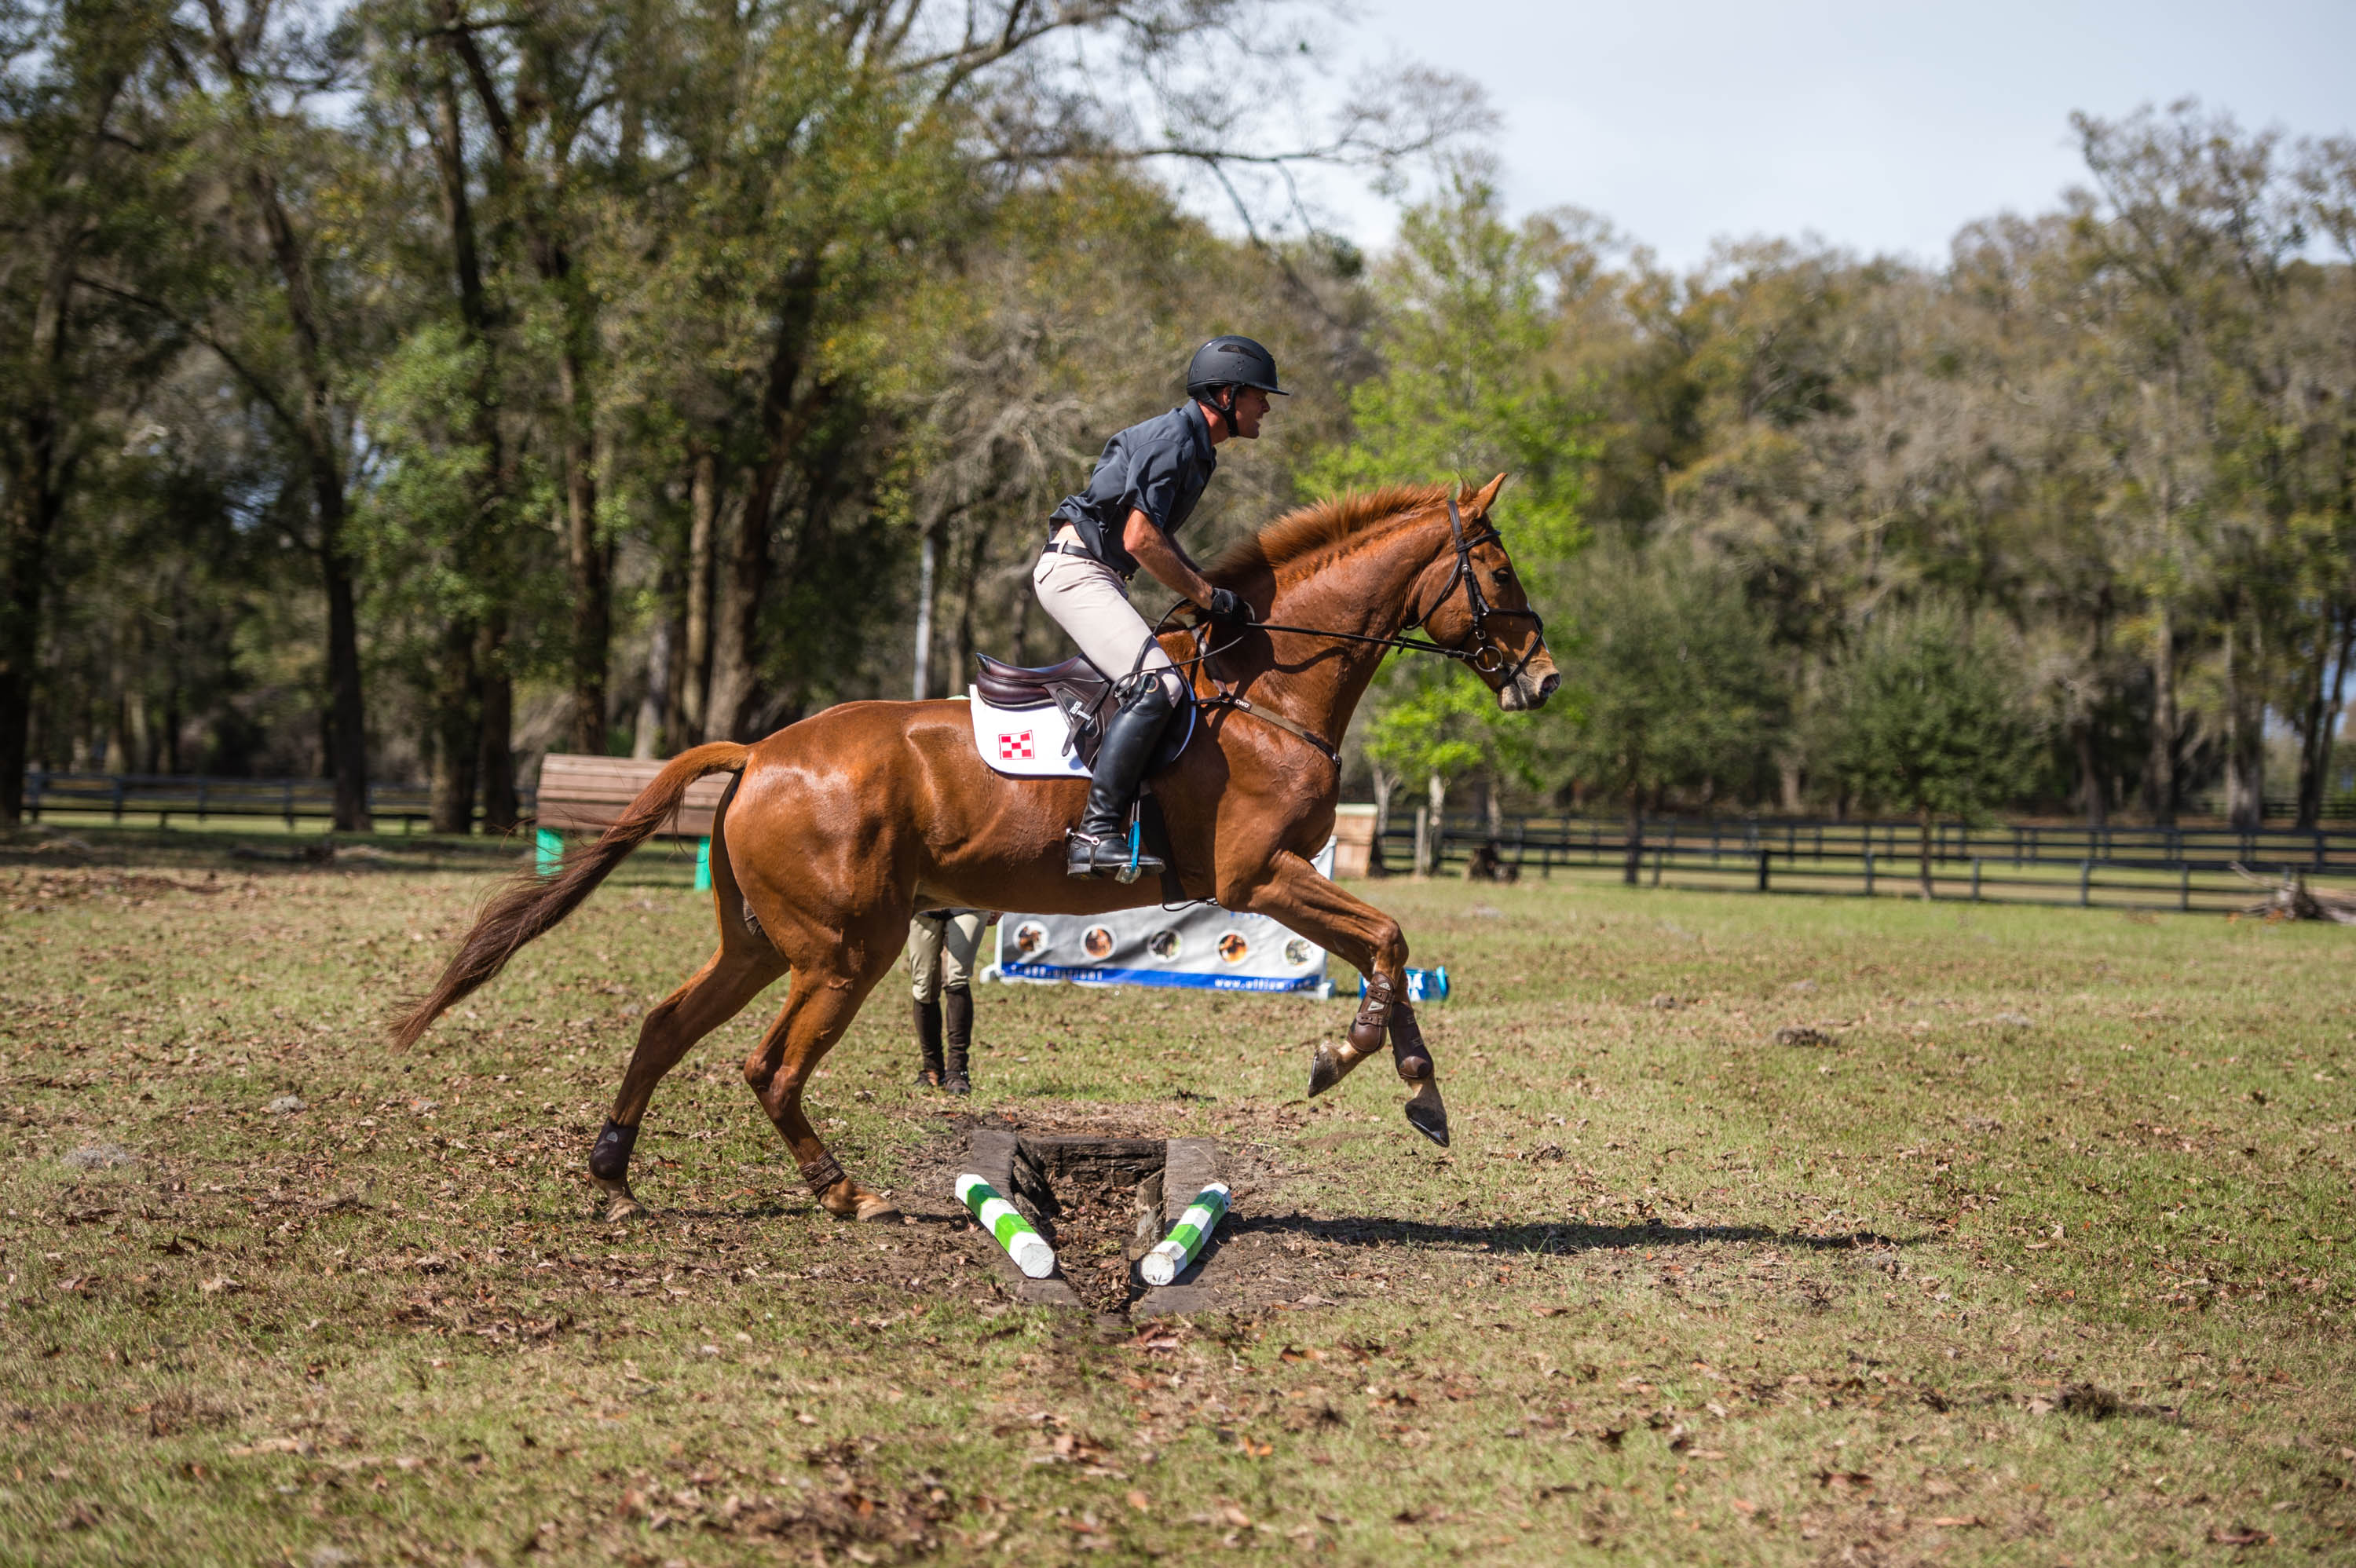
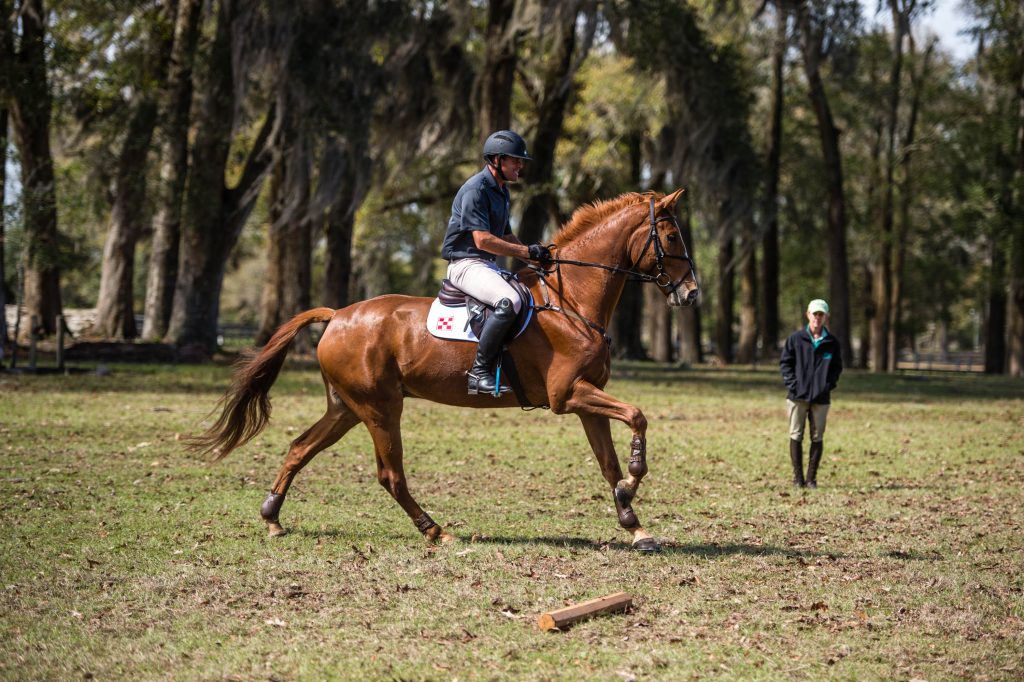
1 Photo: Marshall already has some experience with ditches. Because of this, I can begin fairly close to the edge of this one. Many horses need to start much farther away. As we approach the ditch here, I close my right leg and open my right rein. This asks to ask him to bend his head and neck 5–6 inches to the right. The end result is he’s looking away from the ditch. © Amy K. Dragoo
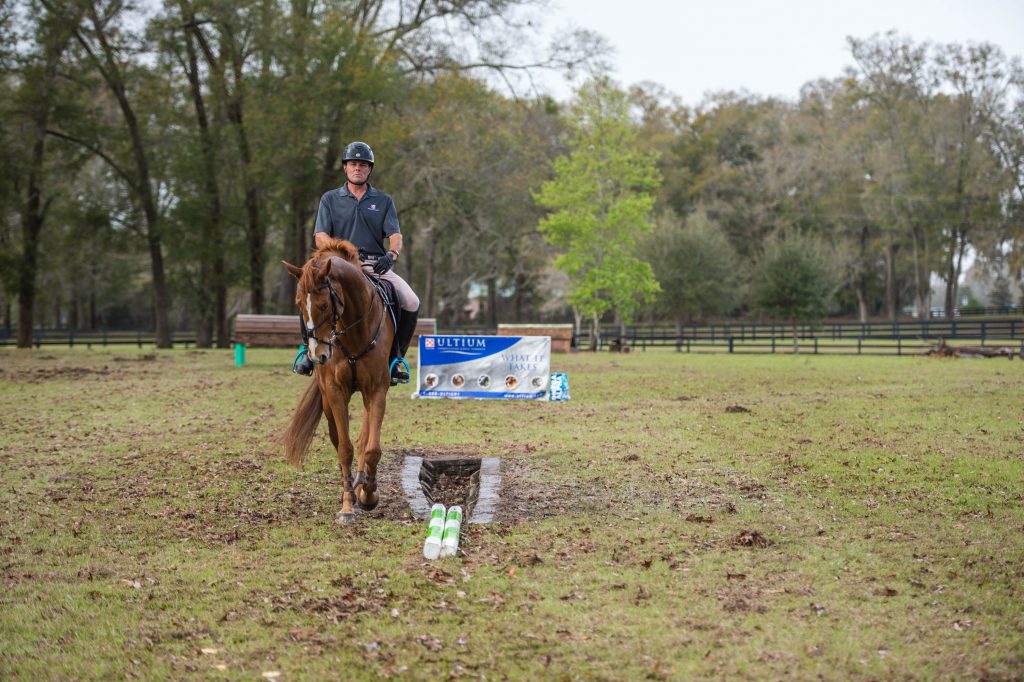
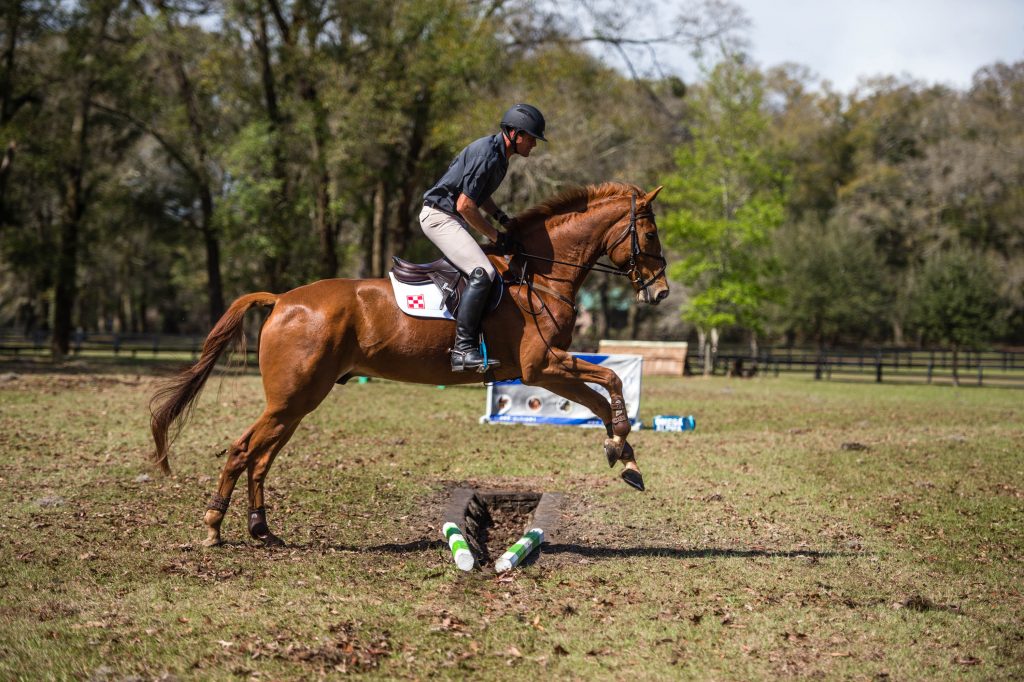
2 Photo: After passing the ditch, I turn Marshall to the right. I allow him to straighten his head and neck. Then we make a wide, looping left turn back toward the ditch. I’ve raised my heel too high here, but I’m clearly using my legs to keep him marching forward.
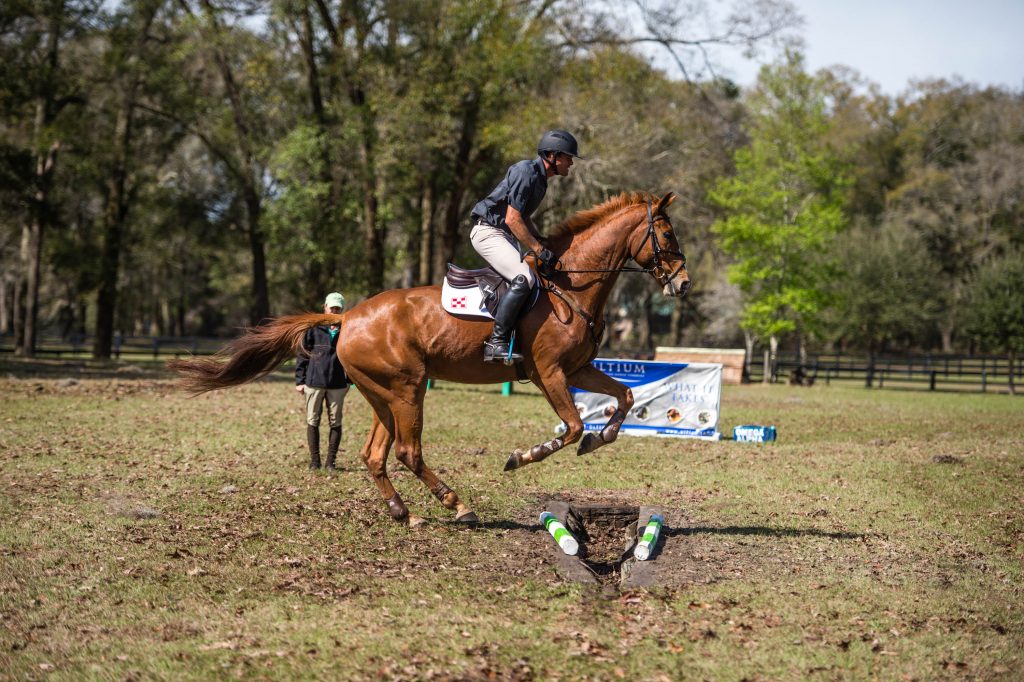
3 Photo: Approaching on the other side, I bend Marshall’s head and neck to the right again. This way, he never gets a chance to look directly at the ditch. I’ll walk past the ditch this way. Then I’ll turn him to the right and make a wide turn left back to it.
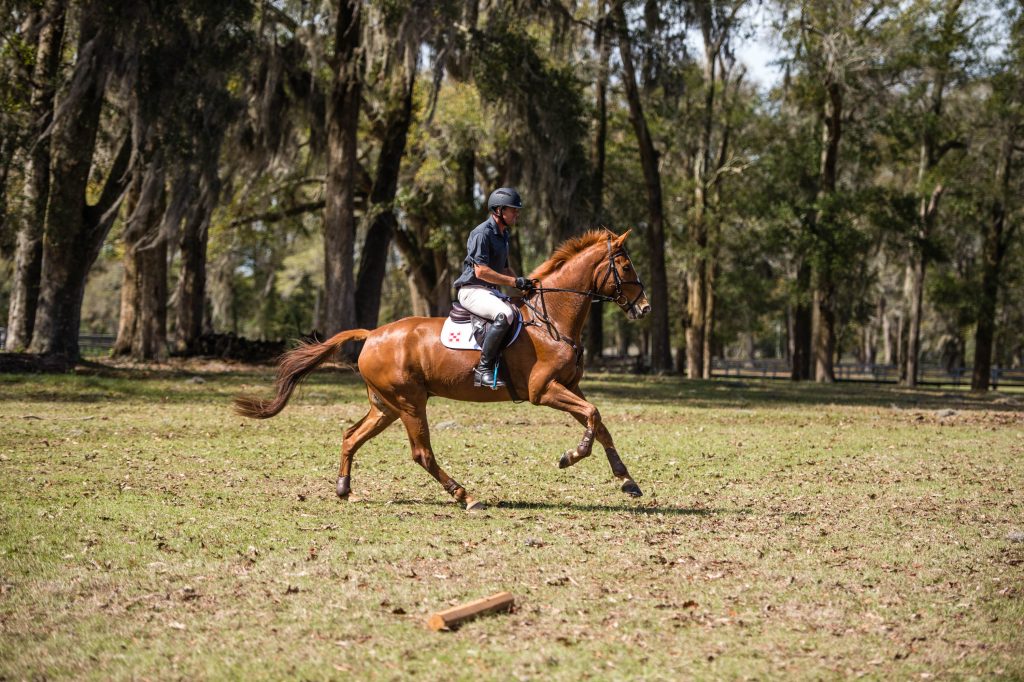
4 (Photo): I repeat the exercise several times. Each time, I gradually move my parallel line closer to the ditch until I’m within 2–3 feet of it.
You’ll be surprised how easily you’ll get him close to the ditch with this method. Because you do it so peacefully, he will learn that he can put his feet near the ditch safely. He doesn’t have to worry that he’ll be bullied into doing something he doesn’t feel ready to do yet. Getting him this close to the ditch is a huge step psychologically. It shows him that the eventual ground he’s going to take off to jump the ditch is stable. Now you’ll have a greater chance of getting him to the other side of the ditch. This is opposed to if you’d galloped head-on toward it. Such a ride risks having him stop a stride and a half away.
But you’re not going to try to jump the ditch yet. Repeat the entire process in the opposite direction. In this approach, your horse is passing the ditch on the other side of his body. If you started with it on his left side, this time start with it on his right side. When he is quietly walking along its edge in both directions, you’re ready to move on to the next step.
Step 2: Jump Poles Next to the Ditch
Next, set up for Step 2. Place the two show-jump poles parallel and next to one another in the space beside the end of the ditch. In the photos, the poles are right next to each other. Set one pair‘s ends against the end of the ditch so that they appear to extend its length. Then take your marker (a cone or ground pole). Place it on one side of the poles, perpendicular to and about 18 feet away from their centers.
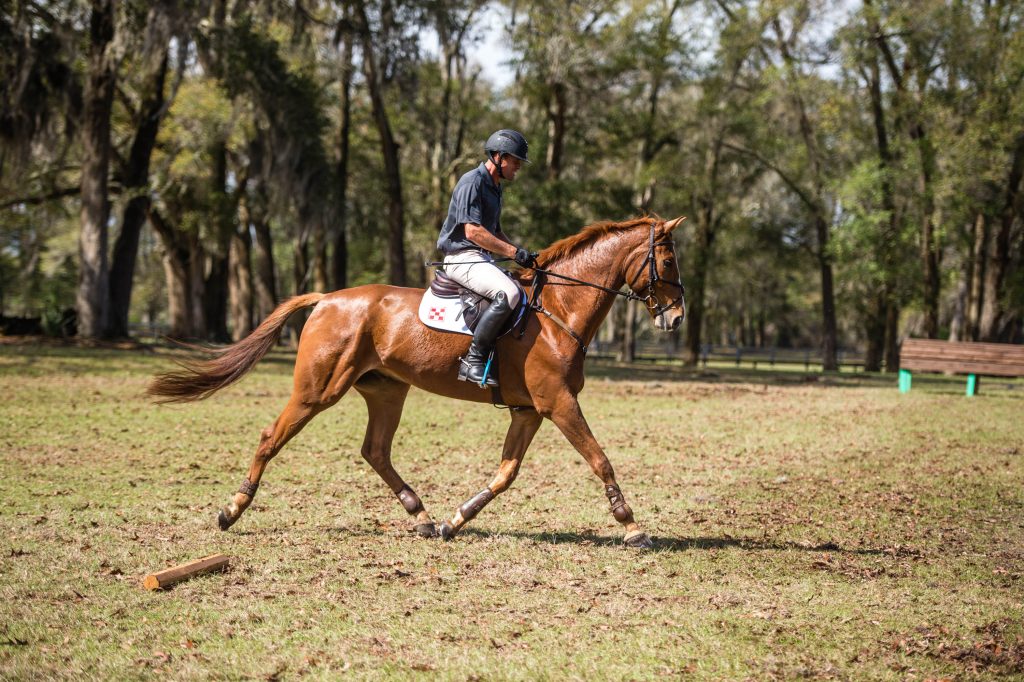
Now I’ll to teach you how to develop the ride I want in the approach to every ditch. Use this approach from this day forward. Pick up an active posting trot and coil your horse’s energy into short, punchy steps. When that feels good, turn him onto a line to the jump poles. This line will take you past the marker and over the center of the poles.
As you pass the marker, bring your seat down into the saddle in a sitting trot. Sit up tall and close your legs on his sides as much as necessary to make him move forward. (Depending on your horse, this can be anything from a whisper of a leg aid to a very strong squeeze.) Think of increasing your pace by 20 percent. In this short space, you probably won’t actually achieve this increase. But this mental goal will produce the forward reaction you need.
You must feel a true reaction. He must move! If he’s on the lazy side, think of going as fast as you possibly can. It’s not good enough to say afterward, “Well, I closed my legs.” It’s OK if he breaks into a canter. Whatever he does, be careful not to tip your upper body forward.
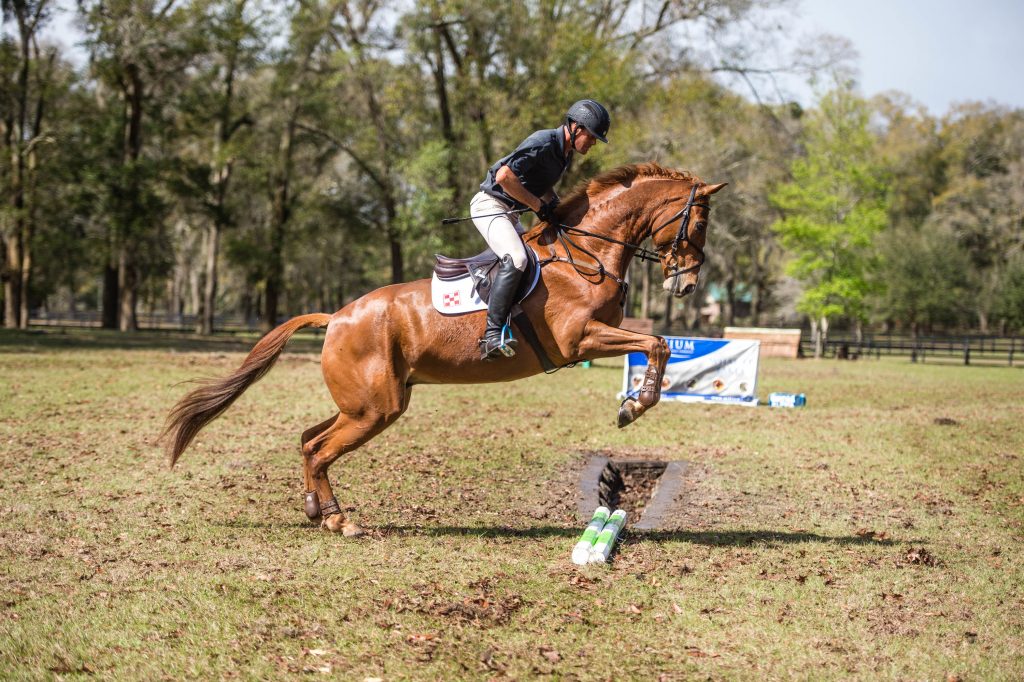
Don’t worry if your horse gets flat over the poles. To jump open ditches, he doesn’t need any loft to his jump. But he does need the confidence to travel across them without hesitation.
Since your horse is comfortable about getting fairly close to the ditch, he will likely focus more on the poles. Don’t worry about whether he jumps them or simply steps over them. If he knocks them out of place, have your ground person straighten them.
Repeat this several times at the trot and then do it at the canter. Always approach from the same direction and applying your increased leg aid the moment you pass the marker. If your horse gets too strong and fast, use a little less aid in the approach next time. But still insist that he move forward to the ditch.
Canter over the poles this way at least eight times. Make a big continuous circle on the same lead to return to the beginning each time. Always start with the punchiest, shortest stride possible. (This is the same idea as the energetic, collected “coffin canter” you’ll teach him later in his career). Then think of increasing your pace 20 percent more in the final strides to the ditch. Even if it feels unnecessary to give him the cue to go forward at the cone, do it anyway. That way the sequence becomes routine for both of you.
This is the step people don’t take seriously enough. Developing a consistent ride in the approach to ditches is the whole foundation for riding them successfully. Nobody ever masters ditches. They always require a clear, determined approach that says, “We’re moving forward now!” Even when I’m jumping an experienced, Advanced-level horse over a relatively small ditch, I still ride it the same way because that’s what horses understand.
Step 3: Gradually Move the Poles Over the Ditch
Next, your ground person is going to move the poles 1 foot in the direction of the ditch. Now their ends now overlap its edges slightly. If your ditch is wider than 6 inches, spread the ends of the poles apart just enough so they rest on its edges. Leave the other ends of the poles about 6 inches apart, so they create a wedge shape.
Canter to the poles again in the very same way that you did in Step 2. As before, dictate the line your horse takes, aiming for the exact center of the poles. Be very clear about this and don’t allow any wavering.
Repeat this about five times. Then ask your ground person to move the rails another foot over the ditch. Canter over the center of the poles another five times.
Continue this process until the poles are completely overlapping the ditch. At this point, your horse is jumping it and the poles in a single effort. I promise, if you ride the approach the same way every time and never get complacent, he will jump it!
Step 4: Remove the Poles and Jump The Ditch on its Own
Once the poles are completely overlapping the edges of the ditch, jump them five times. Next, without taking a break, have your helper remove the poles. Then approach the ditch a little more aggressively, asking your horse to go even more forward. Jump it three times this way, aiming for the center each time.
This is the moment when many riders tend to let down their guards. Their horses have jumped the ditch successfully a few times, so they stop riding and take off the leg. This change in the ride signals to the horse that something’s different. That’s when he realizes what he’s doing and starts to worry that his rider doesn’t have complete confidence in him. To avoid falling into this trap, be sure your ground person is watching you closely. Ask her to offer feedback, pointing out any difference in your ride. These can include questions like, “Did you achieve the shortest, punchiest stride possible in the approach? Did you give a substantial forward aid at the marker? Did you continue to sit up or did your body tip forward?” Make whatever corrections are necessary.
Ask your ground person to tell you if you’re tipping forward in the approach and getting ahead of the motion. If so, don’t be afraid to make a dramatic correction. Think of positioning your helmet over your heels or hips, even if it feels as if you’re leaning backward. This will discourage any last-minute changes in your balance that could upset your horse.
Completing these steps may take one, two or more sessions. Regardless of the time, remember that you should never have to resort to kicking or stressing your horse in any way. This logical, step-by-step process will make sense to him. He should finish it as happy and comfortable as he was when you started.
Most importantly, he’ll trust that you’re there for him. Maintain that faith by riding the same way to every ditch in the future.
How to Find a Ditch
Don’t expect your horse to learn how to jump ditches overnight. Depending on his comfort level, it may take five or more training sessions for him to master the concept. After that, he’ll need periodic refreshers multiple times per year. As advances through the levels, you will modify his schooling sessions. This is to introduce him to each new variation of ditch challenge he’ll face in competition.
If you don’t have easy access to a ditch described in this article, do some research. Check out local cross-country courses and event barns that have schooling ditches available. Even if you have to trailer a substantial distance and pay a full day’s fee to school just the ditch (and a few warm-up jumps), it will be worth it. The jump poles are essential, too. So if the venue doesn’t have any available, bring them along in your truck or trailer.
You may find that you’ll save money and time in the long run by digging your own ditch at home. I dug the one you see in these photos by hand. Just be sure that the ground on either side of the ditch is settled and stable before you use it.
About Kyle Carter
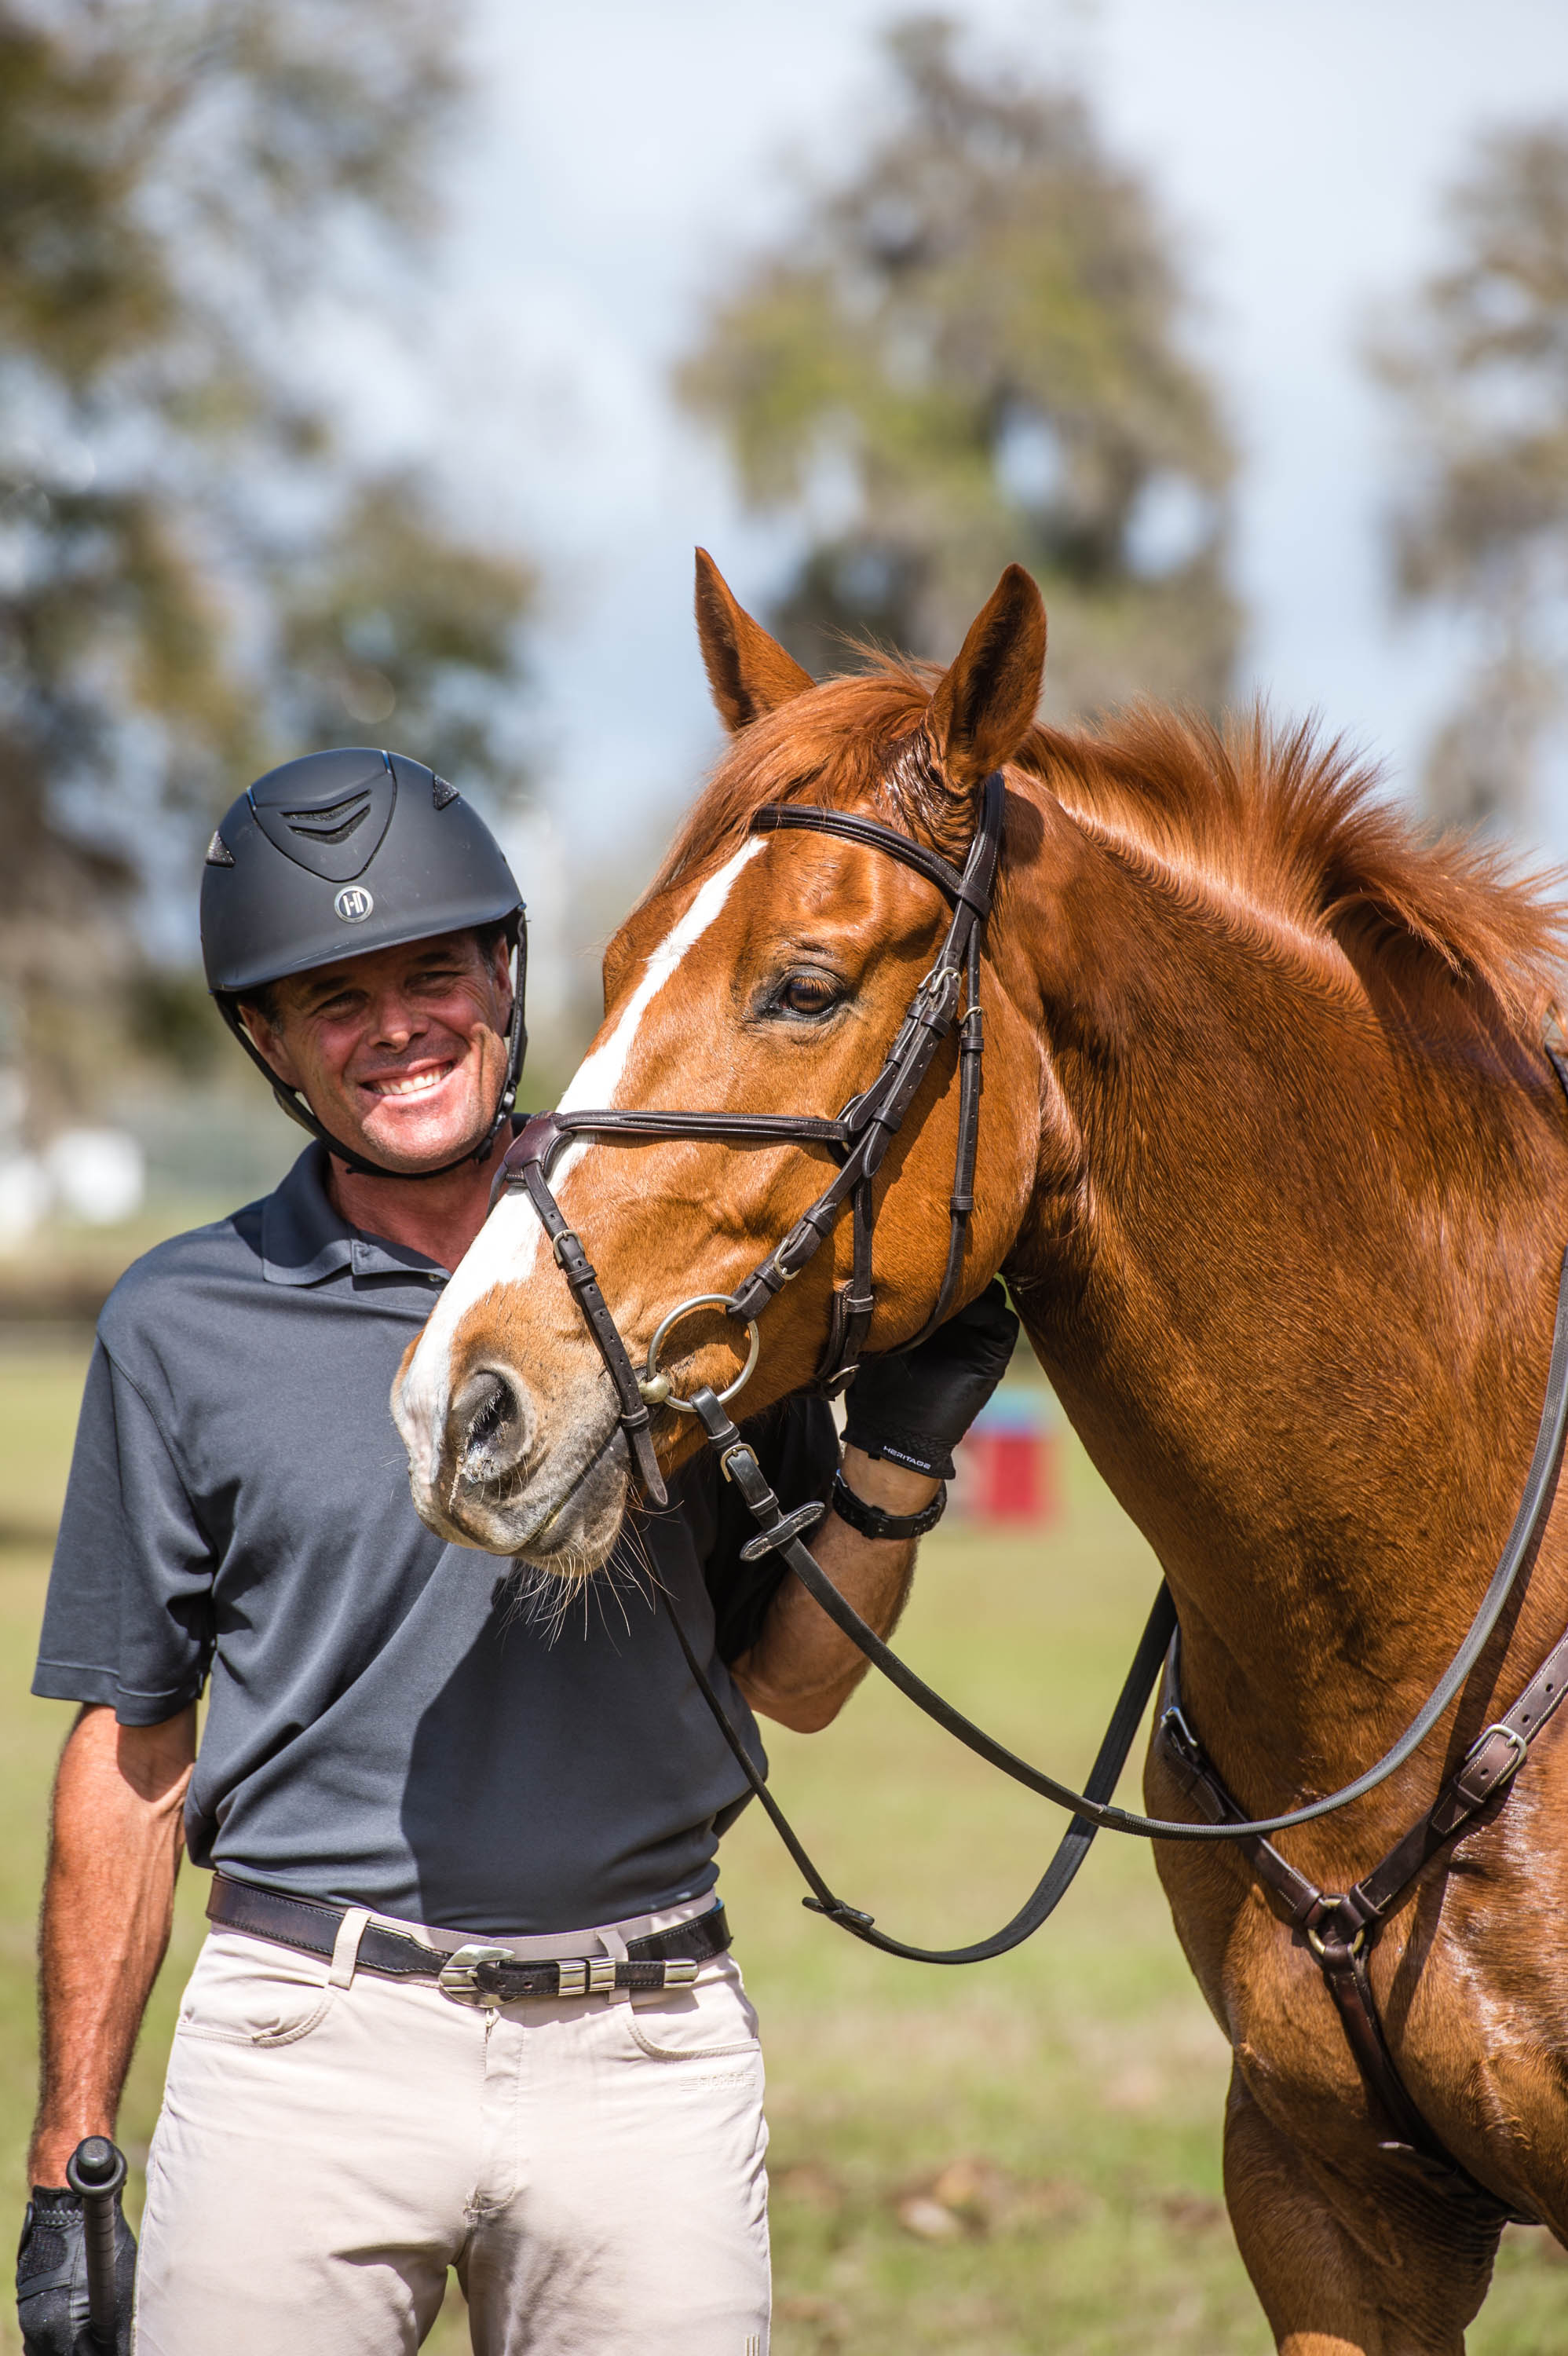
Canadian native Kyle Carter spent his Junior years show jumping at Spruce Meadows. He switched gears to three-day eventing when he turned 18 and spent a year training in England.
In the late 1990’s Kyle and his wife, Jennifer, relocated from Canada to Ocala, Florida. There they built what is now their home base at Five Rings Stables. Not long after establishing their farm, Kyle teamed up with what would become his “horse of a lifetime.” Thant horse was Canadian-bred Thoroughbred gelding Madison Park. Together the pair made seven starts at the five-star level. They competed at the 2008 Beijing Olympic Games. They also won silver medals at both the 2007 Pan American Games and the 2010 World Equestrian Games.
Well known for his teaching acumen, Kyle has also become a very successful coach. He has coached multiple riders to the five-star level. Kyle has also has more medals to his name than any other North American Youth Championships’ coach.
This article was originally published in the November 2017 issue of Practical Horseman.