One of my favorite tools for training horses and riders of all levels is the four-stride line. It’s easy to incorporate into gymnastic exercises and courses in small arenas where five- and six-stride lines don’t fit well. The four-stride line also demands more straightness and accuracy than longer lines, as there’s less room for error. You can practice it in either bending lines or straight lines—or both, as you’ll see in the course below.
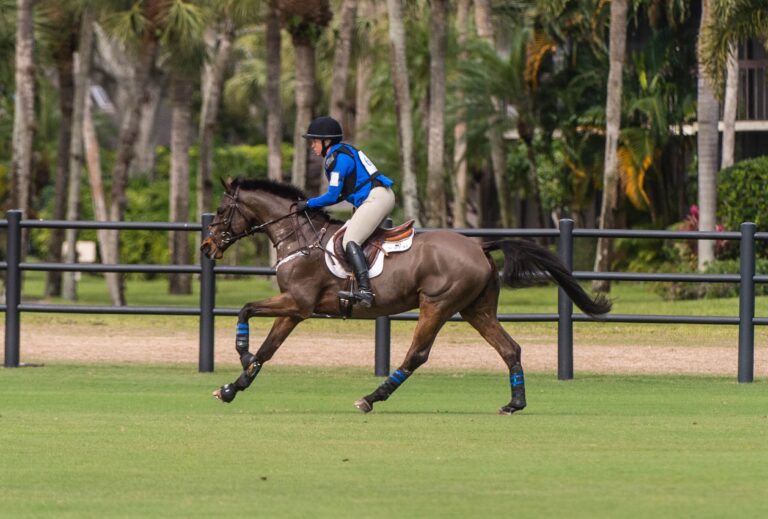
© Amy K. Dragoo
The gymnastic exercise and course I share here are just some of the many ways you can incorporate four-stride lines into your training at home. They will help you improve both your horse’s rideability and your own ability to ride any lines successfully. Additionally, they will test the quality of your flatwork. Before trying these exercises, practice changing the bend and lengthening and shortening your horse’s stride frequently on the flat. Transitions on the flat should mimic what you will start to ask for over fences, so try to make transitions every four strides or approximately every 50 feet on the flat. Also be sure that your horse is always nicely in front of your leg. That means that he is energetically moving forward carrying his own weight in every gait without you nagging him with your legs and spurs every stride. He also needs to be balanced between your legs and hands. Think of driving a car on a cold day. If you turn on the heat, you keep the windows closed to keep the warm air inside the car. If you open the windows, all the warm air escapes. Your hands are like the windows. If you apply leg (the warm air) to your horse, you need to “capture” the horse’s energy you’ve created by maintaining good rein contact—and vice versa.
As with any lesson, when you practice the exercises I describe here, use plenty positive reinforcement to show your horse what you want. It’s OK to make mistakes—that’s the whole point of training. Respond to them calmly and without emotion. For example, if he lands on the wrong lead, quietly bring him down to the walk, regroup and start over. Think of each new exercise as a pyramid. Breaking the exercises into parts and repeating the ones he’s having trouble with before moving on to a more challenging exercise will create a good foundation. And give him plenty of praise, pats and walk breaks (sinking softly into the tack to make nice downward transitions) when he gets the work right. Just like humans, horses will respond better to positive feedback than being told when they are wrong. Eventually, they will start to associate the quick pat as executing the exercise or line correctly.
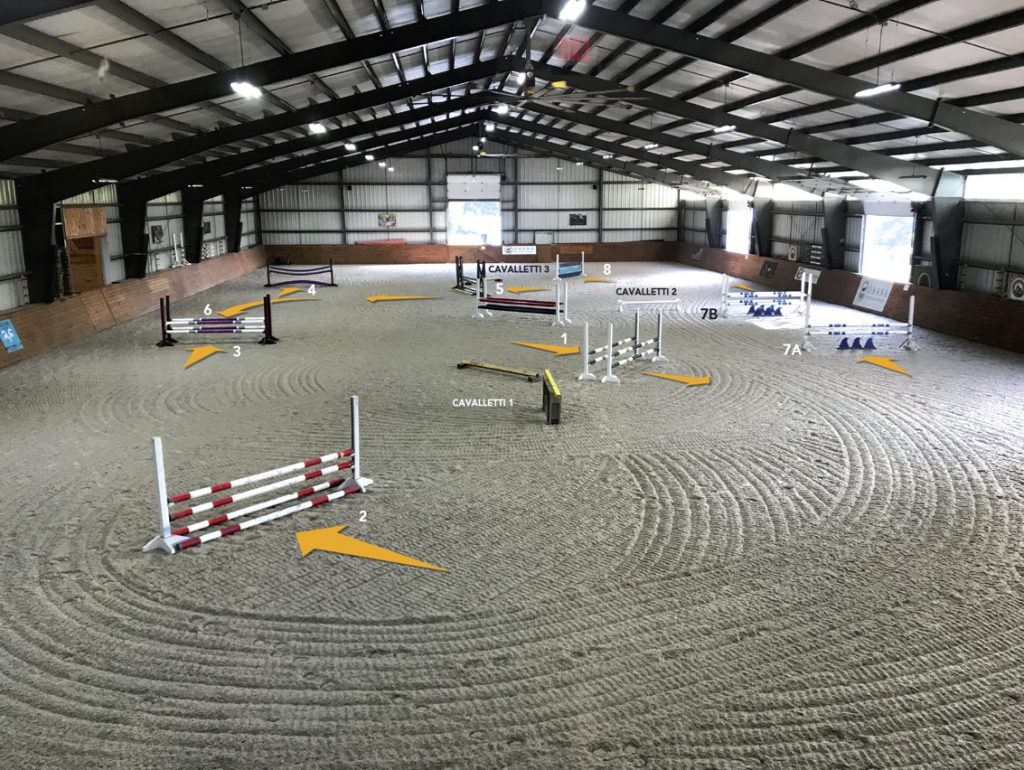
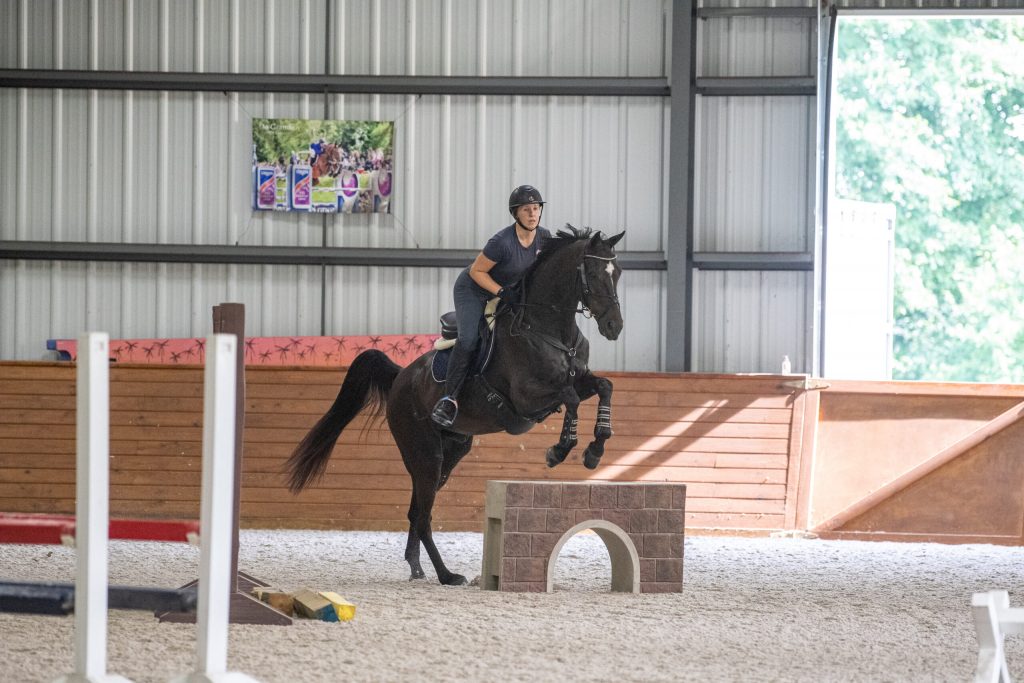
Cavalletti Exercise
Exercise setup: Set a cavalletti midway down one of the quarterlines in your arena. This is the middle, or second, cavalletti. Place it so you can easily approach it on a straight line fron either direction. Then set two more cavalletti, the first and third, each on a bending four-stride line from the middle cavalletti. See the cavalletti placement in the course photo. To measure the distances beween the lines, see “Walk Distances Accurately,” at left. Set the cavalletti heights low but slightly off the ground, to give yourself something to focus your eyes on as you visually measure the distances.
Any horse can perform this simple cavalletti exercise. The low obstacles are forgiving if you make a mistake—and all riders make mistakes at some point. The bending lines also accommodate horses with different natural stride lengths. Although the general goal is to ride to the center of each cavalletti, you can ride a slightly wider line between them on a longer-strided horse or a more direct, inside line on a shorter-strided horse. This setup also enables you to play with the distances to test your horse’s adjustability.
Begin the exercise riding over the second cavalletti only. If you’re a less experienced rider, start this exercise at the trot. Otherwise, begin by making a transition from an energized working walk to a working canter. Carry that energy around the short side of the arena and maintain it down the quarterline to the middle cavalletti. Focus your eyes on the center of the cavalletti as you ride around the turn and canter to the takeoff. Repeat this once or twice, then change direction by making a half turn in reverse toward the center of the arena.
When your horse is jumping the single cavalletti in both directions in a steady rhythm, staying between your hands and legs, ride a straight line to the middle cavalletti followed by a bending line to the “out” (third) cavalletti. Use an opening inside rein to guide—not pull—your horse in the air over the first cavalletti. Use your inside leg at the girth to ask for just enough of a bend through his body that you can see his inside eye. You don’t want so much bend that he bulges his shoulder to the outside. Think of steering his wither around the bend, not his head. Additionally, use the connection in your outside rein to create a sort of “wall,” preventing him from drifting outward. As a general rule, the inside rein controls the bend, and the outside rein controls the length of stride.
Again, use your eyes to focus on the center of each obstacle as you approach it. “Measure” the four strides in your mind as you land and canter between the cavalletti. Depending on how your horse jumps the first one, be ready to gently adjust his pace in the first stride after landing. Apply leg if he jumped the first too quietly or a half-halt (a squeeze and release of either the inside or outside rein) if he overjumped it.
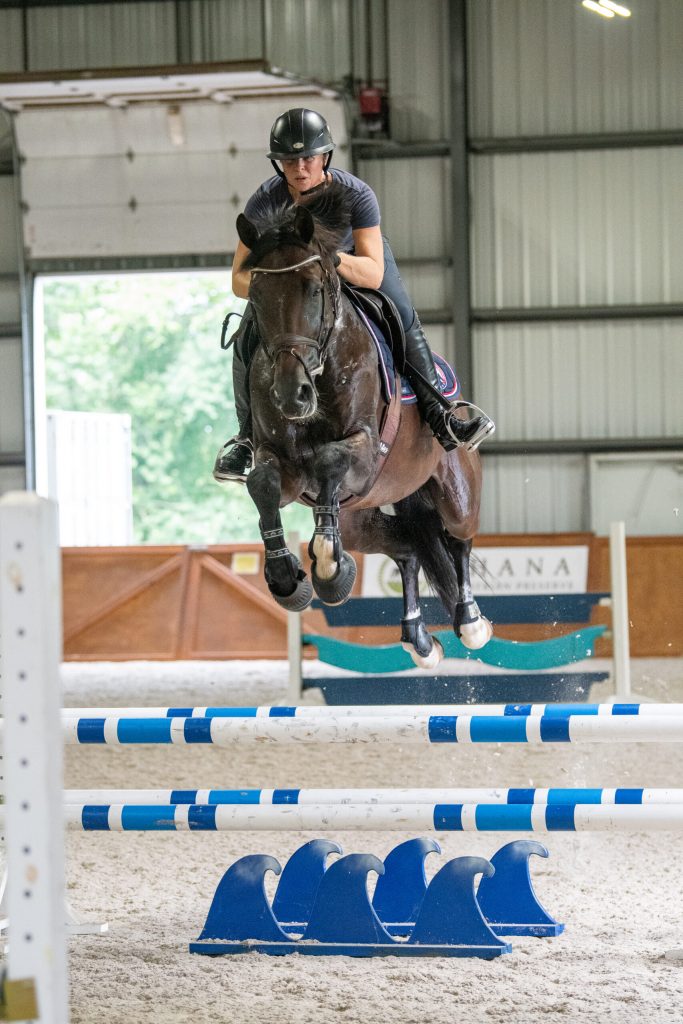
© Amy K. Dragoo
Once you feel comfortable jumping from the quarterline cavalletti bending toward the last cavalletti, put all three cavalletti together. Again, be prepared to adjust the distance to the second and third cavalletti depending on how the first one rode. Aim for the center of each cavalletti. If you notice your horse consistently drifting in one direction or another, use both your legs and reins to correct him. Meanwhile, stay very tall in your upper body in between the obstacles to help him maintain his balance. Don’t be afraid to break it down even farther and trot all three the first time. Continue turning in the same direction after the last cavalletti, reminding your horse to stay on the same lead throughout the exercise.
The repetition of maintaining the lead with three cavaletti makes it easy to correct your ride while also allowing both horse and rider to regroup and relax briefly down the long side. Focus only on the adjustability between the jumps, straightness, forward, back and bend between the cavaletti.
Although the goal is to ride both lines in four strides, make the quality of the canter and your horse’s straightness through his body your top priorities.
If you’re a more advanced rider, next practice dropping your stirrups and collecting the canter. Stretch your legs long around your horse’s sides, with your heels lower than your toes. Then ride each of the distances in five strides instead of four, taking the outside track through the exercise (for example, riding to the right of your original line, if you’re bending left). Then challenge yourself even more by riding five strides from the first cavalletti to the second, then four strides from the second cavalletti to the third.
Increase the Challenge
If you’re a more experienced rider or on a more experienced horse, make the cavalletti line more challenging. Replace the first or third cavalletti with a narrow (or “skinny”) fence . This will require you to ride even more precisely (using both legs) especially on the bending lines. Ease into this challenge by putting an 8-foot pole on top of each narrow fence initially, so it appears like a normal-size jump. After jumping that successfully a few times, move the pole down to the ground as a ground line. When you’re ready, you can remove these “training wheels” altogether. You can also incorporate these narrow jumps into the course to make it more challenging.
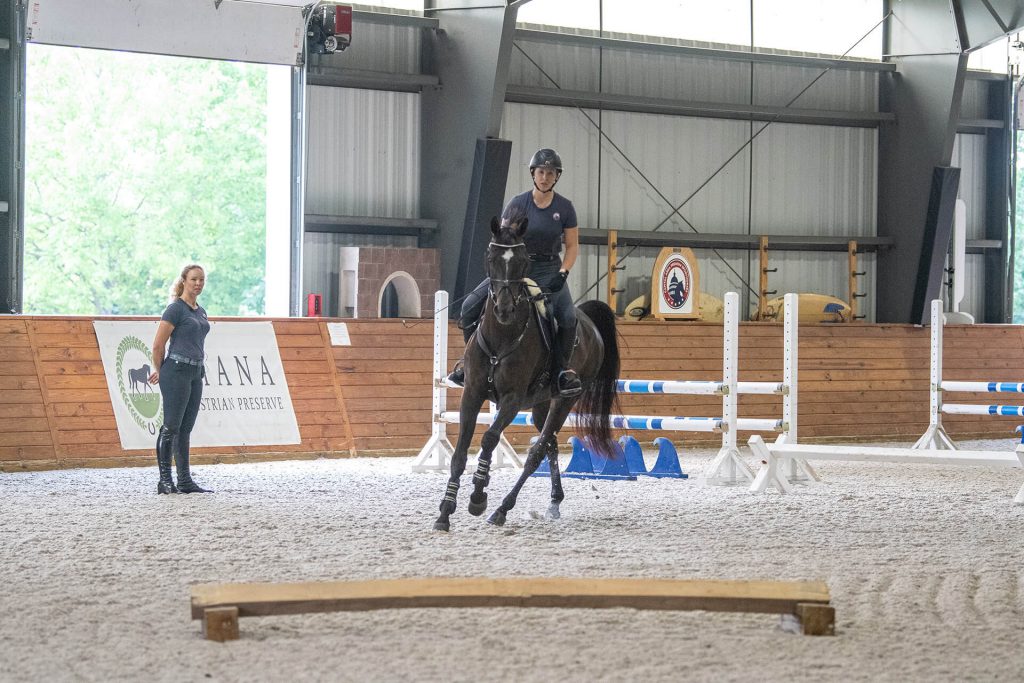
© Amy K. Dragoo
Course Warm-Up
After you’ve completed the gymnastic exercise successfully in both directions, you’re ready to try the course. Start by cantering a large, sweeping circle to the vertical (Fence 2 above), keeping your horse’s body straight between your hands and legs as you did in the cavalletti exercise. Focus your eyes on the center of the top rail. After the jump, tighten the circle so that you approach the vertical on a shorter turn next time.
In the air over the vertical, use an opening inside rein and sink weight into your outside stirrup to encourage your horse to land on the same lead so you can continue cantering around the circle in the same direction. At the same time, keep both legs on his sides and stay connected through the outside rein.
Repeat this exercise in the other direction before warming up over the oxer (Fence 1) in the same way, first with a large circle, then with a tighter turn in the approach. When that goes well, you’re ready to ride the course.
Troubleshooting: If you have to move up to the jump at the last minute, that means you need more canter in the turn. Be sure to create this energy early enough in each approach. You want to feel like there is a magnet pulling your horse to the other side of the jump.
On the other extreme, if your horse gets too quick in the approaches, half-halt with your outside rein to balance him and get his attention.
If he fights the reins and tries to rush the jump—or, for example, tries to leave out a stride in a four-stride line—sink your weight down into the tack and hold steadily but firmly on the contact until he he gives in. Once he gives in be sure to reward him by softening immediately. Don’t give in and let him take over. If you need to break it down even farther, you can canter in toward the jump and then transition to a working trot 20 feet before and trot over the jump to try to quiet his mind and body. This is the time to gently remind him that you’re in charge of the pace, so that when you get to the show, you can lengthen and shorten him like an accordion.
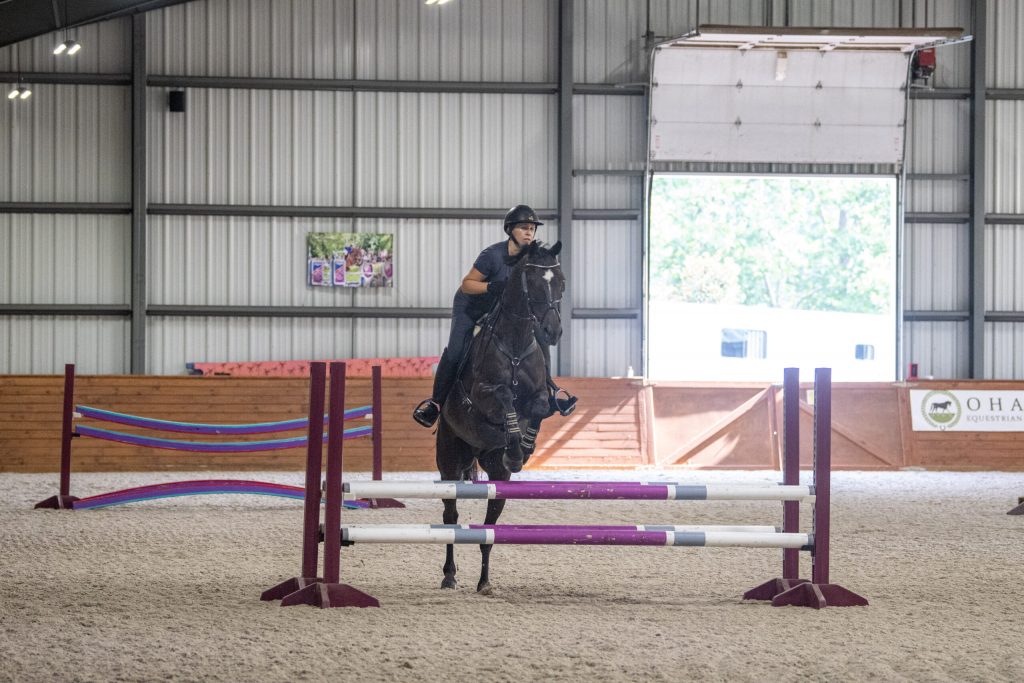
Bending and Straight Lines in a Course
Now it’s time to put all of your new skills to the test on a course. The course combines bending and straight four-stride lines. Set the jumps so that you can ride them in both directions, making the oxers square.
Establish a good pace directly from the first canter departure and be sure to maintain the energy around every turn. Be ready to half-halt whenever necessary. And use all the tools you practiced in the cavalletti exercise and warm-up.
Most horses are stronger on one lead than the other, so the bending line to the right (from Fences 2 to 3) may feel different from the bending lines to the left (from Fences 5 to 6 and from Fences 7AB to 8). The distances of the lines may also feel longer or shorter depending on whether they’re bending or straight and what sort of jumps and lines precede them. This course’s variety will prepare you for many different scenarios in the show ring.
Be prepared to respond promptly and appropriately to whatever your horse does throughout the course—and try not to overreact. Be matter-of-fact in your corrections and praise your horse. Check frequently that your reins are short, your hands are together and carried just above the withers, and your elbows are soft. And always keep the quality of the canter and the straightness of your horse’s body a top priority. Remember, if you and/or your horse makes a mistake, that’s OK! This is how we learn. Pause, regroup and repeat the difficult section again—without emotion.
Once you’ve ridden the course as it’s numbered here, take a break and then ride the entire thing in reverse, starting with Fence 8, in the opposite direction. You may find that the distances ride differently in this direction. For example, while the bending four-stride line from the one-stride combination (Fences 7AB) to the final vertical (Fence 8) may have ridden comfortably in the first round, the short turn in the approach to the vertical in the other direction may back your horse off, making the distance to the in-and-out feel longer. You’ll need to work harder to maintain the energy around that turn than you did in the longer, straight approach you took to Fence 7A when riding the course in the original direction.
© Amy K. Dragoo
Walk Distances Accurately
Although a measuring tape is useful for setting up straight lines in your courses and gymnastic exercises at home, the simplest way to set up bending lines is by pacing them out on foot. First, train yourself to take 3-foot steps: Use a measuring tape to measure a straight, 12-foot distance on the ground, marking each end with something visible, like a groove in the footing or a cone—or a piece of tape if you’re on a hard floor. Mark each 3-foot increment similarly along the 12-foot distance.
Next, practice walking four 3-foot steps along the measured distance. Start with the heel of one foot against the first marker. Then try to land each next step so that your toe meets the next marker.
With practice, you’ll be able to reliably re-create this step length when setting up courses at home and walking distances at shows. Most courses are set based on a standard 12-foot stride. So, for example, if you’re measuring out a four-stride line, you’d start at the landing spot of the first jump (4 to 6 feet away from the base of the jump, depending on how high the fence is), then pace out four 12-foot strides to the takeoff spot for the next jump (again, about 4 to 6 feet). Altogether, that should work out to about 60 feet for each four-stride line, measured from the base of one jump to the base of the other (four 12-foot strides, plus up to 12 feet total for takeoff and landing).
About Kama Godek
Virginia native Kama Godek is a five-star FEI grand prix jumper rider who began riding in Pony Club and eventing before working for riders such as Katie Prudent, Laura Kraut and Dutch breeder Egburt Schep.. She went on to compete in Europe for more than a decade before returning home to train horses and riders. Now based at Capital Area Premium Sporthorses in Aldie, Virginia, she has guided many young riders to success in the jumper rings, including up-and-coming grand prix riders Abby Grabowski, Sandra Zimmerli, Malachi Hinton and Taylor St. Jacques. Kama holds the U.S. Hunter Jumper Association Trainer Certification and the German Trainer Certificate and has produced many young horses from the local to FEI levels.
Watch a free video of Kama Godek’s four-stride line exercises at practicalhorsemanondemand.com. Scroll down to “Check out what’s trending for FREE!” to find the video.
This article originally appeared in the Winter 2022 issue of Practical Horseman.