© Bob Langrish
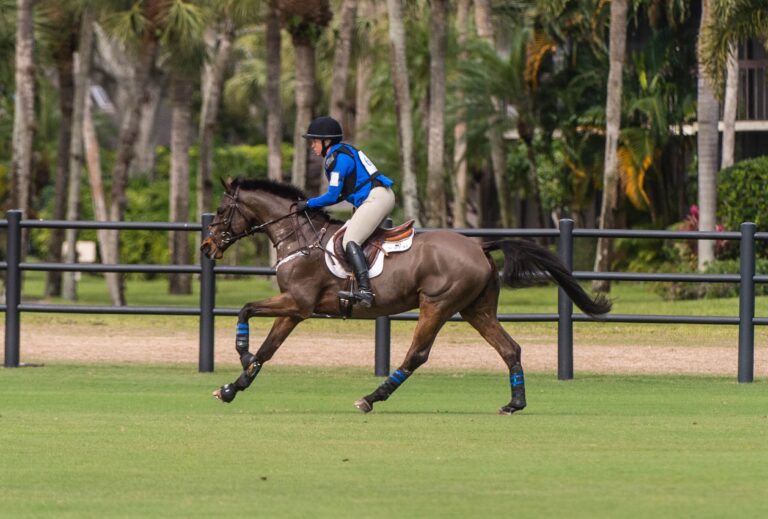
To perform a successful jumper round, both you and your horse need to be physically and mentally prepared for the questions asked by the course designer. Your horse’s jumping mechanism—his muscles, tendons and ligaments—needs to be warm and supple to perform its best, but not worked to the point where fatigue might set in while he’s still on course. He needs to be mentally focused and tuned-up, too. Similarly, your body needs to be warm and loose and your brain must be fully engaged in the task at hand. Both of you should enter the ring feeling prepared and confident.
In this article, we’ll share our basic system for warming up a horse for the jumper ring. We’ll cover our flatwork strategy and then move on to jumping, starting with a big crossrail, then advancing to a vertical and finishing with an oxer. We’ll also discuss how we adjust our plan depending on the horse’s strengths and weaknesses and the questions a particular course is asking. It’s very important to tailor your warm-up to each situation and to your horse’s (and your) individual needs. Our goal with this story is to give you ideas to create or fine-tune your own plan to prepare for the jumper ring and have a successful ride.
As you devise your warm-up plan, keep in mind that less is more when it comes to the number of jumps you do. Worldwide polls of trainers suggest horses begin to lose their best shape in the air after about 36 jumping efforts. So, if your horse will be jumping 15 fences on course, and hopefully another 6 to 8 in the jumpoff, that leaves you with only about 13 to 15 warm-up jumps (including the jumpoff warm-up). Similarly, the extremely powerful, collected canter we try to create in the approach to each jump can be very taxing on a horse’s muscles. Rather than asking your horse to stay in that canter for much of your warm-up, aim to produce it only for the last few strides of each approach.
Most importantly, remember that warm-up is not the time to train. Address whatever skills you need to work on or problems that need solving at home. And only use exercises in the warm-up that your horse has already seen at home, so there are no surprises for him.
Mental Preparation
We’re strong proponents of visualization. Ride the course in your mind until you know exactly what you’re going to do at every point—where you’ll balance your horse, where you can take a breather and regroup, etc. If you’re worried about a fence, blow out your breath as you get to that jump in your mind, imagine having a really positive ride there, then move on to the rest of the course.
Depending on where you are in the order of go, you can do this visualization somewhere quiet in the barn or while walking your horse around the warm-up ring. Also plan a time to recite the course to someone—a trainer, parent, spouse or friend. Name each jump in terms that conjure up the best image for you (for example, “the blue planks” or the “yellow triple bar”). Repeat this until you can recite the entire course without any prompting. The goal is to enter the ring so mentally prepared that you almost feel as if you’ve already ridden the course!
Be aware of the role that nerves can play on your mental state, too. Nerves are probably responsible for 90 percent of riders going off course. If you feel nervous before the class, ask yourself, ‘What am I nervous about? What do I need to do to stop feeling nervous?’ Then do that! For example, if a certain turn is worrying you, find a way to simulate that in the warm-up.
Watching other riders jump the course can be both constructive and destructive. It helps to see if the course rides the way you expected it to, but watching too many rides can be confusing and even upsetting. Instead, try to single out just a few horses who look like they’ll go similar to yours. Otherwise, have faith in your plan.
Timing your warm-up is very important, too. All riders have their own personal preference for how early they want to be mounted and how much time they want to spend on flatwork and jumps. If you know you need extra time by yourself to get into “the zone,” work that into your plan.
Here’s a general framework to guide you in preparing your plan:
Flatwork
We generally recommend getting on your horse when you have about 12 horses to go before your turn. Walk around the schooling area for several minutes before picking up the trot. The goal of your flatwork is to warm up, loosen up and stretch your horse’s muscles in preparation to jump. This isn’t the time to drill him and insist on absolute correctness (from him or yourself). Instead, spend about five minutes asking him to stretch his head and neck forward and down to go “long and low” at the walk, trot and canter.
After that, shorten your reins and gradually ask him to go forward from your leg into your hand for a little more collection. Then spend some time lengthening and shortening his stride at all three gaits. Depending on his level of training, work in some familiar lateral work—shoulder-in, haunches-in, etc.
When your horse feels physically warm and limber, take a walk break and check how many horses are left ahead of you.
 1. For the first five minutes of a warm-up for the jumper ring, your goal is to stretch and loosen your horse’s muscles in preparation to jump. Riding with long, soft reins here, Jenni is encouraging her grand-prix horse, 14-year-old Holsteiner Casseur de Prix, to stretch his frame. His long, relaxed topline allows him to swing his legs freely, thus warming up all of the muscles in his body. The big, 17.3-hand gelding can be a little tense and reluctant to take a hold of the bit, so Jenni encourages him to relax and move forward into the bridle. | photos © Tass Jones
 2. Jenni asks Casseur to collect his frame. With stronger leg aids, she asks him to engage his hindquarters, producing more power and elevating his forehand. Her shorter reins help to compress his frame and stride. She’ll then start to ask him to lengthen and shorten his stride alternately. This will warm up his muscles further and tune up his responsiveness to her aids. | © Tass Jones
 3. She does the same thing at the canter. The lengthening and shortening help to shift Casseur back on to his haunches, creating the compression he’ll need for takeoff over fences. He’s well-balanced between her hands and legs, responding to the latter by stepping well underneath himself with his hind legs and accepting solid contact with the reins. Through the progression of the flat warm-up, he has significantly ramped up his intensity, gathering the extra energy he’ll need in the ring. The focused look on Jenni’s face indicates that she’s concentrating on how Casseur is feeling today. She’s connecting to him through her legs, seat and reins, trying to get a sense of what he needs to work on in his warm-up to achieve his best performance. | © Tass Jones
Start with a Big Crossrail
When there are about five horses in front of you, start the jumping phase of your warm-up. Set the jump cups for your crossrail as high as legally possible within the U.S. Equestrian Federation rules. This will encourage your horse to use his shoulder and chest muscles to rotate and lift his scapulas (shoulder blades) and forearms. Place a ground rail 9 to 12 inches from the base of the jump, on each side, to help him arrive at a comfortable takeoff spot, so he has plenty of time to lift his front end and “roll,” or rotate, his body smoothly over the jump.
Approach the crossrail in a very slow, powerful canter, using your legs to create plenty of impulsion and your seat and reins to collect his energy. This will encourage your horse to use power, rather than speed, to clear the fence. Do this once in each direction. If the jump is flagged to be jumped in only one direction—with the red flag on your right—approach it in that direction, first on one lead and then on the other. Then approach the crossrail on a circle or turn, asking him to turn slightly in the air so that he lands on a straight line. This will sharpen his technique without scaring him.
If your horse has a lazy front leg, approach the crossrail at an angle, so that you arrive closer to the high part of the “x” on the side he tends to hang his leg. So, for example, if he has a lazy right front leg, approach the jump heading from right to left. Again, ask him to land on a straight line, perpendicular to the fence.
At this point, your purpose is still primarily to warm up your horse’s jumping mechanism. You’ll also be starting to get a feel for how he’s feeling. Is he fresh, lazy, nervous?
Throughout the rest of your warm-up, use the landing sides of the jumps to work on his rideability. Approaches are important, but what you do after each fence is the most important. This is the time to correct whatever went wrong before the fence. For example, if he opened his step too much in the approach, ask him to land and shorten his stride. If you have trouble bending him to the left in the approach, turn left afterward. If he gets out of balance in the approach, do some transitions or lateral work on the landing side. Always react to his mistakes after he lands, not while you’re in the air.
The landing side of jumps is also a good time to remind your horse to be on his toes for the constantly changing demands he’ll face on course. Test his responsiveness by changing your speed or direction every four to six strides—speed up, slow down, turn, speed up, and so on. You can ask him to land on a certain track, angle or lead—or even practice holding a counter-canter.
Although we’re not proponents of forcing multiple rubs in the warm-up, we allow horses to make mistakes so that they’re more careful in the ring. Throughout your entire warm-up, try not to protect your horse from hitting the jumps. Don’t hold him off the fence with your reins in the approach, cluck on takeoff or override with your legs and seat. Don’t abandon him, either, by riding with less-than-normal rein and leg support. If he makes a particularly beautiful effort over a fence, instead of pushing him more to try to get a rub, bring him to a walk, pat him, say “good boy,” and give him a breather. Let his memory of that good jump sink in.
After you’ve jumped the crossrail about three times, give him another breather.
 1. In the approach to their first warm-up jump, a big crossrail, Jenni keeps Casseur’s canter slow and compressed, using firm leg aids to produce plenty of impulsion while staying connected with a soft back, light seat and soft arms. By keeping her upper body vertical, she helps him to maintain a collected, uphill balance. | © Tass Jones
 2. This nicely balanced canter brings Casseur to a good takeoff spot, close enough that he has to rely on his power, rather than speed, to clear the fence neatly. Jenni maintains the rein contact in the air so she can communicate with him immediately on landing. Meanwhile, she keeps her own body well balanced over a secure lower leg and deep heel. She always keeps her legs on the horse in the air so there’s never a break in contact. | © Tass Jones
 3. After jumping the crossrail from a straight approach one or two times, Jenni approaches it from a mild angle. Because the rails are so high on the sides, Casseur has to pick up his feet even more carefully to avoid hitting the jump. In the air, Jenni is already opening her right rein to ask him to turn his body slightly so they land straight on a track perpendicular to the jump. | © Tass Jones
Progress to a Vertical
Next, change the crossrail to a vertical set two or three holes lower than competition height. The goal is still to encourage the full range of motion in your horse’s shoulders. If that’s already feeling really good at this point, you can start with a slightly higher vertical. Roll the ground rails in to about 3 inches from the base of the jump. This will invite him to get closer to the jump on takeoff and possibly rub a rail.
Approach the vertical with a little more pace than you had over the crossrail, daring him to snap his legs up more quickly in the air. Continue to test his responsiveness after the jump with frequent changes of pace, turns, lateral work, etc.
If he tends to get “bullying” in the approach—pulling on the reins and getting underneath the fence (too close to it on takeoff to produce his best jump)—roll the ground rails back out to about 6 inches to encourage him to jump better. For extremely bullyish horses, you may need to roll it out to 9 or 12 inches.
If your horse drops his hind end a little in the air (a habit your ground person might notice or that would be evident if he frequently knocks down rails in the ring with his hind legs), place a rail on the ground either 9 or 18 feet away from the jump on the landing side. This will catch his attention as he lands and remind him to be more careful with his hind feet. Note: For all gymnastic exercises like this one, adjust the distances to make them comfortable for your horse’s natural stride. Don’t make them so short or long that he might run into trouble. The goal is to show him what he can do, not what he can’t.
Each time you jump the vertical, increase the height by one or two holes, until you get to show height. Repeating the same height over and over again wastes your horse’s jumping efforts. Only do it after a very bad effort or because you’ve reached the maximum height. Otherwise, move on to the next height or exercise. (After most moderately bad efforts, such as a missed distance or knockdown, both you and your horse will usually know why you made the mistake and won’t need repetition to learn from it.)
Now is the time to begin fine-tuning your warm-up. Create exercises to address the questions on course that you think will be most challenging for you and your horse. Here are some sample exercises:
Exercise 1
Challenge: Collecting for a short distance. For example, if a vertical is followed by four or five short strides to an oxer, the sooner you can collect after landing from the vertical, the more forward you’ll be able to ride to the oxer.
Solution: Place a rail on the ground 18 to 21 feet after the vertical, again, adjusting the distance to produce a comfortable one stride. This will naturally encourage him to shorten in the first stride after landing. (Once he’s backing himself off from the rail, you may be able to shorten the distance a little more to ask for additional collection.). Use the rail as a reminder to get yourself immediately back into position, too.
Exercise 2
Challenge: Hot horse who runs off on the landing side of the jumps.
Solution: Set a rail 32 feet (two strides, adjusted for your horse’s natural stride) after your warm-up vertical. When he lands, stretch your body upward and let the rail do the work. After jumping through this a few times, he’ll figure out that he needs to slow himself down on landing.
Exercise 3
Challenge: A longer than usual distance in a combination. Because they see so many tight combination distances, horses generally expect to jump into one and have to “back up” (collect the stride) right away. When suddenly faced with a longer distance, they can sometimes get into trouble and arrive too far away from the “out” jump.
Solution: Set a rail 24 feet after your warm-up vertical. This will encourage him to open up his stride on landing.
Exercise 4
Challenge: A bending line in the direction that your horse has trouble with—for example, he tends to bulge his shoulder to the outside.
Solution: Place a rail three to four strides away from the jump, then ride a curved track from the jump to one side of the rail. So, for example, if you’re practicing for a line that bends to the left, aim to cross the left-hand side of the rail.
Once your horse is using his shoulders well over the vertical, give him another breather and take a moment to check your equipment—galloping boots, bit, spurs, etc.
 1. Jenni progresses to a vertical, approaching it with a little more pace than she used for the crossrail. Even in this more forward canter, she stays connected with Casseur through her hands, seat and legs. | © Tass Jones
 2. Although the added pace dares him to get closer to the fence and risk hitting it, he stays in balance and arrives at another nice takeoff spot, then folds his forelegs carefully over the jump. | © Tass Jones
 3. Now Jenni plays with Casseur’s adjustability on the landing side of the jump. First, she adds a rail 18 feet after the vertical. After he lands, Jenni sits up and closes her fingers on the reins to ask him to collect his stride. You can see he’s come up to her hand, balancing himself for the shorter stride. | © Tass Jones
 4. Jenni tests the opposite extreme, rolling the rail out to 21 feet from the jump. When Casseur lands, she uses a more-forward upper-body position and softer, following reins to encourage him to lengthen his stride to reach the rail. Compare his longer stride and frame here to his more collected frame and stride in this photo. | © Tass Jones
Build an Oxer
Next, move on to a ramped oxer. If you can, build it so that you’ll jump it first in the direction that your horse goes best. Leave the vertical as is for the back rail, then add a second set of standards in front of it, so the width of the oxer is about half the width of the widest fence on course. Set the front rail about two holes lower than the back rail and place a ground rail about 3 inches in front of the jump.
Approach this oxer at ring pace or even a little faster than ring pace. Open up your horse’s step on the long side of the arena, letting him run away from you and even get a little out of balance. (This will produce the power you want to collect in front of the jump—and will test his rideability.) As you make your turn to the oxer, start to ask for balance and control again, so that he arrives three or four strides away from the jump with the correct amount of speed and impulsion for the size of the jump.
If you can, reverse the ramp jump (lower the back rail and raise the front rail) so that you can jump it from the other direction.
Next, if your horse’s hind legs feel loose and free (you’re feeling that extra kick in the air) and he’s jumping across the oxer easily, raise the front rail to one hole lower than the back rail and widen the oxer to the maximum height and width on course. (If your horse is young, it may not be necessary to jump the maximum height in warm-up, which might scare him. Courses are designed to build a horse’s confidence as he progresses. So, for example, if you’re jumping in the 1.25-meter class, it’s fine to warm-up over just a 1.20-meter oxer.)
If your horse makes a particularly impressive effort over the oxer, consider lowering the height for your next attempt. This will reassure him that the jumps won’t always be so big. For some horses, giving such a great effort can be a little discouraging unless you immediately follow it with a confidence builder.
Then take a break and evaluate how you and your horse are feeling. Do you want to jump higher or wider? This might help improve a lazy hind end. Do you want to try for a rub—riding to the oxer with plenty of pace and soft hands? Do you need to widen the ground rail to improve his technique in the air?
Depending on your personal timing preference, plan to jump your last one or two jumps at about the time the rider before you is midway through the course. We usually go back to a vertical at the end of the warm-up—unless that particular horse needs more encouragement to jump across his fences or sometimes when the course starts with an oxer. A final vertical reminds the horse to be a little more collected and to round up his arc in the air, in case he got a little flat over the oxer. Some people like to go to the ring on a rub, but we’d rather end the warm-up on a confident effort so the horse goes to the ring feeling like he’s jumping as well as he possibly can.
Now your challenge is to bring your warm-up into the ring. From your last warm-up jump to the moment you enter the ring, keep your mental focus. Now is not the time to hang out at the in-gate and chat. Separate yourself from other riders and your entourage and either visualize the course one more time or recite it to your ground person. Stay 100 percent in your competitive groove.
 1. For the oxer, Jenni combines all of the components of the warm-up to create Casseur’s best jumping effort. She asks him to produce even more impulsion in the approach, as you can see by how far he’s reaching under his body with his hind legs. You already can see his body shifting backward, preparing to push off the ground with maximum power. | © Tass Jones
 2. The result: a nice, big effort in the air. Jenni and Casseur are both physically and mentally warmed up and ready to go in the ring and tackle the course with confidence. | © Tass Jones
Jumpoff Warm-up
If you’re fortunate enough to make it into the jumpoff, remember how few good jumping efforts your horse has left. The previous round has already warmed him up. Your goals now are just to get his front end and hind end working quickly. Start with one or two small verticals. If you have a particular concern about the course, for example, a tight turn to the right, practice this now. Then pick up the pace a bit more than your earlier warm-up and jump a few verticals and oxers to simulate your speed on course. Try to limit your jumps to four or five. Many jumpoffs are lost in the warm-up, so don’t get too aggressive. And, as always, have faith in your plan!
Jenni and Steve McAllister run a jumper sales, training and showing business based in Sun Valley, California. Jenni won team gold in the 1986 CSIOJ Junior Nations Cup and team silver at the 1987 North American Continental Young Riders before competing nationally and internationally at the grand-prix level. She has scored many grand prix wins and top placings in World Cup Qualifiers and rode in the World Cup Final in France this spring.
 © Tass Jones
Jenni’s husband, Steve, began his career as a farrier before taking up training and coaching. The pair now trains a select number of horses and riders with their “custom-fit” program, which integrates all the proper angles, from hooves to hunt-seat position. Among the program’s many recent accomplishments, Steve coached the winning team of the inaugural West Coast Junior-Amateur Jumper Championship last November.
Before Getting On
Much of an effective warm-up occurs before you even get on your horse. Start by identifying your specific goals for a particular class. Is this a confidence-builder or are you aiming to win? Are you preparing for a more important class later in the week? Did you or your horse have a problem in the last class that you want to address? What do you need to do to push yourself into your most competitive frame of mind? Be honest with yourself. For example, if you know you’re a bit of a control freak, try to produce the feeling of letting yourself get a little run away with in the warm-up.
In your course walks, you should have identified the questions that will be most challenging for you and your horse. In the main story, we explain how to incorporate these questions into your warm-up so you feel ready to tackle them.
Find out ahead of time if any conditions might make the warm-up more challenging than usual. For example, is the schooling area significantly smaller or bigger than the competition ring? Is the footing or lighting different? Is the warm-up ring set on sloping or uneven ground? Will the traffic be extremely heavy? Talk with your trainer about ways to adjust your warm-up plan to compensate for these variations.
Ground Rails
Ground rails can be excellent tools in the warm-up. They can be set on the ground close to the fence with either one rail in front of it or one in front and one behind so your horse jumps the rails as part of his jumping effort. He uses the front rail to measure his distance to the base of the jump and judge his takeoff and the back rail to plan his landing. Or they can be set farther from the fence so he canters over them separately from the jump. We like to use them to shape the horse’s bascule (the shape of his jump over the fence), to improve carefulness and to simulate questions on course. We offer some examples in the main article. If ground poles are not available, think of creative ways to achieve the same goals. Even just imagining a ground rail on the landing side of a jump or at a point where you plan to initiate a turn can make a difference.