Q: I started competing in hunters last fall. During my over-fence classes, I have some problems with pace and missed distances. Is there some kind of checklist I should be going over in my head as I go around the course?
A: Putting together a course of jumps can seem complicated and overwhelming. By breaking it down into easy-to-remember concepts, you can analyze how it will ride and what you need to do to ride it well. The following steps will help you formulate a plan and solve problems as they arise.
Before jumping a course, though, it’s important to assess your position and skills to make sure that you’re ready to tackle courses. These basics give you the ability to positively influence your horse and allow him to do his job over each jump. Ask yourself the following questions:
- Are you able to keep your heels down over each jump with a stable leg position?
- Do you stay with your horse’s jump each time, grabbing mane if you need to?
- Can you regain your position between jumps so you can steer and adjust your horse’s pace?
- Can you get to the middle of jumps?
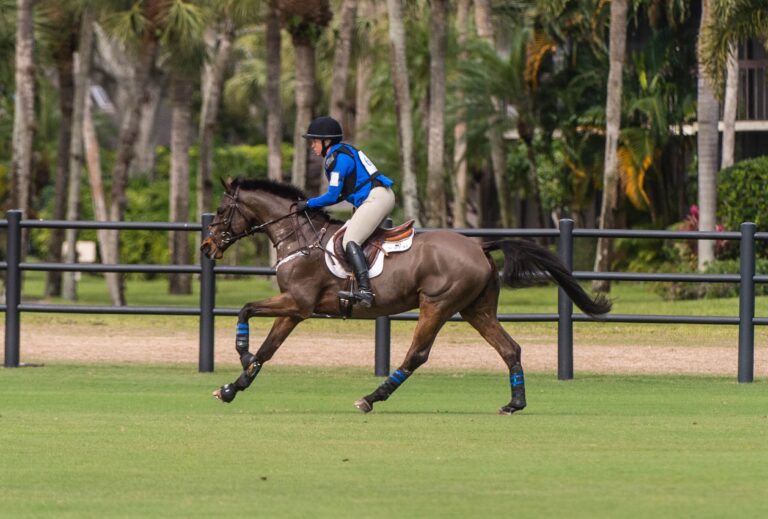
- Are you able to adjust your horse’s pace to slow down or speed up when you need to?
If any of these skills are lacking, spend some time solidifying them. The first three can be addressed by lots of work in your two-point position as well as without stirrups. The last two can be improved by work over ground poles or riding as if you were jumping: riding a track between standards, with or without ground poles, to practice adjusting your horse’s stride and your track without the added difficulty of jumping. Working with a qualified instructor will also help.
Once these things are in place, take time before your next jumping course to learn the nuances of it and make a detailed step-by-step plan of how you’ll ride it. Consider what types of questions are being asked and how your horse will respond. Not only do you need to learn the track and remember what jump comes next, you also need to understand how your horse will perform over that course of jumps on that day.
First, where are all the jumps located in the ring? Which direction are you jumping them? Some jumps will ride differently because of where they are placed in the ring. For instance, a jump at the far end of the arena may make your horse lose impulsion because he’s far from the in-gate and his horse friends, so he might need more support from your leg. For jumps that are at the end of the course and coming toward the in-gate, you might need to hold your horse’s stride together as he heads toward “home.”
As you formulate your plan, remember that everything you do influences what you’ll do next. How you ride the corner after your opening circle directly influences the way you’ll jump the first fence of a line. Your jump into a line influences the second jump of that line. Your turn coming off a line influences the second half of that turn, which then influences your next jump, and so on. Pay attention to each step, and a course becomes smaller with easier-to-tackle pieces that come together to form a flowing round.
Here are some things to remember once you’re on course:
1. Get straight. Straightness means that your horse’s haunches follow the same track as his front feet, whether he’s traveling in a straight line or bent in a corner. If he’s crooked, you’ll not only have a sloppy track; you’ll lack the adjustability you need for each jump. Imagine holding a spring in your hands. If you compress the coil in a straight manner, you’ll be able to compress it completely. If not, it will bulge to the side or pop out of your hands. It’s the same with your horse. Keep him between your leg and your hand–providing the push from behind with your leg, while containing and shaping that energy with your hands–and you will be able to “funnel” your horse toward the jumps. You will minimize the risk of run-outs, and you will also help your horse shorten or move up to a distance by compressing or letting out his stride, as needed.
2. Use the ends of the ring. Corners are places to regroup. A correct turn is one that allows you the most room to rebalance your horse after a jump and still allows you to have a flowing pace on the way to the next one. An incorrect turn is one where you either turned too late (overshooting) or too soon (cutting your corner). If you overshoot your turn, you will have to zigzag back toward the jump to get straight. Cutting the turn causes you to travel at an angle toward the jump, and you will have to move outward to fix it. This causes you to miss distances because neither you nor your horse will have enough time to accurately assess the take-off point. This can also throw off your horse’s balance, making it tougher to adjust his stride in front of the jump.
I like to square my turns (90-degree angles that are slightly rounded) to ensure that I get the straightest approach to each line. This allows you extra time after each line to set up lead changes and fix your horse’s pace in time for the following jump.
To square your turn, stay out on the rail while you look for the center of your next jump. Start turning a stride or two before lining up the center. It will take some practice to develop your timing. Don’t be in a hurry to get there: You want to turn as late as possible and then use your outside leg and an indirect outside rein to straighten your horse on the way to the jump.
To practice squaring corners at home, I set up buckets or cones in the corners of my arena to make a “chute” to the jump. Set two cones, one for the inside of the turn and one for the outside of the turn (if the jumps are set off the rail), placed the width of the jump standards about 10-15 feet from the end of the ring on the approach to the jump. These will make sure that you stay out long enough while keeping you from overshooting your turn to the jump.
Keep in mind that squaring your turn too much can make your horse lose impulsion. I call this “dwelling” in the corners. The tighter your arc, the more leg you’ll need to continue your pace and keep your horse’s balance so you can get to the jump correctly.
3. Remember line and pace. Every distance you get, good or bad, is a direct result of the pace you carry–both speed and length of stride–and the track you take to get to a jump. When you don’t like a distance you got, think about which of those two things were errant. The next time you approach the jump, change that one thing; not both. Only change one variable at a time, otherwise the distance will still not work.
4. Avoid extremes in pace. When you allow your horse to be too fast or too slow to a jump, you eliminate adjustability options. If you carry too much pace, you’re already at the end of your stride for any adjustability?there’s no more lengthening to do, and it’s too late to shorten his stride. If your horse is too fast, you are probably leaving out strides on the way to the jump and either taking off too far away or chipping.
When you approach a jump from a too-slow pace that is lazy and lacking impulsion, you don’t have enough horse under you to push to a bigger distance. Conversely, if you need to wait for a quiet distance, your horse doesn’t have enough impulsion to rock back on his hindquarters and shorten while keeping a balanced canter. The result is often a chipped distance–or worse–a refusal. Even if your horse makes it over the fence, everything feels weak off the ground and you’re more prone to “single-footed” distances (where the horse is hesitant at the take-off point and launches all four feet over the jump at the same time). You’ll also find that you are adding strides on the way to each jump.
5. When in doubt, go forward. Going forward will help you tackle sticky moments with greater confidence. To do this, squeeze your legs to increase your impulsion and pace. It’s a lot harder for a horse to get wormy or back off to a jump when you have the right speed and impulsion. If you don’t get a result, add a cluck or use a tap of the crop behind your leg to get him going. At the same time, provide light contact with your reins so you don’t allow your horse to lengthen his stride or get strung out.
Places where you might need to go forward are away from the in-gate, through a shadowy corner or on the way to a spooky jump. Going forward doesn’t mean running your horse at the jumps, however.
6. Set one goal at a time. Riding a course successfully takes a lot of coordination and attention to detail. There are a lot of things to think about, and it’s important to address each in turn. Set a goal for each time you go in to jump a course. For example, if you have trouble getting straight to your jumps, make that your one goal for your next trip. Or maybe your horse gains speed when he jumps toward the in-gate; make having an even pace the main thing you work on.
Each time you jump is a building block for the next round. Small goals will help you to see progress and will help you build the foundation for better rides. When you can simplify your ride, your confidence–and your horse’s confidence–will soar.
Terri Young trains horses and teaches riders of all levels at her stable, Clairvaux LLC, in Leesburg, Virginia. She specializes in bridging the gap between the local Virginia show circuit and USEF-rated shows. Terri grew up competing in equitation and hunters in New Jersey before spending several years working for dressage trainers, including Lendon Gray. After graduating with a degree in business management from Syracuse University, she moved to Germany where she trained and showed jumpers before returning stateside to open her own stable. She is a USEF “R” judge and USHJA certified trainer.